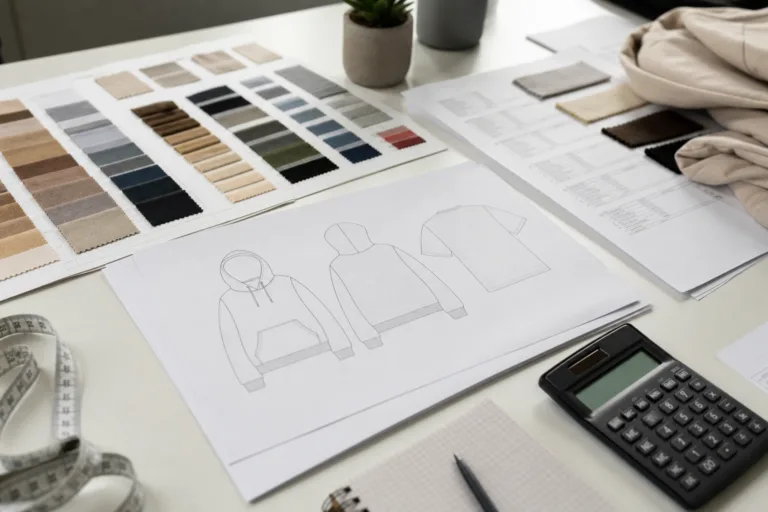
Introduction: Why Converting Block Patterns is Essential
Professional apparel development relies on the foundation of accurate block patterns—master templates that represent the core fit and balance of a garment. However, true style innovation emerges through pattern manipulation and style development, enabling brands and makers to transform these blocks into on-trend pieces. This guide unpacks proven factory methods—slash & spread, dart rotation, seam changes, and neckline/sleeve variations—for turning basic blocks into distinctive garments. Whether you’re aiming for fast fashion flexibility or custom-fit excellence, mastering these conversions gives you control over silhouette, detailing, and cost.
How to Convert a Block Pattern Into a New Style
Converting a block pattern into a new style involves strategic manipulation of shape, construction, and line details while protecting fit integrity. Here’s a systematic overview:
- Assess your block: Confirm size, fit type, allowances, and key construction references.
- Select manipulation methods: Choose slash & spread for volume, dart rotation for shape, or seam changes for design lines.
- Adjust specific regions: Tackle neckline, sleeves, hem, or panels to match your inspiration while preserving movement and balance.
- Finalize for production: Add notches, grainlines, shrinkage allowances, sewing marks, and double-check against measurement specs.
Key Parameters When Converting
- Block type: Adult basic bodice, men’s shirt, pant, skirt, sleeve, or other foundation pattern.
- Fabric behavior: Account for stretch, drape, and shrinkage (e.g., single jersey vs. woven poplin).
- Seam types & quality: Plan seam construction, SPI, and thread type to suit the new design’s demands.
Common Mistakes to Avoid
- Ignoring ease allowance or movement range.
- Neglecting pattern balance (waist, bust, hip, and armhole relationships).
- Overcomplicating new seamlines or dart positions, making cutting/sewing inefficient.
Practical Tips
- Work with traced copies of your block to preserve the original master.
- Label all adjusted pieces and keep revision notes for future use.
- Mock-up in muslin and observe drape and fit before committing to final fabric.
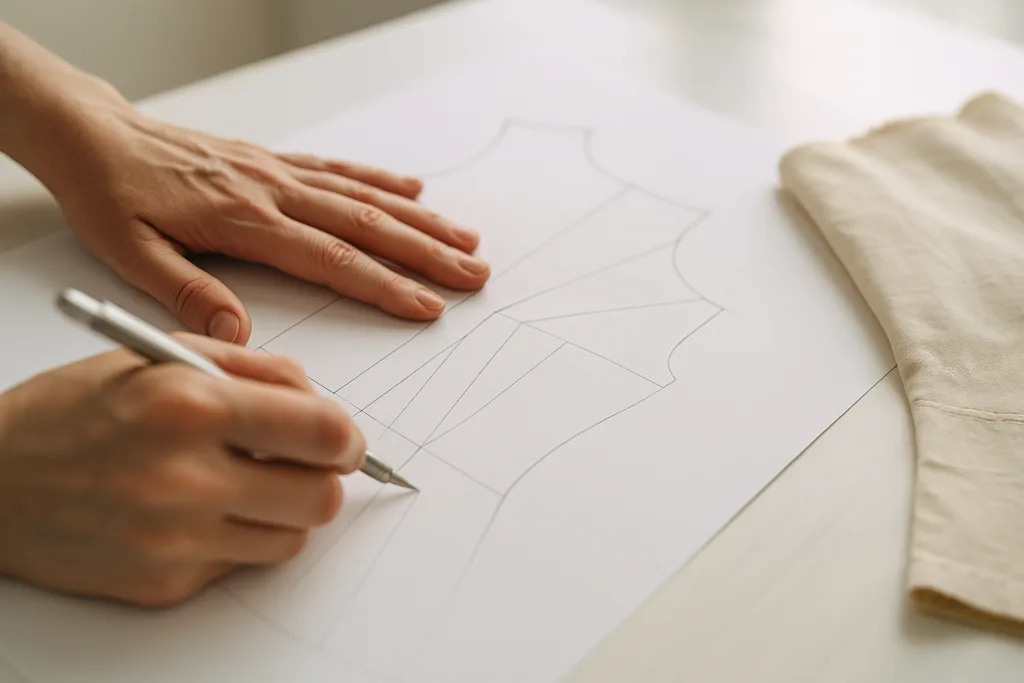
Fundamentals of Pattern Manipulation
Pattern manipulation is the art of adjusting a block’s shape, lines, and fullness to engineer new looks. This method underpins style development in export factories and couture ateliers alike.
Why Manipulate Patterns?
- To create trend-driven variations without redrafting from scratch.
- To adapt a single block for multiple target fits—slim, regular, oversized.
- To streamline development, reducing error-prone measurement changes.
Block vs. Style Patterns
| Pattern Type | Purpose | Adjustable Elements | Production Use |
|---|---|---|---|
| Block/Base Pattern | Foundational fit with minimal style | Minimal ease, basic seamlines | Starting point for each new style |
| Style Pattern | Finished fashion design | Neckline, sleeve, dart, seam variation | Direct for sample & bulk cutting |
Slash & Spread Method: Adding Volume and Shape
The slash & spread technique allows controlled volume adjustments and shape transformation. It’s ideal for peplums, flared skirts, bell sleeves, and innovative drape features on bodices.
When to Use Slash & Spread
- To add flare or gather to hems or sleeves
- For A-line, gored skirts, or circle skirt effects
- To create soft drape or asymmetric panels
Step-by-Step Slash & Spread
- Mark slash lines on your block (radial or parallel, depending on effect).
- Cut (slash) carefully—not to the edge, but through the seam allowance, keeping a ‘hinge.’
- Spread key sections apart by the desired amount, anchoring the hinge; secure with tape.
- Align edges and blend new curves/silhouettes, retaining grainline integrity where possible.
- Redraw new cutting lines and add notches for balance and sewing accuracy.
Factory Tips
- Double the spread amount for symmetrical left/right panels.
- Test with scrap fabric to judge drape—single jersey will behave differently than poplin or twill.
- For elaborate flare (e.g., full circle skirt), check marker efficiency and fabric utilization before committing to bulk.
“A precise hinge placement is crucial—move the pivot too close to the seam and you’ll get distortion,” shares Rain Chen, based on years of slit & spread operations for global casualwear brands.
Dart Rotation: Shaping Style With Precision
Dart rotation involves shifting the location of the dart intake to new areas—side seam, neckline, armhole—while keeping the bust/waist shaping proper. It’s a powerful tool for creating princess lines, gathers, tucks, or decorative yokes.
When to Rotate Darts
- Shifting a side bust dart to the waist or neckline for style lines
- Disguising darts in gathers, pleats, or yoke seams
- Building bodice panels for fit-and-flare or semi-fitted garments
How to Rotate a Dart
- On the front block, mark the original dart and the desired new point (e.g., shoulder, neckline).
- Draw lines from bust point to both original and target dart locations.
- Cut along dart lines, close the original dart (overlap edges), letting new opening create the rotated dart.
- Refine seam or edge curves for smoothness, and add sewing marks/notches.
Why Factories Use Dart Rotation
- Hides shaping for fashion-forward or clean looks
- Improves sewing efficiency by combining dart with seam
- Maintains bust/waist shaping for consistent fit across size sets
Seam Changes: Creating Style Lines and Visual Interest
Changing seam lines is a cornerstone of style development. By repositioning or adding seams, garment makers introduce panels, yokes, decorative topstitching, or functional features (e.g., color blocking, pockets).
Types of Seam Variations
| Seam Type | Stitch Code | Strength | Garment Use |
|---|---|---|---|
| Princess Seam | Lockstitch (301) | High | Dresses, tailored shirts |
| Yoke Seam | Overlock + Topstitch | Medium | Shirts, jeans |
| Piped Seam | Lockstitch (301) | Variable | Kidswear, sportswear |
Process for Adding/Moving Seams
- Trace the block piece; draw the new seam position.
- Cut along the planned seam; add seam allowances (usually 1–1.2 cm for straight seams, up to 1.5 cm for curved or high-stress seams).
- Ensure cross-checking matching notches for precise joining.
- Label each panel (e.g., CF, yoke, side front) and confirm grain direction for each piece.
Quality Points
- Avoid overly sharp curves (difficult to sew, weak finish).
- Reinforce high-stress seams with bartack or narrow zigzag (especially on activewear).
Neckline & Sleeve Variations: Modernizing the Block
Altering necklines and sleeves is a guaranteed way to modernize a block and offer new silhouettes. Key options include scoop, boat neck, V-neck, square, and deep/plunging necklines. Sleeves can be cap, puff, bell, raglan, or bishop.
Changing the Neckline
- Mark the new neckline shape on the block (measure from shoulder and CB/CF).
- Cut the new neckline curve, preserving balance (avoid drastic dips at shoulder tips).
- Add facing or binding pieces; note required seam allowance (usually 0.7–1 cm for neckline finish).
Altering Sleeves
- Draw new sleeve shape (cap rise, bicep, hem width, sleeve head) over existing block or sloper.
- For puff or gather, use slash & spread; for slim, reduce width and adjust armhole curve.
- Double-check armhole-sleeve cap match—errors here cause puckering or tight movement.
Tips for Modern Style Development
- Follow current trends but maintain production feasibility—avoid ultra-deep necks or extreme sleeve width in mass production.
- Prototyping is a must for new edge shapes or drape-dependent sleeves. Test with similar fabrics.
Troubleshooting Common Issues When Manipulating Patterns
Even experienced teams face challenges in pattern manipulation, which often impact fit, cost, or quality control.
Fit Imbalances
- Symptoms: drag lines, armhole tension, uneven hemline
- Causes: incorrect dart movement, grain misalignment, excess/insufficient flare from slash & spread
Production Complications
- Poor marker efficiency due to irregular panels or extra seaming
- Labeling confusion: failure to mark mirrored or new pieces clearly
- Sewing difficulty: sharp points, extreme curves, mismatch at key joins
Garment Performance Issues
- Poor drape/fit after wash due to fabric shrinkage not allowed for in manipulation
- Seam slippage/weakness at new joins
- Negative impact on print/artwork placement when seam lines change
Best Practices for Troubleshooting
- Always compare manipulated pattern against the block and against the spec sheet
- Pre-test with trial fabric and wash before full development
- Mark clear notches for matching and sewing line accuracy
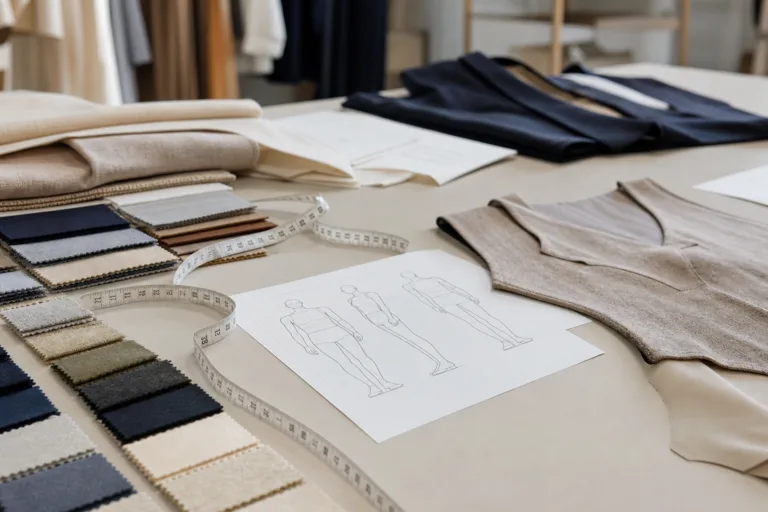
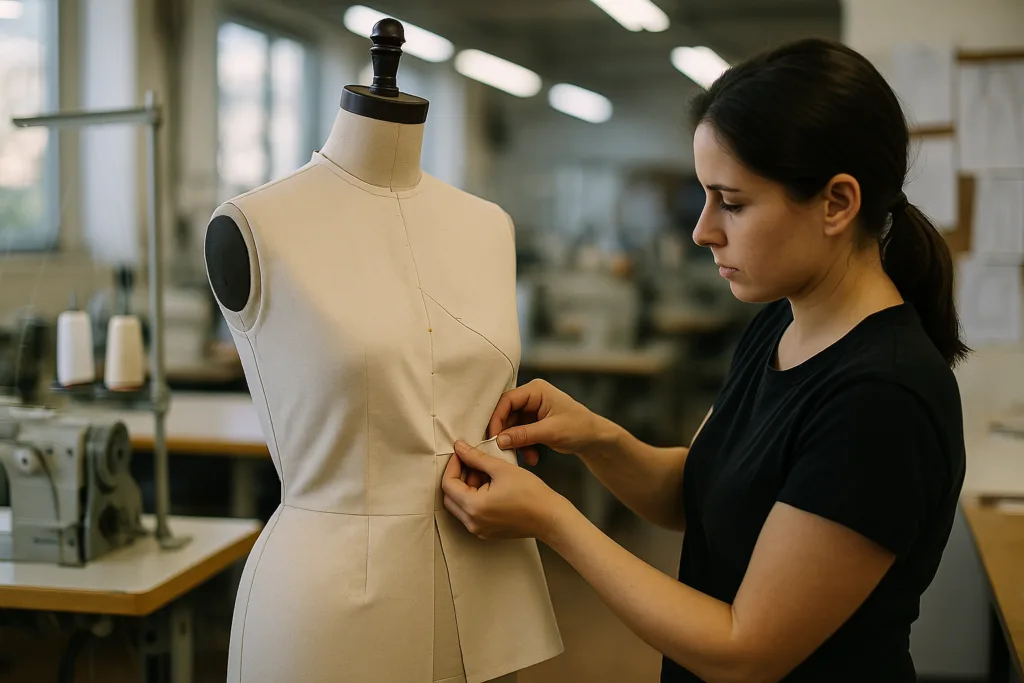
Sample Making and Fit Checking for New Styles
After manipulating a block, sample making validates the transformation. Both buyers and production teams should check:
Fabric Selection
- Pilot samples should use the final, or at least similar, GSM and fiber mix (e.g., 180 GSM single jersey, 97% cotton 3% spandex for stretch bodice).
- Sample shrinkage testing is mandatory; even a 2% difference post-wash can skew grade rules and production specs.
Measuring Sample Accuracy
| Dimension | Spec +/- Tolerance | Typical Measurement |
|---|---|---|
| Bust/Chest (knit top) | +/- 1 cm | 48 cm S, 56 cm XL |
| Shoulder width | +/- 0.5 cm | 40 cm S, 47 cm XL |
| Sleeve length | +/- 1 cm | 17 cm S, 24 cm XL |
Fit Session Checklist
- Wearer can move/shrug without restriction
- Seam lines lie flat without distortion
- Hems/edges remain level
- No puckering, twisting, or drape collapse
- Artwork and labels correctly positioned relative to new design lines
Quality Control for Style Development
With every manipulated style, quality control must adapt. Factor in:
- Dimensional stability after wash—request reports from internal QC or certified labs
- Sewing performance, especially at newly introduced seams or darts—look for skipped stitches, seam grin, and unintended puckering
- Bulk fabric/trim approvals against sample to catch dye lot, GSM, or handfeel mismatches
- Special trims on new seamlines must meet safety/regulatory standards (e.g., nickel-free snaps for kidswear)
End-of-Line Checks
- Random measurement of critical dimensions across size sets
- Inspection for seam accuracy, stitch count, labeling, and finishing
- Packing compliance with style specifications—neckline or sleeve shape often dictate folding or hanger packing
Documenting Style Development for Production Teams

Clear technical documentation bridges the gap between design intent and bulk manufacturing. This includes accurate pattern sheets, tech packs, and graded nests:
Technical Drawing Updates
- Reflect every manipulation—new seams, dart positions, edge shapes—in flat sketches and measurement references
- Annotate key changes for sample rooms and sewing teams
Pattern Sheet Details
- Include all piece names, cut counts, and grainlines
- Mark critical sewing points and notches, especially where multiple panels join
Sample Room Communication
- Provide a full manipulation history so adjustments in stitch type, finish, or fusing can be tracked and repeated
- Specify any special handling needed for atypical shapes (e.g., bias cut hem, asymmetric sleeves)
Frequently Asked Questions
What is the first step in converting a block pattern into a new style?
Assess the original block’s fit, construction, and measurements, then choose the best manipulation technique for your design intent.
Which fabrics work best for slash & spread techniques?
Fabrics with good drape, like lightweight jersey, viscose, or crepe, showcase slash & spread effects better than stiff or heavy cloth.
Can dart rotation change garment fit?
Dart rotation relocates fullness but preserves fit if executed correctly; incorrect rotation can shift balance and cause drag lines.
What seam allowances are standard when adding new seams?
Woven garments usually use 1–1.2 cm allowances, while knits and special seams may need 0.7–1.5 cm depending on curve and stress areas.
How can I check that new style lines haven’t distorted the pattern?
Overlay your manipulated pieces on the block and check for matching length, balanced curves, and consistent grain direction before cutting fabric.
What’s the most common cause of fit failure after pattern manipulation?
Failing to maintain ease or grainline integrity during manipulation often leads to poor fit, excessive tightness, or twisting in the final garment.