Understanding Topstitching Techniques for Professional Finishing
Topstitching is a cornerstone of professional garment construction that combines function and decoration. In every export-grade factory, topstitching is both a visible sign of precision and an invisible test of skill. Mastering topstitching techniques—from adjusting thread tension to controlling stitch width and applying double-needle topstitching—elevates the aesthetics and durability of finished apparel. Whether you’re new to the sewing floor or managing bulk production, this guide unpacks the practical details behind flawless topstitching, including how decorative stitching choices influence garment style and perceived quality.
What is Topstitching? Definition and Core Purpose
Topstitching is a finishing process where stitches are sewn visibly on the garment’s right side, often along seams, edges, or as decorative surface lines. Its dual role is to reinforce structural strength and add visual appeal. Apparel Wiki’s production team relies on topstitching to stabilize collars, cuffs, waistbands, pockets, and hems on everything from classic denim to performance sportswear.
Functional Aspects
- Reinforces high-stress areas (e.g., jean pockets, shirt plackets)
- Secures layers and seam allowances
- Improves shape retention after washing
Aesthetic Aspects
- Creates clean, defined edges
- Adds decorative detail with contrast thread or unique stitch patterns
- Highlights specific garment design features and branding
Common Applications
Shirts, polo tops, jeans, skirts, jackets, activewear, uniforms, and children’s wear frequently incorporate topstitching. Different techniques suit varied fabric types such as twill, denim, jersey, fleece, and softshell.
Key Elements Influencing Topstitch Quality
Thread Selection
Quality topstitching starts with the right thread. High-tenacity polyester or core-spun cotton/poly threads are typical, with thickness chosen to suit the fabric weight. Factories often specify thread counts between 20s/2 to 60s/2 for jersey, and up to 8s or heavier for canvas/denim.
Needle Choice and Size
Needle size (e.g., 75/11 to 110/18) must match thread diameter and fabric density. Ballpoint needles suit knits; sharp-pointed needles excel on woven fabrics.
Sewing Machine Type
- Lockstitch machine for single/straight topstitching (ISO 301)
- Double-needle lockstitch for parallel rows
- Coverstitch and chainstitch occasionally used for heavy or decorative applications
Operator Skill and Control
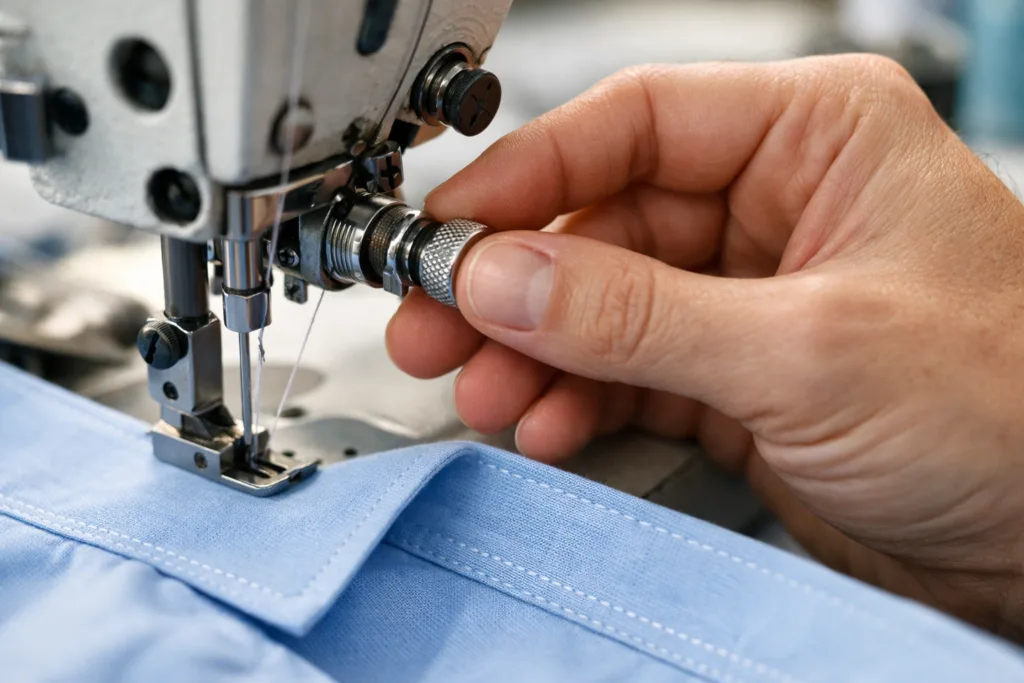
Consistent seam allowance, steady feeding, and careful overlapping of corners are critical for symmetry. Rain Chen’s tip: Always check for thread tension at the start of each batch to prevent skipped stitches and puckering.
Topstitching Techniques: Types and Their Effects
Single-Needle Topstitching
Straight lines along seam edges, often 2–5 mm from the fold. Best for simple reinforcement and subtle finish on shirts, polos, casual pants.
Double-Needle Topstitching
Parallel lines using a twin-needle (or double-needle) machine. Enhance visual strength, commonly used on jeans, denim jackets, sportswear. Typical spacing: 6–8 mm between needles; adjust per spec.
Decorative Stitching
Includes zigzag, geometric, contrast color, or specialty threads (e.g., metallic, heavy-duty). Used for accent, branding, or unique design elements on cuffs, pockets, or outerwear.
Edge Topstitching
Placed right along the garment edge (≤2 mm), ideal for crisp finish on collars, lapels, and waistband edges.
Functional Topstitching (Bartack & Reinforced)
Bartack stitches (dense zigzag) reinforce stress points: pocket edges, belt loops, button holes.
| Technique | Machine Type | Best For | Aesthetic Impact |
|---|---|---|---|
| Single-Needle | Lockstitch | Shirts, polos, lightweight pants | Subtle, clean edges |
| Double-Needle | Twin-needle lockstitch | Denim, outerwear, sportswear | Strong, bold lines |
| Edge Topstitching | Lockstitch | Collars, cuffs, lapels | Crisp, sharp silhouette |
| Decorative | Various (lockstitch, zigzag) | Trim, branding, accents | Contrast and texture |
| Bartack | Bartack machine | Stress points | High durability |
Thread Tension: Achieving Consistent and Durable Stitches
Thread tension is one of the most common reasons for topstitching defects in factories. Proper tension prevents loose loops, thread breaks, and puckering—especially when switching between light jersey and heavyweight denim.
Factors Affecting Thread Tension
- Thread type and diameter
- Fabric thickness and stretch
- Needle size and machine settings
- Stitch density (SPI—stitches per inch)
How to Set and Check Thread Tension
- Test on fabric scraps before bulk production.
- Adjust both upper and bobbin thread settings as needed.
- Inspect stitch appearance: balanced tension gives flat, even stitches with no visible loops or bobbin knots on either side.
- Conduct simple stretch/pull tests to check for seam failure or distortion.
Rain’s Tip from the Production Line
Before any new style run, always run a tension sample on the actual bulk fabric—as GSM, weave, and finish can affect thread behavior. Skipping this step is a common cause of topstitching returns.
Stitch Width and Density: Visual and Structural Considerations
Stitch width (distance from seam line or between parallel rows) and stitch density (SPI) are specified on style sheets and directly impact both durability and aesthetics. Wider stitches can provide dramatic contrast, while tight stitch density reinforces seams in workwear and uniforms.
Optimal Widths and Densities
- Single topstitch: 2–5 mm from edge for most shirts and polos
- Double-needle: 6–8 mm apart for denim/outerwear
- Edge topstitch: 1–2 mm for lapels/collar
- Stitch density: 8–12 SPI for jersey, 6–9 SPI for denim
Always confirm on a size set before bulk runs to accommodate any shrinkage or distortion after washing.
Factory Checklist for Stitch Settings
- Review spec sheet for topstitch dimension requirements
- Confirm machine adjustments (feed, cam, needle spacing)
- Compare PP sample with approved standards
- Conduct random inline checks during production
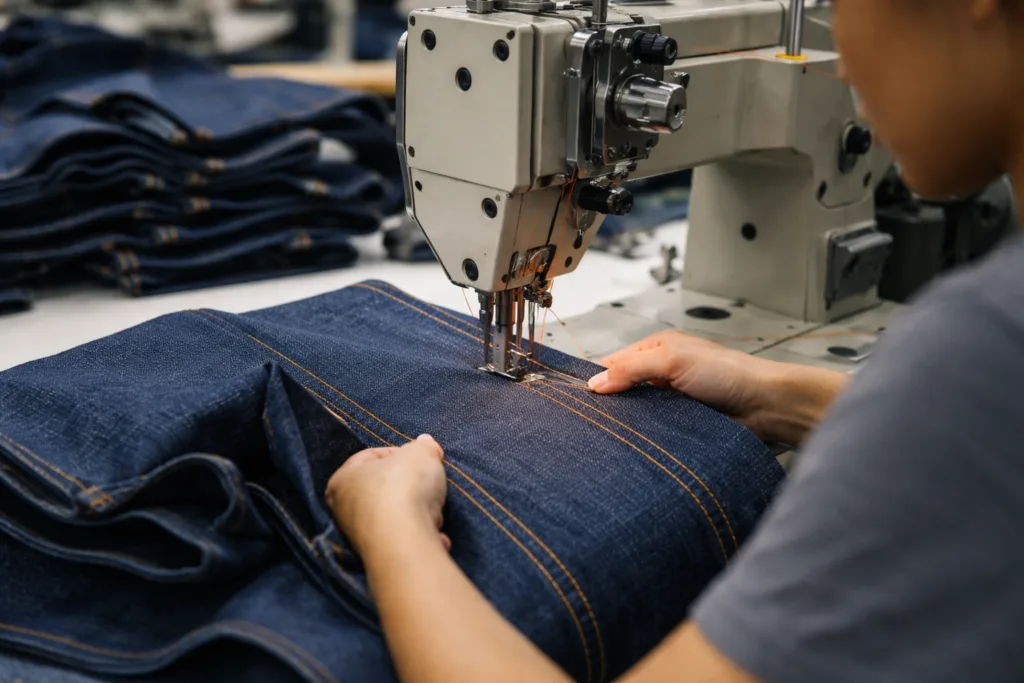
Double-Needle Topstitching: Techniques & Best Practices
Double-needle topstitching uses two needles on a twin-needle machine to create parallel stitch lines, a hallmark of premium jeans, heavy jackets, and modern sportswear. It’s valued for both its improved seam strength and eye-catching appearance.
Advantages
- Increases seam durability and prevents seam splitting
- Sharp parallel lines provide visual impact
- Efficient—completes two rows in one pass
Application Guidelines
- Set needle spacing according to design (typically 6–8 mm)
- Use matched thread/tension on both needles
- Start sample runs on the exact bulk fabric—denim, canvas, twill, or even technical outerwear
- Monitor row alignment, especially on curves and corners
Common Double-Needle Challenges
- Skipped stitches caused by inconsistent fabric feeding
- Uneven thread tension between needles
- Puckering on stretch fabrics without proper stabilization
Quality Control Points
- Check symmetry and parallelism of lines
- Inspect for thread breaks, skipped stitches, and puckering
- Conduct wash and stretch tests
[PROMPT]: Topstitching Techniques for Professional Finishing
Topstitching techniques for professional finishing cover a full spectrum—from classic single-topstitch for shirts to decorative, heavy-duty double-needle for denim. For every method, precise control over thread tension, stitch width, and stitch density defines quality. Here’s how to differentiate and apply the main approaches:
Definition and Why It Matters
Topstitching techniques refer to specific methods and stitch types used to finish garment edges, seams, and accents. They matter because:
- They visually signal quality and brand identity
- Provide extra seam strength—especially post-wash
- Can camouflage construction errors or distractions
Key Parameters to Control
- Thread composition and thickness (polyester for durability, cotton for natural look)
- Tension settings for each fabric and seam type
- Needle size and finish (ballpoint vs. sharp, chrome vs. coated)
- Machine and stitch type: lockstitch, chainstitch, twin-needle, zigzag
- Stitch density (SPI) and width according to application
Common Mistakes and How to Avoid Them
- Setting incorrect stitch width that looks uneven or misaligned
- Failing to adjust tension after fabric changes
- Overlooking stitch density, leading to seam slippage
- Ignoring post-wash effects in spec planning
Practical Tips
- Always request a topstitch sample in PP (pre-production) and size set samples
- Check stitch appearance and symmetry against the approved spec sheet
- Inspect inline production for any deviation, especially with complex decorative stitching
- Record and address any customer returns linked to topstitch issues
Decorative Stitching: Opportunities for Branding and Design
Decorative stitching transforms basic finishing into a signature brand element. From contrast color lines on luxury polos to geometric stitch patterns on sportswear, factories leverage decorative techniques for cost-effective standout style.
Popular Decorative Approaches
- Zigzag or wave stitches for dynamic accents
- Contrast color topstitch for branding
- Metallic or multi-filament threads for badges, pockets, hems
- Embroidery-style decorative stitches (e.g., triple stitch, honeycomb)
Materials and Placement
Use high-quality threads with stable dye. Always test for colorfastness (washing, perspiration) to avoid future complaints. Popular placements include:
- Pocket borders
- Cuff and collar edges
- Outseams and yokes
Design and QC Tips
- Review design allowance on spec sheets—does the decorative stitch interfere with structure?
- Always approve decorative layouts in the first PP sample
- Use tight controls for thread tension and stitch pattern repeatability
- Include special wash and abrasion tests for durability
Quality Control and Inspection: How to Ensure Seam Integrity
The importance of inspection cannot be overstated: neat topstitching is checked at every factory—inline, endline, and final audit. Apparel Wiki relies on rigorous multi-point checks:
Key Inspection Points
- Consistent stitch width and spacing
- No skipped, broken, or loose stitches
- Symmetry on paired seams (left/right sleeves, pockets)
- No puckering or distortion after pressing/washing
- Thread colorfastness (test per ISO/industry standards)
Inspection Methods
- 4-point system for visible defects
- Pull-test for seam strength
- Random bulk wash tests
- Compare with reference PP samples during production
Common Quality Issues
- Overlapping topstitch lines on curved seams
- Puckered stitching after shrinkage washes
- Unbalanced tension causing uneven stitch formation
Practical Applications: Matching Topstitching Methods to Garment Types

The best topstitching technique always relates back to the garment type, fabric properties, and end-use scenario. Below is a comparative overview:
| Garment | Fabric Type | Recommended Stitch | Visual Effect |
|---|---|---|---|
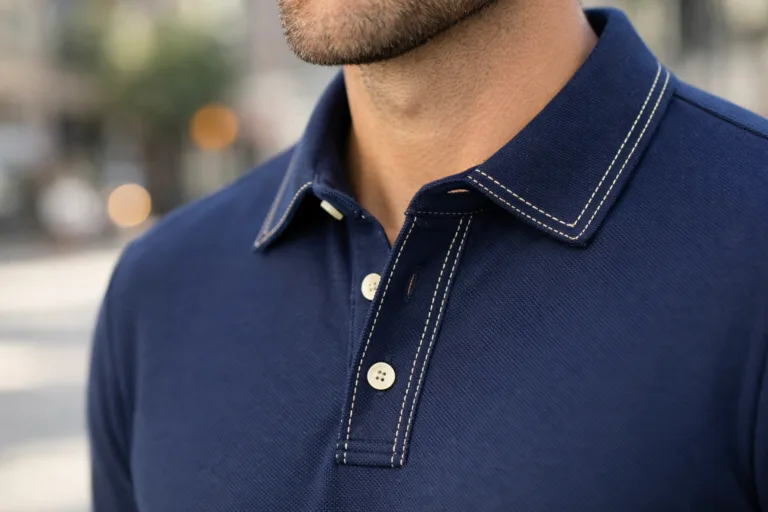
| Polo Shirt | Pique, CVC blend, 180–220 GSM | Single-needle edge topstitch | Clean collar/placket |
| Jeans | Denim, 10–12 oz (340–410 GSM) | Double-needle, contrast topstitch | Bold seam accents |
| Hoodie | French terry, 280–330 GSM | Single/zigzag decorative stitching | Casual sport look |
| Workwear | Heavy canvas or twill, 300+ GSM | Bartack + parallel double-needle | Reinforced, industrial finish |
| Children’s Wear | Soft jersey, <160 GSM | Single, no exposed threads (safety) | Gentle edges, minimal risk |
Trade-Offs and Practical Considerations
- High-density topstitching improves durability but can stiffen soft knits
- Decorative techniques add cost and complexity, affecting MOQ and labor
- Double-needle demands operator skill, especially at corners and curves
What to Discuss with Your Factory or Buyer
- Confirm sample approvals match bulk production standards
- Share clear spec sheets for all topstitch dimensions, placement, tension, and decorative requirements
- Request wash and wear tests, especially for new decorative threads or techniques
- Include visual inspection checkpoints during line and end-line QC
Frequently Asked Questions
What is the main purpose of topstitching in garments?
Topstitching strengthens seams, defines edges, and enhances a garment’s aesthetic by adding visible stitched lines for both functional and decorative effects.
How does thread tension affect topstitch quality?
Balancing thread tension prevents puckering, skipped stitches, and seam failures—especially when switching between fabric types and thicknesses in production.
When should I choose double-needle topstitching?
Double-needle topstitching is ideal for creating parallel accent lines, added durability, and bold design on heavy fabrics like denim, jackets, and sportswear.
Does stitch width impact the look and function of topstitching?
Yes, stitch width changes the visual impact and structural strength; wider stitches can highlight seams, while closer, edge stitches add subtle definition and reinforcement.
Can decorative stitching be used on any fabric type?
Decorative stitching works best on stable, medium-to-heavyweight fabrics and should be tested for durability, colorfastness, and wash performance before bulk production.
How do factories inspect topstitching during quality control?
Factories check for even stitch width, tension, and symmetry, ensure no skipped stitches, and perform wash and strength tests on sample and bulk garments.