Introduction: Why Seam Allowance Matters in Garment Construction
Understanding seam allowance standards for different garment types is crucial for anyone invested in sewing, garment production, or pattern making. Seam allowance refers to the extra fabric edge added between the stitching line and the fabric’s raw edge. It serves as the foundation for assembling garment sections and is a key determinant of fit, durability, and the final polished look of any apparel piece. Whether you’re making dresses, trousers, or jackets, learning to select the correct seam allowance can make the difference between a successful project and one riddled with fitting issues or quality problems.
What Is Seam Allowance?
Seam allowance is the specified width between the stitch line and the raw edge of fabric. It allows for precise sewing, supports structural integrity, and provides room for adjustments or alterations. For beginners, it’s helpful to view seam allowance as both a safety net and a design tool. Proper seam allowance ensures that seams are strong and that fit adjustments, when needed, can be made with minimal effort.
The Role of Seam Allowance Standards in Different Garment Types
Every garment type, from flowing dresses to tailored jackets, has unique requirements for seam allowance. Standard measurements are influenced by garment style, construction techniques, and the properties of the chosen fabric. Seam allowance is more than just a margin; it is a deliberate, functional design choice designed to balance aesthetics, strength, and comfort. In commercial production, using the correct standard also helps with repeatability and manufacturing efficiency.
Standard Seam Allowances by Garment Type
Below is a quick reference table highlighting typical seam allowance standards for various garment categories:
| Garment Type | Main Seam Allowance | Special Areas (e.g., collars, hems) |
|---|---|---|
| Dresses | 1.0–1.5 cm (3/8″–5/8″) | Hems: 2–4 cm (3/4″–1 1/2″) |
| Trousers/Shorts | 1.5 cm (5/8″) | Waistband: 1 cm (3/8″), Hems: 3–4 cm (1 1/4″–1 1/2″) |
| Jackets/Blazers | 1.0–1.5 cm (3/8″–5/8″) | Collars/Lapels: 1 cm (3/8″), Hems: 3–4 cm (1 1/4″–1 1/2″) |
| Shirts/Blouses | 1.0 cm (3/8″) | Cuffs: 1 cm (3/8″) |
| Denim/Garments with Flat Felled Seams | 1.6 cm (5/8″) | Hems: up to 4 cm (1 1/2″) |
How Seam Allowance Influences Fit and Quality
The right seam allowance offers flexibility during fitting and provides insurance for future adjustments. Too little may cause seams to fray or fail; too much can lead to bulky, uncomfortable seams. Consistency is also key to neat construction—crooked allowances lead to irregular shapes or misaligned seams. As explained in the Master Stitch: 17 Ways Understanding the Grain Line Transforms Garment Fit, grain line alignment and seam allowance choices together define how a garment drapes, stretches, or holds its shape.
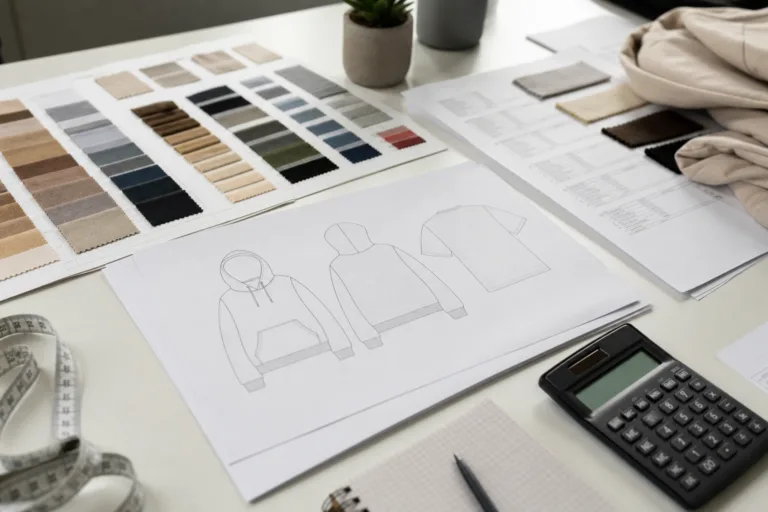
Basic Seam Allowance Measurements: A Beginner’s Guide
For those new to sewing, the standard seam allowance is generally 1.5 cm (5/8″), especially for home sewing patterns. Read the instructions, as different areas such as hems, facings, or collars often require smaller or larger values. Mark seam lines clearly on fabric, or use notches and symbols for accuracy—further tips on symbols are available at The Ultimate Guide to Sewing Pattern Symbols.
Seam Allowance by Fabric Type: How Material Impacts Decisions
Softer, fraying-prone fabrics (like silk) often need wider seam allowances—up to 2 cm (3/4″)—for French or enclosed seams. Sturdy fabrics (like denim) favor robust seams, typically using 1.6 cm (5/8″). Knits, which stretch and don’t fray, can have narrower allowances; just 0.6–1 cm (1/4″–3/8″) suffices for most. Apparel Wiki often advises adjusting allowance depending on fabric stretch, thickness, and final use case.
Dressmaking: Recommended Seam Allowances
Dresses demand precision. Seam allowances are usually 1 to 1.5 cm (3/8″–5/8″) at bodice, side, and sleeve seams. Hem allowances can be larger: 2–4 cm for a professional finish. For garments with multiple layers or linings, consider consistent allowance values to ease assembly and avoid confusion.
Trouser and Skirt Seam Allowances: Where Fit Counts Most
Trousers and skirts feature stress points at seats, rise, and crotch. A 1.5 cm (5/8″) side seam allowance provides enough room for fit tweaks, while crotch seams may get 2 cm (3/4″) for durability. For waistband attachment, 1 cm (3/8″) is standard, ensuring a neat finish with less bulk.
Jacket and Blazer Seam Allowances: Precision for Structure
Jackets benefit from 1 to 1.5 cm (3/8″–5/8″) main seam allowances. Structured areas like collars, lapels, and armholes typically feature 1 cm (3/8″) to maintain sharp, flat edges. Hem allowances tend larger: up to 4 cm for weighted drape and clean pressing.
Shirts and Blouses: Seam Allowance for Lightweight Construction
For shirts and blouses, 1 cm (3/8″) is the industry-favored allowance. This keeps seams light, flexible, and comfortable. Flat-felled seams or French seams, common for durability and clean finishes, require more fabric—check your specific pattern’s directions.
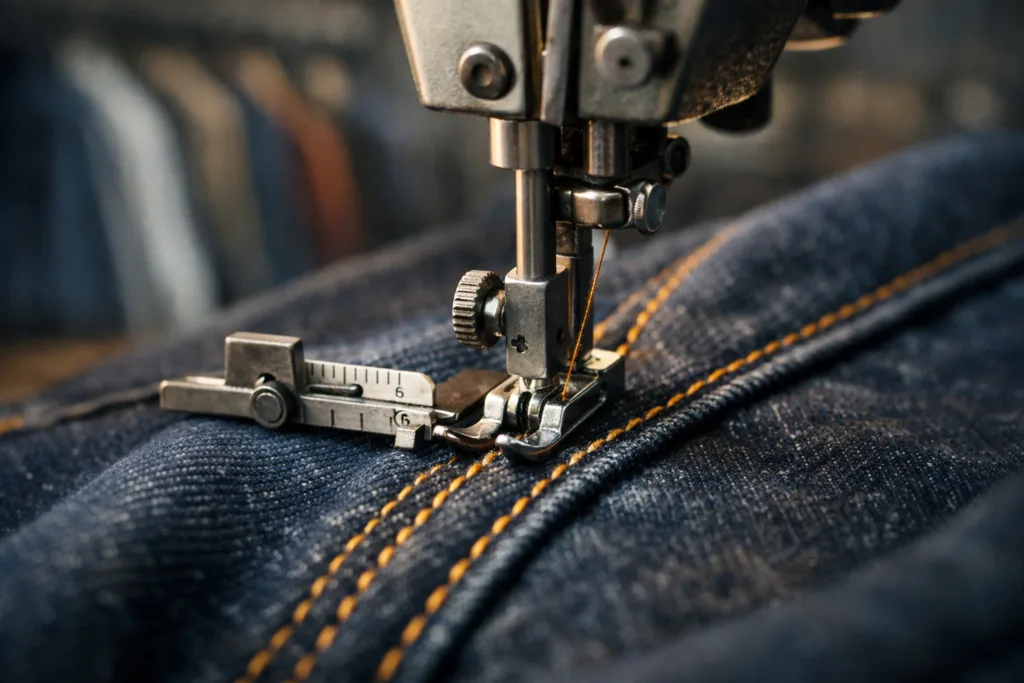
Denim and Heavyweight Garments: Increased Seam Allowances for Strength
Heavyweight fabrics like denim, canvas, and corduroy are usually constructed with seam allowances of 1.6 cm (5/8″) or more, especially when using double stitching or flat-felled seams. Hems often get up to 4 cm (1 1/2″) for added robustness, as explored in Heavyweight Fabrics: Canvas, Denim, Corduroy.
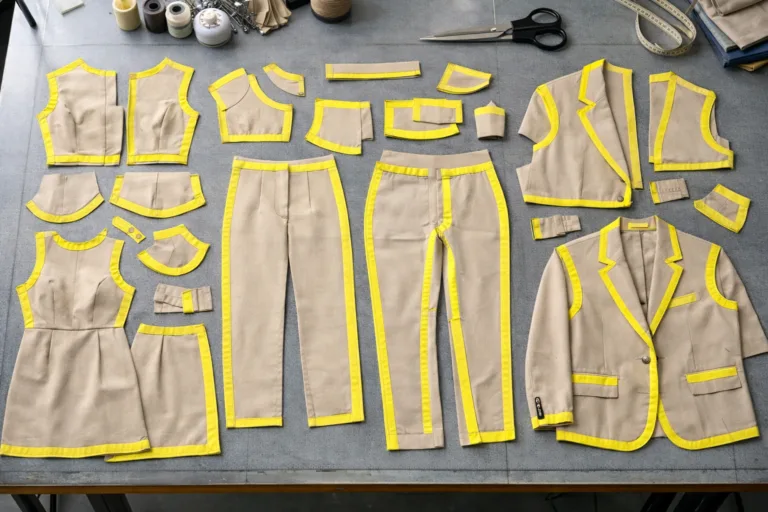
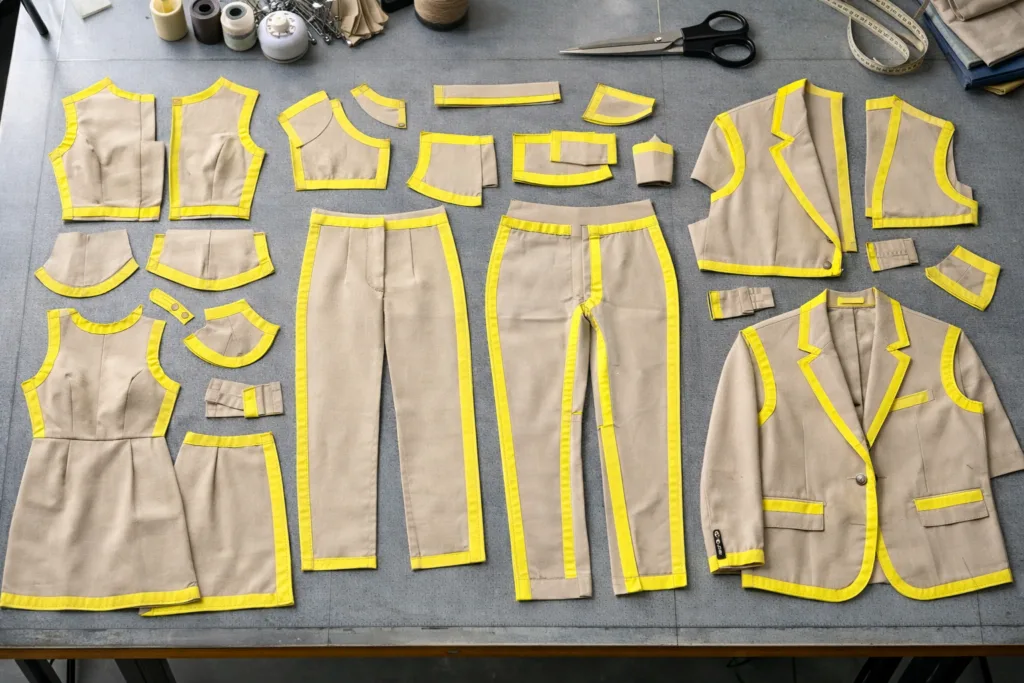
Specialty Seam Finishes and Allowance Adjustments
Some seam finishes—like French, Hong Kong, or bound seams—require larger than standard allowances to enclose or reinforce edges properly. Always factor in extra width if using specialty finishing for exposed or high-stress areas.
Tightly Fitted Garments: When to Add Extra Allowance
Even expertly drafted patterns can vary when sewn in stretch or fitted garments. Consider adding up to 2 cm (3/4″) at side seams to permit fitting adjustments. Excess can be trimmed later after confirming fit during a fitting session.
Where to Reduce Seam Allowance (Less Is More)
In delicate areas like collars, cuffs, or curved seams, smaller seam allowances—about 0.6–1 cm (1/4″–3/8″)—make turning and pressing easier and prevent bulk. Trimming allowances after stitching is also common for neatness.
Strategic Notching and Clipping for Curved Seams
Curved seams (armholes, necklines) almost always require you to notch or clip the seam allowance so the finished edge lays flat. Match the allowance to your method—larger allowances for deeper curves, smaller amounts for shallow curves.
How Pattern Type Impacts Seam Allowance Choices
Commercial, home, and digital patterns may use different standard seam allowances. Digital pattern systems, now popular in the industry, often default to 1 cm (3/8″). Detailed insights on digital pattern systems are available at Expert Comparison: How Digital Pattern Making with Gerber, Lectra, and CLO3D Is Transforming Garment Design.
The Relationship Between Garment Ease and Seam Allowance
Ease is the extra room added to a pattern for movement and comfort. However, seam allowance is not the same as ease. Understanding this distinction is critical—refer to What Is “Ease” in Pattern Making? for deeper clarity.
Seam Allowance for Wovens vs. Knits
Woven fabrics, which do not stretch, typically require wider allowances for robust seam structure. Knits can tolerate narrower allowance because their edges rarely fray and seams stretch more naturally. For a full exploration of the differences, see Developing Patterns for Knits vs Wovens.
When to Adjust Seam Allowance for Fabric Shrinkage
Certain fabrics shrink when washed or pressed. Account for this by preshrinking fabrics before cutting, and by keeping seam allowances at least 1.5 cm (5/8″) until after the first press and fit check. Read about shrinkage testing at How to Perform a Fabric Shrinkage Test.
Industry vs. Home Sewing: Written Standards and Technical Packs
In commercial manufacturing, technical packs (“tech packs”) clearly specify not only the seam allowance but where and why to adjust it—reducing errors and supporting consistent results across production runs. For real-world examples, visit 9 Real-World Tech Pack Examples for T-Shirts, Hoodies, and Denim—What Works, What Doesn’t, and Why.
Improving Factory Communication for Reliable Seam Allowance
Smooth collaboration between pattern makers, designers, and factories relies on clear communication of seam allowance details. Use consistent callouts, diagrams, and comments within your documentation. Apparel Wiki has detailed frameworks for How to Communicate Pattern Corrections to Your Factory with Precision.
How to Mark and Check Seam Allowances Before Sewing
Use fabric markers, tailor’s chalk, or snip small notches to define seam lines. Always double-check allowance widths with a ruler or gauge before assembling the garment. For first-time projects, test on scrap fabric to observe how your seam allowance affects overall dimensions and construction feel.
Troubleshooting Common Seam Allowance Problems
Common mistakes include uneven seam allowances, mismatched widths at intersections, or choosing an allowance incompatible with the fabric or seam finish. Solutions include careful pressing, trimming excess bulk, reinforcing weak seams, or, when in doubt, consulting a technical resource like Apparel Wiki.
Seam Allowance Standards for Different Garment Types
Across all garment types—dresses, trousers, jackets, and shirts—seam allowance standards ensure quality, repeatable results, and easier future adjustments. By tailoring allowance size to the fabric, construction method, and stress location, you make sewing and manufacturing more straightforward, consistent, and professional. Learning, adapting, and standardizing these practices will put you on the path to high-quality garment construction, whether in a home studio or industrial setting.
Conclusion

In summary, mastering seam allowance standards for different garment types is foundational knowledge for anyone working with apparel. Tailor the allowance to garment style, fabric, and intended use—standardize for manufacturing, and always allow for testing and fit adjustments. Consistent, well-chosen seam allowances improve fit, garment quality, and your overall experience in sewing and apparel development. Keep refining your technique, and let best practices guide your patterns for polished, professional garments every time.
Frequently Asked Questions
What is the typical seam allowance for dresses?
Standard seam allowance for dresses is 1 to 1.5 cm (3/8″–5/8″), with 2–4 cm (3/4″–1 1/2″) at hems for finishing flexibility.
Why is seam allowance important in garment making?
Seam allowance allows for strong seams, fit adjustments, and neat finishes, reducing risk of fraying or poor construction quality.
Should seam allowance be different for knit and woven fabrics?
Yes. Knits often use narrower allowances (0.6–1 cm), while wovens need wider allowances (1–1.5 cm) for durability and structure.
How do I know what seam allowance to use?
Check sewing pattern instructions, consider fabric type, and consult reference tables. When in doubt, 1.5 cm (5/8″) is a safe default.
Can I adjust seam allowance to fix garment fit?
Absolutely. Adding wider allowances at side seams provides room for later fitting; trim away excess after getting the right fit.
What tools help measure and mark seam allowance?
Use a ruler, measuring tape, seam gauge, tailor’s chalk, or fabric pens. Always measure carefully for accuracy before stitching.
Related Reading
- A Clear Guide to Seam Allowance: Beyond the Basics for Garment Construction
- 9 Essential Communication Tips: Pattern Corrections in the Factory
- See Real-World Tech Pack Samples for Multiple Garment Styles
- Master Pattern Symbols & Notches: Step-by-Step Solutions
- Choosing and Developing Knits vs. Woven Patterns
- Working With Heavier Fabrics: Tips for Canvas and Denim