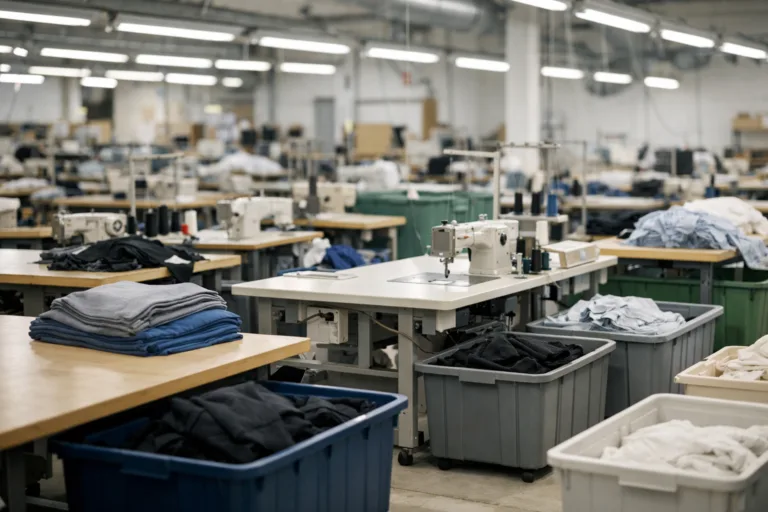
Introduction: Why a Perfect Tech Pack Matters
In today’s fast-moving product development world, a well-structured tech pack can be the difference between a smooth launch and a manufacturing nightmare. This comprehensive guide—The Anatomy of a Perfect Tech Pack: A Section-by-Section Guide.—reveals every crucial component, emphasizing why each matters for both designers and manufacturers. Whether you’re new to apparel development or refining your workflow for fashion or tech products, this article helps you build flawless communication, avoid costly mistakes, and boost both speed and quality.
What Is a Tech Pack? An Overview
A tech pack (technical package) is the official blueprint for a product, outlining every detail needed to turn a design concept into an actual item. It serves as a universal language between designers and manufacturers, ensuring nothing gets lost in translation during product development. The more complete and accurate your tech pack, the smoother the process—from quoting to first samples to bulk production.
The Core Sections of a Perfect Tech Pack
Each tech pack may look different, but the best ones follow a standard structure. Here are the fundamental sections you should always include:
- Cover Page & Product Overview
- Technical Drawings & Sketches
- Bill of Materials (BOM)
- Measurements & Size Specs
- Construction Details
- Artwork, Prints, & Embellishments
- Colorways
- Labeling & Packaging
- Testing & Compliance Requirements
- Revision History
- Additional Notes & References
Cover Page & Product Overview
The cover page introduces your product at a glance. It usually contains:
- Product name
- Style or code number
- Season or collection
- Brand logo
- Release date or delivery window
- Contact details of designer or product manager
This section helps every stakeholder quickly identify the tech pack and its owner. Small errors here can cause confusion, so simple consistency is important!
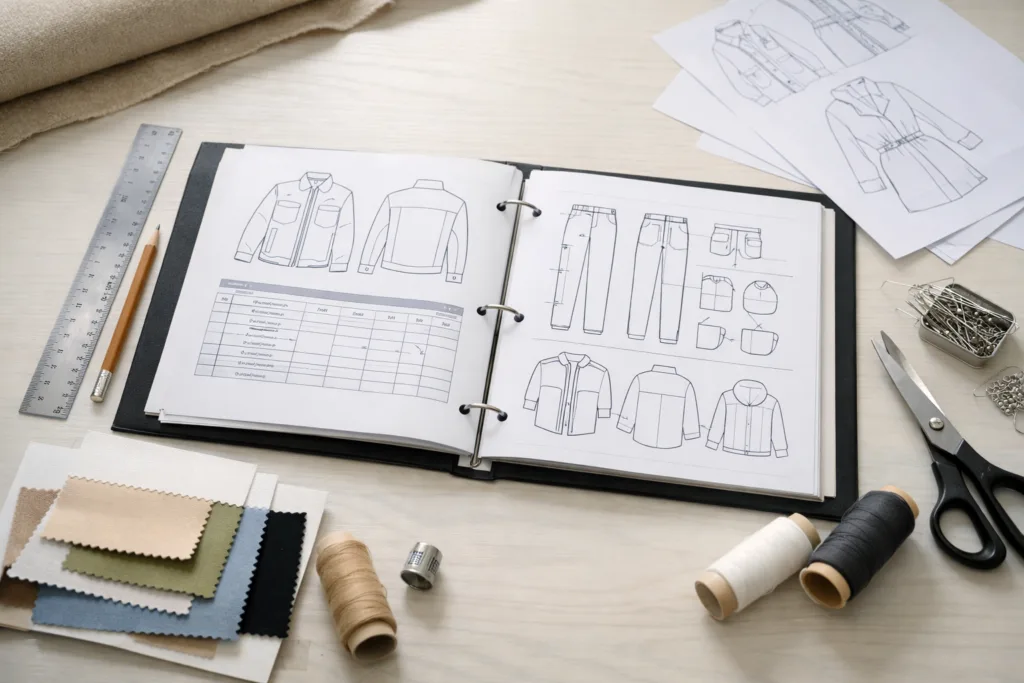
Technical Drawings & Sketches
Clear flat sketches (front, back, side views) ensure everyone shares the same vision. They should be:
- To scale, preferably with black outlines (no shading)
- Annotated with points of interest—like special seams, pockets, or fastenings
- Digitally created or hand-drawn as long as they’re legible and unambiguous
Learn about digital pattern making tools, which can help standardize this process.
Bill of Materials (BOM): Building Quality From the Start
Your BOM lists every component required to make the product—from main fabrics and trims to threads and labels. Each item should include:
- Material type and content
- Supplier/company
- Color code
- Quantity or consumption per unit
- Special finishes (water-repellent, flame-retardant, etc.)
A complete and accurate BOM keeps sourcing consistent and upholds your desired quality. Sustainable fabric choices also belong here.
Measurements & Size Specs
This section provides precise measurement charts for each size your product will be made in. Key details:
- Clear column headings: body point, measurement type, tolerance, and target sizes
- Standard POMs (Points of Measurement) selected for the specific style
- Tolerances for production errors
Clarity here directly impacts fit and reduces costly remakes. For more structure, look into creating a measurement chart for development.
Grading Rules: How Sizes Expand from a Base Pattern
Grading rules explain how your base (sample) size will be scaled up or down for other sizes. Typical details include:
- Increment values for key measurements (e.g., chest +2 cm per size)
- Specific sizing charts and formulas
Understanding grading rules ensures consistency across your entire size range.
Construction Details: Bringing Your Vision to Life
This section specifies exactly how each part of your product should be assembled. It often covers:
- Seam types (e.g., overlock, flat-felled)
- Stitch type and density
- Edge finishes and reinforcement areas
- Sample images or diagrams where helpful
Clear construction notes prevent misunderstandings—and production failures.
Stitching and Finishing Techniques
Description of required stitching (e.g. topstitching, bar tacks, buttonholes), expectations for neatness, and quality checkpoints. Know-how on stitch types is crucial.
Artwork, Prints & Embellishments
This details any graphics, embroidery, screen prints, patches or decorative elements. It should contain:
- Accurate placement guides (digital overlays or diagrams)
- Dimensioned artwork files (.AI, .PSD, etc.)
- Color callouts with Pantone or universal codes
Attaching mockups reduces risk of print placement mistakes. Don’t forget to specify print techniques and durability requirements.
Colorways: Visualizing Every Look
Document every intended color option—including colorway names, swatch images, and material callouts by color. This keeps your vision clear throughout development and production.

Labels, Tags & Branding Elements
This section covers main brand labels, care labels, hangtags, size pips, and any special branding. Outline:
- Label placement diagrams
- Label artwork and construction specs
- Attachment methods (sewn, heat pressed, etc.)
Mislabeled garments are common defects, so clarity is key. Apparel Wiki recommends consistently updating label instructions as regulations change.
Packaging Specifications and Instructions
How should your product be folded, bagged, boxed, or tagged for delivery? Clear folding diagrams, packaging material specs, box sizes, and barcoding rules eliminate confusion at the end of the supply chain.
Testing & Compliance Requirements
List all testing, certification, and compliance obligations—e.g., colorfastness, seam strength, safety standards. Refer to colorfastness testing, seam strength tests, and other relevant protocols. Include who is responsible for each test (brand or factory).
Revision History: Keeping Everyone Aligned
Track every significant update to your tech pack. Log:
- Date of change
- Section updated
- Description of update
- Version number
This section ensures all parties are working from the same playbook. Preventing outdated versions is especially critical for overseas production partners.
Additional Notes, Q&A, and References
Add clarifying instructions, common factory Q&As, and links to reference documents for more complex features. For instance, details on seam allowances or specific government regulations.
Best Practices for Tech Pack Success
Some proven tips to maximize clarity and efficiency:
- Use clear, simple language—avoid jargon unless defined elsewhere in the tech pack
- Organize your tech pack with a consistent hierarchy and naming
- Visuals (photos, diagrams) help reduce confusion
- Keep file formats universal: PDF for sharing, Excel for measurements
- Regularly update and review for accuracy with your manufacturer
Common Mistakes and How to Avoid Them
Even the best teams can stumble. Typical errors include:
- Skipping key measurements
- Not including tolerances
- Vague construction notes
- Conflicting artwork instructions
Double-check all sections and cross-reference with earlier versions to prevent production errors. You can also review tech pack guides focused on avoiding common mistakes.
Streamlining Communication Between Designers and Manufacturers
Tech packs are primarily a communication tool. Set up scheduled review sessions, involve manufacturing teams early, and clarify any assumptions or abbreviations. Share editable versions so questions are quickly resolved. An effective tech pack transforms uncertainty into shared understanding.
The Anatomy of a Perfect Tech Pack: A Section-by-Section Guide.
This guide underscores that the perfect tech pack isn’t about volume—it’s about clarity, completeness, and adaptability. A great tech pack serves as your best insurance policy against costly surprises and delays during product development, sample making, and bulk production. Remember, every well-structured page you create up front saves you time, money, and stress down the road.
Summary Table: Tech Pack Sections and Their Purpose
| Section | Purpose |
|---|---|
| Cover Page | Identifies product & contacts |
| Technical Sketches | Clarifies design intent visually |
| BOM | Specifies all materials/components |
| Measurements | Ensures proper fit by size |
| Grading Rules | Defines size range scaling |
| Construction | Details assembly instructions |
| Artwork/Embellishments | Sets graphics/branding placement |
| Colorways | Documents all color options |
| Labels/Packaging | Regulates branding/delivery |
| Testing/Compliance | Meets legal & quality standards |
| Revision History | Tracks all tech pack changes |
Conclusion: Crafting the Blueprint for Success

Mastering tech pack creation takes time and careful attention, but the results speak for themselves. With every section detailed and documented, your product development and manufacturing flow more smoothly, with fewer missteps and less back-and-forth. Remember, success is built on clarity. Make your tech pack the go-to reference, and everyone involved—from your design team to your factory partner—will thank you. Keep learning, keep refining, and your next tech pack will be your best one yet.
Frequently Asked Questions
What is the most important section in a tech pack?
All sections are important, but technical drawings and measurements are vital as they ensure accurate communication of your design and fit requirements.
How detailed should a bill of materials be?
Include every material, trim, and label, specifying type, color, supplier, and consumption. Detailed BOMs prevent supply chain errors and keep quality consistent.
When should a tech pack be updated?
Update your tech pack any time a change is made—from the first sample through production, so that all stakeholders always reference the latest version.
How do tech packs streamline manufacturing?
They reduce miscommunication, define expectations, speed up sampling, and help avoid costly errors by providing all specifications in one place.
What files should be included with a tech pack?
Attach artworks, CAD files, grading rules, measurement charts, and any specific instructions needed to ensure nothing gets lost in transmission.
Can I use templates for tech packs?
Yes, templates are a useful starting point, but always customize each tech pack for the specific requirements of your product and manufacturer.