Introduction to How to Convert a Block Pattern Into a New Style
Every garment starts with a pattern—your foundation is typically the block pattern, standard in size and shape, representing a garment without design elements or styling. To create something new and unique, you must master pattern manipulation and style development techniques, such as slash & spread, dart rotation, seam adjustments, and creative neckline and sleeve variations. These processes transform a basic block into a fresh, fashion-forward garment fit for sampling and final production.
At Apparel Wiki, we see firsthand how meticulous each change must be—small pattern details determine the garment’s entire fit, silhouette, and production cost. This comprehensive guide demystifies the journey from block pattern to new style, with practical, actionable steps for designers, sample room staff, merchandisers, and factory technicians alike.
Understanding Block Patterns: The Starting Point
A block pattern—sometimes called a sloper—serves as the unstyled template for a particular garment type. Blocks are developed from standard size charts with accurate body measurements, minimal ease, and no garment styling.
- Designed for basic shape and fit (e.g., bodice, skirt, pant, sleeve blocks)
- No seam or closure details—purely structure and proportion
- Used as the master from which endless styled patterns are derived
In experienced factories, block templates are refined over years and often kept as hardboard or CAD digital files. Pattern makers refer to these blocks when starting any style development process, ensuring sizing consistency and production efficiency.
The Fundamentals of Pattern Manipulation and Style Development
Pattern manipulation is the technique of altering the block, using principles of geometry and garment construction to achieve desired fit, silhouette, or design elements. Style development refers to evolving the pattern to meet current trends or function, often defined in a design brief or by sampling teams.
Why Master Pattern Manipulation?
- Ensures design accuracy—final garment matches design intention
- Influences production cost, sewing methods, and bulk repeatability
- Allows for creative differentiation in competitive markets
Key Pattern Manipulation Techniques
- Slash & Spread Method
- Dart Rotation
- Seamline Engineering
- Neckline and Sleeve Transformations
How to Convert a Block Pattern Into a New Style
Converting a block pattern into a new style is best broken into clear steps and careful record-keeping. Every modification must consider garment fit, sewing feasibility, and the end-use of the product. Below, you’ll find a practical, senior-level walkthrough for doing this efficiently in your workroom or with your factory pattern team.
Step 1: Analyze Your Block and Define New Style Requirements
Examine your base block pattern—ensure it is correct, accurate, and has all necessary notches, grainlines, and reference points marked. Gather your design inspiration and functional requirements—what features and silhouette does the new style need?
- Compare measurements with target size spec
- Mark required style changes (e.g., flare, new neckline, added fullness)
Step 2: Plan Your Pattern Manipulation Approach
Decide which manipulation methods—slash & spread, dart rotation, seam changes—will best achieve your targeted design. For example, a flared skirt may call for slash & spread, while a cowl neckline uses neckline manipulation.
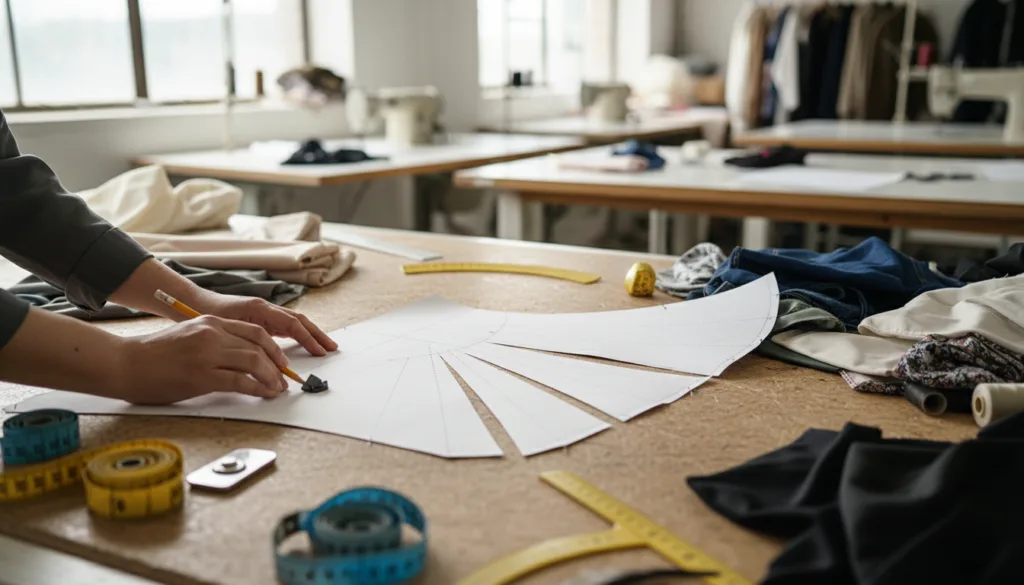
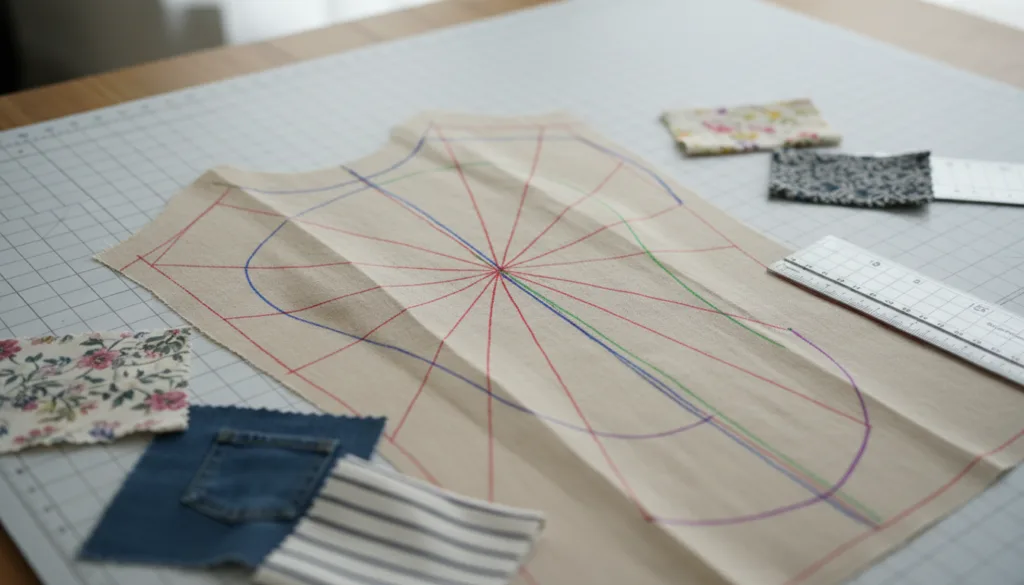
Step 3: Execute Slash and Spread for Volume and Shape
Slash and spread is a classic technique for changing proportions or adding fullness. It involves cutting the pattern (slash) and repositioning or widening (spread) the pieces before redrawing the outline.
| Application | How to Slash | Where to Spread | Examples |
|---|---|---|---|
| Adding flare to skirt | Vertical cuts from hem to waist | At hemline only | Circular skirt, flared dress |
| Fuller sleeve | Multiple rays from sleeve head | Evenly at biceps, wrist | Bishop, bell sleeves |
| Peplum or gathers | Slash bodice or skirt | Waist or designated seam | Peplum tops, gathered skirts |
Checklist: Slash & Spread Best Practices
- Use a sharp blade for clean cuts to preserve grainline
- Maintain registration points for seaming accuracy
- Redraw curves smoothly for even sewing—not sharp angles
- Add appropriate seam allowance before cutting fabric
Step 4: Apply Dart Rotation and Manipulation
Darts are vital for creating shape over the bust, waist, or hip. Dart rotation allows you to shift fullness to different positions according to the style, e.g., transferring a side bust dart to French dart, shoulder dart, or contoured seam.
- Mark existing dart legs and apex
- Draw guideline to new dart location
- Cut from dart point to the guideline and close old dart to open new one
This preserves total fullness but moves it aesthetically or functionally. Always true and blend new lines to keep sewing straightforward.
Rain’s Tip from the Production Line: Always walk your seam lines after dart manipulation. Misaligned seams create puckering or twisting in the finished garment—catch it on paper, not in bulk.
Step 5: Engineer Seam Changes and Design Lines
Changing seam placement—side, princess, yoke, panel seams—dramatically alters both appearance and construction complexity. Consider how seam type influences marker yield, sewing efficiency, and the final garment’s strength.
- To create princess seams, split bodice along new curve instead of basic dart
- Yoke introduction shortens main body pieces, adds seam at a strategic level
- Panel lines can support color-blocking or print placement
Always add notches and marks at intersecting seams or points of ease. Update sewing instructions according to the new seam plan to prevent sample room confusion.
Slash & Spread: In-Depth Methodology and Applications
A mainstay in style development, the slash & spread technique goes beyond adding fullness. It’s used for both subtle and dramatic silhouette changes across all garment categories.
Common Garments Suited to Slash & Spread
- Flared skirts, A-line dresses, godet panels
- Balloon, bishop, or bell sleeves
- Peplums and exaggerated hems
Practical Steps
- Draw slash lines radiating from point of fullness
- Cut carefully—keep hinge at seam or apex as needed
- Spread to desired volume, securing with masking tape or weights
- Redraw outline, maintain key points (grain, notches)
Always test slash & spread results with paper or muslin mockups before moving to your main fabric. For bulk production, these changes must be coordinated with fabric yield estimates—increased flare, for instance, can significantly increase usage per garment.
Dart Rotation: Transforming Fit and Style Lines Efficiently
Dart rotation is the backbone of upper-body pattern manipulation, allowing technical designers to move fullness without losing size or fit integrity. This method unlocks new neckline looks, armhole shapes, or contoured panels.
When to Use Dart Rotation
- To hide bust darts in seam lines or gathers
- When creating asymmetric styles (e.g., one-shoulder tops)
- For advanced drape or contouring in fashion pieces
The process always follows geometric rules: Total dart value stays the same, only the position shifts. This ensures the pattern sews true to fit, regardless of where visual fullness appears on the garment.
Quality Control Watchpoints
- Measure transferred dart intake after manipulation
- Ensure walkability: Seam curve lengths must match
- Mark all notches clearly for production clarity
Seam Changes: From Structural Need to Fashion Statement
Seam changes aren’t just aesthetic; they impact everything from fabric layout to sewing line operations. Factories may recommend certain seam types (French, flatlock, overlock) depending on style and fabric.
| Seam Type | Production Code | Strength | Common Use |
|---|---|---|---|
| Overlock + Topstitch | 504/301 | Good (knits) | T-shirts, polo shirts |
| French Seam | 401 | High (wovens) | Shirts, blouses |
| Flatlock Seam | 605 | Moderate | Sportswear, leggings |
Style-driven seam placement can enable color-blocking, reduce or increase fabric consumption, and support fit across different zones of the body. For example, a princess panel offers both shape and seam reinforcement at stress points, but may cost more in terms of sewing SMV and marker loss. Always check with your production team before finalizing seam changes.
Neckline and Sleeve Variations: Unlocking New Silhouettes
Among the simplest yet most transformative style developments, changing the neckline or sleeve shapes can redefine the entire garment. Whether adapting a round neck block to a V-neck, boat neck, or off-shoulder, careful redrawing of the neckline ensures proportionality and sewing viability.
Key Steps for Neckline Variations
- Mark and measure the new neckline on the existing block
- Consider neckline depth—factory tolerances are usually ±0.5 cm
- Engineers should adjust facing, binding, or collar pattern pieces to match the new neckline edge
Sleeve Transformation Techniques
- Cap, set-in, raglan, kimono, and drop shoulder styles require unique armhole shapes
- Slash & spread for volume, or pivot for shape
- Redraw sleeve head curve to match the armhole, ensuring sewing walkability
Misalignments at neck or armhole cause sewing defects and are costly to fix later. Lay out all pattern pieces as a set and check seamlines carefully before sending to the cutters or CAD team.
Fit, Fabric, and Production Considerations
Converting blocks to new styles isn’t only about shape—it directly impacts fit, comfort, and production. You must consider fabric type, shrinkage, ease, and intended end-use. For knits (like T-shirts and jersey dresses), more stretch means less built-in ease; woven apparel must plan for adequate movement, especially across joints and structured seams.
| Fabric Type | Block Used | Ease Level | Best Applications |
|---|---|---|---|
| Single Jersey (knit) | Knit bodice/sleeve | Low ease (2–6%) | T-shirts, tops |
| Twill, Poplin (woven) | Woven block | Medium-high ease (6–12%) | Shirts, dresses |
| Elastane blends | Stretch block | Minimal ease | Activewear, leggings |
For best results, always check size charts and fit protocols. Perform a quick test-fitting with a muslin sample or fit model to confirm ease, dart orientation, and seam placements before approving for bulk cutting.
Rain’s Tip from the Production Line: Update the garment tech pack and graded size set with every new style change—factories run fastest with accurate, current measurement specs and clear construction diagrams.
Real-World Applications: From Mockup to Production Approval
After manipulation, your new pattern requires validation. In most factories, a pre-production (PP) sample and a size set sample are produced. Both undergo thorough measurement, fit, and construction checks. Dimensional stability, shrinkage, and seam strength should all meet the client or brand standards (typical garment tolerance: ±1 cm in finished measurements for body width, ±0.5 cm for sleeve or collar).
- Check fit on relevant body form or live model in all target sizes
- Inspect all changed pattern sections—walk seams, align notches, confirm dart position
- Test finishing (e.g., neckline bindings, hem treatments) for bulk-feasibility
- Review fabric behavior—especially with slash & spread fullness or collar changes
After confirmation, digital patterns are graded for full-size range and transferred to cutting/cad for marker making. This is where correct pattern development pays dividends, minimizing costly sample remake cycles and delivering precise, production-ready styles to market rapidly.
Pattern Manipulation Troubleshooting: Avoiding Common Mistakes
No matter your level of experience, a few key errors can derail even the best patternmaker’s plans. Here’s how to spot and fix them early:
- Seam Walk Error: Mismatched curve lengths after slash, spread, or dart rotation. Always walk seams edge-to-edge before finalizing.
- Grainline Distortion: Spreading incorrectly skews grain; for stability, maintain grainline reference across all new segments.
- Bulk Allowance Overlooked: More fullness or panel seams often increase fabric usage and sewing time. Update your costing and SMV planning after every change.
- Notch Confusion: Always update and clearly mark new notches, especially if adding/removing darts, for correct sewing alignment.
In production settings, systematically check the updated style against the size spec, technical sketch, and original block to catch small variances before they multiply in bulk.
How to Convert a Block Pattern Into a New Style
In summary, converting a block pattern into a new style is a blend of technical skill, creative thinking, and impeccable attention to production detail. Mastery of pattern manipulation—especially slash & spread, dart rotation, inventive seam changes, and clever neckline/sleeve variation—empowers both designers and factory technicians to move beyond basics and into higher-margin, distinctive styles.
- Begin with a verified, well-fitting block pattern for your garment and fabric type
- Map out style development based on design intent and production needs
- Choose and carefully apply the best manipulation technique(s)
- Test, fit, and refine before approving for grading and bulk production
Practical experience in these techniques creates a foundation on which new styles—whether for retail, corporate uniforms, or performance gear—can be built efficiently, with standout fit, shape, and commercial viability. Work closely with your pattern team and sample room to catch issues early, ensuring the new design not only looks right, but also fits, performs, and is profitable to produce at scale.
Frequently Asked Questions
What is the difference between a block pattern and a finished style pattern?
A block pattern is a basic template with no design features, while a finished style pattern incorporates all the styling, seam, and fit adjustments needed for the final garment.
Why is dart rotation important in pattern manipulation?
Dart rotation allows designers to move fullness to different areas, enhancing aesthetics and comfort while maintaining correct garment fit.
Can slash & spread technique be used on any fabric type?
Yes, but the amount of spreading may change based on fabric drape and stretch—always test with the intended material for best results.
What should I watch for when changing necklines or sleeves?
Ensure the new neckline or sleeve head properly matches all adjoining pattern pieces and allows for ease while preventing sewing defects.
How do seam changes affect production?
Seam changes can impact fabric efficiency, sewing complexity, and final garment strength, so always update cost and construction details accordingly.
How can I check if my manipulated pattern will fit correctly?
Sew a muslin or test sample first, walk all seams on paper, and check against the measurement spec to confirm correct fit before bulk.