Understanding Common Fit Issues & How to Fix Them
Every garment factory and brand faces the challenge of fit problems. These issues frequently show up as bust gaping, tight shoulders, or dragging lines that distort the intended silhouette and comfort for the wearer. Understanding how to accurately diagnose fit problems and apply the right pattern corrections is essential to delivering high-quality, comfortable apparel. This guide, drawn from decades on the garment floor and technical pattern expertise, explains the common causes, how to spot them, and actionable steps for fixing them—especially by reading garment balance.
What Are Fit Problems?
Fit problems are deviations from the intended sizing, shape, or drape of a garment, causing discomfort, restricted movement, or poor appearance. They can arise from incorrect measurements, misguided pattern changes, fabric behavior differences, or construction errors during sewing. Typical complaints include bust gaping, tightness at the shoulders, and unsightly dragging lines radiating across the body or arms. Diagnosing the source is as important as the fix, as it prevents escalation into bulk production defects and costly rework.
Types of Fit Problems
- Bust gaping – Excess or shortage of fabric around the bust, often seen as a vertical or horizontal gap at the button or seam.
- Tight shoulders – Sleeves or shoulder seams cut too narrowly, restricting movement.
- Dragging lines – Diagonal or horizontal wrinkles, frequently radiating from points under stress, highlighting balance or length discrepancies.
Why Factory Diagnoses Matter
In production, catching these issues early avoids costly bulk rework, customer complaints, or returns. Skilled pattern masters use first samples, wearer trials, and measurement checks to identify not just what is wrong, but why. This diagnosis forms the backbone of any effective pattern correction process.
The Role of Garment Balance in Diagnosing Fit Problems
Garment balance refers to the proportional alignment of front/back lengths, armhole heights, and other structural elements so that the piece hangs correctly. Imbalances often signal underlying fit problems, such as a bodice too short in front causing bust gaping, or a back pattern too long leading to fabric pooling at the rear waist. A garment that is out of balance will display telltale signs—slanted side seams, shoulder seams shifting backward or forward, and dragging lines pointing to the imbalance.
Key Balance Areas to Check
- Shoulder slope match – Check the angle against the wearer’s natural shoulder line.
- Armhole depth – Too shallow causes tightness; too deep can drag the sleeve.
- Bust point placement – Misaligned bust darts or princess seams trigger gaping.
- Front and back body length – Should reflect wearer’s proportions; mismatches create horizontal pulls or vertical drag lines.
Rain’s tip from the production line: “Always check side seam hang after trying on a garment. Uneven side seams are a classic warning sign of poor balance in either pattern or assembly.”
Diagnosing by Observation
Look for signs like puckering at stress points, gaping when the body moves, and wrinkles that connect specific areas (e.g., bust to side seams, underarm to shoulder point). Each issue points toward a specific correction on the pattern piece.
Common Fit Issues & How to Fix Them
This section dives into actionable ways to correct the most frequent fit problems: bust gaping, tight shoulders, and dragging lines. For each, I’ll map the telling symptoms, common pattern causes, and proven fixes used in professional pattern rooms and on production lines.
Bust Gaping
- Symptoms: Fabric pulls open at the bust, especially at button closures or below armholes, sometimes forming vertical ‘V’ gaps.
- Main Causes: Pattern bust point too high or low, insufficient dart intake, bust circumference too small, incorrect ease allowance, or grade rules not matching body shape.
- Corrections: Adjust bust dart to point directly to apex; add bust cup options; increase front panel at bust point; use Full Bust Adjustment (FBA) or Small Bust Adjustment (SBA) techniques. In woven shirts, increase vertical dart length or adjust princess seams for extra shaping.
Tight Shoulders
- Symptoms: Restricted arm movement; sleeve ‘bites’ into the bicep or underarm; seams ride up or shift backward.
- Main Causes: Shoulder width too narrow in the pattern, sleeve cap with insufficient ease, incorrect armhole size or placement, or aggressive grade steps between sizes.
- Corrections: Add width to the shoulder seam (from neckline outward); expand sleeve cap; drop or raise armhole by 0.5–1cm as needed; verify sleeve head shape matches armhole. For knits, ensure enough stretch is considered.
Dragging Lines
- Symptoms: Diagonal or horizontal wrinkles radiate from bust, armhole, or side seam; garment twists on the body.
- Main Causes: Pattern pieces not trued after alteration, front/back length imbalance, wrong seam placement, or fabric stretch properties overlooked. For knits, torque or fabric distortion in cutting process is a frequent culprit.
- Corrections: Re-true all altered pattern lines; balance lengths on front and back (add or remove at required points); adjust grading; round off sharp pivot points. On the sewing line, check fabric relaxation before cutting, as stressed fabric can ‘spring back’ and cause twisting or drag lines post-sewing.
Step-by-Step: Diagnosing Fit Problems Through Garment Balance
Follow these practical steps to efficiently diagnose fit issues by observing and measuring garment balance—either in a sample room or during PP sample review.
- Have the intended wearer (or correct size mannequin) try the garment wearing standard undergarments.
- Observe side seams while standing naturally. If they slant or twist, balance is likely off between front and back panels.
- Check shoulder seams for correct placement—they should sit as the shoulder begins to curve, not too far forward (which signals a front/back length mismatch).
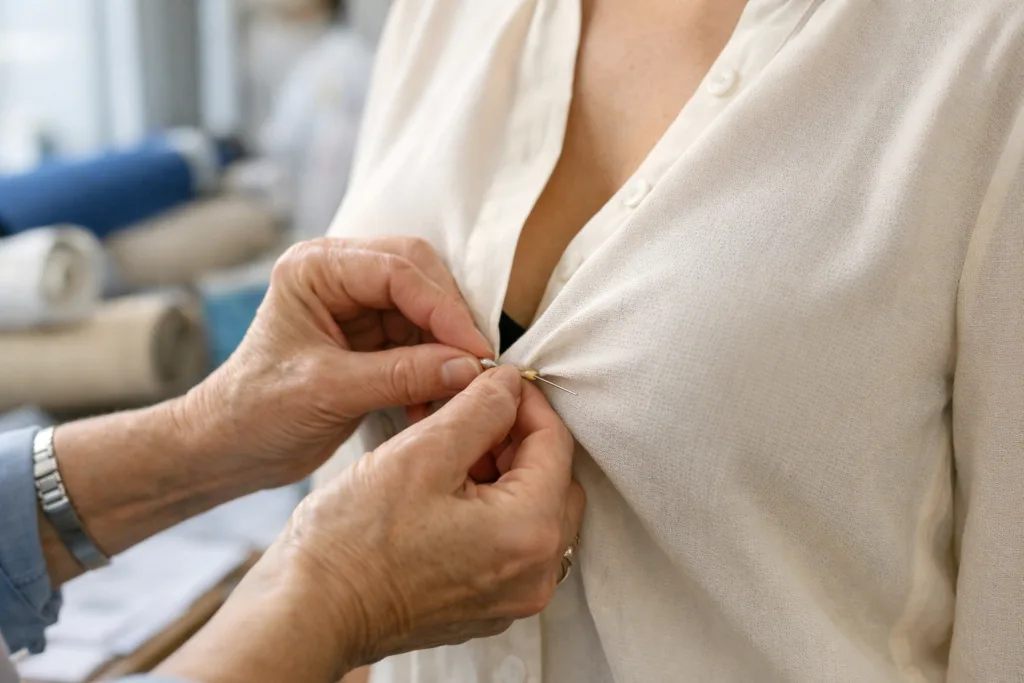
- Mark the bust, waist, and hip lines with tape or pins to visualize drape and possible gaping or drag points.
- Record any horizontal or diagonal wrinkles, then ‘pinch out’ excess or measure the gap to estimate how much fabric to add/remove from the pattern.
- Take measurements from key reference points (shoulder, CF, CB, bust apex, armhole depth) and compare to approved spec sheet and pattern chart. Document variances.
- Confirm findings with wearer feedback—are movements restricted, or is discomfort reported at certain points?
- Document observations with photos in a consistent pose/lighting for reference during pattern correction.
Practical Example Table: Diagnosing Common Fit Problems
| Fit Problem | Main Visual Clue | Pattern Area to Check | Typical Correction |
|---|---|---|---|
| Bust gaping | Gap at bust apex | Bust dart; apex location | Add dart intake; FBA/SBA |
| Tight shoulders | Armhole pulls; restricted raise | Shoulder width; sleeve head | Widen shoulders; adjust armhole |
| Dragging lines | Diagonal wrinkles; twisting | Front/back balance; grainline | Balance panels; true pattern lines |
Materials, Fabric Behavior & Their Role in Fit
Fabric properties have a major influence on fit outcomes, beyond just pattern accuracy. Knitted fabrics (e.g., single jersey, rib, interlock) provide more stretch and require less structured shaping, while woven fabrics (e.g., poplin, twill, denim) need careful darting and shaping to accommodate body curves. The degree of mechanical/chemical finish (enzyme, silicone softening, peaching) can alter fabric drape, stretch, and recovery, all directly impacting how a garment fits after wash and wear.
GSM, Fibre Type, and Fit
- Lower GSM knits (150–180 gsm) – more drape, susceptible to drag lines if not cut on relaxed fabric.
- Cotton vs. polyester blends – cotton offers breathability but shrinks more; polyester adds stability but can show puckers if over-stitched.
- Spandex/elastane content (2–8%) – allows additional ease, crucial in slim/close-fit apparel but must be reflected in pattern grading rules.
Checklist: Fabric Inspection for Fit Impact
- Confirm shrinkage % and account for in pattern (e.g., add 3–5 for 100% cotton)
- Inspect for skew/torque risk (especially rib and interlock)
- Assess recovery after stretching
- Request finished width and GSM consistency across roles/lots
The Pattern Correction Process: Best Factory Practices
Pattern corrections are the most reliable long-term fix for persistent fit issues. The process is ideally collaborative, with pattern makers, sample machinists, and QC working together. Here’s how factories with high first-pass approval rates handle fit problems:
1. Document and Prioritize Issues
Collect all observed fit problems with annotated photos and precise measurements. Prioritize those affecting fit or comfort most—such as bust popping open, or sleeves pinching at movements.
2. Review Pattern vs. Body/Spec Chart
Overlay problem sample’s measurements onto the intended pattern, highlight deviations, and trace the cause—e.g., is the shoulder too narrow compared to the spec? Is the bust dart off the apex by >1cm?
3. Implement Changes Cautiously
Apply pattern corrections (e.g., adding width, moving dart) conservatively—over-correcting can introduce new imbalances. Check with half-sample mockups where practical; especially for woven styles.
4. Test, Fit, Repeat
Produce a new fit sample and try it on the same fit model or mannequin. Confirm no new problems emerge, particularly in adjacent areas (e.g., fixing bust doesn’t cause side seam flare).
Communication Between Factory & Buyer: Ensuring Fit Agreement
For buyers and brands, clear fit standards and fit model consistency are critical. Factories benefit from detailed spec sheets, graded measurement charts, and early warning about target demographics (e.g., athletic build, petite fit). For brands, requesting wearer-trial reports and photo feedback supports transparent, data-driven fit improvements rather than guesswork.
What to Clarify on Spec Sheets
- Define ease levels per measurement point (e.g., chest +6cm, hip +4cm)
- List acceptable tolerances (e.g., +/–1cm for body width in knits)
- Mark intended bust apex, waist, hip points with height references
- Include grade rules and size chart, not just a base size
What Factories Should Report Back
- Photos of fit on model/mannequin in key poses (arms raised, bent etc.)
- Notes on any pattern changes made from buyer’s base
- Observations on shrinkage after wash
- Records of measurement deviations from chart
Preventing Fit Problems in Production
Proactive steps during the development and bulk production phases greatly reduce the risk of widespread fit issues:
Key Preventive Actions
- Pre-produce test size sets and include both shrinkage and stretch evaluations.
- Relax fabric rolls before cutting (especially for knits) to prevent post-sew shrinkage or torque.
- Calibrate sewing machines for stitch density and tension suited to the fabric type—over-tight stitching can cause puckering and drag lines.
- Control interlining, fusing, and trims for correct compatibility; improper reinforcement leads to fit distortion at closures and collars.
- Perform inline and end-line QC sample fitting against the original spec/fit model so issues do not go unchecked through bulk.
Factory Floor Insights
In leading export factories, root-cause reviews after each season provide learnings to improve next season’s blocks and grading. This cycle of evaluation, correction, and documentation forms the backbone of a strong fit culture.
Fit Problems by Garment Category: Typical Scenarios
Each type of garment brings its own fit risks and pattern considerations. Below are common scenarios and solutions for several key categories:
Shirts and Blouses
Issues: Bust gaping at buttons, tight biceps, uneven hem.
Pattern corrections: Apply FBA/SBA, increase bicep width in sleeve, true side seam lines, review hem shaping for evenness.
Trousers and Shorts
Issues: Wrinkles below seat, thigh drag lines, restricted waist.
Pattern corrections: Add seat depth, adjust crotch curve, check hip grade; reduce waistband stiffness or increase allowance for comfort.
T-shirts and Polo Shirts
Issues: Side seam twisting (especially in single jersey), dropped armhole, pulling at chest.
Pattern corrections: Ensure correct grainline, allow for fabric shrinkage and torque; true armhole and sleeve head match; review ease over chest/bust region.
Sportswear & Performance Garments
Issues: Overly tight arms/scyes, body rides up during movement, bust flattening or gaping due to high modulus knits.
Pattern corrections: Add functional ease at key movement points; consider contour shaping for bust/hip in women’s styles; use dual-stretch grades for sleeve and body as needed.
How Finishing, Seams & Trims Affect Fit
Quality of seams, types of stitches, and the placement and nature of trims have subtle but powerful impacts on fit outcomes. Commonly, over-tight overlock (504/514) on knits can lead to puckering along seams, while improper placket or collar fusing causes distortion and gaping at closures.
Stitch Type vs. Seam Strength/Look vs. Fit Impact
| Seam Type | Stitch Code | Strength & Best Use | Fit Risk |
|---|---|---|---|
| Overlock side | 504, 514 | Strong, clean edge for knits | Puckering if too tight |
| Coverstitched hem | 602 | Flat, flexible finish for knits | Hem tunneling if tension mis-set |
| Lockstitch set-in | 301 | Classic look for woven shirts | Bust gaping if dart or curve insufficient |
| Flatlock | 605 | Flat, low bulk—good for sportswear | Seam slippage if thread/needle mismatched |
Checklist: Finishing & Decoration Cautions
- Test placket/interlining fusing for post-wash stability
- Check decorative tapes, patches, or prints do not shrink or distort fabric after curing
- Specify button size/thickness on plackets to avoid accidental bust gaping
- Review applied elastic trims (waistbands/cuffs) for correct stretch/recovery ratio
Common Fit Issues & How to Fix Them

To master fit, one must continually diagnose, test, and refine at every stage: from pattern, to sample, to bulk production. The most diligent factories invest in ongoing fit training for their pattern and sample teams, keeping updated blocks, and fostering open communication with buying teams. Fit problems—whether bust gaping, tight shoulders, or dragging lines—are rarely a one-time fix. Fabrics change, bodies differ, and styles evolve. But with the practical approach in this Apparel Wiki guide, most issues can be prevented or quickly resolved, securing comfort and satisfaction for the end wearer.
Frequently Asked Questions
What causes bust gaping in shirts and blouses?
Bust gaping is typically caused by insufficient fabric or incorrect dart placement at the bust point, leading to a gap when the garment is worn. Pattern correction, like adjusting the dart or adding fullness, usually solves this problem.
How should shoulder fit be checked in production samples?
Shoulders should sit at the natural curve of the wearer without shifting forward or backward, and there should be no restriction when raising the arms. Measurement against the approved spec and wearer trial are key checks.
What do diagonal drag lines in a garment indicate?
Diagonal drag lines often result from imbalance in front-to-back length or incorrect seam placement, highlighting the need for pattern rebalancing and trueing of adjacent seams.
How does fabric choice impact garment fit?
Fabric weight, stretch, fiber content, and finish directly impact how a garment hangs and moves. Patterns must be adjusted for shrinkage, stretch, and recovery behavior of the chosen material.
What information should be provided on a spec sheet for best fit outcomes?
Spec sheets should include accurate body measurements, ease allowances, grade rules, tolerance levels, and clear marking of bust, waist, and hip points for all sizes.
How can buyers and factories prevent fit problems in bulk production?
By producing and reviewing size sets, allowing fabric relaxation before cutting, performing shrinkage and fit tests, and ensuring transparent communication of any pattern or spec changes.