Introduction: Why Sewing Pattern Symbols Matter
Understanding how to read sewing patterns is the foundation of successful garment making. If you’ve picked up a set of sewing instructions and felt overwhelmed by the maze of symbols and lines, you’re not alone. Symbols and notches are the secret language of sewing patterns—they guide your every move from fabric cutting to flawless garment assembly. In this comprehensive guide, we’ll unlock the meanings behind the most essential symbols and notches found on sewing patterns, show you exactly how to interpret each one, and help you avoid common pitfalls that lead to frustration or fitting issues. By the end, you’ll have the clarity and confidence you need to bring any pattern to life.
What Are Sewing Pattern Symbols?

Sewing pattern symbols are visual cues printed directly onto pattern pieces. These marks communicate how to cut, align, assemble, and finish each part of your garment. They act like a universal language, ensuring you follow the designer’s intent with accuracy. Whether you’re sewing for the first time or want a refresher, learning this language streamlines your process and reduces mistakes.
The Purpose of Notches in Pattern Making
Notches are small marks along the edges of pattern pieces. Their main job is to help you accurately match garment sections—such as sleeves to armholes or waistbands to skirts. Notches prevent confusion, twisting, and misalignment, especially when pieces look very similar. They’re essential for sewing curves, easing fabric, and ensuring a polished, professional finish.
Decoding Common Pattern Symbols and Meanings
Let’s break down the most widely used symbols you’ll encounter on sewing patterns:
- Cutting Lines: Thick or dashed outlines marking where to cut your fabric. Sometimes multiple lines show different sizes.
- Stitching Lines: Dashed or dotted lines inside the cutting line, showing where to sew.
- Grainline Arrow: A straight line with arrows at each end, indicating fabric direction. For a deep dive on how the grainline affects fit, check out Master Stitch: 17 Ways Understanding the Grain Line Transforms Garment Fit.
- Fold Line: A bold line with arrows against the edge, showing where to place on the fabric fold.
- Notches: V-shaped marks, triangles, or lines for matching key points when sewing.
- Button & Buttonhole Symbols: X’s or rectangles, or indicated placements for these features.
- Dots and Circles: Indicate dart ends, pivot points, or pockets placements.
- Lengthen or Shorten Lines: Double lines show where to adjust pattern length if needed.
- Place-on-Fold: Brackets or arrows direct you to align pattern edges with the fold for symmetrical pieces.
- Gather or Ease Lines: Mark areas where fabric needs to be gathered or slightly stretched.
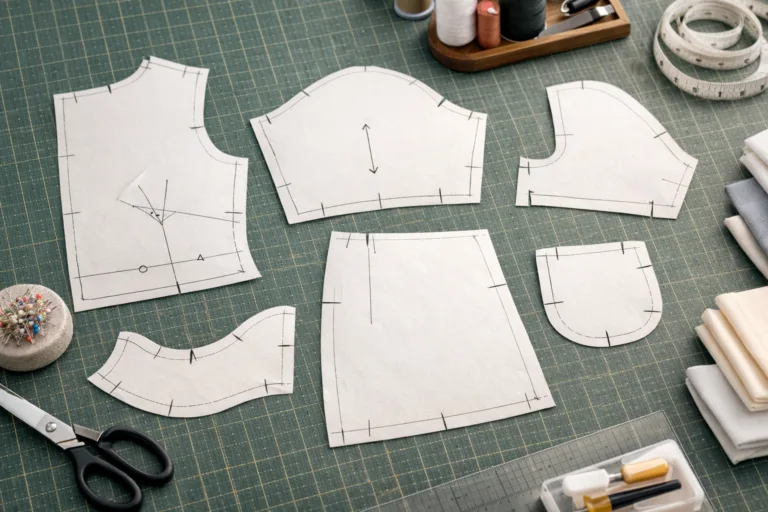
Understanding Cutting and Stitching Lines
On most multi-size patterns, you’ll notice several nested outlines—the outermost is usually the largest size, with smaller sizes inside. Always trace or cut along the line corresponding to your chosen size. The stitching line sits inside the cutting line and marks your sewing path. It doesn’t appear on the fabric unless you transfer it using tracing methods.
The Power of Grainlines: Ensuring Fabric Alignment
Grainline arrows are not just suggestions—they’re crucial for garment drape and fitting. Ignoring grainline instructions can cause twisting, poor fit, or garments that don’t hang well. The grainline should run parallel to the selvage (the finished fabric edge). Misalignment may not always be obvious at first but will affect wear over time. For more on this, see Apparel Wiki’s extensive guide to grainlines and garment fit transformation.
Fold Lines and Why They Matter
The fold line is essential when you need a perfectly symmetrical piece—like the center front of a shirt or a skirt panel. Placing your pattern piece along the fabric fold ensures you don’t end up with a seam where none is supposed to exist. Always make sure your pattern edge sits flush against the fold, keeping the grainline true.
Notches: Single, Double, and Triple Explained
Notches aren’t all the same. Here’s what the different forms mean:
- Single Notch: Used to indicate the front side of a garment (e.g., a sleeve’s front edge).
- Double Notch: Marks the back of a garment, helping you avoid reversing sleeve or bodice placement.
- Triple Notch: Less common, usually for center back or special matches like princess seams.
These marks avoid costly errors—like attaching a sleeve backwards (a frequent problem for new sewers!). For typical notch placements in real apparel production, you can reference Apparel Wiki’s technical advice. See our article on sleeve asymmetry and garment symmetry issues.
Dots, Circles, and Other Placement Markings
Dots and small circles on a pattern can indicate pocket placement, dart tips, or where to stop or pivot during sewing (such as corners or inset points). Accurately transferring these marks ensures neat construction and even finishing.
Button and Buttonhole Symbols
Look for X’s, rectangles, or elongated ovals along the garment front or cuffs. These show precisely where to add buttonholes and buttons for optimal spacing and functional fit.
Lengthen or Shorten Here: Adjustment Lines
Double horizontal lines marked “Lengthen or Shorten Here” are provided to let you adjust for height or preferred garment length. To lengthen, cut along the line, spread the pattern, and tape paper in place. To shorten, fold the pattern at the marking and trim off the excess.
Place-on-Fold Symbols and When to Use Them
Symbols such as brackets or arrows with “Place on Fold” tell you the pattern edge needs to be positioned along the fabric fold—this is critical for creating mirrored, seamless pieces such as shirt fronts, skirt panels, or facings.
Understanding Gather and Ease Lines
Shirring, gathered sleeves, or eased waistbands depend on the proper use of these lines. They show where to apply gathering stitches or distribute excess fabric evenly for smooth, wearable curves.
How to Transfer Pattern Markings to Fabric
Transferring these marks accurately from your paper pattern onto fabric is key. You can use tailor’s chalk, washable pens, or tracing paper and wheel. Remember that not all marks should stay visible on your final garment—just those needed for assembly.
Notches in Practice: Step-by-Step Alignment
Let’s walk through using notches for a basic sleeve installation:
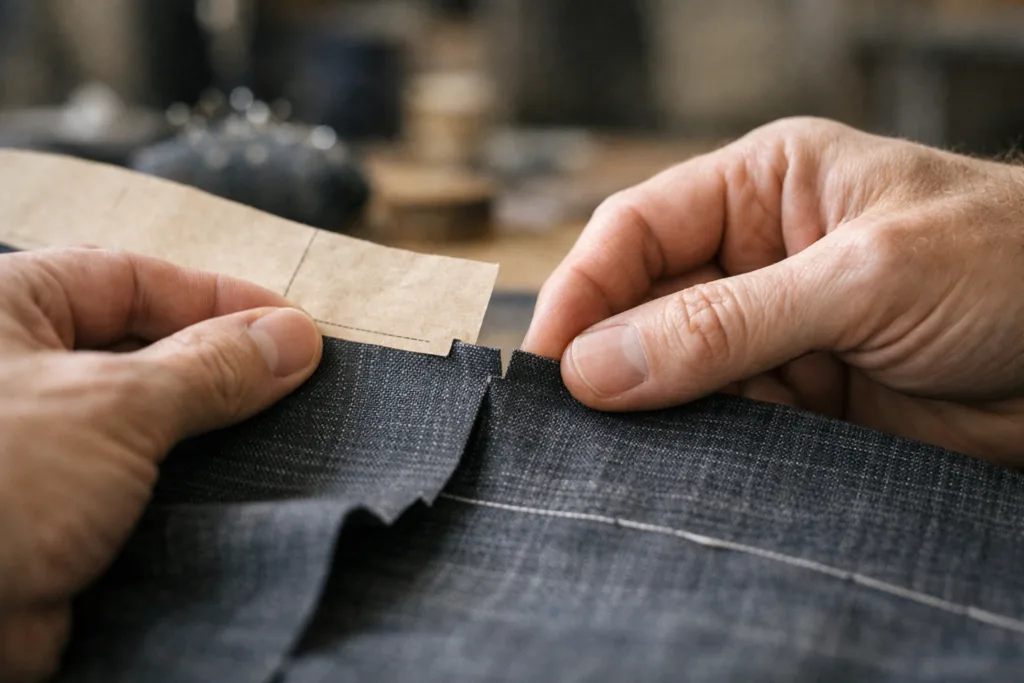
- Match single notches along the front sleeve with the bodice front.
- Align double notches along the sleeve back and bodice back.
- Line up underarm and shoulder seams, pinning through notches for a smooth join.
Following these marks not only speeds up construction but helps avoid the rookie mistake of inserting sleeves backward.
Why Are So Many Pattern Symbols Needed?
Each symbol serves a functional purpose — from construction accuracy to efficient assembly in factory settings. They help prevent seam mismatches, incorrect fit, or construction headaches. Apparel Wiki notes that most garment factories worldwide rely on standardized symbols for quality assurance, as covered in guides on seam allowance and pattern making ease to ensure consistent results.
Factory vs. Home Sewing Pattern Symbols
Commercial patterns for home sewers often include more detailed instructions, color-coded lines, and legends. Production patterns used in manufacturing may strip away some details for efficiency but still rely on symbols and notches for alignment and fit.
International Differences in Pattern Symbols
While many basic symbols are universal, there can be differences in notation or terminology between American, European, and Japanese patterns. Always check the legend or instruction sheet provided to avoid misinterpretation.
Tips for Confident Pattern Reading
- Review the pattern legend before starting—every brand may use slightly different markings.
- Highlight your size and key marks before cutting for visual clarity.
- Never skip notches or dots, even if they seem minor.
- If confused, reference the instruction sheet or look up a pictorial guide from a trusted site.
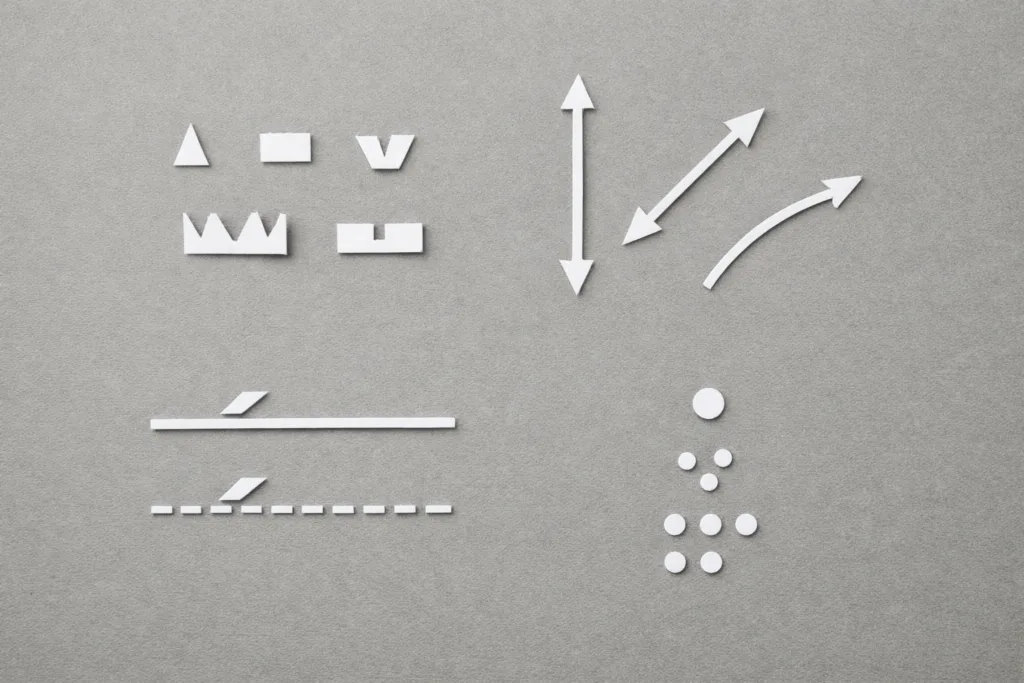
Visual Guide to Essential Pattern Symbols
Having a quick-reference table or chart helps you instantly identify common sewing pattern markings:
| Symbol | Meaning |
|---|---|
| →← | Grainline (fabric direction) |
| —•— | Fold line—place on fabric fold |
| V | Notch (match pieces here) |
| O | Dot or circle (placement, pivot) |
| X | Button placement |
| === | Lengthen/shorten lines |
Review this table whenever you start a new pattern for a smooth workflow.
How Pattern Symbols Support Garment Fit and Quality
Schema symbols are not just about assembly—they’re about fit and function. Properly aligned notches prevent twisting seams and drooping shoulders. Darts and pocket placements keep the finished garment looking tailored and professional whether you’re sewing denim, knits, or lightweight wovens.
Working with Specialty Fabrics: Adjusting for Symbol Interpretation
Patterns for stretch fabrics, slippery silks, or heavy wools require extra care. Be sure to mark notches and symbols clearly, and stabilize edges if needed before cutting. For example, patterns for knits often rely on special symbols for stretch direction—review Apparel Wiki’s resource on developing patterns for knits vs wovens for details.
Common Mistakes When Reading Pattern Symbols
- Misinterpreting single vs. double notches, leading to reversed parts
- Overlooking tiny dots, causing incorrect pocket or dart placement
- Ignoring “place on fold” signs, resulting in mismatched pieces
Take your time and check twice before cutting. Prevention is far easier than correction in sewing!
Tips for Transferring Notches and Dots
Cut notches outward from the fabric edge as small clips or triangles—not into the seam allowance, which can weaken the seam. Mark dots and circles with a washable marker or tailor’s tacks.
How to Read Sewing Patterns: Symbols and Notches Explained.
Mastering the interpretation of sewing pattern symbols and notches isn’t just about decoding lines on paper—it’s about bringing design concepts to life with skill and ease. Each symbol provides a piece of the puzzle, ensuring your final garment fits well, drapes correctly, and meets the original vision. Invest time in reviewing the pattern key, transfer markings carefully, and appreciate the clarity this “language” brings to your sewing projects. Armed with these fundamentals, you can confidently advance to complex patterns and even modify existing designs with precision.
Frequently Asked Questions
What do double notches mean on sleeve patterns?
Double notches typically indicate the back edge of a sleeve, preventing you from accidentally attaching it backwards. Always align these with double notches on the garment body.
How do you mark notches without cutting into fabric?
You can snip small outward triangles or use tailor’s chalk or washable markers to highlight notches. Avoid cutting into the seam allowance to prevent weakening the seam.
What is the difference between a dart and a pleat symbol?
A dart is shown by two converging lines ending in a dot or circle, while a pleat may use arrows or double lines showing where to fold and press the fabric.
Why do home sewing patterns show more symbols than factory patterns?
Home patterns often include extra guidance for less experienced users, while factory patterns streamline symbols for speed and efficiency. Both use critical notches and grainlines for accuracy.
How can I tell if a pattern uses American or European symbols?
Check the instruction sheet or pattern legend—American and European patterns may have variations in squares, dots, or terminology. When in doubt, compare to a trusted reference chart.
Do all patterns use the same notch conventions?
No, but most follow the practice of single notches at the front and double notches at the back. Always consult the legend to confirm for your specific pattern.
Related Reading
- 17 Proven Grain Line Techniques That Transform Garment Fit
- Solving Sleeve Asymmetry: Prevent Mistakes with Real-World Pattern Placement
- Knit vs Woven: How Patternmaking Changes with Fabric Type
- Unlock the True Secret to Pattern Fit: Understanding Ease
- Stop Seam Blowouts: The Essential Guide to Seam Allowance in Sewing