How to Sew a Clean Collar: Factory-Level Techniques
Sewing a perfectly clean collar is one of the hallmarks of professional shirt collar construction. Whether for fine dress shirts, uniforms, or casual polos, mastering collar sewing means every edge is crisp, every seam aligns, and the collar stands evenly without twisting. This article shares step-by-step collar sewing techniques, focusing on the collar stand, interlining, turning, pressing, and strategies for avoiding collar twisting, all honed from decades of factory manufacturing experience.
Understanding Shirt Collar Construction
The collar serves both as the focal point and the frame of many garments, especially woven shirts. Its construction demands precision because slight errors in alignment or finishing become instantly visible when worn. The shirt collar can be divided into two main components:
- Collar leaf: The uppermost piece, visible above the neckline.
- Collar stand (band): The strip encircling the neck and connecting the collar to the shirt body.
Supporting these pieces is typically an interlining—a hidden layer providing structure—bonded or sewn inside. Getting these components right is essential for consistent shirt collar construction at scale.
Collar Types in Garment Manufacturing
| Collar Type | Shape | Construction Difficulty | Common Garments |
|---|---|---|---|
| Classic stand collar | Straight/curved band plus leaf | Medium to high | Dress shirts, uniforms |
| Mandarin/stand | Short upright band | Medium | Polo, tunic shirts |
| Notched collar | Collar with lapel notch | High (multi-piece) | Jackets, blouses |
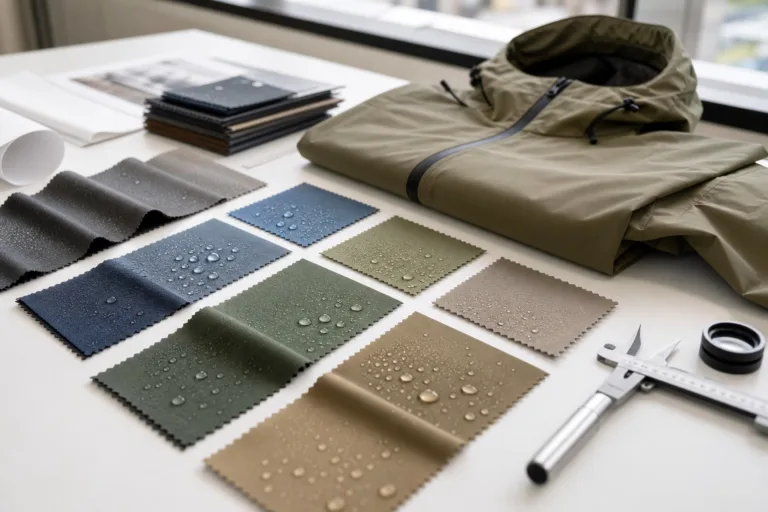
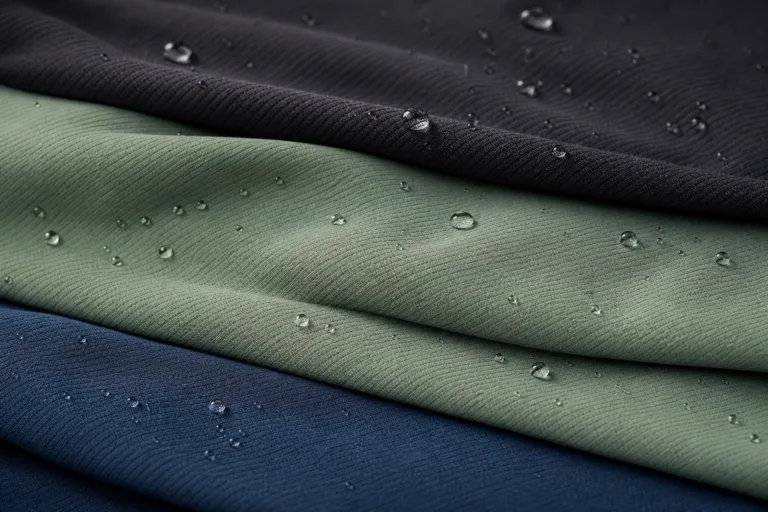
Materials for Shirt Collars
Most shirt collars use medium-weight woven fabrics such as cotton poplin, twill, or oxford, with interlinings matched to garment durability and required handfeel. Key collar sewing materials include:
- Main fabric: 100% cotton or blends (CVC, TC); 110–160 GSM typical for shirts.
- Interlining: Rigid, semi-rigid, or soft; thermofusible is most common in industry for collar construction.
- Sewing thread: High-tenacity polyester, size Tkt 50–80. Fine needles (Nm 65–75) to prevent puckering.
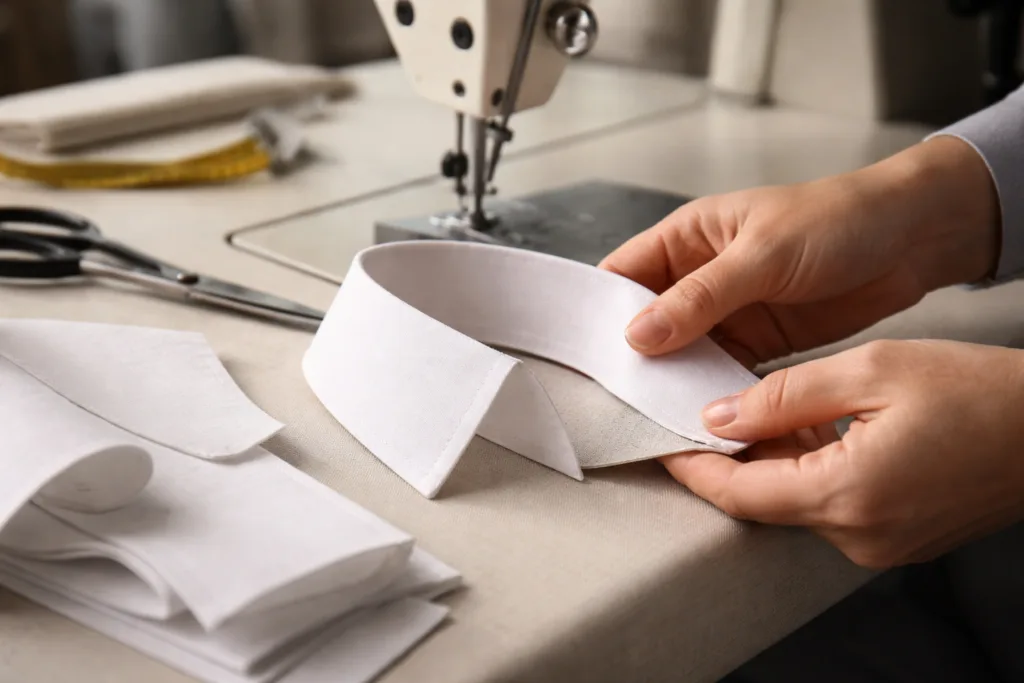
Collar Stand Creation: Foundation of a Balanced Collar
The collar stand, sometimes called the collar band, is the anchor point for achieving a clean, professional finish and the first part tackled in factory-level shirt collar construction. A precise collar stand:
- Ensures the collar sits evenly around the neck
- Supports the collar leaf to prevent droop
- Prevents twisting or torqueing after washing
Patternmaking for Collar Stands
Correct pattern drafting is fundamental to balanced collar sewing. Key tips:
- Select a stand curve that matches the shirt’s neckline, with seam allowances of 0.6–1.0 cm (1/4–3/8″).
- Confirm stand width is proportional (typically 3–4 cm at center front) and that both stand pieces fit the neckline without tension.
- Be mindful of the center back notch: a must for symmetrical construction.
Factory Sewing Steps for the Collar Stand
- Fuse or sew interlining to the outer stand piece for firmness and shape retention.
- Join collar stand outer and inner; stitch along the curved top edge using a 2.5mm lockstitch (ISO 301).
- Clip seam allowances along curves to facilitate a smooth turn without bulk or puckers.
- Turn the stand right side out using a blunt turning tool; press and shape with moderate steam.
- Attach the stand’s inner edge to the shirt neckline, using precise notching at center front, center back, and shoulder seams to ensure a perfect fit.
Interlining Methods for Collar Stability
The interlining, or fusing, is what gives a collar its handfeel and lasting shape. Modern bulk shirt manufacturing usually relies on thermofusible (iron-on) interlining for its balance of ease and performance. High-end or workwear shirts may use sewn-in interlining for added durability.
Choosing the Right Interlining
| Interlining Type | Handfeel | Best For | Notes |
|---|---|---|---|
| Rigid fusible | Crisp, firm | Dress shirts, uniforms | Holds collar shape after many washes |
| Semi-rigid fusible | Malleable, semi-firm | Business casual, blended fabrics | Preferred for comfort |
| Soft fusible | Supple, flexible | Casual shirts, lightweight poplins | More comfortable but less shape |
| Sewn-in (non-fusible) | Varies (often stiffer) | High-end shirts, some uniforms | Superior durability, costlier labor |
Factory Fusing Process for Collars
- Cut interlining precisely to collar shape—0.2–0.4 cm smaller than the main fabric piece to avoid fuse bleed at the seam.
- Apply with industrial press: 140–160°C for 10–18 seconds, pressure 1.5–2.5 bar, adjusted for fabric base and adhesive melt point.
- Check adhesion: Try to tear fused fabric; rejection if delamination occurs (per Apparel Wiki bulk QC guidelines).
- Control warp/weft shrinkage: Pre-shrink interlining if necessary, especially for high-cotton blends.
Rain’s tip from the production line: “Consistent collar handfeel comes from the right match of base fabric and interlining. Always test with your actual shirt fabric and adjust press settings before bulk.”
Collar Sewing Best Practices: Aligning, Stitching, and Turning
Once the collar leaf and stand are prepared, assembling these components with clean, accurate sewing is critical for a sharp, untwisted collar. Collar sewing in factories follows a disciplined flow:
- Baste or pin the collar pieces, aligning notches and center points for symmetrical finish.
- Sew outer collar to the collar stand (both with interlining up), using 2.5–3 mm stitch length. If using a label, insert between layers at this stage.
- Trim seam allowances to 0.4–0.6 cm (1/4″), especially at points and corners.
- Clip curves and grade seams to reduce bulk after turning.
- Turn the collar right side out. For sharp collar points, use a wooden point hammer or narrow blunt tool—never scissors, to protect from piercing through.
- Final press before attaching to the neckline for accuracy check.
Common Collar Sewing Problems (and Solutions)
- Twisted collar after wash: Usually due to off-grain fusing. Solution: Check fabric grain and pre-shrink fusing.
- Puckering at the collar: Thread tension or needle too coarse. Solution: Use fine needles (Nm 65–75), adjust tension, match thread size to fabric weight.
- Uneven collar points: Insecure turning or inaccurate trimming. Solution: Use precise trimming and specialized tools for turning points evenly.
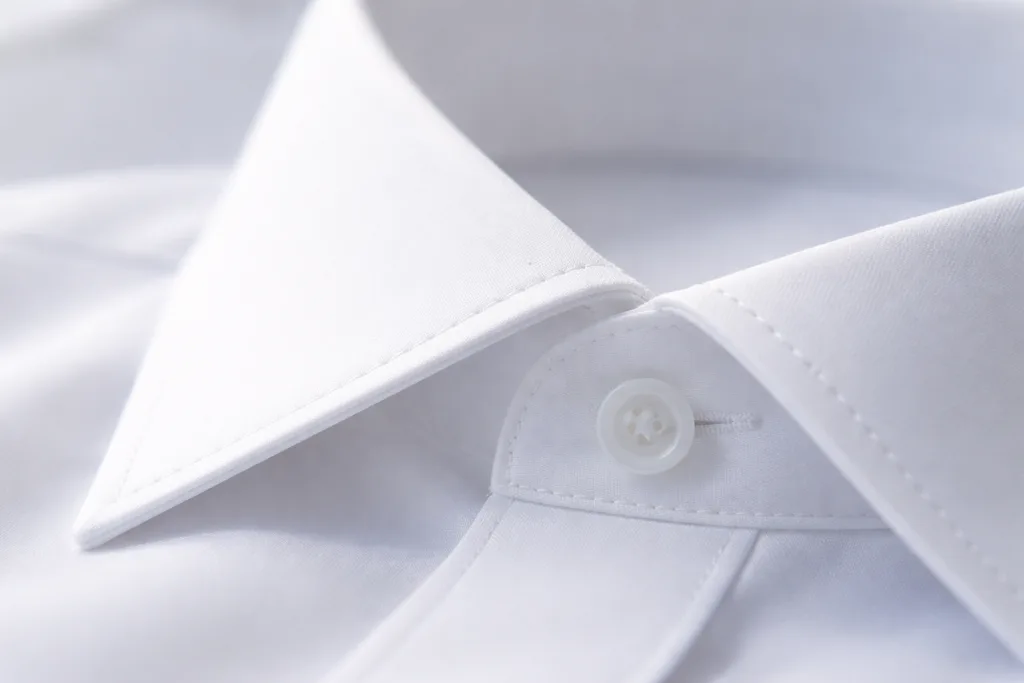
Turning Techniques for Crisp Collar Points
Impeccable collar points signal expert craftsmanship. In industrial shirt collar construction, the details make a difference. Here’s how to achieve even, sharp points:
Step-by-Step Collar Turning
- After sewing the collar perimeter, carefully trim the seam allowance at the collar tips to a single thread’s width—but do not cut the stitches.
- Notch around the curve for flexibility if the collar is rounded, leaving more fabric at the base for durability.
- Insert a collar point turner (wood or plastic) into the collar tip, gently push out the point. Some lines use fine awls for perfect corners, but avoid too much force to prevent needle holes.
- Finger-press the seams flat before ironing to prevent rolling.
Professional operators usually complete this step in under 15 seconds per collar—but the most experienced can produce 150–200 pieces per hour, all with identical point sharpness!
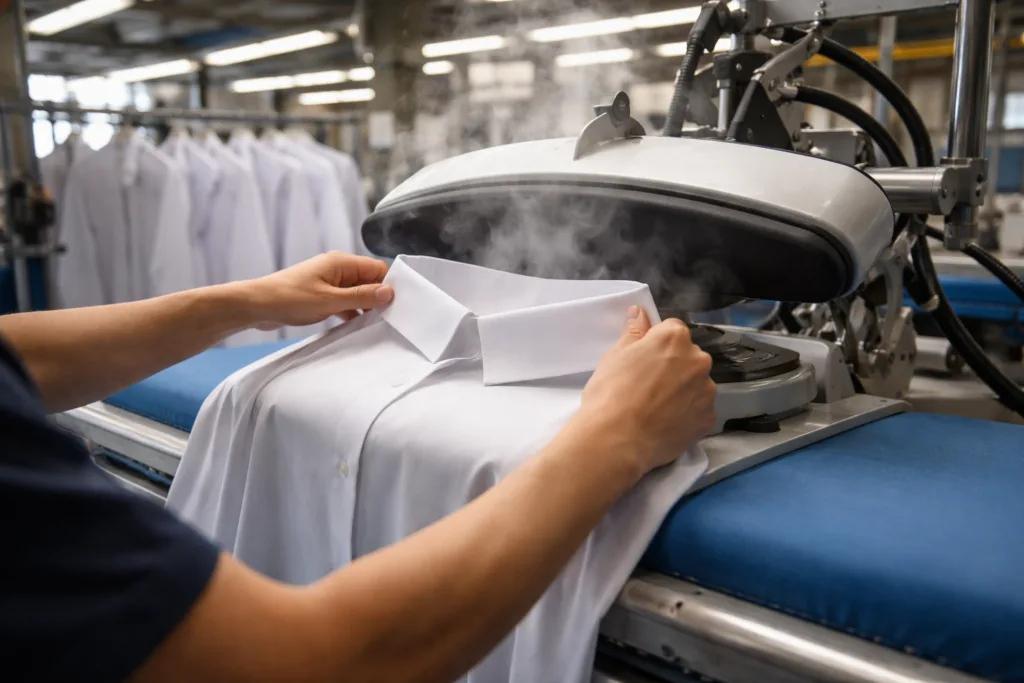
Pressing and Setting the Collar for a Precise Finish
The pressing stage is where a collar earns its permanent shape and a truly clean appearance. Without correct pressing, even the most accurate sewing will not yield a factory-quality collar finish.
Industry Collar Pressing Process
- Collapse collar seams onto the collar stand; finger-mold gently then press flat with a vertical industrial iron or built-in collar press block.
- Use a collar shaper mold where available—to set the collar roll and keep all collars consistent across the batch. Steam is applied for 5–8 seconds, drying for 10–15 seconds.
- Press from both inside and outside to eliminate seam rolling and bubbling.
- Never over-press, which can flatten the collar too much and damage interlining adhesion (especially for formal shirts).
- For soft casual collars, reduce steam and pressure to preserve a natural curve.
- In some cases, a final collar pressing is repeated after garment construction for premium control.
Avoiding Collar Twisting: Practical Controls and Quality Assurance
Collar twisting—a skewed or torque-prone collar—is a common quality failure that appears after washing and finishing. Preventing twisting requires precise control of fabric grain, fusing direction, and seam alignment.
Tracing the Causes of Collar Twisting
- Asymmetrical collar stand pattern, especially mismatched curves front/back
- Grainline not respected during fabric cutting or fusing, leading to differential shrinkage
- Poor pressing technique, over-stretching one side of the collar
- Seam pucker from incorrect thread or SPI (stitches per inch) calculation
Testing for Collar Twisting
- Launder production samples according to actual care label instructions.
- Lay flat, check that both collar points and center meet the same line when closed; measure with a steel ruler for bulk QC (+/-2 mm max allowed deviation).
- Check for collar stand roll and even overlap at the button closure.
“One of the most frequent callouts at bulk inspection is collar twisting. Control every step—grain, fusing, and pressing—and your shirts will pass first time.”
Preventative Best Practices
- Always align interlining with the warp/weft direction of the shell fabric.
- Pre-shrink all components before sewing (test shrinkage ≤2% for cotton/cotton blends).
- Use jigs or molds for consistency on every sewing operation.
- Train sewing operators to check symmetry by folding collars in half before final press.
Factory Quality Checklist: Final Collar Inspection
In industrial environments, all collars are subject to end-of-line quality checks before packing. This ensures every shirt leaves the factory with a clean, professional collar. In Apparel Wiki’s practical experience, the following control points are essential:
- Measure collar length and point width against the style spec sheet (usually ±2 mm tolerance).
- Check both collar tips for symmetry—fold collar in half and make sure points align.
- Close the top button; both collar points must touch the body evenly, with neither overlapping nor gaping.
- Gently pull on the collar to check for fusing delamination or seam breakage.
- Inspect visually for puckering, color migration from fusing, and exposed threads.
Sample Collar Quality Measurement Chart
| Control Item | Spec | Allowed Tolerance |
|---|---|---|
| Collar length (CB to tip) | 65 mm | ±2 mm |
| Collar point width | 35 mm | ±2 mm |
| Collar stand height (CF) | 30 mm | ±1 mm |
| Symmetry (point-to-point) | Exact match | 0 mm dev. |
Practical Applications: Collar Sewing for Different Shirt Types
Collar sewing techniques are adapted by fabric type, shirt category, and end use. Here’s how best practices shift for some common garment types:
Dress Shirts (Business & Formal)
- Stiff or semi-stiff fusible interlining, perfectly pressed
- Very tight tolerances for shape and symmetry
- Frequent air-molding and collar shaper use
Polo Shirts & Casualwear
- Softer, flexible interlining to maintain drape
- Often ribbed knit collars (simpler construction, no stand)
- Less rigid styling—collar can roll or curl with wear, so pressing is lighter
Uniforms & Workwear
- Reinforced collars, sometimes with sewn-in, non-fusible interlining
- Durability checks, especially for collar stand strength
- Extra bartack at high-stress points for industrial laundry conditions
Shirt Collar Decoration and Label Integration
The collar area—as a prominent location—often carries the garment’s size, brand, and care labels. Proper integration of these elements is vital for brand image and wearer comfort:
Integrated Labels
- Insert main label before closing stand, using soft label backing to prevent neck discomfort.
- Avoid placing rough threads or cut edges near the collar seam; always cover with a facing stitch or inside tape.
- For special branding, embroidery or printed logos can be added after primary collar sewing, then pressed flat.
Quality Points
Label attachment should not distort the collar stand nor show threads on the outside. For children’s wear, ensure all collar decorations comply with safety regulations and avoid causing irritation.
How to Sew a Clean Collar: Factory-Level Techniques
Sewing a clean collar at factory level means controlling all variables—from pattern, through fusing, to each sewing operation. Let’s recap what sets factory-standard collars apart:
Why Collar Sewing Matters
- The collar is the first detail buyers and wearers inspect; mistakes are highly visible.
- A clean collar sits flat, resists puckering and twisting, and maintains symmetry after washing and wearing.
Key Factory Controls
- Pattern and stand match shirt neckline, with precise notching and seam allowances.
- High-quality interlining, properly fused for even, lasting shape and no delamination.
- Turn collar points with specialized tools to avoid piercing and achieve sharp edges.
- Industrial press shapes and sets the collar before shirt assembly, locking in a flat, permanent roll.
- Symmetry checks and post-laundry testing ensure collars meet bulk QC criteria for every shipment.
Common Mistakes to Avoid
- Poor grain alignment causing collar twist or torque
- Uneven collar points due to inadequate trimming/turning
- Exposed interlining edges caused by oversized fusing cuts
- Puckering from inappropriate thread or needle choice
Practical Tips for Buyers and Technicians
- During proto and PP sample review, stress-test collars by washing/ironing three times and measuring shape retention.
- For new designs, always run fusing and interlining trials before greenlighting bulk fabric buys.
- Maintain a clear collar spec chart for each style—including exact collar stand and leaf dimensions, interlining type, and allowed tolerances—for traceability and quality control.
Mastering the art of clean collar construction yields shirts that look sharp off the line and remain flawless through wear and washing. With consistent controls at each stage, every production batch can deliver professional, clean collars worthy of the Apparel Wiki standard.
Frequently Asked Questions
What causes a collar to twist after washing?
Collar twisting is usually caused by misaligned fabric grain during cutting or fusing, or by applying interlining off-grain, which leads to differential shrinkage and torque during wash and wear.
Which interlining is best for dress shirt collars?
Rigid or semi-rigid thermofusible interlining is best for dress shirt collars because it maintains a crisp shape, withstands repeated washing, and provides a balanced collar roll essential for a formal look.
How do you achieve sharp collar points?
Trim seam allowances at collar tips to a thread’s width, turn with a specialized point turner, and ensure exact stitching up to, but not through, the collar tip for clean, sharp points.
What stitch type is most common for collar sewing?
The lockstitch (ISO 301) is standard for collar assembly because it provides a durable, neat seam with minimal bulk and is ideal for precision sewing in shirt collar construction.
How is collar size measured for quality control?
Collar size is measured flat from center back to tip and across collar points; factory specs allow ±2 mm tolerance for length and width to ensure uniform fit and appearance.
Can I use the same collar sewing process for knit shirts?
No; knit shirts, such as polos, often use ribbed or self-fabric collars needing softer interlining and different attachment methods, focusing more on comfort and stretch than on stiff shaping seen in wovens.