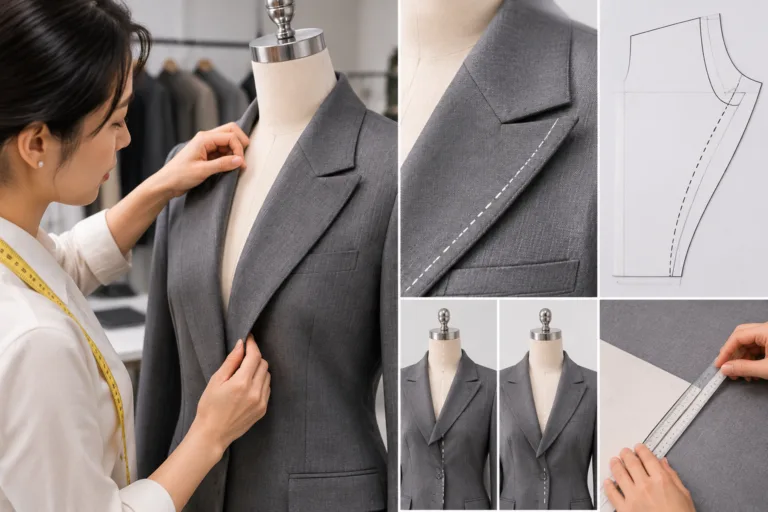
A lapel roll line is the intended fold path where the garment front turns into the lapel. In pattern drafting for lapel roll lines, that fold is not a single decorative stroke on paper; it is the visible outcome of connected lines — center front, neckline, gorge, break point, and lapel edge — working with the front’s balance. This article defines the roll line, traces the geometry that produces it, and organizes the inputs that move, flatten, or distort it. Because exact positions and shapes are design- and method-dependent, the focus stays on relationships and inspection steps rather than universal measurements, so you can read a lapel draft the way a pattern maker does: as a system, not an outline.
What a Lapel Roll Line Represents
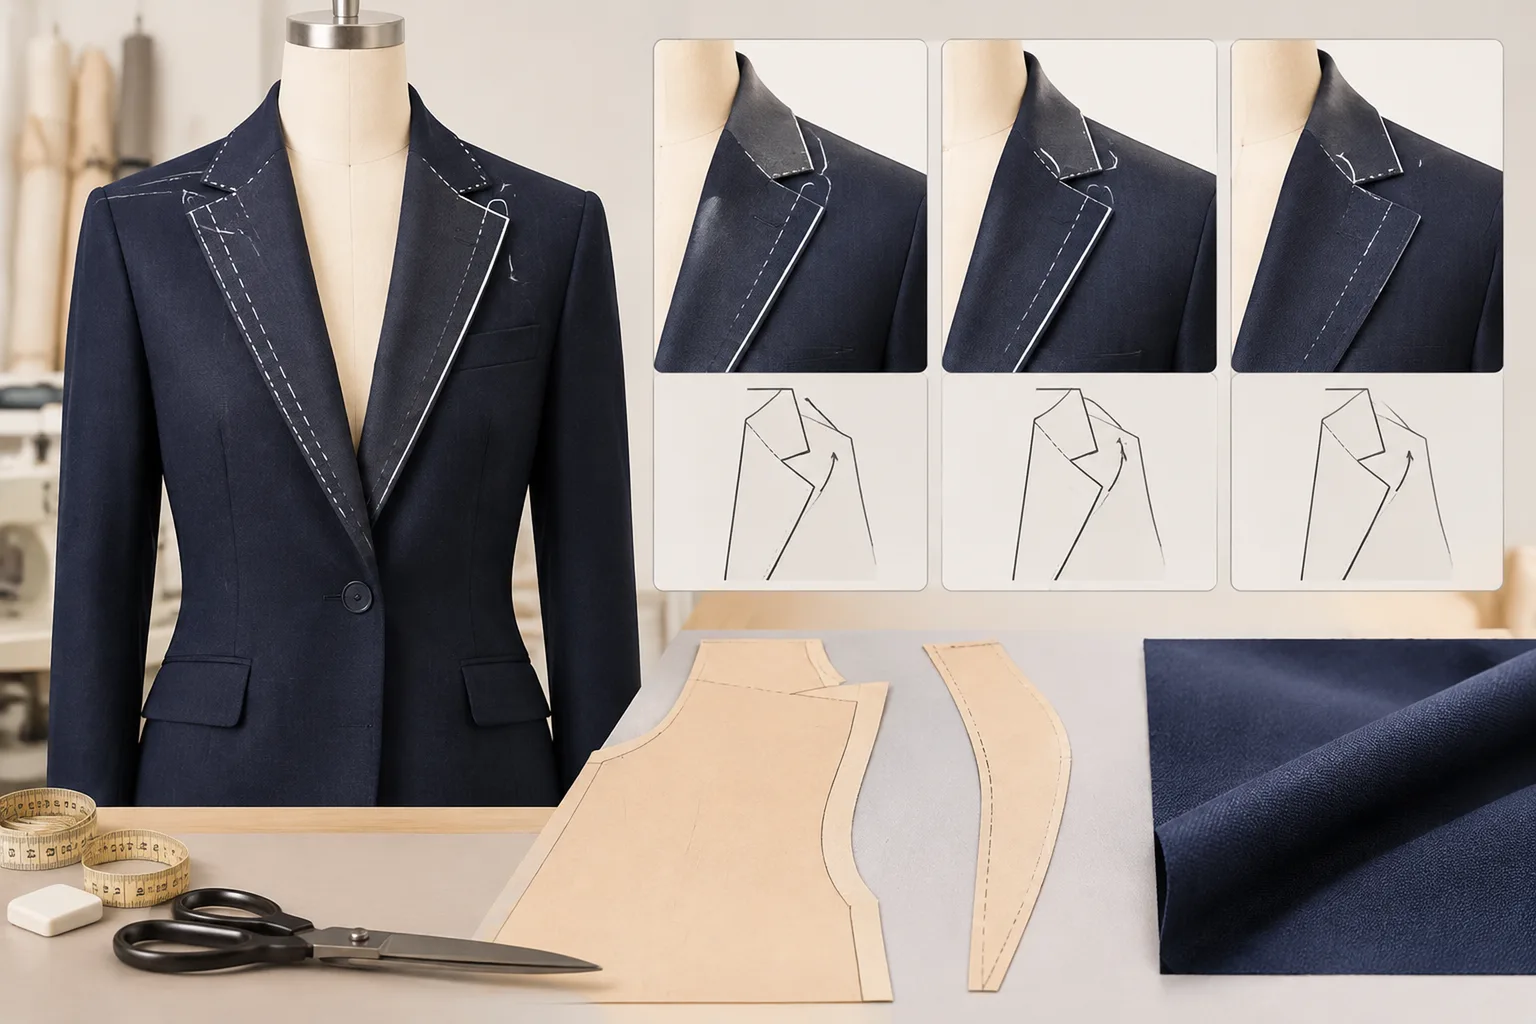
The lapel roll line is the planned transition along which the front of a garment folds back to form the lapel and reveals the under-front or facing. In drafting, it functions as a reference: a line the designer marks to indicate where the turn should begin, how far it should carry, and how the lapel should sit against the body. On a finished garment, the actual fold may sit close to that reference or drift from it, because cloth, interlining, assembly, and pressing all reshape what the paper specified. The marked line is intent, not a guaranteed physical result.
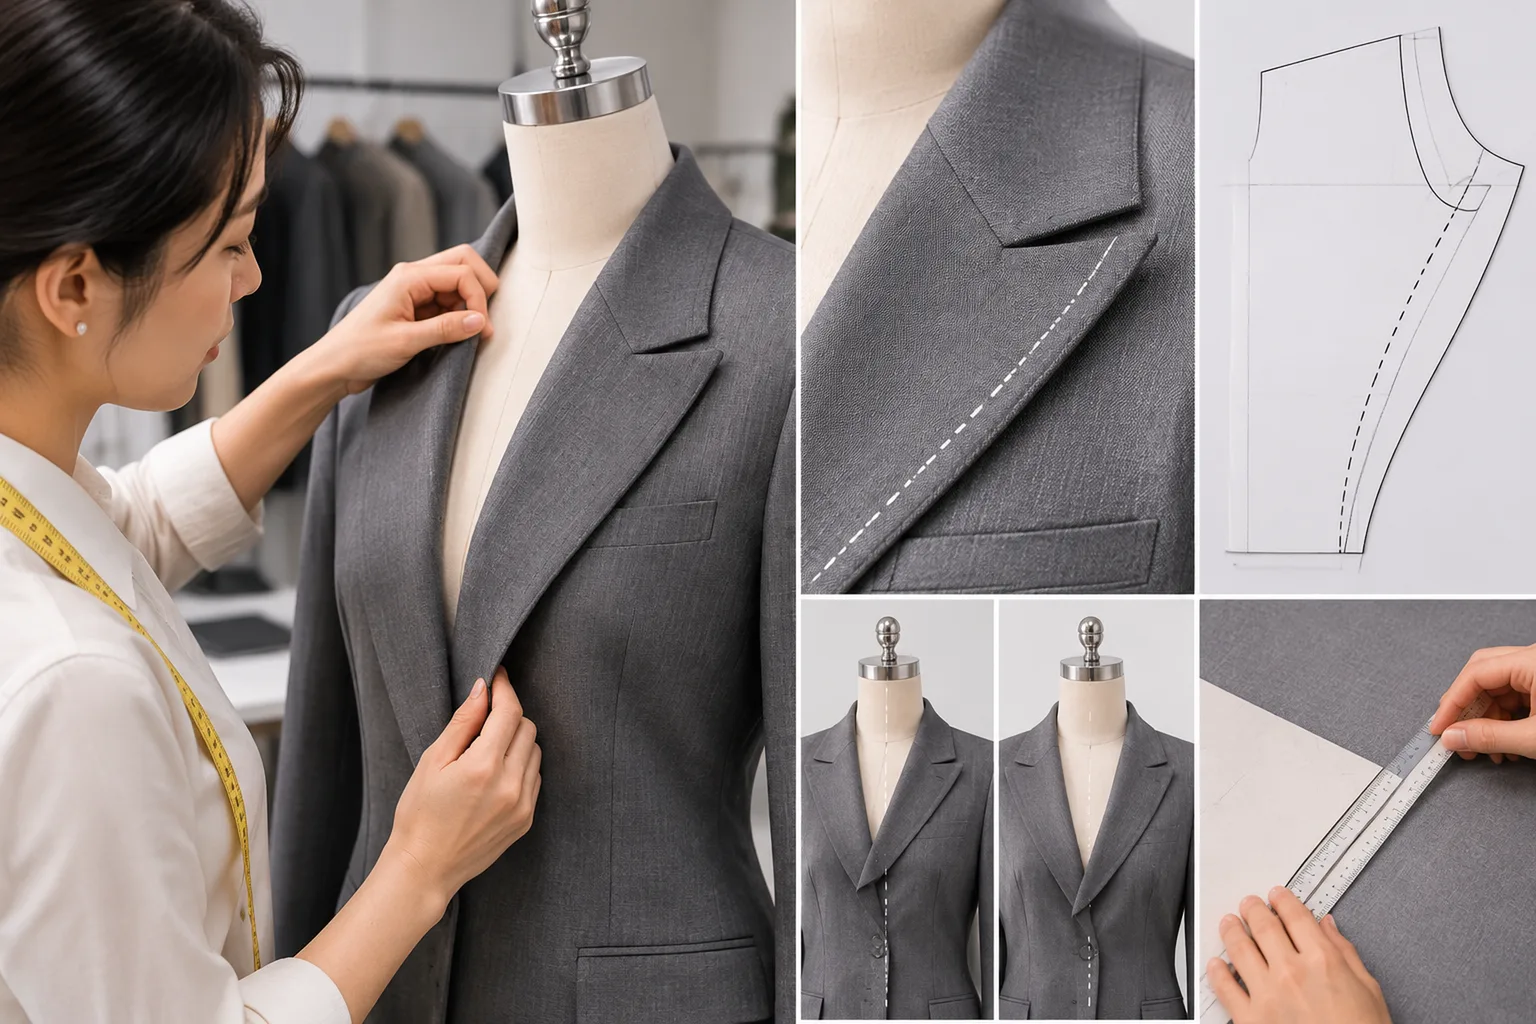
It helps to separate the roll line from the lines it is often confused with. The lapel edge is the outer, visible boundary of the folded-back lapel. The neckline is the seam that joins the collar area to the garment, and the gorge is where the collar and lapel meet. The break point is where the roll line ends and the lapel opens below, typically at or near a button position. None of these is the roll line itself, and none is a seam allowance, which exists only to assemble pieces.
Before judging any lapel shape, locate the surrounding geometry first: center front, the neckline, the gorge, the lapel’s outer edge, the break point, and how the front connects to its facing. These references form a chain. Changing one link — shifting a neckline, moving a break, reshaping a lapel edge — can alter the apparent roll path, the visual lapel width, or the front’s balance rather than only the segment you edited. That is why a lapel is best understood as lapel geometry: a set of relationships that a flat drawing compresses into a small area.
Lapel Roll Lines in Pattern Drafting: How the Geometry Works
In pattern drafting for a lapel, the upper references are established first. The front neckline sets where the lapel begins near the shoulder and neck, and the gorge fixes the junction between collar and lapel. Together they anchor the top of the turn. Lower down, the break point and the lapel’s outer edge establish the direction and visual width of the fold: where the lapel stops rolling and starts lying open, and how much of the chest the lapel covers.
The roll line itself is read along the garment’s intended fold path, which means seam lines, not cutting edges, are the reliable references. A seam line is the line pieces are actually joined along; the cutting line sits outside it by the seam allowance. Tracing only the outer perimeter can hide mismatched seam lengths, an altered neckline angle, or a facing that no longer matches the front — problems invisible until the lapel refuses to roll where the drawing promised.
It also matters whether a change is geometric or constructional. Moving a line, changing an angle at the break, or rotating a section changes the pattern’s relationships. Pressing, interlining, and support change how those relationships appear in cloth. A draft can be correct and still roll poorly if the material cannot hold the intended fold; conversely, a well-supported front can make a modest draft look sharp. Both layers deserve inspection.
A simple tracing exercise makes the connections visible. Mark the reference points — center front, neckline, gorge, break point, lapel edge — on the pattern. Follow the intended roll path from gorge to break and confirm it crosses the front as a continuous path. Then compare the front and facing along their sewing lines, checking that matching edges and notches correspond before judging the lapel’s shape. Only after those relationships agree is it meaningful to critique the outline.
Inputs That Change the Shape of a Roll Line
The variables that shape a roll line fall into two groups: those controlled in the pattern and those introduced during cutting, assembly, and finishing.
- Design inputs. Break placement and lapel width are deliberate choices. A low or high break, or a wide or narrow lapel edge, repositions the roll line by design.
- Fit and balance inputs. An unintended shift can come from front imbalance, an altered neckline, or mismatched seam lengths between front and facing. These produce the same symptom — a displaced roll — for a different reason.
- Grain and seam relationships. Grain direction and the lengths of matching seams determine whether the lapel can turn consistently around the body. If adjoining sewing lines disagree, the fold twists or drifts no matter how the outline looks.
- Material and support. Fabric weight, extensibility, thickness, and the interlining or support behind the lapel all change how the visible roll behaves. A paper pattern cannot by itself validate final cloth behavior.
- Intended ease. Wearing ease belongs to fit, not to seam allowance, and it is separate from the geometric control of the lapel.
A compact decision framework: first ask whether the roll displacement is intentional (design) or unintended (balance, seams, grain). If unintended, check the pattern’s connected sewing-line relationships before the sample. If the pattern relationships hold, inspect fabric, support, and pressing as a combined system. Check the intended garment, fabric, and support together before changing the draft, and avoid treating a successful result in one material as a universal pattern rule.
How to Evaluate a Drafted Roll Line
Evaluation works best as a three-stage pass: paper first, sample second, finished front last. Each stage answers a different question, and each result should be written down before any line is moved.
Start with the pattern itself. Confirm where the roll-line reference sits, then locate the break point, neckline, gorge, lapel edge, and grain direction. Compare adjoining pieces — front, facing, and any collar sections — along their sewing lines, not along cutting edges. Cutting outlines include seam allowance, so two edges that look equal on paper can disagree where the stitches actually go.
Move to a toile or sample. Hang it on a body or form in a neutral stance and observe three things: whether the roll follows the intended path, whether the lapel twists or collapses along its length, and whether the front stays balanced rather than pulling open or swinging back. Record the fabric, interlining, and pressing conditions at the same time, because the same pattern can behave differently under a different material system.
Two diagnostic possibilities show why the cause matters before the correction. If a soft-front garment in a lightweight knit or supple woven rolls lower or flatter than intended, inspect material behavior and support first; a sharp geometric correction may be the wrong tool when the cloth itself is the variable. Conversely, if a structured front shows a displaced roll right after a neckline or break alteration, recheck the connected seam lengths, front balance, and facing relationship before widening the lapel or moving the outer edge. The edit likely propagated, exactly as the earlier geometry discussion predicted.
Classify the outcome before editing: a pattern adjustment, a construction or support review, or a material-specific trial. One caveat applies at the end of this stage: a satisfactory result in the middle size of a graded set does not prove that the roll behaves identically at both ends. Body proportions and posture do not change linearly with size, so inspect more than one size before treating the roll line as validated across the range.
Adjusting the Geometry Without Losing Balance
Once evaluation points to a cause, choose the correction that matches it. A deliberately shifted break calls for a design edit at the break point and its connected lines. A mismatched seam calls for redrafting the affected sewing line. Incorrect balance points toward the front and side relationships rather than the lapel outline. An unsuitable grain or a strong material response may call for a support or pressing review instead of any paper change. There is no single universal fix; each symptom leads to a different edit.
Remember that one reference point rarely moves alone. Shifting the break point or neckline can change the gorge, the lapel edge, the facing, and the front balance at once. After editing a piece, redraw or recheck every matching edge — the same sewing-line comparison used during evaluation. Local edits propagate through neighboring pieces, so review the full connected geometry after each change rather than assuming the correction stayed contained.
Keep seam allowance in its proper role. Allowance exists for assembly; it is not wearing ease, and adding it is not a reliable way to create the intended lapel geometry. A wider allowance cannot substitute for reshaping the seam line, and any allowance change should follow the revised sewing line, not lead it.
A repeatable closing check sequence keeps the adjustment controlled:
- Confirm the intended roll path before touching the draft.
- Compare matching seam lines and notches on the revised pieces.
- Inspect grain direction and front balance together.
- Review the sample under the intended support and finishing conditions.
- Document what changed and why, so the next iteration starts from evidence.
One boundary frames all of this: a pattern adjustment can improve the geometric setup, but it cannot guarantee a specific result in cloth. The visible roll depends on the actual material and construction, so the final confirmation always comes from the sample under real conditions, not from the drawing alone.
Key Takeaways for Reading Lapel Geometry
A lapel roll line is a relationship among connected pattern and construction variables, not an isolated decorative line. The practical method is consistent: define the intended roll path, trace the connected geometry from neckline through gorge and break point, keep seam lines separate from cutting lines and allowances, inspect balance and material conditions as one system, and make one controlled change at a time. As an educational next step, compare your pattern’s seam-line specifications and check the drafting or construction method you are using before treating any roll-line result as a general rule.
Frequently Asked Questions
Is a lapel roll line the same as the lapel edge?
No. The lapel edge is the visible outer outline of the lapel, while the roll line is the intended fold path where the lapel turns back over the front. They are related geometrically, but they are different reference lines.
Which pattern lines should be checked when a lapel roll line looks misplaced?
Check the connected set: center front, neckline, gorge, break point, lapel edge, facing, and the matching seam lines between adjoining pieces. Compare along sewing lines rather than cutting edges, and confirm grain and front balance before interpreting the displacement.
Can changing the seam allowance fix an incorrect lapel roll line?
Generally no. Seam allowance exists for assembly and is not wearing ease or a shaping tool. If the roll line is wrong, reshape the seam line itself; any allowance change should follow the revised line, not lead it.
Why can the same lapel pattern roll differently in different fabrics?
Fabric weight, extensibility, thickness, interlining, pressing, and support all change how the marked roll path appears in cloth. A paper pattern cannot validate final cloth behavior, so evaluate the intended garment, fabric, and support combination together.
How should a lapel roll line be evaluated across garment sizes?
Inspect more than one size, including the ends of the range, not only the middle. Grading rules scale measurements, but body proportions and posture do not change linearly, so a satisfactory middle size does not prove identical roll behavior everywhere.