

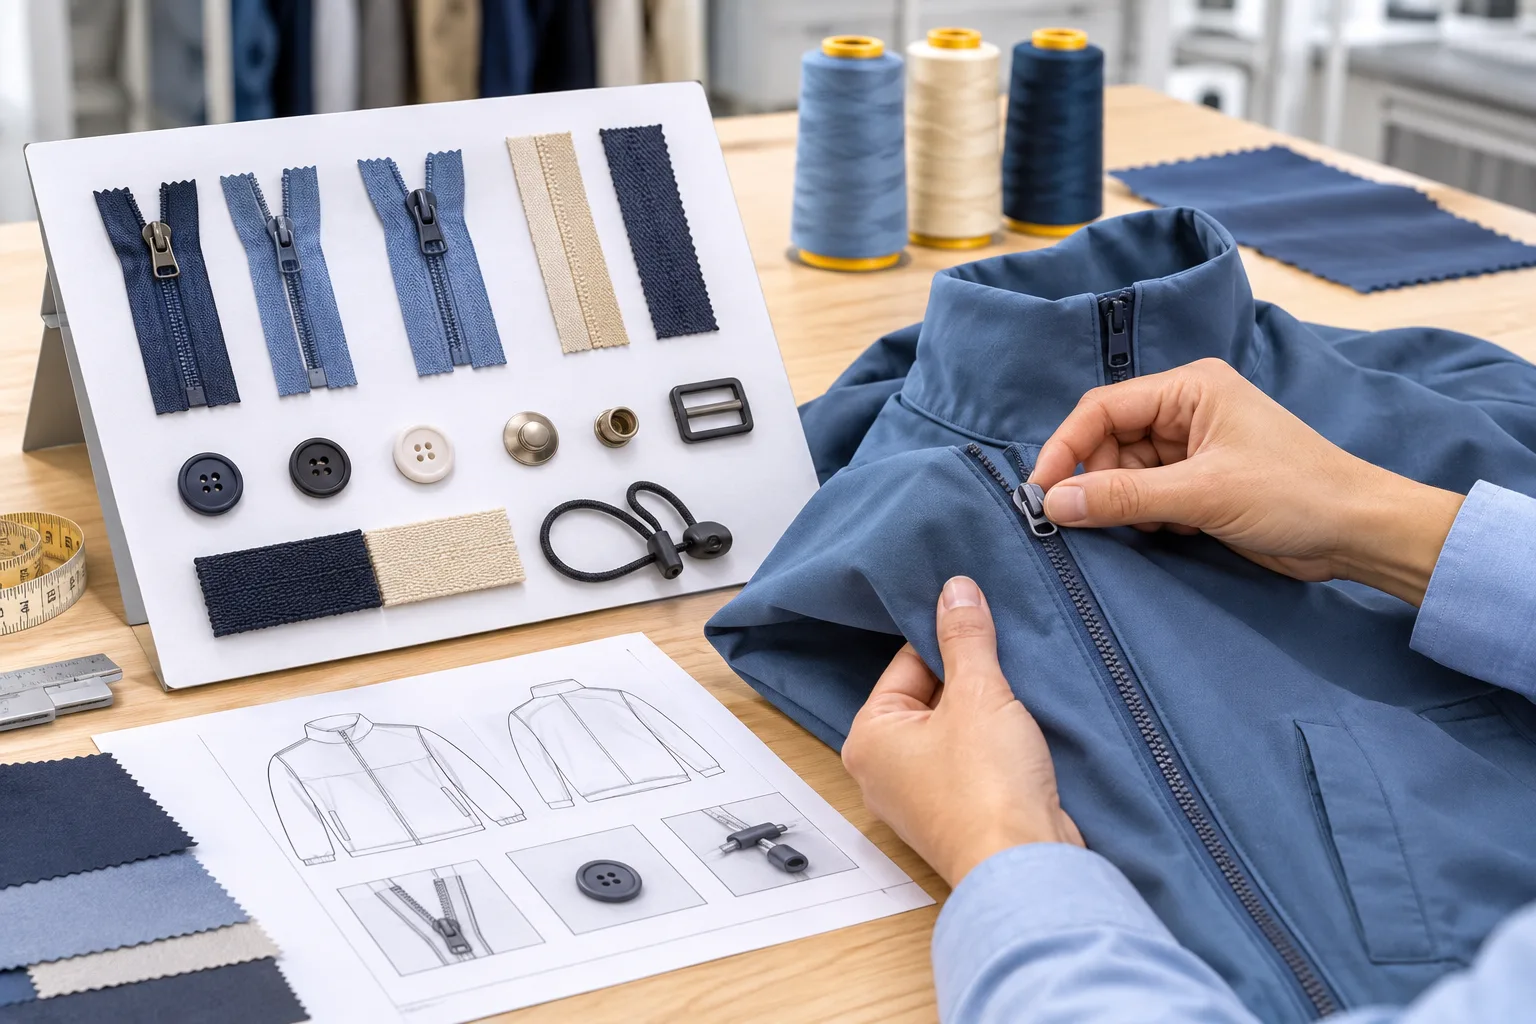
Build a garment trim card by giving each distinct trim its own entry. Record what the trim is, which details identify it, and where it goes or what it does on the garment. Attach a physical reference or point to an identifiable image or component specification when available. Then compare the entries with the garment sample and record any changes so reviewers can tell which selection they are assessing.
The card gives everyone a shared record of the trim choices. The assembled sample shows how those choices work with the fabric and construction. Approval depends on the project’s review criteria and any verification those criteria call for.
What a Garment Trim Card Does for Sample Approval
A garment trim card is a working record of the components selected for a garment sample. It can cover closures, elastic, labels, and other trims used in the style. For each component, the reviewer should be able to answer two questions from the entry: which item was selected, and where or how is it used?
Location matters when a garment uses similar-looking components in different places. A jacket might have a zipper at the center front and another at an inside pocket. An entry labeled “black zipper” could refer to either. Adding the location and closure details gives the reviewer enough information to connect a comment to the right component.
The card and the sample answer different questions during review. A loose zipper gives the reviewer a reference for details such as the tape color and pull shape. On the assembled garment, the reviewer can see how the pull sits beside a seam or whether it is easy to reach where the zipper is installed. The fabric and construction help determine which of those details matter for the style.
A complete trim card establishes which components are under review. The project’s criteria determine whether the sample is acceptable. A decision about installed performance needs evidence suited to the property being assessed, with the garment’s fabric and construction taken into account.
What to Include on a Garment Trim Card
Start with one entry per distinct trim selection. Give it a plain-language name, an identifying description, the color or finish where applicable, and a location or function. If the same component is used in several places, one entry can list those locations clearly. Give different versions separate entries when their characteristics affect what the reviewer needs to compare.
Choose identifying details based on what could otherwise be confused. For a zipper, that might mean recording whether the end separates, how length is measured, how many sliders it has, and which color and placement go with that selection. When length is specified, state the measurement basis so readers know which endpoints the figure refers to. A size designation alone can leave the closure style and other distinguishing features unclear.
Give each available reference a label the reviewer can find. Identify a mounted trim by its entry or swatch label. For a reference image, name the file or view that shows the relevant feature. For a component specification, identify the document or item it describes. A reference to “the zipper photo” is hard to use if several zipper images accompany the sample.
| Trim name | Identifying details | Garment location or function | Reference | Review status |
|---|---|---|---|---|
| Front zipper | Separating zipper, single slider, black tape, matte pull | Center-front opening | Mounted front zipper reference | Installed review pending |
| Brand label | Woven label, white lettering on black ground, folded ends | Inside back neck | Back-neck label artwork | Placement review pending |
Adapt the fields to the project. A zipper entry with a length callout needs enough information to interpret that measurement. A label entry may need an artwork identifier to distinguish versions that look similar at a glance. If you include review status, name the aspect under review so readers can tell whether the open question concerns the component itself or its placement and attachment.

Organize the Card Around the Garment Sample
Choose an order that makes the card easy to use with the garment in hand. Grouping by area works when reviewers move around the sample from the front opening to the pockets, cuffs, and inside neck. Assembly order can be easier to follow when the reviewer uses a construction reference arranged in the same sequence. Keep the order consistent within the card.
Use location names that match the sample notes or accompanying drawing. “Left chest pocket opening” gives the reviewer a more precise place to look than “front pocket” when the garment has multiple pockets. If left and right could be read from different viewpoints, state the convention used on the card and the drawing.
Place physical references next to their entries or give them matching labels. Keep the written color or finish visible beside the swatch. If two trims share a tape color but have different pull finishes, record the finish in words so the difference stays identifiable when someone works from a copy of the card or handles a loose reference.
On a lightweight knit top, an entry that reads “woven brand label, inside back neck, ends caught in the neck binding seam” tells the reviewer where to look and how the label is held. Flag that entry for review on the assembled sample, where the reviewer can inspect how the binding lies at the attachment points. If the design switches to a label stitched flat to the knit, where the stitching passes through the fabric becomes a more relevant detail. Those construction notes direct attention to the installed trim. Wash and repeated-use performance require separate evidence when they matter to the decision.
Check Trim Choices in the Sample
A garment trim sample review should begin by matching the card to the assembled sample. Check each listed item against the garment, not only against a loose reference. Confirm that the trim is present in the recorded location and that its written description matches the visible color, finish, and construction.
Work through the entries in a consistent order. For each item, ask whether the reviewer can identify the same component without guessing. A separating zipper, for example, should be distinguishable by its closure context, length basis, color, slider details, and placement when those attributes matter to the project. The card is useful only when its description points to the actual selection under review.
Then examine the trim in relation to the fabric and construction. Look at how an attachment sits, how an edge is enclosed, and whether the component changes the appearance or handling of the surrounding garment. These observations do not establish suitability, but they can show where a closer review or additional evidence is needed.
Keep observations separate from conclusions that require a specified test, supplier information, or another project record. “The applied trim changes the way this area handles during inspection” is a review note. It is not a pass or fail result. Record the follow-up, such as checking the relevant component information or determining whether an applicable evaluation is required.
If an applied trim appears to affect garment appearance or handling, note the location, the observed condition, and the question that remains open. Do not infer wash or repeated-use performance from a visual sample check. The assembled sample helps reviewers assess the installed component, while other decisions may require separate verification.
- Match every card entry to a physical item on the sample.
- Compare location, color, finish, and identifying details with the garment.
- Record observations about fabric and construction interaction.
- Separate visible observations from test-based or supplier-supported conclusions.
- Flag follow-up questions instead of treating an unchecked point as approved.
Record Revisions and Unresolved Decisions
Trim selections can change while a sample is being reviewed. Keep the current card and the current assembled sample identifiable with project-appropriate information, such as a version label or date. There is no single universal control format; the important point is that a reviewer can tell which record belongs with which sample.
When a detail changes, record what changed and which entry it affects. Note whether the physical sample, reference image, specification, or other supporting material was updated. A replacement zipper, different label finish, or changed attachment detail should not remain hidden inside an older entry.
Use clear status language for decisions that are still open. Terms such as “under review,” “option,” or “pending confirmation” help distinguish an unresolved selection from a confirmed one. Add a short note explaining what must be decided or inspected next. A blank field can look like an omission rather than an intentional open question.
An updated card identifies the revised choice; it does not prove that the revised trim has been evaluated. If the sample has not yet been updated, say so. If the sample changed but the reference did not, flag that mismatch before review. Keep the documentary trail concise, but make the relationship between the card, the sample, and the remaining question visible.
Use the Card to Support a Clear Approval Decision
Before a review begins, check that every trim visible on the assembled sample can be matched to an entry. Confirm that references are identifiable, locations are clear, and unresolved questions are easy to find. This final comparison makes the card a practical guide for discussing the actual garment rather than a list of disconnected component names.
The reviewer must apply the project’s actual criteria and any applicable verification. A garment trim card identifies the item and its intended use, but it does not replace those criteria or establish that an installed component is suitable. Apparel Wiki provides educational guidance, not approval authority, laboratory evaluation, or manufacturing services.
As your next step, compare the current card with the assembled sample and the relevant component specifications. Mark every mismatch or open decision, then check the applicable evaluation method when the decision depends on a test or other defined requirement.
Frequently Asked Questions
Is a garment trim card the same as a trim specification sheet?
Not necessarily. A trim card is organized around the selections used on a particular garment sample and their locations or functions. A specification sheet may describe a component more broadly. The two records can support each other, but they serve different review purposes.
Should every trim on a garment sample have its own entry?
Use one entry for each distinct selection that a reviewer needs to identify. Identical components may share an entry when every location is stated clearly. Separate entries are more useful when color, finish, construction, or placement differs.
What details should I record for a zipper on a trim card?
Record the details needed to distinguish that zipper in its application. Depending on the project, these may include closure style, length-measurement basis, slider count, color, and placement. Treat these as context-dependent fields, not universal requirements.
Can a trim card prove that an attached component is suitable?
No. The card documents the selected component and its intended garment use. Reviewing the assembled sample can reveal observations about attachment, fabric, and construction, but suitability or performance conclusions may require project-specific evidence or an applicable evaluation.
How should I show a trim choice that has not been finalized?
Label the entry clearly as under review, pending confirmation, or another status used consistently in the project. State what remains unresolved and whether the sample or reference still needs an update. Do not present an option as a confirmed selection.
What should I update when a trim changes after sample review?
Update the affected entry, the identifying details, the sample reference, and the status of the decision. Record what changed and whether the assembled sample reflects it. Any review still needed for the revised trim should remain visible.