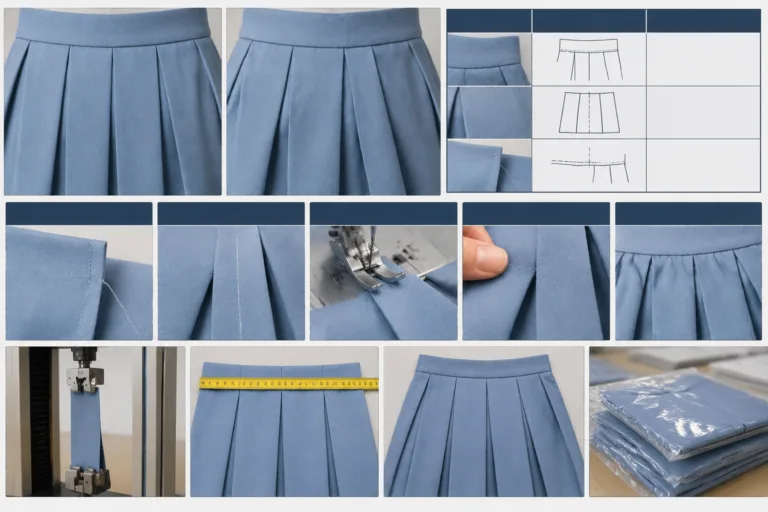
Uneven box pleats after assembly usually reflect a difference in fold placement, fabric control, seam alignment, or pressing rather than one automatically confirmed sewing error. As the Sponsor disclosure indicates, Apparel Wiki is an independent educational publication, so this guide separates observable symptoms from possible causes. Preserve the garment, record what changed, and compare the intended pattern, marked fabric, material behavior, and assembly sequence before correcting anything.
The useful question is not simply whether a pleat looks wrong. It is where the mismatch begins, whether it repeats, and under which garment condition it appears. The checks below move from visible symptoms to pattern and marking evidence, then to fabric, layer control, and assembly handling.
What Box Pleats Construction Defects Look Like After Assembly
An uneven box pleat is a visible mismatch in the position, width, depth, direction, or balance of the folds after joining and pressing. Compare the center reference, the two sides of the pleat, top and bottom registration, and the way the fold continues along the panel. A pleat may look centered at the waist but drift lower down, or its fold may be deeper on one side.
Record the symptom before proposing a cause. Note its location, direction, frequency, and the garment state in which it appears: flat, worn, pressed, joined to another component, or viewed after handling. Also record whether the issue occurs on one garment, several pieces from one batch, or most of the batch. These observations are more useful than a photograph alone, which cannot establish when or why the distortion occurred.
Separate a local displacement near a seam, pocket, waistband, or closure from repeated spacing differences along an entire panel. The first points toward a local registration or access check; the second calls for comparison of shared references. An intentional design asymmetry is not automatically a construction defect, so compare the assembled piece with the approved pattern and markings before labeling it a defect.
Keep the garment in its current condition where practical. Document the visible result, then inspect pattern, fabric, handling, and assembly evidence. Avoid pressing or unpicking first, because that can remove clues about the stage at which the uneven box pleats developed.
Inspect the Pleat Pattern and Marking Before Blaming Sewing
Start with a side-by-side comparison of the paper pattern, marked fabric, and assembled garment. Check the pattern center, fold lines, pleat intake, extension, seam allowances, and adjoining notches as separate references. Do not treat every mismatch as a general “pattern problem.” A drafting difference, an unclear fold line, a transferred mark, and a missing notch provide different inspection paths.
Follow each fold line through the full length of the piece. Look for drift near curves, hems, waistbands, pockets, or joining seams. Compare the intended reference with the mark that was actually used during folding and stitching. If two operators could reasonably align different marks, the sewing line may appear controlled while the finished pleat still lands in a different position.
Check whether seam allowances obscure, interrupt, or shift the usable reference. Review notches and matching points against the fabric, and look for marks that have faded, transferred inaccurately, or failed to cross all required layers. These are inspection points, not proof that a particular marking caused the result.
When the garment differs from the pattern, first decide whether the difference was intended. Retain the original pattern and a marked comparison sample. Change one confirmed input at a time, then compare the result with the same reference points. This helps distinguish box pleat pattern alignment problems from placement changes introduced during handling or joining.
Check Fabric Behavior, Grain, and Layer Control
A correctly planned pleat can still appear inconsistent when the fabric or folded layers do not remain stable during handling. Compare the pleat area with the actual material specification and observed behavior. Note whether the structure is woven or knit, whether a directional grain is visible, how readily the fabric extends, and how its thickness, surface friction, and recovery affect the fold.
Inspect the layers before stitching and again after joining. Multiple folds, facings, linings, or seam allowances can shift relative to one another. Check whether the fold remains registered at the top, middle, and bottom, and whether a layer has crept out of position near a seam. The garment’s movement and surface feel matter as well as its flat appearance.
| Observable input | Possible implication for fold control | Initial inspection choice | Variable that can change the decision |
|---|---|---|---|
| Extensible or recovering fabric | Fold position may change during handling or release | Compare the marked and assembled references before and after gentle handling | Direction of stretch, layer count, and construction restraint |
| Directional grain or visible distortion | The panel may not hang or fold consistently along its length | Compare grain direction with the pleat and surrounding panel | Cutting layout, fabric structure, and garment support |
| Thick or friction-prone layers | Layers may resist sliding or form added bulk at the fold | Inspect the fold cross-section and nearby seam allowances | Layer order, allowance position, and local reinforcement |
| Change after pressing | A shifted fold may become more visible or remain fixed | Compare the same area before and after the applicable pressing step | Heat, moisture, pressure, fabric recovery, and access |
Do not treat pressing, interfacing, or stabilizing as universal fixes. A correction that sharpens a fold can also add thickness, stiffness, friction, or a hard point. Compare appearance, movement, and comfort before and after the intervention on the same construction area.
Review Folding, Stitching, Pressing, and Assembly Order
Map the actual operation path from marking and folding through temporary control, stitching, joining, pressing, and final finishing. At each stage, note whether the pleat can move, whether all layers remain accessible, and whether a later operation can hide the first point of displacement. The relevant box pleat sewing sequence is style- and equipment-dependent, so the recorded sequence is more useful than an assumed universal order.
Keep related terms distinct. Stitch formation describes how the thread is formed; a seam describes how fabric layers are connected; seam allowance position describes the material retained beside that connection; fold registration describes whether the pleat remains aligned. A stitch can be consistent while the seam joins an incorrectly registered fold, and a correctly joined seam can still show a fold shifted by handling.
Inspect the seam area for layer movement, an altered needle path, or handling that pushed the fold away from its mark. Check whether pressing fixed a displaced fold in place. Compare the first stage at which a change can be demonstrated with the stage at which the problem becomes most visible. This narrows the correction and avoids reworking operations that did not introduce the mismatch.
Access also matters. Once a waistband, closure, facing, or lining has enclosed a section, some references become difficult to see and some corrections become more disruptive. Record those irreversible points in the operation map. If a controlled alternative sequence is tested, change the relevant operation or handling condition while keeping the other comparison inputs as consistent as practical.
Diagnose Box Pleat Construction Defects With a Cause-and-Check Matrix
A visible mismatch does not identify its cause by itself. Use the garment evidence to compare competing explanations, then choose the smallest check that can separate them. Record both supporting evidence and counterevidence instead of treating a common cause as confirmed.
| Observable input | Possible implication | Initial check | Decision variable |
|---|---|---|---|
| Repeated spacing drift across a panel or batch | A shared pattern reference, marking, or handling condition may be inconsistent. | Compare the intended pattern, transferred marks, and batch records side by side. | Whether the drift follows the same location or direction on multiple pieces. |
| One localized displacement | A nearby seam, closure, fold registration, or layer movement may be involved. | Inspect the operation where the displacement first becomes visible and check access at that point. | Whether surrounding pleats remain aligned away from the local area. |
| Unequal fold depth | Fold intake, fabric movement, or layer control may differ between sides. | Compare the marked fold lines and the fabric layers before and after joining. | Whether the difference remains when the area is laid flat without tension. |
| Distortion beside a joining seam | Seam matching, seam allowance position, or handling may have shifted the fold. | Trace fold registration through the seam and review the operation sequence. | Whether the pleat was aligned before the seam was closed. |
| Appearance changes after pressing | Pressing may have emphasized an existing shift or fixed a fold in a new position. | Compare the area before pressing, immediately afterward, and in its normal garment state. | Whether the change is temporary surface response or a registered construction shift. |
For repeated mismatch across a panel, start with shared references rather than assigning the issue to individual handling. A pattern-to-garment comparison and a review of the marking system can show whether the same displacement is built into several pieces. If one panel differs while others match, local handling becomes a stronger hypothesis, but it still requires a check.
For a single mismatch beside a closure, inspect local access, layer movement, and registration at the closure operation. If the pleat looked correct before joining but shifted afterward, trace seam matching and closure order. That observation weakens the theory that the original fold plan alone caused the defect.
Lightweight or extensible fabric creates another comparison path. Check grain, stretch, friction, recovery, and pressing response before adding reinforcement or revising the pattern. The decision should change if the fold remains stable when unsupported, or if the distortion appears only after layers are joined. A controlled comparison of one variable at a time provides more useful evidence than a list of assumed causes.
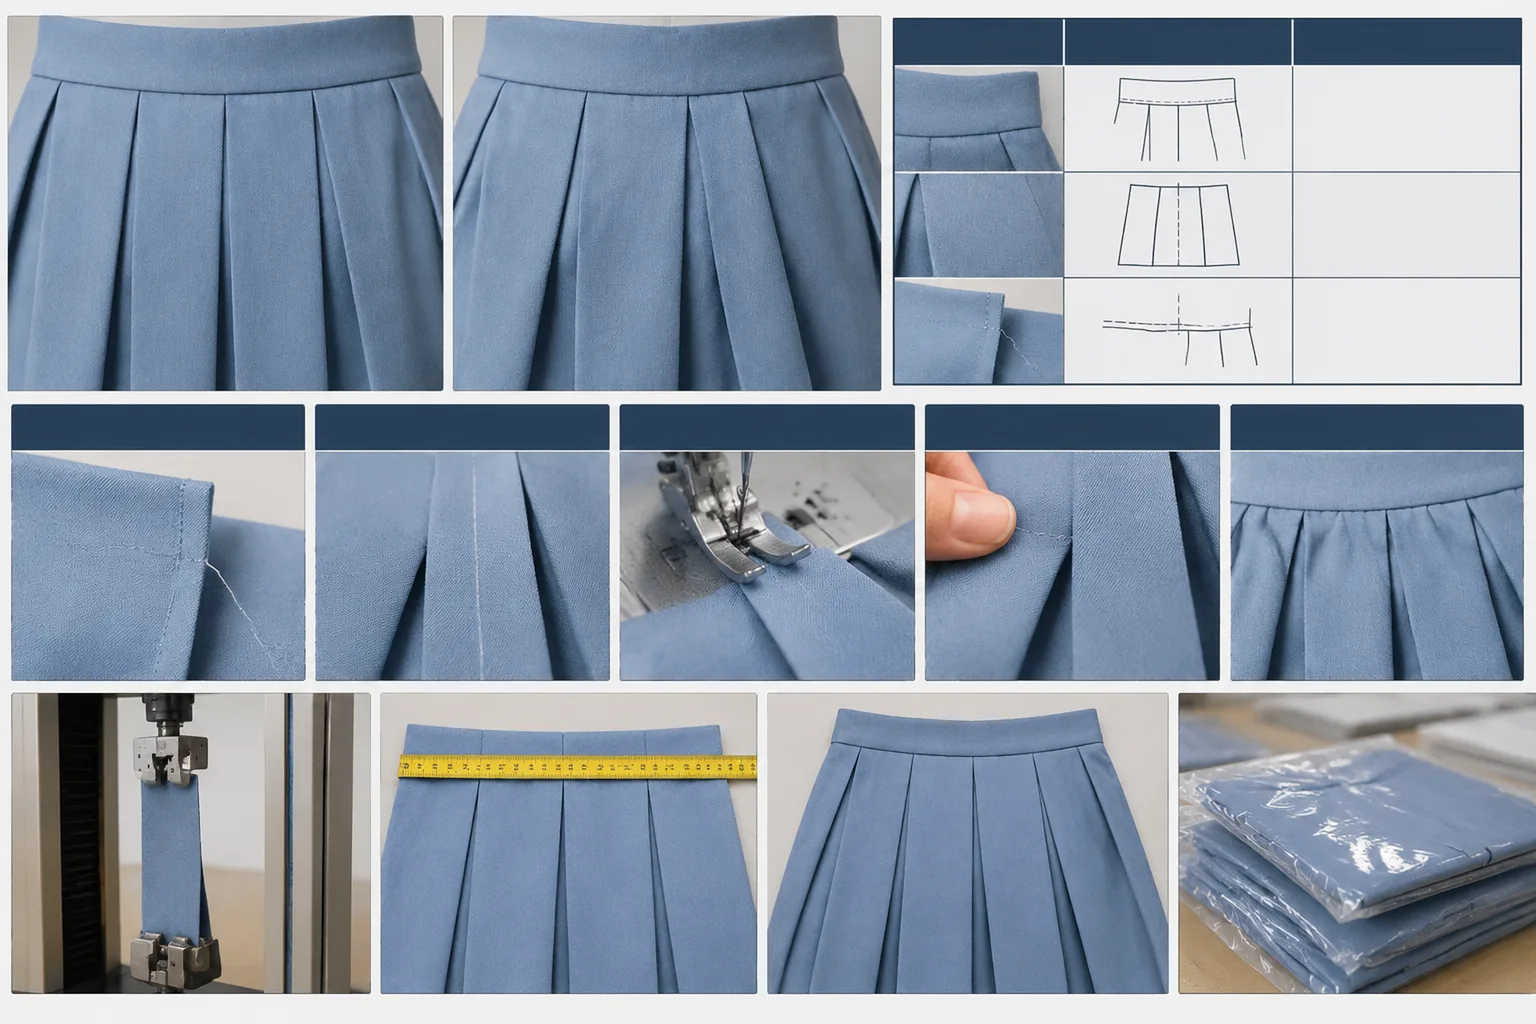
Choose a Proportionate Correction and Verify the Result
Once the evidence narrows the likely cause, match the correction to that cause. Restore or clarify markings when the reference is unclear. Adjust pattern geometry only when the pattern-to-garment comparison supports a drafting mismatch. Improve layer control when movement occurs during handling, and review the operation sequence when the shift begins during assembly.
Change one major input at a time and retain the original sample or marked comparison. This makes it possible to distinguish the effect of the correction from ordinary variation. A correction that changes several operations at once may improve the appearance without showing which explanation was supported.
Evaluate the revised pleat in the garment state that matters. Check center alignment, fold consistency, seam appearance, movement, surface feel, and the response after the relevant handling or care condition. Do not judge only the face of the pleat. Added layers or local reinforcement can introduce bulk, hard points, friction, seam stress, or nearby distortion.
Document the symptom, suspected cause, change made, comparison result, and remaining uncertainty. This record keeps an unconfirmed improvement from becoming a universal specification. It also shows whether the correction solved the construction problem or only concealed its most visible sign.
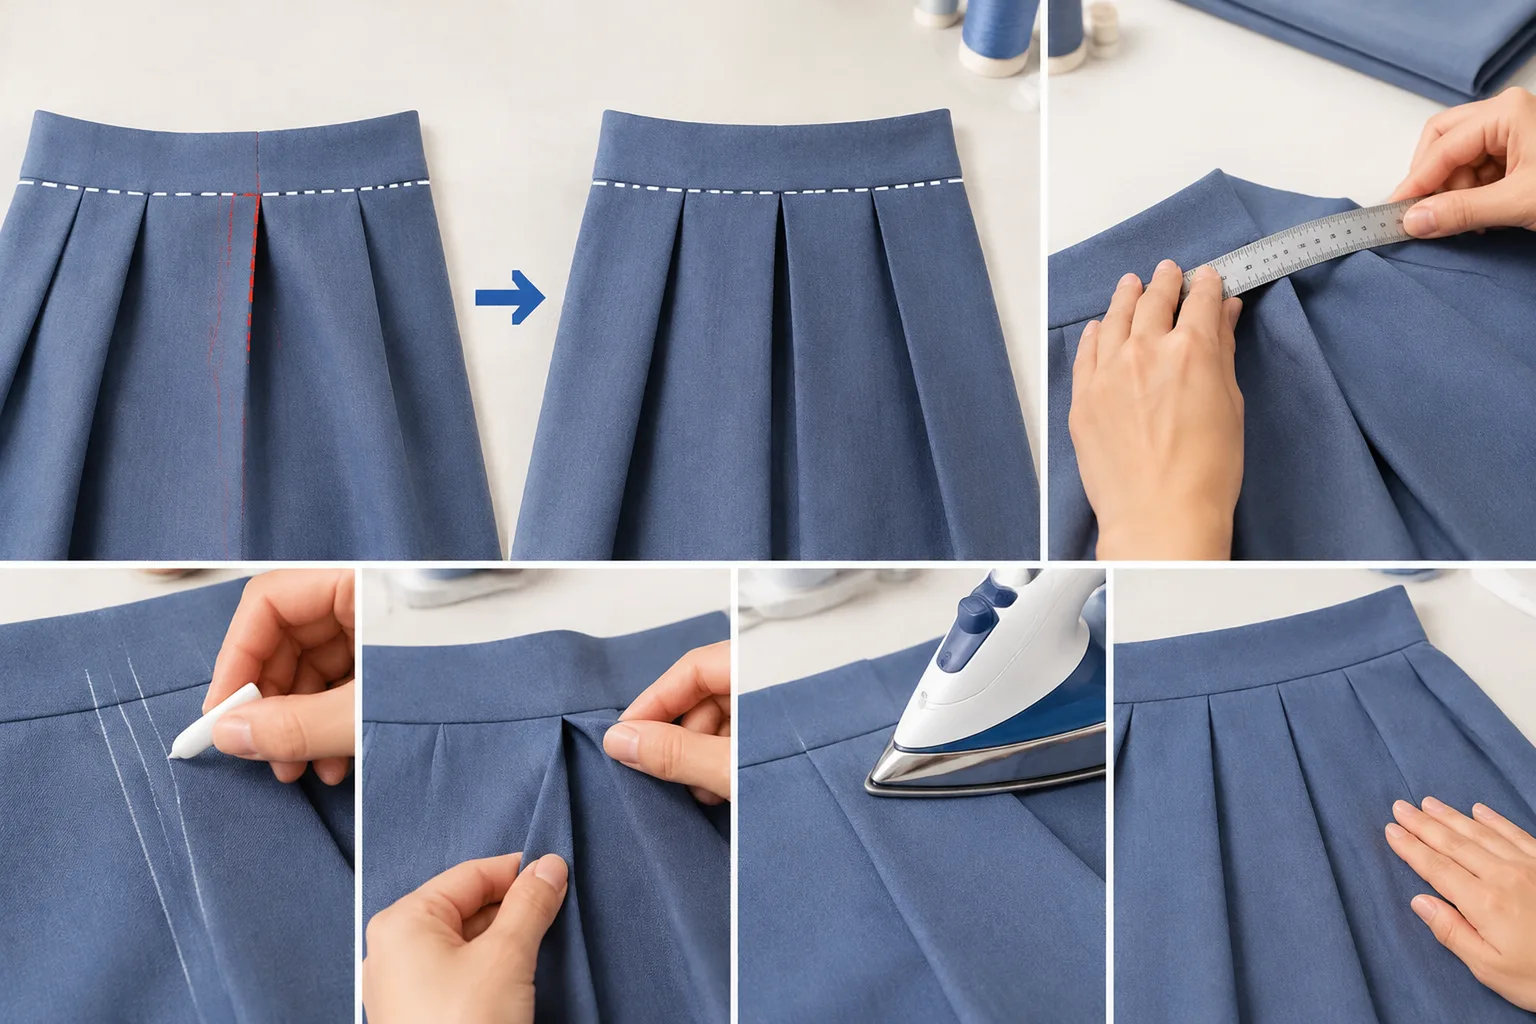
Use a Documented Check Before Finalizing the Construction
Before finalizing the construction, compare the intended pattern, marked sample, recorded assembly sequence, and garment evidence. Note the symptom’s location, direction, frequency, garment state, checks completed, correction tested, and unresolved questions. Then consult the applicable construction reference or test method for the material and product rather than adopting an invented tolerance. The result should be a narrower, evidence-supported next step for the next sample or inspection.
Frequently Asked Questions
Can uneven box pleats be caused by the pattern instead of the sewing operation?
Yes, a pattern or marking mismatch can be one explanation, but appearance alone cannot confirm it. Compare the intended fold lines, intake, extension, seam allowances, and notches with the marked and assembled garment before changing the pattern.
How can I tell whether a box pleat shifted during assembly or pressing?
Compare the pleat at documented stages, such as before joining, after seam closure, and after pressing. The first stage showing a demonstrable change is useful evidence, although pressing may also make an earlier shift more visible.
Why do box pleats look different on woven and stretch fabrics?
Woven and stretch materials can differ in extensibility, recovery, friction, layer movement, and pressing response. Treat those as inspection variables rather than fixed outcomes. Check the same pleat while relaxed, handled, joined, and pressed.
Should I add interfacing or reinforcement to correct an uneven box pleat?
Not automatically. Added layers may improve fold control in one situation but can also create bulk, stiffness, friction, or hard points. First identify the failure mechanism, then compare the construction before and after the intervention in the relevant garment state.
What should be recorded when investigating repeated box pleat defects?
Record the location, direction, frequency, garment state, batch occurrence, suspected inputs, checks performed, correction tested, comparison result, and remaining uncertainty. Preserve the original pattern and marked comparison when possible so later observations remain traceable.
When should a box pleat problem be treated as a local construction issue rather than a pattern-wide issue?
A single displacement near a seam, closure, or joining point directs attention to local registration, access, layer movement, or handling. Repeated drift across a panel or several garments directs attention to shared pattern references and marking conditions, subject to verification.