Understanding Fabric Shrinkage in Garment Production
In the apparel industry, accurate fabric shrinkage testing is essential for quality control and meeting customer specifications. Garment shrinkage QC is more than a laboratory exercise—it’s a cornerstone of factory workflow, from sample approval to bulk production. A precise fabric shrinkage test ensures consistent sizing, fit, and quality for everything from T-shirts and hoodies to uniforms and workwear. Neglecting proper shrinkage testing can lead to major issues in finished garments, rework, or costly claims downstream.
What Is Fabric Shrinkage?
Fabric shrinkage refers to the change in length or width of textile material after it undergoes washing and drying. Different fibers, constructions, and finishes react uniquely to water, heat, and agitation. Knitted fabrics like single jersey and fleece often shrink more, while pre-shrunk or synthetic fabrics may barely change. The degree of shrinkage must be measured and factored into the garment pattern to ensure the final size matches specifications.
Fabric Shrinkage and the Garment Manufacturing Process
From pattern drafting to marker making and cutting, every step in garment production is connected to shrinkage data. Adding an appropriate shrinkage allowance, making informed choices about washing and finishing, and verifying bulk fabric stability are critical for consistent results.
- Incorrect shrinkage data leads to size specification failures and high reject rates.
- Different washing methods (normal, enzyme wash, stone wash) affect shrinkage behavior.
- Buyers and factories must agree on testing protocols to prevent disputes.
How to Perform a Fabric Shrinkage Test—Step-by-Step
Performing a reliable fabric shrinkage test involves several key steps. The goal is to simulate the actual conditions the garment will experience, then measure the dimensional change. This procedure forms the benchmark for garment shrinkage QC, guiding both buyers and factories.
1. Sample Selection
Cut at least three representative fabric swatches (usually 50 cm x 50 cm or larger). Include both length (warp or wale) and width (weft or course) directions. For striped, printed, or constructed fabrics, ensure samples reflect overall variability.
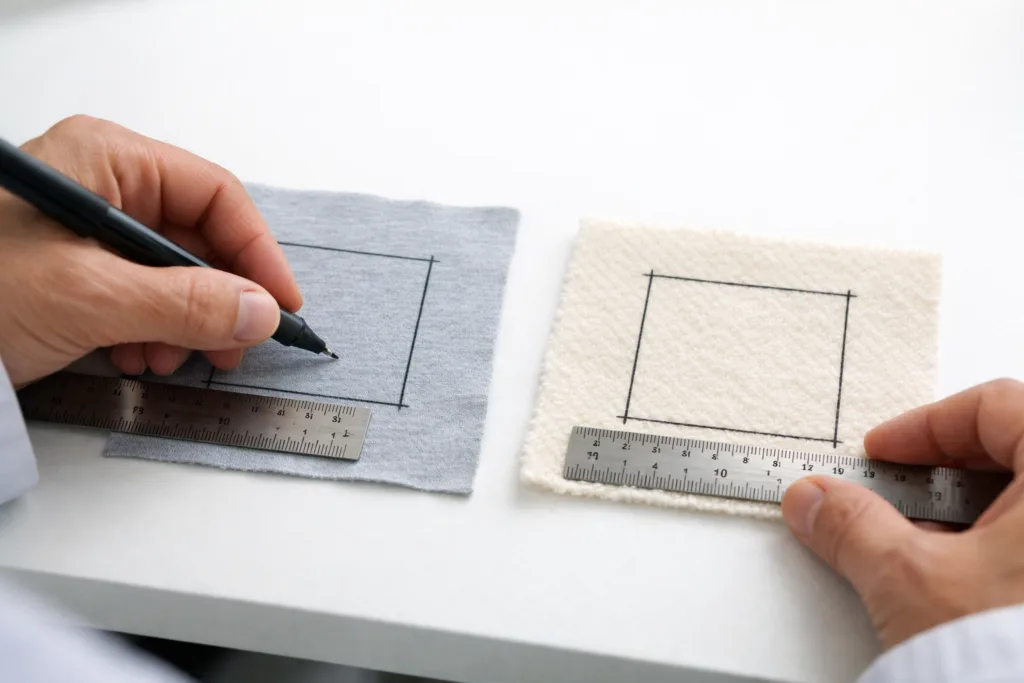
2. Marking and Measuring
- On each swatch, use a fine permanent marker to draw an accurate square (usually 35×35 cm). Mark points at the four corners, at least 5 cm away from edges. This is the measured area for the test.
- Record the initial distance between marks in both length (L0) and width (W0), accurate to 0.5 mm.
3. Washing Procedure
The next step is a controlled laboratory or in-house laundry wash. Use a protocol that matches actual garment care:
- For cotton/knitwear: ISO 6330, AATCC 135, or agreed local standard. Typically 40°C, normal cycle, with standard detergent.
- Avoid fabric softeners or additives unless specified in the finish.
- Run the samples in the same load for consistency.
4. Drying Methods
Drying methods significantly impact shrinkage results. Choose the method specified in the buyer’s test protocol or care label simulation:
- Line drying (hang dry): For most everyday knits, T-shirts, children’s wear.
- Tumble drying: Use when the care label requires machine drying or when garments are likely to be dried this way in real use.
- Flat drying: Recommended for delicate or heavily constructed knits to avoid distortion.
- Note the exact method, temperature, and drying duration in the test record.
5. Re-Measuring the Fabric
- After samples are fully dry and relaxed, re-measure the same distance between the original marks.
- Use the same measuring point and tool for consistency.
Fabric Shrinkage Test: Key Calculations and Formula
Quantifying shrinkage is straightforward but must be done carefully to ensure accuracy for garment shrinkage QC. The standard shrinkage percentage formula is as follows:
Calculate shrinkage separately for length (warp/wale) and width (weft/course). For instance, if your initial length was 350 mm and after wash is 340 mm:
Apply the same for width. If you observe negative numbers (measured dimension increased), this indicates dimensional expansion—which can happen, especially in some blends or after mechanical finishing.
Typical Shrinkage Tolerances for Common Fabrics
| Fabric Type | Standard Shrinkage (%) | Usual Tolerance (%) | Best Applications |
|---|---|---|---|
| Cotton Single Jersey | 3–7% | ±2% | T-shirts, polos, kidswear |
| Cotton Fleece | 5–8% | ±2.5% | Hoodies, sweatshirts |
| CVC/TC Blends | 2–5% | ±1.5% | Polo shirts, uniforms |
| Polyester (100%) | 0–2% | ±1% | Sportswear, linings |
| Denim (Cotton) | 4–10% | ±3% | Jeans, jackets, workwear |
| Viscose/Rayon | 5–10% | ±3.5% | Fashion knits, blouses |
Discuss with buyers/factories: Does the specification match the end-use and user expectation?

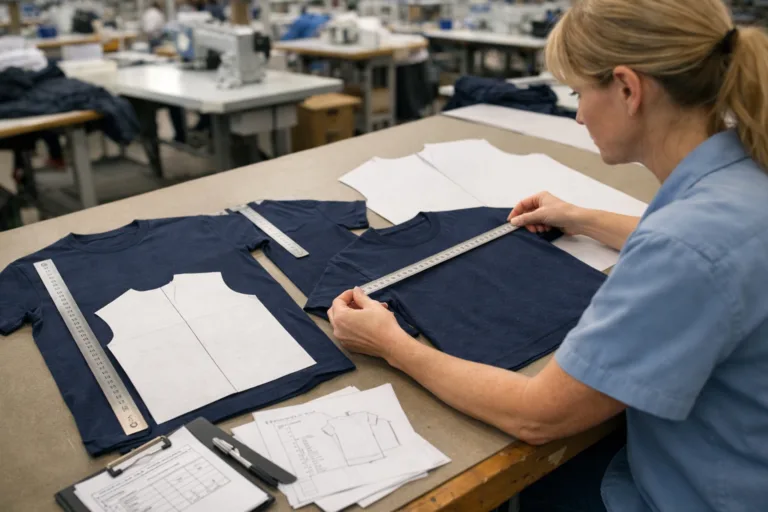
Shrinkage Allowance and Its Impact on Pattern Making
One of the most practical effects of fabric shrinkage is the calculation of shrinkage allowance for pattern making. Garment tech packs specify finished measurements, but if a factory misses the correct shrinkage value, garments will not meet tolerance after wash or during wearer use. All dimensions in the cutting pattern must be increased by the shrinkage percentage, rounded to the nearest 0.1 cm or mm depending on garment type.
Examples of Shrinkage Allowance Application
- A T-shirt requires a chest width of 50 cm after wash. If expected shrinkage is 4% in width, the cutting width should be 52 cm (50 / 0.96 = 52.08 cm, round as appropriate).
- For rib trims or collars with higher shrinkage (sometimes 8–15%), adjustments are especially critical to avoid collars becoming tight or distorted.
Checklist: What to Discuss with Pattern Makers
- Are different shrinkage rates applied for the body, rib, waistband, or cuffs?
- Was the test done on bulk fabric, not only lab dips?
- Are buyers’ shrinkage requirements stricter than industry norms? If so, double-check pattern changes.
- Will garments undergo additional post-sewing washes (e.g., enzyme wash, stone wash) that may alter shrinkage?
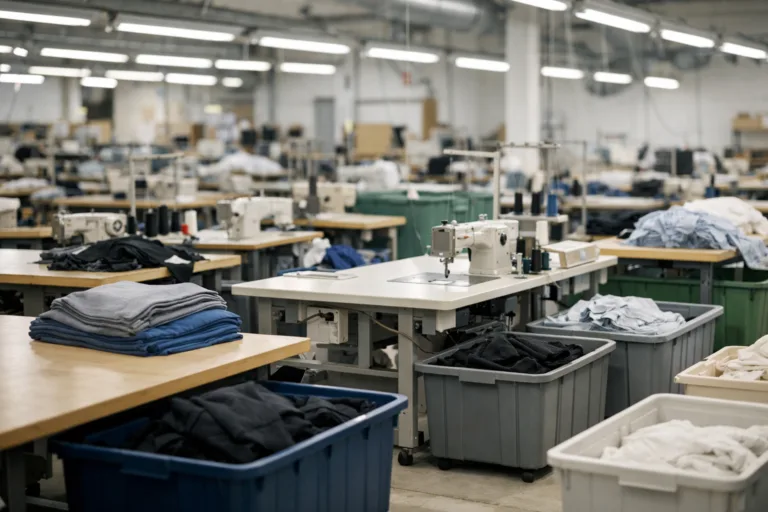
Garment Shrinkage QC: Inline and End-of-Line Testing
Garment shrinkage QC doesn’t stop after lab testing fabric. Real factory practice includes inline random shrinkage tests and final garment washing checks before shipment—especially for mass orders or repeat buyers. Both buyer QC and factory QC teams conduct these tests to validate apparel durability and measurement accuracy.
Inline Shrinkage Checks
- Take fabric from bulk laying, mark test squares, and log results at least once per fabric lot.
- If discrepancies occur (unusual shrinkage above tolerance), investigate possible causes—supplier mix, batch difference, or process issues.
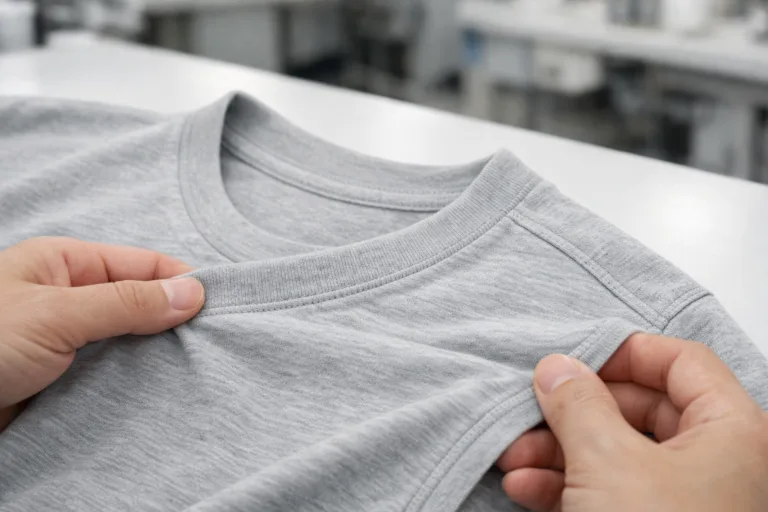
Final Garment Shrinkage Checks
- Randomly select finished garments for test washes mirroring expected customer use.
- After drying, measure main points (body length, chest/bust width, sleeve length).
- Compare before-and-after measurements against tech pack requirements.
In many large export factories, shrinkage failures are top causes for shipment holds. Regular training, cross-checking between lab and bulk, and transparent communication with buyers is critical for success.
— Rain Chen
How Fabric and Washing Methods Affect Shrinkage
Different fabrics and wash treatments respond very differently to laundering, directly impacting garment shrinkage QC. Understanding these effects prevents costly surprises after shipment.
Main Factors Influencing Shrinkage
- Fiber Type: Cotton shrinks more than polyester; viscose is more sensitive to water and heat.
- Fabric Construction: Knits (jersey, rib, fleece) have higher shrinkage due to loops relaxing. Wovens are more stable but can distort if tension was high in weaving.
- Chemical and Mechanical Finishing: Pre-shrunk, sanforized, or preshrunk-processed fabrics shrink less. Peaching or brushing may slightly relax the fabric, affecting shrinkage.
- Wash Type: Enzyme or bio washes (‘bio-polish’), heavy garment washes (acid/stone for denim) increase overall shrinkage compared to standard home laundering.
- Drying Conditions: Tumble drying typically causes more shrinkage than line drying, especially with high heat.
Factory Best Practices
- Test with the method closest to the real customer use (if unsure, simulate “worst-case”—normal machine wash plus tumble dry).
- For high-stakes orders (uniforms, export knits), double-check colorfastness and pilling resistance together with shrinkage.
- Document all wash and dry settings in test reports for traceability.
Common Challenges and Solutions in Fabric Shrinkage Tests
No shrinkage test is immune to problems. The following issues frequently arise in real factories, but they can be managed with practical countermeasures.
Challenge: Inconsistent Bulk Shrinkage
- Solution: Always test multiple bulk rolls from different lots. Track and separate fabric rolls with higher or lower shrinkage, and inform the buyer if the difference is significant.
Challenge: Disagreement on Wash Protocol
- Solution: Confirm the test method—including water temperature, detergent, agitation, and drying—in writing before PO approval. When in doubt, follow the buyer’s care label instructions.
Challenge: After-wash Distortion or Twisting (Torque)
- Solution: For knits especially, observe not only dimensional shrinkage but also skewing or misalignment of stripes/sideseams after washing. Factories may need to adjust tension settings or pre-relax the fabric longer before cutting.
Tip for Effective Shrinkage Testing
- Keep detailed test records, including photographs of before-and-after measured squares, for easy factory–buyer communication.
Pitfalls to Avoid and Expert Tips for Garment Shrinkage QC
Even experienced teams sometimes miss subtle issues in fabric shrinkage test routines. Here’s a summary of best practices and cautionary advice, drawn from decades of shop-floor observation and buyer interactions.
- Don’t trust mill-provided shrinkage data blindly; repeat the test on arrival at the factory, as bulk deliveries sometimes differ from lab dips.
- For styles using multiple fabrics (e.g., cotton body with ribbed collar/cuffs), always test each component separately and plan the shrinkage allowance individually.
- Document and archive test results for at least one year in case of shrinkage claims or audits.
- Communicate early with buyers if actual shrinkage exceeds the quoted tolerance, and recommend options (e.g., pattern revision, reprocessing).
- Train sewing operators and QC inspectors to recognize abnormal shrinkage straight from the line—this speeds up root-cause fixes and reduces rework.
- For special fabrics (modal, bamboo, organic cotton, coated or laminated textiles), consult international standards (AATCC, ISO) for extra guidance, as these materials can behave unpredictably.
How to Perform a Fabric Shrinkage Test
The fabric shrinkage test is the single most effective safeguard against garment size disputes, poor fit, and unhappy customers. This step-by-step process covers all the essentials for both factories and buyers seeking reliable garment shrinkage QC protocols. Invest time and care in testing, from selecting the right swatch to accurate measurement, and you’ll consistently achieve garments that fit and perform as intended—even after repeated launderings. For further detail and ready-to-download procedural templates, explore the resource area of Apparel Wiki.
Frequently Asked Questions
What is the standard size for a fabric shrinkage test sample?
The standard fabric shrinkage test sample is usually 50×50 cm, with a measured square of 35×35 cm marked centrally for accurate dimensional checks.
Which washing and drying methods should be used for shrinkage testing?
Use the washing and drying protocols that mirror intended garment care—typically ISO 6330 or AATCC 135 with line or tumble drying as specified in the product tech pack.
How do you calculate the shrinkage percentage in fabric?
Shrinkage (%) is calculated by the formula: ((Original dimension − After wash dimension) ÷ Original dimension) × 100, for both length and width directions.
How does shrinkage affect garment pattern making?
Shrinkage determines how much to add to paper patterns or cutting specs, ensuring measurements fall within required tolerances after washing; different fabrics require different allowances.
What if a fabric shrinks more than the allowed tolerance during QC?
If a fabric exceeds shrinkage tolerance during QC, factories and buyers must review the batch, consider adjusting patterns, or negotiate remediation before bulk production proceeds.
Why might shrinkage differ between lab dips and bulk fabric?
Lab dips and bulk fabric can shrink differently due to variations in fiber lot, finishing processes, or storage; always perform shrinkage tests on bulk fabric before cutting.