Understanding Final Random Inspection: Checklist & Standards
In garment production, the Final Random Inspection (FRI) is a cornerstone of quality control, giving buyers and manufacturers a vital safety net before products leave the factory. In apparel, final inspection entails a systematic review of finished goods to catch defects, verify specs, and safeguard reputations. This comprehensive guide unpacks the essentials of final inspection apparel protocols, focusing on key inspection points: measurement, appearance, workmanship, packaging, and weight. Mastering these FRI QC steps helps prevent costly returns, delays, and brand damage—especially in export markets where standards are uncompromising.
What is Final Inspection Apparel and FRI QC?

Final inspection apparel refers to the last stage of garment quality control conducted after bulk production but before shipment. FRI QC (Final Random Inspection Quality Control) is the process by which a statistically representative sample of the finished order is checked for compliance with specifications, buyer requirements, and international standards. In many export-oriented factories, FRI is conducted by third-party agencies with a robust, impartial method—usually employing AQL (Acceptable Quality Level) sampling procedures. However, even in smaller workshops, an effective FRI helps verify conformity, reduce returns, and uphold brand trust.
- Timing: After 100% production and at least 80% packing completed.
- Purpose: Detect major and minor defects, measure compliance, spot packaging errors.
- Common methods: AQL (ANSI/ASQC Z1.4 or ISO 2859-1), visual inspection, measurement/test tools, weight scales, and packaging review.
The following sections detail each inspection point and how to execute a world-class FRI—whether you’re a retailer, sourcing agent, or factory head.
The Role of FRI in Apparel Manufacturing
Final Random Inspection acts as both a preventive measure and a last checkpoint in the garment production process. It ensures only compliant goods reach the buyer, and it offers valuable feedback to refine process controls further upstream.
When Should FRI Occur?
FRI is performed when the shipment is packed or nearly packed (80–100% finished packaging). This timing allows the inspector to check the actual goods in the correct packaging configuration, mirroring what the end customer will receive.
Why is FRI Critical?
- Reduces shipment rejection and costly penalty charges.
- Protects brand reputation with end-to-end quality assurance.
- Identifies process gaps to improve future runs.
- Acts as a contractual milestone before payment or export documentation.
Risks of Skipping or Rushing FRI
Without robust final QC, factories risk sending non-conforming goods—leading to returns, air-freight charges, and potential blacklisting. Even experienced buyers see up to 2–3% critical defects sporadically if FRI is neglected—especially on high-complexity garments or in factories with high operator turnover.
Checklist & Standards for Final Random Inspection
An effective FRI follows a structured checklist and well-defined standards. These typically cover:
- Measurement accuracy
- Visual appearance
- Workmanship and sewing quality
- Packaging and labeling
- Weight verification
Below is a sample FRI checklist comparing common standards used in global garment factories.
| Inspection Point | Standard/Typical Tolerance | Tools/Method | Common Issues |
|---|---|---|---|
| Measurement | ±1cm for knits; ±0.5cm for wovens | Tape, spec sheet | Out of tolerance, misgraded size |
| Appearance | No stains, holes, discoloration | Visual check under good light | Oil marks, color variation, printing flaws |
| Workmanship | No skipped stitches, loose threads | Manual exam, pull test | Broken seams, puckering, skipped stitching |
| Packaging | Buyer’s spec, correct folding & labeling | Checklist vs. packing sheet | Wrong size stickers, barcode errors |
| Weight | Within 5% of standard for style/size | Digital scale, reference chart | Bulk lower weight (underfilling, missing items) |
Reference Standards
Factories often align FRI processes with standards such as ISO 2859-1 for sampling, buyer-specific manuals, or local equivalents. Apparel Wiki recommends customizing these checklists by product type and customer requirement, including special rules for kidswear, PPE, or value-added products with printing or embroidery.
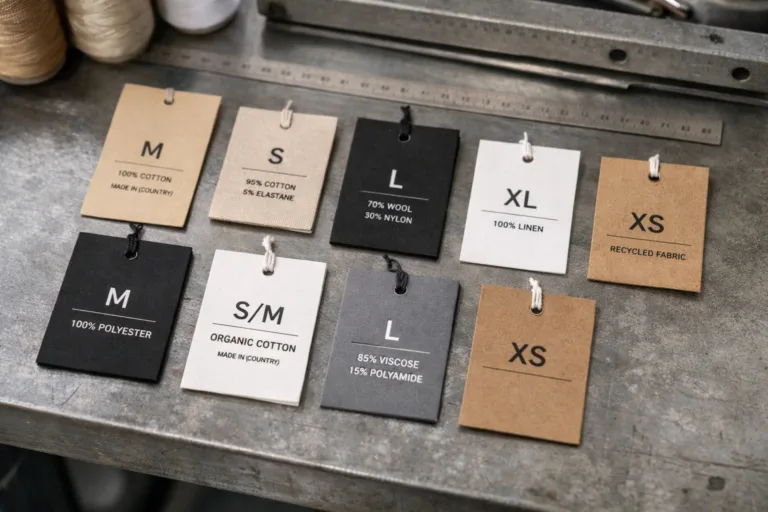
Inspection Point 1: Measurement Accuracy in Apparel QC
Measurement is the backbone of garment fit and customer satisfaction. During FRI, inspectors check garment dimensions against the approved specification sheet or tech pack. A typical procedure involves randomly selecting sample pieces from different sizes, then measuring key points.
Key Spaces to Measure
- Chest or bust
- Body length
- Sleeve length
- Shoulder width
- Waist & hip width (pants/skirts)
Tolerances & Common Problems
- Knitwear: Typical tolerance ±1cm; stretching during handling affects sizing.
- Wovens: Tighter tolerance (±0.5cm), risk of shrinking/warping from washing.
- Denim: Allow extra for post-wash changes; always measure after expected laundry process.
Apparel Wiki tip: Always measure garments laid flat, relaxed, with no tension. Use the same method as documented in the buyer’s spec—don’t improvise.
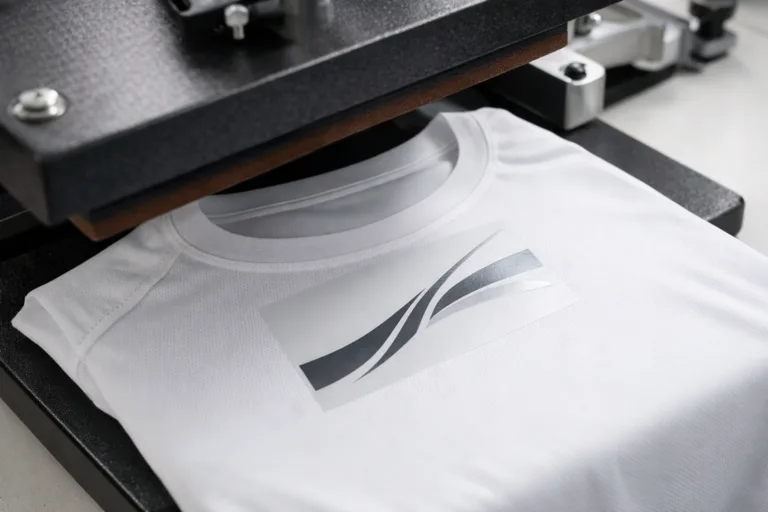
Inspection Point 2: Visual Appearance Evaluation
Appearance checks reveal aesthetic defects that undermine product value, even if the size or structure otherwise complies. Inspectors review the garment under neutral, bright lighting, inspecting both the outside and inside (especially lining, pocket bags, seams, and labels).
Common Appearance Defects
- Oil stains, grease marks, and dirt
- Fabric shading, color inconsistency, or dye streaks
- Printing/embroidery misalignment or color bleeding
- Snags, holes, and broken yarns/threads
- Incorrect thread color or exposed overlock
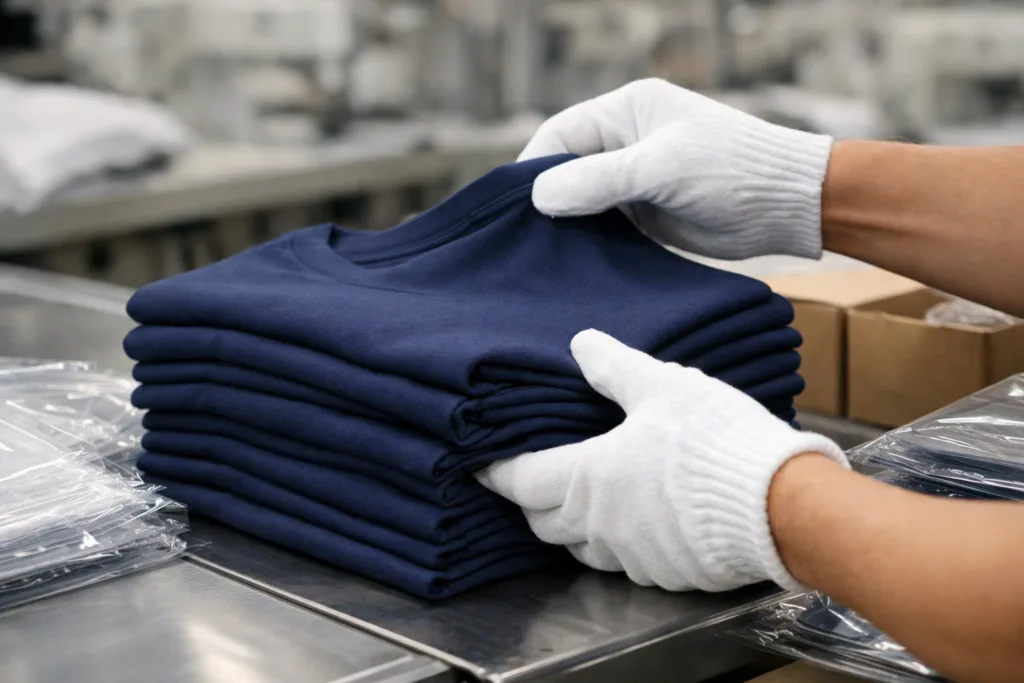
Visual Inspection Best Practices
- Inspect under daylight-colored LED lamps or near windows if possible.
- Use white gloves for lighter fabrics—prevents accidental transfer.
- Rotate the garment to view all areas; check both inside and outside faces.
“Even with advanced machines, last-minute smudges from oil or hands are the top reasons buyers reject shipments. On the factory floor, a full-body mirror at the end of the line catches more defects than any checklist.”
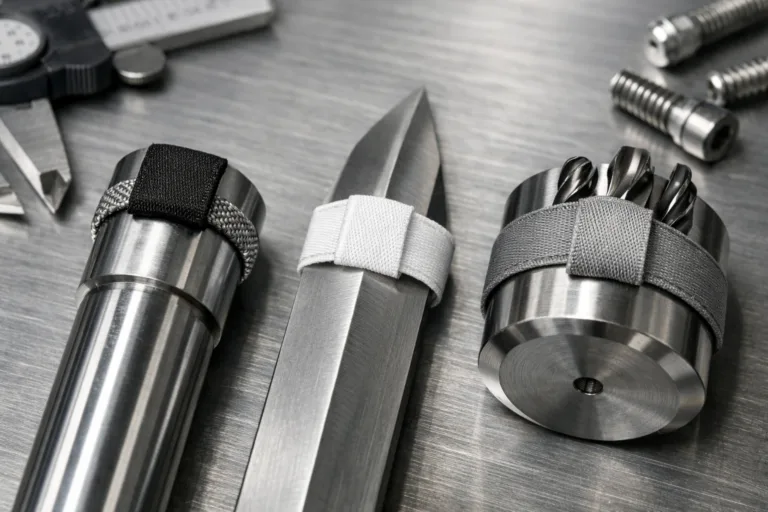
Inspection Point 3: Workmanship & Stitching Quality
Workmanship is a direct reflection of factory skill. FRI QC examines stitching quality, seam strength, thread trimming, and finish—all sources of returns if overlooked.
Critical Aspects to Review
| Stitch/Seam | Common Code | Defect Type | Remedy |
|---|---|---|---|
| Shoulder/side seam | 301/504 | Puckering, broken seam | Re-stitch, adjust tension |
| Hem/Cuff seam | 602/406 | Skipped/broken stitches | Thread/needle change |
| Label/patch attachment | Bartack/zigzag | Loose ends, misalignment | Manual reattachment |
Telltale Signs of Poor Workmanship
- Loose or untrimmed threads
- Mismatched or skipped stitches
- Puckered or stretched seams (especially on elastane/lycra items)
- Misplaced trims, crooked plackets or hoods
Every major apparel buyer has a specified ‘major’ vs. ‘minor’ defect list with classifying criteria. Open seams or holes are always ‘major.’ Torn fabric, exposed spandex, and missed bartacks on pocket corners are also common show-stoppers. Rain Chen’s experience: Always run a gentle pull test along seams—many invisible defects surface only under a little stress.
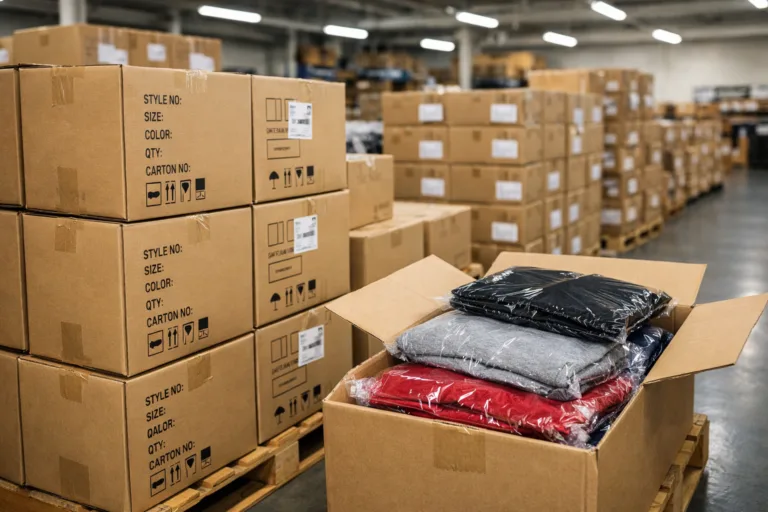
Inspection Point 4: Packaging, Folding, and Labeling Standards
Past all needlework and visuals, packaging is your last wall before customer hands. Poor packing, incorrect barcodes, or missing polybag vent holes can ruin an otherwise perfect batch.
Primary Areas to Inspect
- Folding method matches buyer spec (e.g., half-fold, collar up, sleeve tucking)
- Polybag thickness, warning labels, vent holes (especially for kidswear)
- Correct size, style, and barcode labels attached
- Carton strength (typically 5-ply for export, factory-tested for stacking)
- Accurate carton markings & compliance icons (e.g., suffocation warnings, recyclable symbols)
Packaging Defects
- Incorrect packing ratio (e.g., wrong number of each size/colour per carton)
- Damaged or crushed cartons, water stains
- Barcode mismatches or missing labels
- Poor folding causing wrinkling or crushing prints/embroidery
Many high-street brands audit factories mainly for packaging accuracy. Always verify with the latest pack manual. For sustainability, note any required recycled polybag content or carton reusability markings requested by buyers.
Inspection Point 5: Garment Weight and Bulk Consistency
Weight checks are a less-obvious but critical FRI QC step, especially for volume-driven basics. Significant weight deviation signals wrong fabric GSMs, underfilling, or counterfeit substitution—each a quality and commercial risk.
How to Execute Garment Weight Checks
- Reference finished garment weights by style and size from buyer’s approval or PP sample.
- Randomly select pieces from bulk and weigh using a calibrated digital scale.
- Acceptable variance is usually ±5% per piece. For basics like T-shirts: a 180g sample should not ship below 171g or over 189g (unpacked).
- Investigate outliers—high or low weights may signal fabric mix-ups, shrinkage, or sewing errors.
Special Cases
- Garments with heavy decoration—specify whether weight is ‘with’ or ‘without’ trims.
- Kidswear or uniforms—strict controls to ensure bulk doesn’t drift from approval sample.
- Multi-pack products—confirm total weight aligns with spec, avoiding underfilling or over-packing.
Some buyers may require weight to be part of the packing slip—double-check documentation requirements before the FRI date.
How to Conduct a Professional Final Random Inspection: Step by Step
Apparel Wiki’s practical FRI QC workflow blends international best practices with ground-level factory know-how. Here is a tested step-by-step process:
- Preparation: Confirm shipment is ≥80% packed, obtain final spec, packing list, and latest approved sample.
- Sampling: Use AQL or buyer method—usually S-2 or Level II for apparel, random selection spread across cartons, sizes, and colours.
- Measurement: Compare key points per spec, note all out-of-tolerance items, record results clearly.
- Appearance & Workmanship: Check all visible and hidden defects, run stress tests, check printing/embroidery if present.
- Packaging: Verify folding, polybags, labels, carton marking, and integrity.
- Weight: Weigh random pieces against spec sheet and sample reference; flag any outliers.
- Documentation: Complete detailed inspection report with photos, count of minor/major/critical defects, and clear pass/fail conclusion.
Tips for Effective Communication with Factories
- Share FRI checklist and defect criteria upfront, not at the last minute.
- Confirm which AQL standard and tolerance applies—some brands use ‘tightened’ AQL for premium goods.
- Request corrective action reports (CAR) after major defect findings, even if shipment is accepted.
Final Random Inspection: Checklist & Standards
To consolidate, here’s a focused overview of what Final Random Inspection: Checklist & Standards entails in practical factory scenarios:
Definition & Scope
FRI is a systematic inspection of finished, packed apparel goods, using random sampling to assess compliance with all key specs before shipment. It covers not just how a garment was made, but how it will arrive at the customer’s door.
Why FRI QC Matters
- Reduces risk of full shipment rejection at destination.
- Keeps defect rates within contractual limits.
- Offers a final opportunity for rework—cheaper and faster than recall.
- Signals to the buyer that factory quality management is dependable.
Parameters You Must Control
- Measurement & fit (per style/size/grade spec)
- Visual presentation (colour, finish, trimming, decoration)
- Workmanship (seam strength, stitch neatness, absence of skipped/broken areas)
- Packaging (fold, polybag, labels, barcode, carton integrity)
- Weight (ensures fabric GSM and no shorting)
Common Mistakes to Avoid
- Skipping randomization—always sample from different cartons, sizes, and layers within cartons.
- Relying on operator measurements instead of third-party or supervisor review; bias hides defects.
- Neglecting polybag orientation and label placement—many fashion brands have strict display/folding requirements.
- Missing critical, high-visibility garment sections (e.g., front panel, main print area, zipper function).
- Ineffective documentation—FRI reports must include photos and specific problem/solution notes.
Practical Tips
- Always keep a sealed “golden sample” for direct comparison.
- Use a two-person rule: one measures, the other records—reduces error and fraud risk.
- If a defect is found, examine at least five more pieces from the same lot/carton to gauge if it’s isolated or systemic.
- Communicate FRI results swiftly, allowing for rework or approval decisions without shipment delay.
Best Practices for Different Apparel Categories
Each garment type brings unique FRI QC challenges. Here’s how standards and checklists adapt across common categories:
Knit Tees & Polos
- Focus extra attention on side seam twisting, collar rib puckering, and body width shrinkage (especially after washing).
- Measure across multiple production dates/batches—dye lot variation is a common cause of rejection.
Woven Shirts & Dresses
- Verify button attachment strength and alignment; loose buttons are a major defect for many brands.
- Look for puckering at armhole/sleeve caps and ensure hidden seams are finished and pressed.
Denim & Heavy Bottoms
- Check abrasion marks, pocket bar tacks, and accurate post-wash measurement.
- Weight consistency is particularly important; expect heavier per-piece variation, but major outliers should be sampled more closely.
Socks, Underwear, Activewear
- Elastic recovery, seam softness, and hygiene (free of oil, stains) all require documented inspection points.
- Piling resistance tests or physical checks on finished lots where required.
Remember, each product and buyer may have distinct requirements—always tailor your FRI checklist accordingly. Apparel Wiki provides sample protocols for most mainstream apparel types, but on the factory floor, your team’s vigilance is irreplaceable.
Troubleshooting: What to Do When FRI QC Fails

Despite rigorous controls, failed FRI results sometimes happen. How you respond can make or break a shipment—or even a business partnership.
Immediate Actions
- Isolate failed goods and document all issues with clear photos and lot details.
- Initiate urgent root cause analysis (with supervisors, line leaders, and quality manager involved).
- Develop a corrective action plan—this may involve rework, partial replacement, or a price adjustment if the defect level is marginally above AQL.
- Communicate openly with buyers, presenting findings and your recovery timeline.
Prevention for Next Run
- Update process documents and ensure downstream operators (packing, final pressing) are trained on new controls.
- For recurring trouble spots—add inline or end-line QC steps, not just final inspection; quality is built, not inspected in.
- Review and adjust the FRI checklist at regular intervals—or after every major incident.
Frequently Asked Questions
What is the main purpose of Final Random Inspection in apparel?
The main purpose of Final Random Inspection is to ensure that finished apparel goods fully meet buyer specifications—covering size, appearance, workmanship, packaging, and weight—before shipment, minimizing the risk of non-conformities at destination.
How is the sample size determined for FRI QC?
Sample size for FRI QC is determined using international standards such as AQL (ISO 2859-1), which considers order quantity, risk level, and buyer requirements, ensuring a statistically valid random sample is inspected.
What are major vs. minor defects in apparel final inspection?
Major defects are those likely to affect fit, function, safety, or saleability (e.g., holes, broken seams, large stains), while minor defects are less critical, often cosmetic, and do not impede product usability.
Which measurement points are most critical during FRI?
The most critical measurement points include chest/bust, body length, sleeve length, shoulder width, and waist/hip for bottoms; these directly affect garment fit and customer satisfaction.
What documentation is required after FRI QC?
After FRI QC, a detailed inspection report is required, including photos, measurement results, defect classification, pass/fail verdict, and any recommendations for rework or corrective action.
Can a shipment proceed if some items fail the FRI check?
If failure rates are within the allowed AQL, the shipment may proceed; otherwise, rework, replacement, or buyer approval for partial acceptance is required before goods can be shipped.