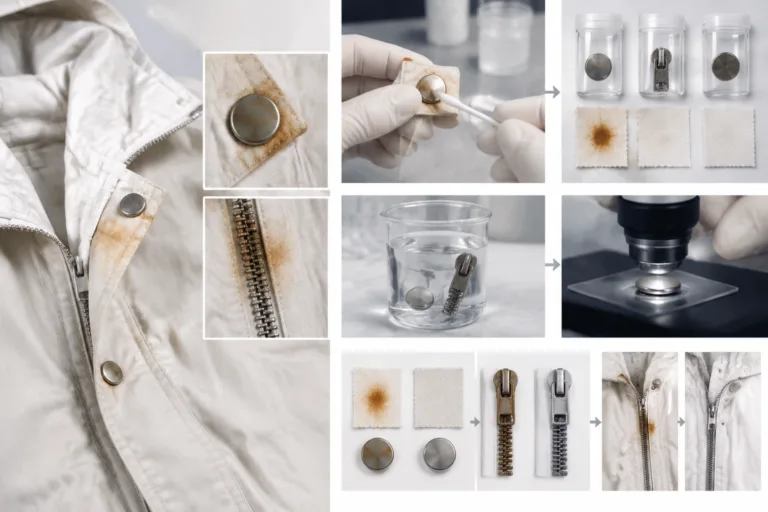
Rust-like stains around garment hardware may come from corrosion of the installed trim, but they may also come from another iron-bearing source introduced during production, handling, washing, transport, or storage. The orange-brown material can then reach the fabric through direct contact or contaminated moisture. Location is useful evidence, but a mark beside a button, snap, eyelet, or zipper does not prove that the hardware caused it. Apparel Wiki is an independent educational publication whose Sponsor information explains its approach to editorial independence; it is not a trim manufacturer, testing laboratory, or certification body.
In practical garment-quality terms, a metal trim rust stain is a visible discoloration suspected of being associated with metal corrosion or iron-bearing contamination. “Suspected” matters. Several substances and processes can produce similar-looking marks, so visual appearance alone cannot establish chemical identity or root cause. A sound diagnosis separates what investigators can observe from what they infer.
What causes rust stains around metal garment trim?
The most direct hypothesis is that a metal component has corroded and transferred colored material to the surrounding textile. This may involve the visible face of a trim, a concealed surface, an attachment point, or another part of the installed assembly. The fabric can become marked where it touches the component or where moisture carries contamination beyond the immediate contact area.
However, the installed trim is only one possible source. Iron-bearing residue could already be present on the fabric, or it could be introduced by equipment, tools, work surfaces, water, packaging, handling, or storage conditions. These possibilities should remain conditional until the production history and physical evidence support or contradict them.
Stain position helps define the investigation. A mark that repeatedly follows the outline of the same trim type deserves attention, especially if comparable garments show a similar pattern. Even so, proximity does not establish causation. The trim may merely be where moisture collected, where pressure brought contaminated fabric surfaces together, or where a preexisting mark became more noticeable.
Conversely, hardware that appears clean and intact should not be cleared solely by visual inspection. Relevant surfaces may be hidden after attachment, and a garment’s construction can create contact conditions that are absent when a loose component is examined by itself. The visible symptom should therefore be recorded as a rust-like or orange-brown stain until stronger evidence identifies its composition and source.
What details help narrow down the source of a rust stain?
Before changing suppliers, materials, cleaning procedures, or storage conditions, describe the problem consistently. Begin with the stain’s exact location in relation to the trim and garment construction. Record its shape, size pattern, direction, color distribution, and frequency. Note whether it appears on the face, reverse, or both surfaces of the fabric and whether it penetrates multiple layers.
Timing is equally important. Determine, when records or reliable observations allow, whether the stain was first seen before assembly, immediately after trim attachment, during storage, after transport, after washing, or during wear. Do not turn an uncertain recollection into a recorded fact. If the first confirmed observation was at final inspection, state that rather than assuming the stain developed during the previous process.
Build a usable investigation record
- Photograph the full garment: Show the stain’s position in relation to seams, folds, packaging points, and nearby trims.
- Capture close-up views: Photograph the stain, the trim face, attachment area, reverse side, and concealed surfaces when they can be examined without destroying important evidence.
- Record traceability details: Include the style, colorway, fabric lot, trim lot, production batch, line or process stage, and relevant storage or transport information that is actually available.
- Describe frequency: Identify which inspected pieces were affected without inventing a sampling rule, acceptance limit, or universal threshold.
- Preserve comparisons: Retain representative affected and unaffected garments or materials from the same batch and, where useful, from other batches.
Photographs and batch records are investigation evidence, not standalone proof of root cause. A close-up can document that a stain touches a snap, but it cannot by itself show where the staining material originated. Likewise, a batch record can reveal a shared trim lot or storage period without proving that the shared factor caused the defect.
Comparisons are most informative when investigators define them clearly. For example, compare affected and unaffected garments made with the same fabric and trim lots, then compare pieces that share the fabric lot but use another trim lot. Differences can help prioritize the next check, although uncontrolled differences in assembly, handling, exposure, or storage may still limit the conclusion.
Which sources should you investigate first?
Start with competing hypotheses rather than a single accusation. For each possible source, record the supporting observations, contradictory observations, and a small controlled check that could distinguish it from alternatives. This structure reduces the risk of changing a material or process simply because it is closest to the stain.
The installed trim and attachment area
Examine whether staining is localized to one hardware type, one surface, or a repeated contact pattern. Inspect the component as installed, including accessible attachment points and the fabric layers around them. Compare affected hardware with unused components from the same identified lot and with installed hardware on unaffected garments. An intact-looking exterior neither confirms nor excludes trim involvement.
Tools, equipment, handling, and nearby operations
Consider whether relevant process history points to contact with tools, machines, racks, worktables, containers, or handling equipment. Also consider nearby operations that could plausibly introduce particles or contaminated moisture. These are hypotheses, not default explanations: the investigation should look for a matching location, timing, batch pattern, or controlled comparison before assigning significance to them.
Water, washing, packaging, and storage
Check whether washing, damp handling, transport, condensation, or storage preceded the first confirmed observation. Review whether marks align with folds, stacked contact points, wet areas, packaging components, or repeated positions in a container. Timing can identify an exposure window, but a stain noticed after washing may have originated earlier and become visible only under later conditions.
The trim-fabric-construction combination
Treat the trim as part of an installed system. Fabric structure, finishes, layered construction, attachment pressure, folds, and retained moisture may affect where contact occurs and how discoloration moves or becomes visible. A loose trim component inspected separately does not reproduce every condition created by the finished garment.
The practical goal at this stage is not to declare a winner. It is to reduce a broad list of possible metal hardware rust stain causes to a manageable set of evidence-based hypotheses. Preserve any samples needed for comparison, document uncertainty, and avoid supplier or process blame until controlled checks can separate trim-related staining from other contamination pathways.
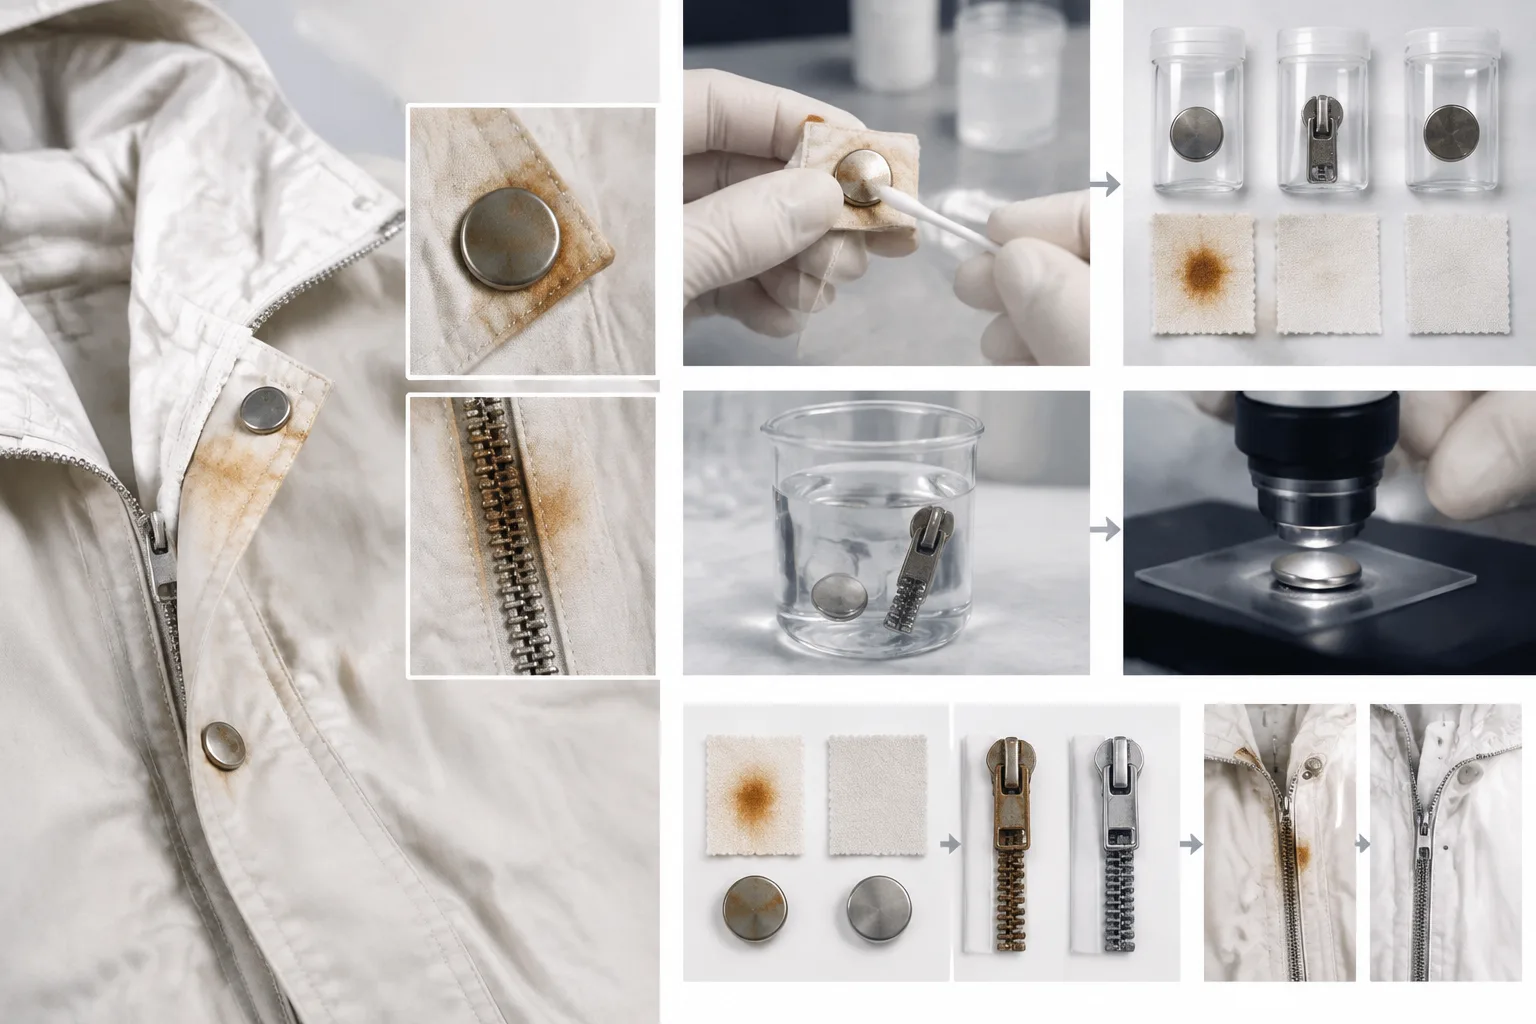
How can you test whether the trim is responsible?
Begin by isolating the potentially affected scope without discarding the evidence needed for comparison. Preserve representative stained garments, apparently unaffected garments from the same batch, unused trim from the relevant lot, and—when available—comparable materials from other lots. Label samples clearly so their style, fabric, trim, assembly stage, and production history remain traceable.
Test the installed combination rather than relying only on a loose button, snap, eyelet, or zipper. The fabric, attachment method, garment layers, folds, finishes, and contact pressure may influence whether discoloration develops or transfers. A component that appears unchanged when examined alone may behave differently after attachment, handling, storage, or garment care.
Build comparisons around the suspected variable. For example, compare the actual trim on the affected fabric with an appropriate control while keeping construction and exposure conditions as consistent as practical. If another trim lot is being evaluated, avoid changing the fabric, attachment process, packaging, and storage condition at the same time. Changing one relevant factor at a time makes the result easier to interpret.
Document what each sample contains, how it was prepared, what conditions it encountered, and what was observed afterward. Record both the expected result and any new problem, such as discoloration in a different location or damage unrelated to the original stain. Photographs should use consistent views and identification, but visual records alone do not chemically confirm rust or identify its source.
These internal comparisons are hypothesis checks, not standardized certification. If the result is unclear, difficult to reproduce, or important to a product-disposition decision, consult a qualified laboratory about an applicable validated method. The laboratory should receive the actual question, representative installed samples, relevant controls, and known process history—not merely an unmarked loose component.
What should you do with affected garments and production lots?
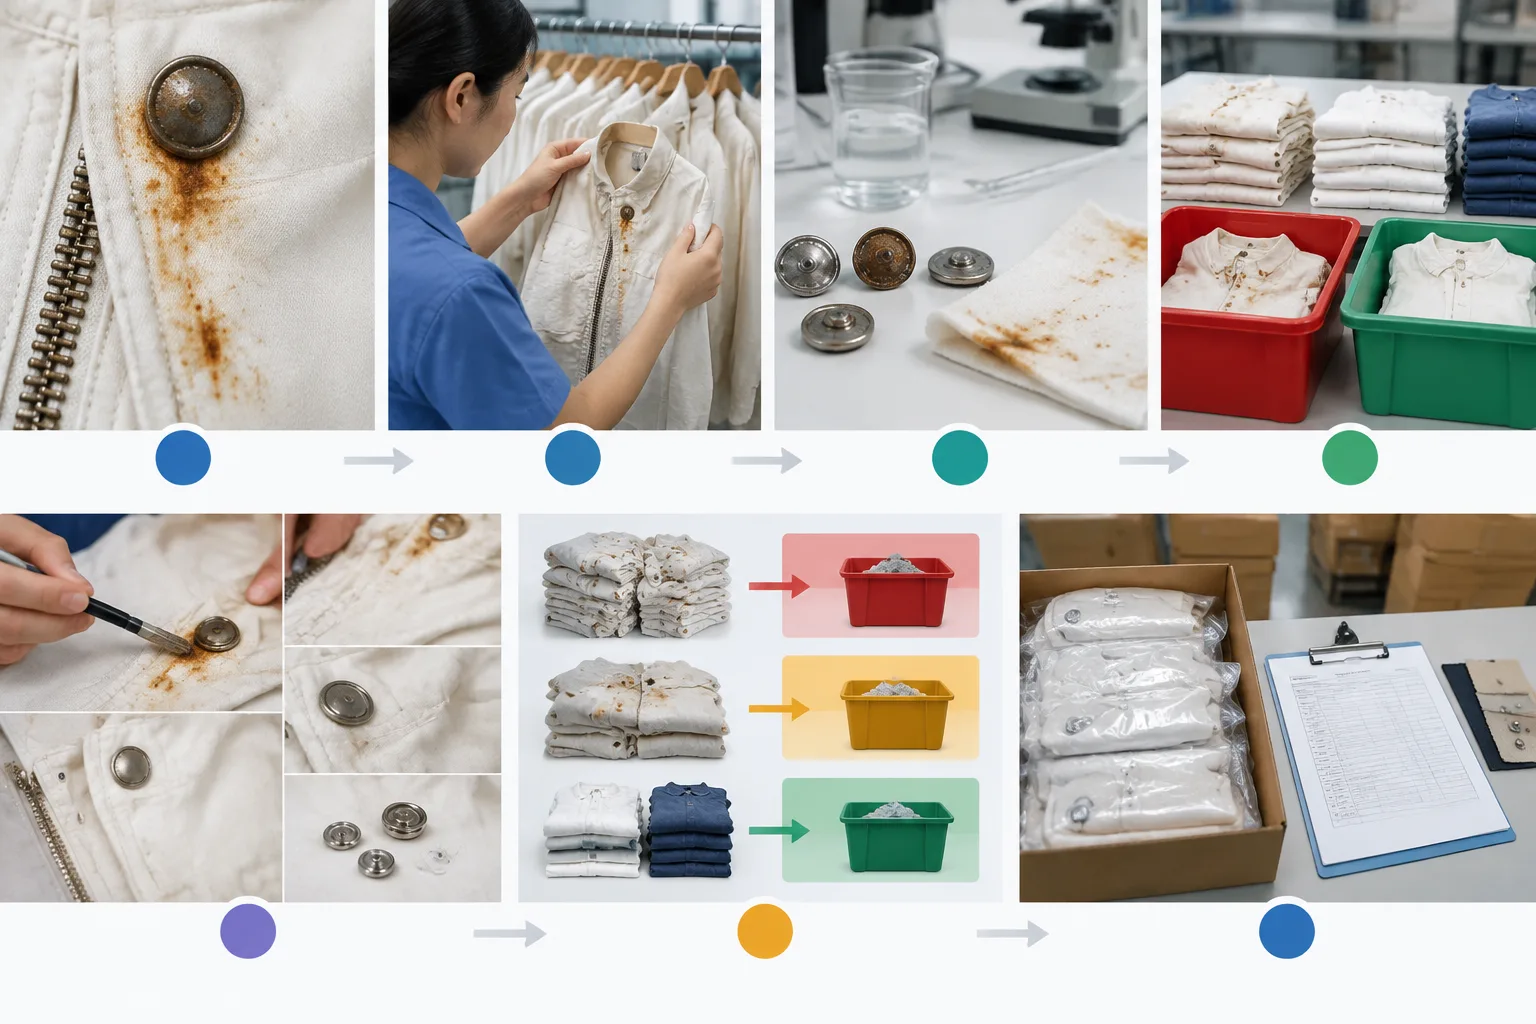
Containment should begin before the investigation reaches a final conclusion. Use traceable records to define which styles, trim lots, fabric lots, production batches, locations, shipments, or inventory groups could share the relevant conditions. Avoid expanding the scope solely because two garments have visually similar marks, but do not narrow it merely because only a few stains have been reported.
Keep containment, disposition, and root-cause decisions separate. Garments may need to be held or reviewed while the cause remains uncertain, according to the organization’s approved quality process and applicable customer requirements. A hold does not prove that the trim is defective, and releasing one group does not establish that every related batch is unaffected.
Select corrective action only after the evidence indicates which factor should change. Depending on the verified cause, the action might involve trim selection, attachment, handling, water contact, packaging, storage, or another process condition. Cleaning or repairing a stained garment should not automatically be treated as root-cause correction, and no removal method should be assumed safe for every fabric, finish, color, or trim.
Verify the chosen action on representative garments under conditions relevant to the original case. Include the actual fabric and installed construction where feasible, then examine whether the original symptom recurs and whether the change creates a different problem. Successful treatment of one garment is useful evidence, but it does not by itself demonstrate stable production performance.
Record the action, affected scope, verification conditions, observations, responsible owner, and follow-up plan. Recurrence monitoring should remain linked to the relevant lots and process changes. When follow-up is incomplete, state that the action has been implemented but its effectiveness is still pending rather than describing the issue as permanently resolved.
When is the cause confirmed, and what remains uncertain?
A cause becomes more credible when several forms of evidence agree: the stain pattern fits the proposed source, traceability shows a meaningful batch or process relationship, controlled comparisons reproduce or prevent the effect, and reasonable alternatives have been examined. Location alone—even direct proximity to a snap or button—is not enough to assign responsibility.
The closing record should distinguish direct observations from interpretations. State where and when the stain was observed, which materials and lots were involved, what comparisons were made, and under what conditions. Then describe the conclusion, contradictory findings, unresolved questions, and limits of the investigation. This prevents an assumption from later being repeated as a confirmed technical fact.
Keep the conclusion specific to the evidence. A result involving one trim lot, fabric finish, attachment arrangement, or storage condition should not be generalized to every component from the supplier or to all garments using similar hardware. Likewise, failure to reproduce a stain under limited internal conditions does not prove that the original observation was unrelated to the trim.
An investigation can be closed when the defined requirements have been addressed, the affected scope and disposition are documented, the evidence supports a sufficiently specific cause or justified qualified conclusion, and corrective action has been verified as planned. If important uncertainty remains, record it openly. “Cause not confirmed” may be more accurate and useful than unsupported blame.
As a next step, turn the findings into a repeatable investigation checklist covering sample preservation, traceability, controlled comparisons, decisions, and follow-up. Apparel teams can also review the Apparel Manufacturing Tools resources for additional educational aids. Apparel Wiki is an independent knowledge publication and does not manufacture trims, certify products, or perform laboratory testing.
Frequently asked questions
Can a rust-like stain near a button or snap prove the trim is rusting?
No. Proximity makes the trim a relevant hypothesis, but the color could have transferred from another iron-bearing source or contaminated moisture. Confirm the cause through traceability, comparisons, and controlled checks.
Why might rust-colored stains appear only after washing or storage?
Later conditions may create moisture exposure, contact, or visibility that was absent earlier. However, the stain may also have originated during a previous stage and only become noticeable afterward. Timing identifies an investigation window, not the source by itself.
How can I distinguish trim-related staining from contamination during production?
Compare stain locations and batch patterns, inspect tools and contact surfaces, review handling and storage history, and test representative garments against controls. Evidence that follows one trim lot or installed contact point strengthens the trim hypothesis, while contradictory patterns support further investigation.
Should I test the metal trim by itself or as installed on the garment?
Use both when they answer different questions, but prioritize garment-relevant comparisons. Testing only the loose component may miss interactions involving fabric, finishes, attachment pressure, folds, layers, or retained moisture.
What records should I keep when investigating a rust stain?
Keep photographs, observation dates, stain locations, style and batch details, fabric and trim lots, process history, storage information, sample identities, test conditions, results, disposition decisions, corrective actions, and follow-up ownership.
When should a garment stain investigation be considered complete?
Close it when the affected scope and disposition are documented, evidence supports the stated conclusion, alternatives have been reasonably considered, and planned corrective action has been verified. Any remaining uncertainty should be recorded rather than hidden.