Understanding Patterns: How Patterns Shape a Garment
Patterns are the blueprint of every garment—without precise, well-constructed patterns, no shirt, dress, or pair of trousers will fit, hang, or function as expected. A pattern transforms design sketches into technical reality, determining shape, proportion, fit, and production efficiency. In the world of garment manufacturing, understanding pattern making, the basics of pattern reading, and the anatomy of patterns is the foundation for producing quality apparel. This article is your comprehensive apparel pattern guide, blending first-hand factory experience with clear, step-by-step explanations to help you master the essentials: what patterns are, how notches and seam allowances work, fit adjustments, and the crucial distinction between basic blocks and production-ready patterns.
What Is a Garment Pattern?
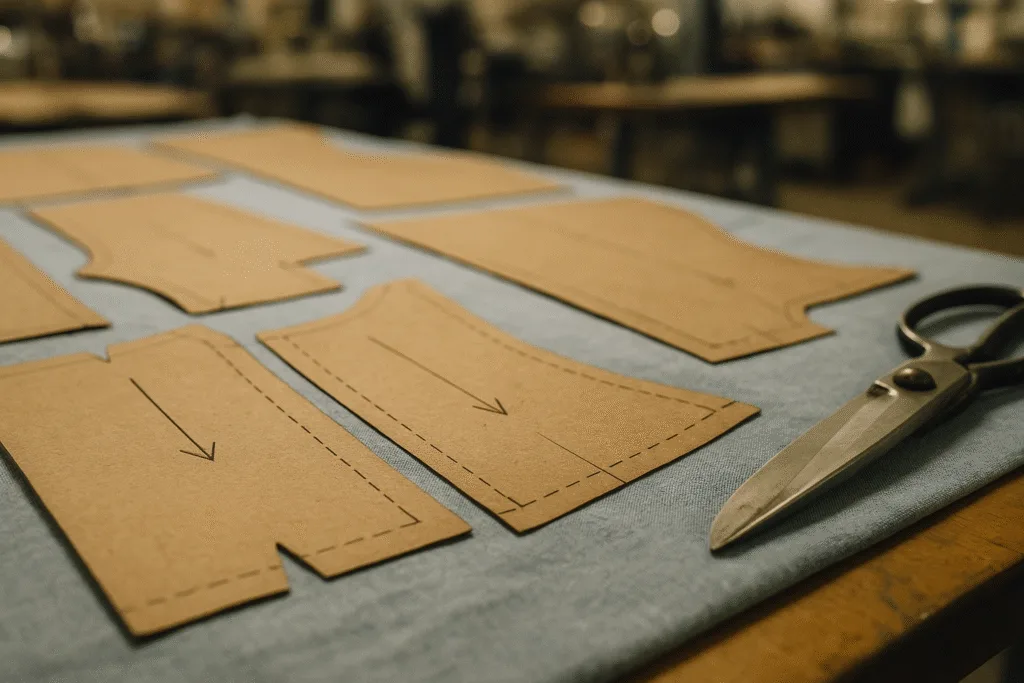
A garment pattern is a set of template pieces, usually made from sturdy paper, card, or increasingly, digital files. These pieces represent each section of a garment—front, back, sleeves, collar, and every additional panel. Patterns dictate every line and curve of the fabric before cutting and sewing begin.
- Pattern making involves translating design sketches into these precise templates.
- Pattern basics are universal, whether you’re producing a T-shirt or a 12-panel evening dress.
Each pattern piece contains critical information: cutting lines, grainlines, notches, seam allowances, and sometimes special markings for trims, pockets, or fabrication details. Great patterns speed up production, reduce waste, and ensure repeatable quality—even across different lots and factories.
The Role of Patterns in Apparel Production
Patterns bridge the gap between a designer’s vision and the production floor. For bulk manufacturing, consistent patterns are non-negotiable: one small error multiplies through hundreds or thousands of garments, leading to fit complaints, wasted fabric, or costly rework. From my experience on factory floors, even three millimeters of deviation in a neck opening can be the difference between a comfortable crewneck and a garment returned by the retailer.
- Patterns are repeatedly used to cut fabric on spreading tables or auto-cutters.
- Each pattern ensures key measurements (chest width, sleeve length, collar circumference) are controlled within agreed tolerances.
- Factories keep signed production patterns for future reference, especially for core styles.
Pattern Types
| Pattern Type | Use Case | Main Differences | Details Included |
|---|---|---|---|
| Basic Block | Fit development, style adaptations | No styling, just fit and proportion | Main panel shapes, minimal details |
| Production Pattern | Bulk cutting and sewing | All seams, finishes, trims included | Full markings, notches, allowances |
| Graded Pattern | Multi-size production | Scaled up/down from base size | Different sizes labeled and marked |
Key Elements of a Pattern: Markings, Notches, and Grainlines
Effective pattern making depends on clear notation and visible guiding marks. Missing a notch or a grainline can cause major assembly issues later in the sewing line.
Pattern Notches
Notches are small V-shaped or straight cuts on the edge of a pattern piece, serving as vital alignment points during sewing. They indicate where to match shoulder seams, side seams, sleeve caps, collars, or key construction steps.
- Single notches typically mean front edges.
- Double notches often indicate back edges or special joins (like pant backs).
- Triple notches are rare and help with complex curves or unique features.
Correct use of notches keeps production lines moving and reduces sewing mistakes. On busy sewing floors, operators are trained to look for and match notches rather than rely solely on measurement.
Grainlines and Cutting Direction
The grainline, shown as an arrow, specifies the direction of the fabric’s warp or weft in relation to the pattern. Correct grain placement ensures the finished garment drapes and stretches as intended, especially for knits and performance fabrics.
Rain’s tip from the production line: “If a sleeve cap or collar is placed off-grain, you’ll see twisting, puckering, or poor recovery—problems often blamed on sewing, but really caused by incorrect pattern placement.”
Seam Allowance: Building in Room for Construction
Seam allowance is the buffer zone of extra fabric beyond the finished garment edge, allowing room for sewing threads and construction. The standard seam allowance varies by garment type, seam location, and factory practice. Accurate seam allowances are critical—too little makes sewing difficult; too much wastes fabric or adds bulk.
- Common seam allowances are 1.0 cm for basic shirts and knits, 1.5 cm for wovens and high-stress seams, 0.6–0.7 cm for overlocked edges.
- Hems (bottom edge or sleeve) often have a deeper allowance—usually 2–4 cm, depending on aesthetic and functional needs.
- Sleeve caps, armholes, and necklines may have varying allowances to manage curves and reduce puckering.
Always confirm seam allowance conventions when working with a new factory or country, as local industry standards can differ.
Fit Adjustments and Pattern Modifications
Patterns must be revised to meet real-world body types, movement needs, and changing tastes. Fit adjustments are systematic tweaks to the shape, dimension, or balance of a pattern, performed before the final sample is approved or graded for production.
Common Pattern Adjustments
- Adding/subtracting width at the chest, waist, or hem for comfort or silhouette.
- Lengthening or shortening sleeves, bodice, or inseams to reach target measurements.
- Shifting shoulder slope to improve hang and comfort, especially in tailored garments.
- Adjusting armhole size for better mobility or to compensate for different fabric stretch.
- Altering rise or crotch curves in pants/shorts for appropriate fit—especially between men’s, women’s, and unisex cuts.
In professional production, all adjustments are marked on a pattern revision sheet and tested with fresh samples. Measurements are clearly labeled, and the reason for each adjustment is recorded. Some buyers require shrinkage allowance to be factored in as well, especially for cotton knits and denim.
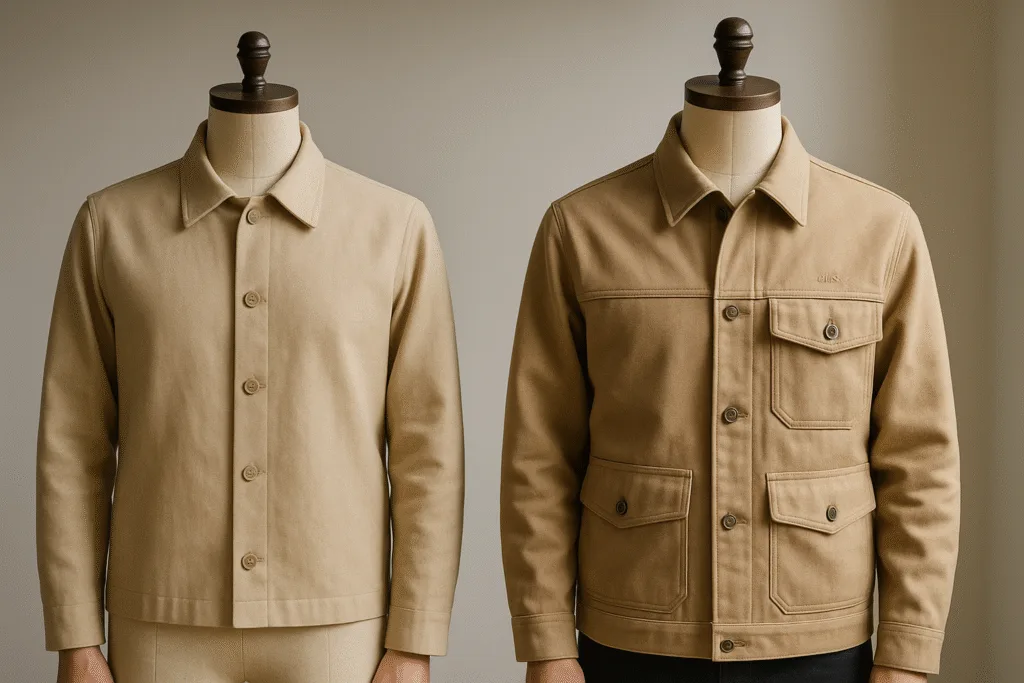
Basic Block vs. Production Pattern: Foundation to Finalization
Many newcomers mistake a basic block for a production-ready pattern. In fact, a block is just the starting point—a neutral shape representing an ‘average’ fit. All style, construction, and branding details get added afterwards. Production patterns reflect exactly what gets cut and sewn on the factory floor.
| Aspect | Basic Block | Production Pattern |
|---|---|---|
| Purpose | Fit baseline, development | Bulk garment production |
| Styling details | None | All lines, pockets, trims, logos |
| Sizes included | Usually one (base size) | All planned sizes, after grading |
| Seam allowance | Often none (added later) | Exactly as needed for construction |
| Markings | Minimal | Full details, QC tabs, notches, finish specs |
To minimize mistakes in mass production, never cut bulk fabric from a block; always finalize a production pattern and conduct pre-production sample trials first.
How to Read and Use an Apparel Pattern Guide
A proper apparel pattern guide lays out essential instructions for both development and production teams. Here’s how to interpret and utilize these guides efficiently in a factory or workshop:
- Identify Parts: Check that all key pattern pieces (e.g., body, sleeve, collar, pocket) are present and correctly labeled.
- Check Alignment Marks: Review all notches, grainlines, and reference marks for clarity and accuracy.
- Review Allowances: Confirm seam and hem allowances match factory sewing expectations.
- Size and Grade: Double-check that all size grading increments make sense (usually verified at size set sampling stage).
- Cross-Reference Spec Sheet: Ensure all pattern measurements are within the tolerance bands specified in the tech pack/spec sheet. Typical tolerances are ±1 cm for width and length on knits, and ±0.7 cm on wovens.
- Anticipate Fabric Shrinkage: Include shrinkage allowances if using unfinished or high-shrink materials. Always run a preshrink test before cutting mass fabric.
- Trial and Adjust: Cut test samples and check for fit, balance, and aesthetic. Store updated patterns as the official standard.
Factories and buyers should insist that pattern files (whether paper or CAD) are clearly dated, revision-controlled, and linked to PP sample approval to avoid confusion.
Pattern Making: Practical Tools, Techniques, and Technology
Pattern making is a specialized craft, blending artistic intuition with technical precision. Whether working by hand or digitally, accuracy at this stage dictates the garment’s final fit and appearance.
Manual (Paper) Pattern Making
- Tools include pattern paper, L-squares, French curves, notcher, tracing wheel, and drill punch for marking.
- Skilled pattern makers transfer key measurements from the spec sheet to the paper, then refine shapes with darts, pleats, and fullness as required by the design.
- Test fit is checked on mannequins or real fit models—adjustments are made and marked directly onto patterns before recutting.
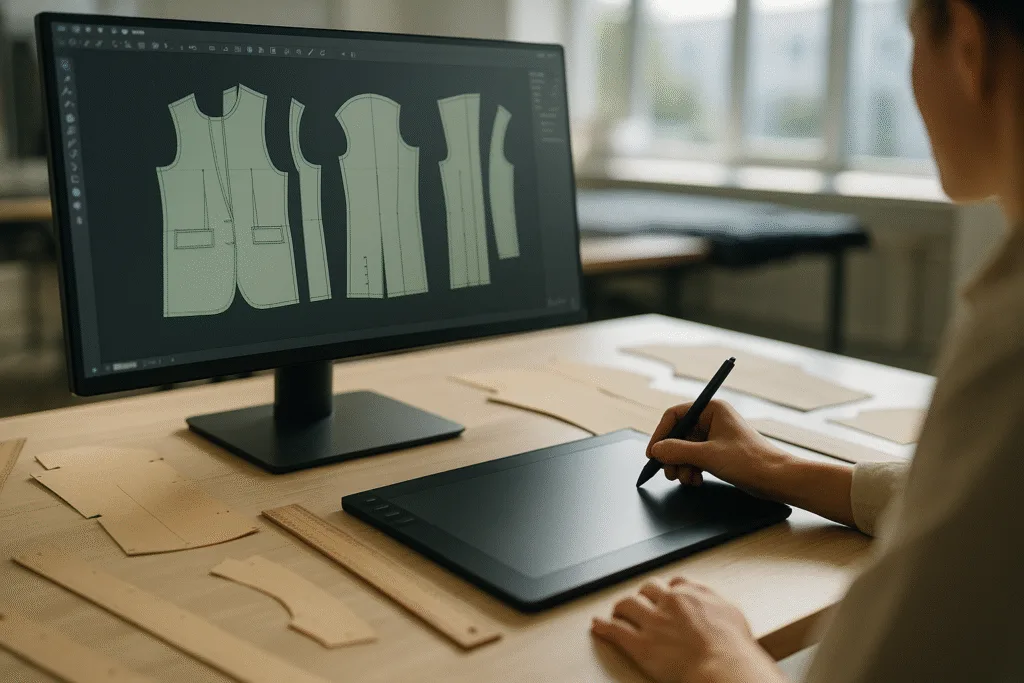
Digital Pattern Making
- Advanced factories use software like Gerber, Lectra, or Optitex to draft and grade patterns, with embedded notches, drill holes, and annotation layers.
- Digital patterns speed up changes, layering, and file transfer between designer, pattern room, and cutter.
- Accurate data storage makes it easier to re-order, scale, or adjust styles in future seasons.
Common Pattern Making Errors and How to Avoid Them
Even small mistakes in pattern basics can result in garments that twist, pull, or wear poorly. Here are frequent errors seen in bulk production and how to prevent them:
- Unmatched Notches: Causes strained or twisted seams. Always verify all notches align perfectly before finalizing patterns.
- Incorrect Seam Allowances: Too narrow allowances cause burst seams; too wide adds cost and bulk. Standardize by garment type and construction method.
- Off-Grain Pattern Placement: Leads to garments that torque or hang poorly after washing. Double-check grainline arrow orientation before spreading and cutting fabric layers.
- Superficial Revisions: Rushing adjustments on the pattern without testing in fabric causes fit issues. Always check with a sample before bulk production.
- Inconsistent Grading: Shrink/expand each size using consistent rules—avoid manual tweaks after grading which can misalign sizes or create tolerance errors.
Fit, Function, and Aesthetics: How Patterns Define Final Garment Quality
Every pattern decision impacts not only how a garment looks, but how it feels and functions. Pattern basics shape the silhouette—slim, boxy, relaxed, or tailored—and dictate mobility, comfort, and ease of wear in daily use.
- In sportswear, ergonomic seams, gussets, and dynamic curves are built into the pattern for freedom of movement.
- In workwear, durable seam allowance and reinforced stress points protect the garment from heavy use.
- In premium fashion, the pattern lines control subtle shaping for drape, volume, and on-body effect.
Pattern notches, seam allowances, and accurate grading weave together to ensure that every unit of a bulk order meets both design intent and wearer expectations. Skipping these steps means fit complaints, returns, and damaged brand reputation.
Practical Checklist: Reviewing Patterns before Production
- Lay out all pattern pieces for a complete style check; match each to the garment spec sheet.
- Verify all notches, grainlines, and annotations are present. Use colored tape or highlight for clarity in manual workshops.
- Test measurements—cross-measure crucial specs (body width, shoulder, sleeve length, rise) at points specified in the tech pack.
- Confirm seam allowance widths by measuring from stitching line. Mark allowances distinctly if multiple values are used for different seams.
- Run a trial cut in intended fabric (including prewash if required) and assemble a fit sample. Evaluate for fit, movement, silhouette, and construction accuracy.
- Document all adjustments and finalize the digital or paper pattern as standard before proceeding to bulk cutting.
- Archive both master and production-ready patterns, linking to sample/size set inspection records for future reference.
Frequently Asked Questions
What is meant by a garment pattern?
A garment pattern is a precise template, usually in paper or digital form, representing each component of a garment for cutting and sewing.
How do pattern notches help in garment construction?
Pattern notches act as matching points, ensuring accurate alignment and assembly of seams, collars, and sleeves on the production line.
Why is seam allowance important in pattern making?
Seam allowance provides extra fabric beyond the finished edge, allowing for proper stitching, strength, and consistent sizing during manufacturing.
What is the difference between a basic block and a production pattern?
A basic block is a neutral fit reference without styling; a production pattern includes all style details, seam allowances, and is used for bulk production.
How can patterns be adjusted for better fit?
Patterns are adjusted by altering width, length, curves, and slopes to accommodate target body measurements and ensure comfort and silhouette goals are met.
What tools are used in modern pattern making?
Modern pattern making uses paper, rulers, French curves, notching tools, and increasingly, digital pattern software like Gerber or Lectra for accuracy and speed.