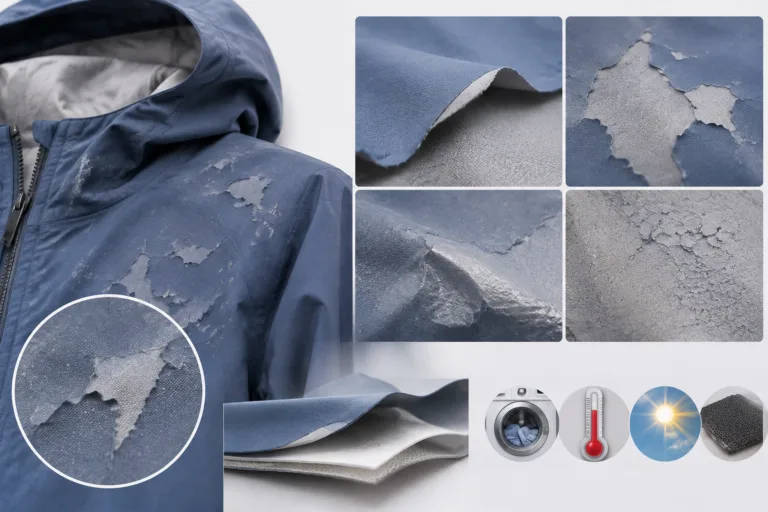
Jacket membrane peeling usually points to separation or damage somewhere in a layered construction, but its appearance alone cannot identify the failed layer or explain why it happened. Location, direction, timing, and exposure history help narrow the investigation. Apparel Wiki is an independent educational publication; its Sponsor page explains the distinction between sponsorship and editorial control.
Start by recording what the damage looks like and where it occurs. Then compare possible material, construction, handling, and care explanations against evidence. A lifted seam treatment, worn face fabric, residue, or coating damage can resemble membrane peeling, so treat each as a possibility to check—not a confirmed root cause.
Jacket Membrane Peeling Causes: Start With the Failure Pattern
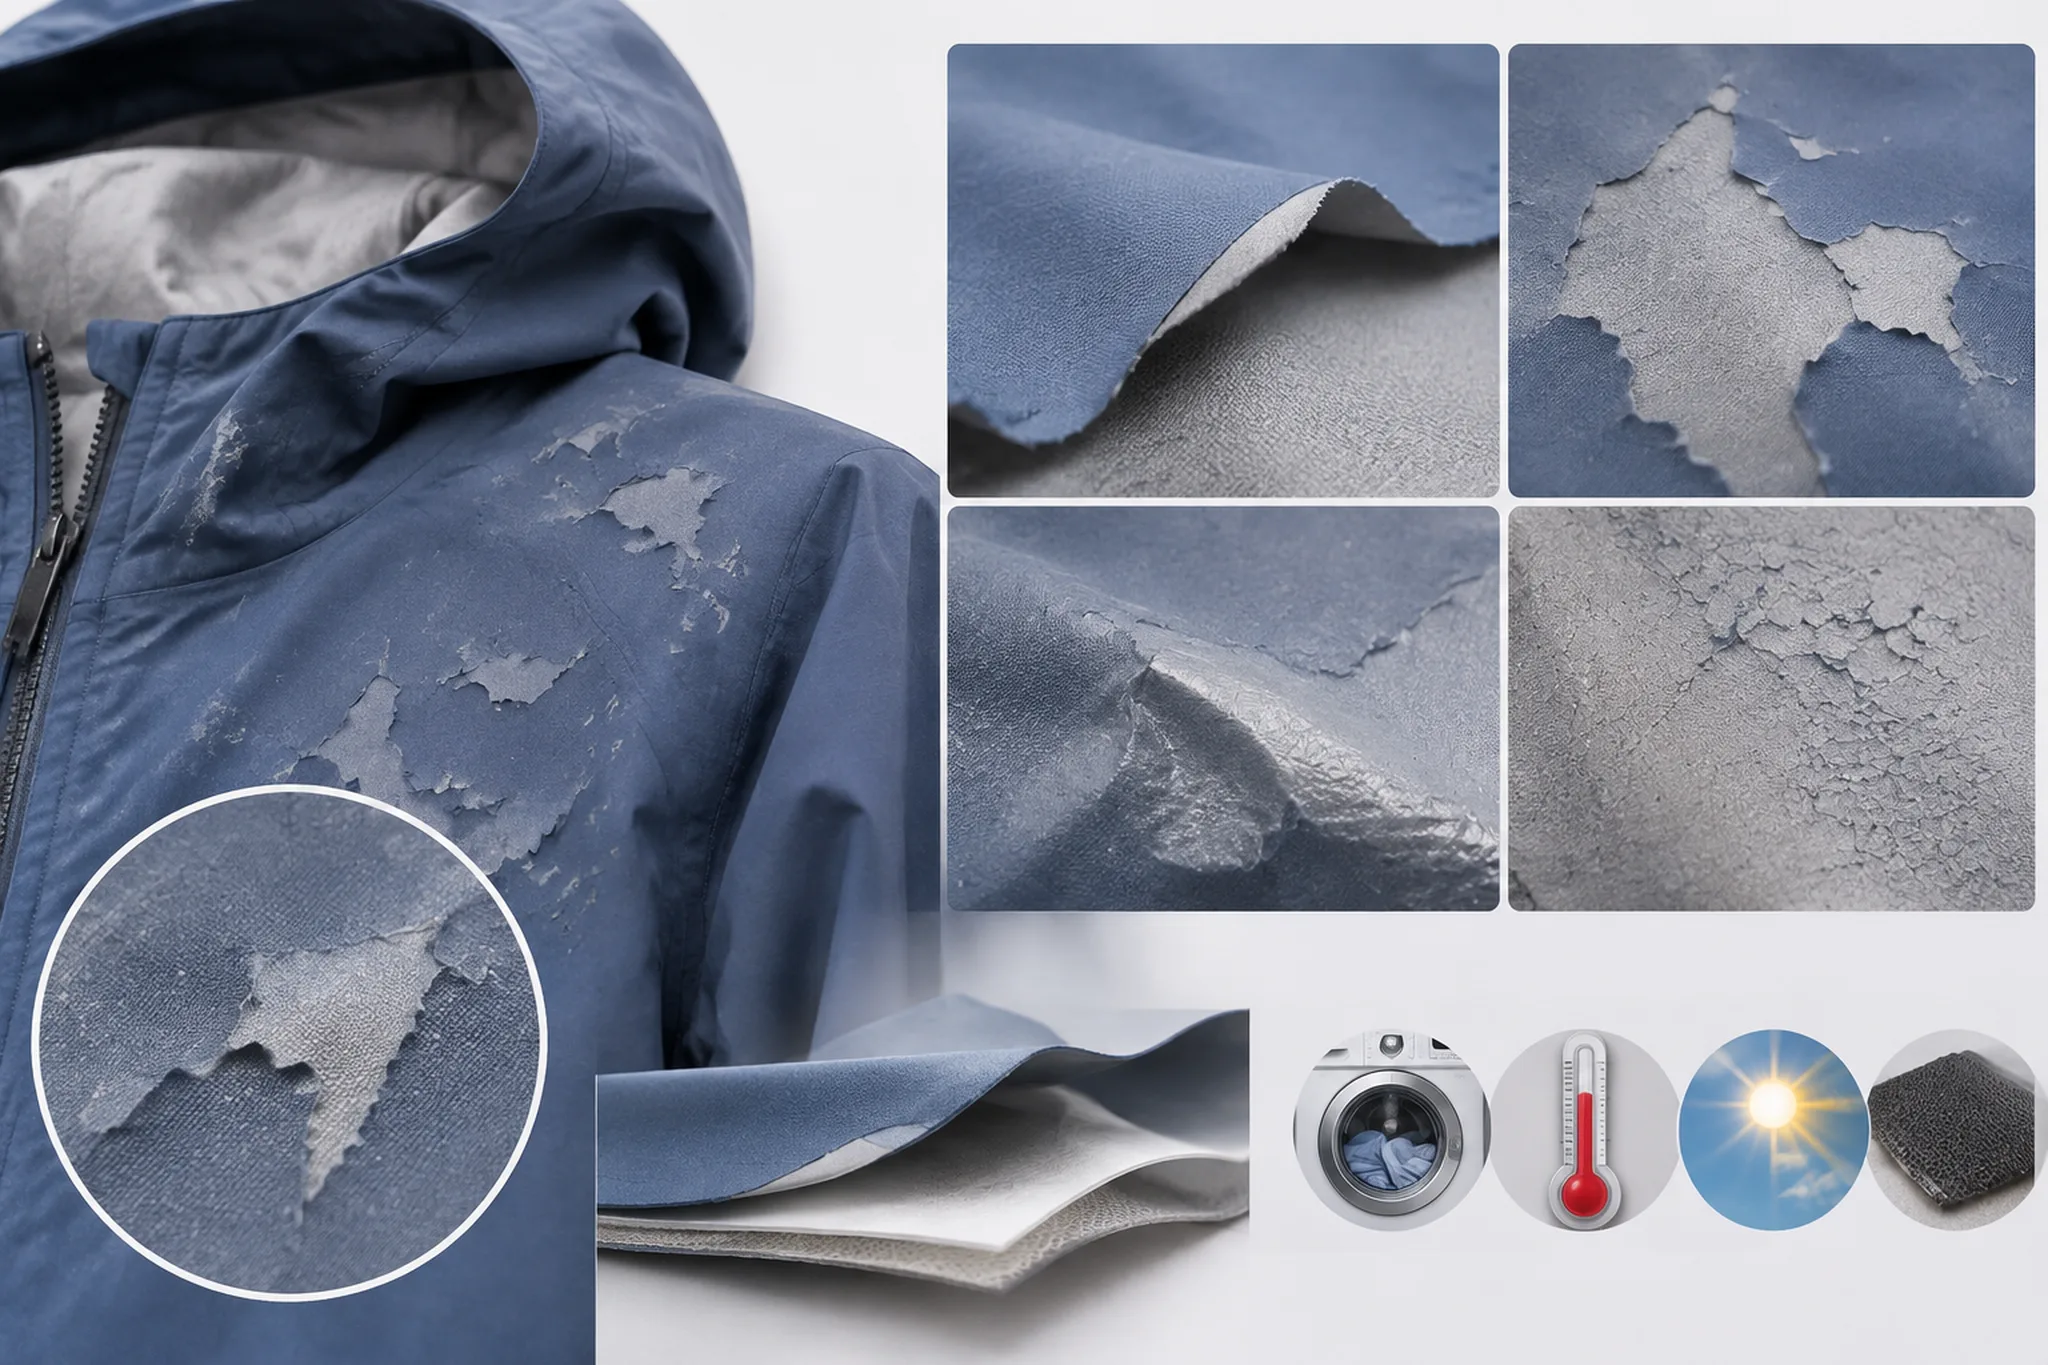
Here, “membrane peeling” describes visible lifting, bubbling, flaking, or separation at or near a jacket’s layered materials. It is a practical description, not proof of a particular failure interface. The separation could involve a boundary between layers, damage within a layer, a neighboring seam treatment, or another part of the construction.
Describe the pattern before proposing a cause. Note whether damage follows a seam, appears across a broad panel, begins at an edge, or stays localized. Record whether material lifts, cracks, blisters, or seems to transfer onto another surface. Also note its direction and whether similar damage appears on other garments.
These details help set investigation priorities but do not diagnose the cause by themselves. Seam-following damage makes the seam area worth examining first; broad or repeated panel damage makes comparison across garments and material or process records useful. Abrasion, folding, contamination, or wear may produce a similar localized appearance.
Photograph the area from multiple angles before handling it further. Record garment and batch information, age, care history, and known exposure to heat, chemicals, pressure, or mechanical handling. For each possible explanation, list supporting evidence, evidence that does not fit, and the smallest useful next check. A single image or familiar cause list is not enough to confirm why a jacket membrane peels.
How Layer Adhesion Can Fail
A layered jacket may combine face fabric, a membrane or coating, bonding materials where present, and seam treatments. The visible symptom does not reveal which component has failed. One possibility is separation at a boundary between layers; another is damage within a material, or tearing of the base fabric. These are useful distinctions for investigation, not conclusions that can be made from appearance alone.
Consider material and interface conditions as hypotheses. Surface condition, compatibility between joined materials, aging or storage history, moisture exposure, and variation between lots may be relevant. Records or comparison garments can help determine whether a pattern is shared, but a difference between lots or a record of exposure does not independently establish cause.
Construction and handling histories are also worth reviewing. Heat, pressure, time under process conditions, tension, contamination, storage, and mechanical handling may be relevant variables. Their importance depends on the materials and process involved; none should be treated as a universal explanation or a specification without supporting evidence.
Peeling noticed after laundering, flexing, abrasion, or repeated environmental exposure may have become visible during use. That timing does not prove the exposure created the weakness. It may instead have revealed damage or a vulnerable interface that was already present.
Use the proposed mechanism to guide the next check, not to claim proof. Preserve the garment and compare its pattern with available records or a suitable unaffected sample. If the actual failure mode remains unclear, further examination or an applicable validated method may be needed; do not infer which layer separated from the symptom alone.
A Practical Diagnosis Matrix for Jacket Membrane Peeling
Use the patterns below as investigation leads, not reliable cause indicators. Begin with documentation and comparison before disturbing the area. The same visible pattern can fit more than one explanation, and each suggested check should be weighed against the garment’s construction and history.
| Observable pattern | What it may suggest | Initial check | What could change the interpretation |
|---|---|---|---|
| Separation follows a seam | A seam treatment, bonding interface, or local construction condition merits review. | Document the seam and compare affected areas with similar seams on an unaffected garment. | Panel preparation, wear, or handling may also contribute. |
| Peeling spans a broad panel or recurs across garments | A shared material, bonding, storage, or finishing factor is worth investigating. | Compare affected and unaffected garments or lots; review available material and process records. | Different care or storage histories may make garments less comparable. |
| Lift appears to start at an edge | An edge condition or local damage may be relevant. | Photograph the edge and record whether nearby fabric or another layer also appears damaged. | Handling, construction, or later wear may produce a similar appearance. |
| Damage is localized near a fold or worn area | Folding, compression, abrasion, snagging, or contamination may be relevant. | Compare the location with recorded use and nearby garment surfaces. | A weak interface could also become visible at a stressed location. |
| Cases differ by batch or care history | A shared history or a difference between groups may help narrow the inquiry. | Separate the records by batch and documented care; compare like with like. | Construction, age, storage, and use may differ between groups. |
Prioritize evidence that separates competing explanations. Preserve an untreated comparison garment if available, document the current condition, and review relevant records before changing or removing material. If a check requires disturbing the sample, record its condition first and use an applicable validated method rather than improvising a test.
Then choose one useful next check and state what result would support or weaken each leading explanation. A seam pattern, a batch difference, or a care history can guide that choice, but none establishes a cause without corroborating evidence. This approach makes jacket delamination troubleshooting more informative while keeping the diagnosis open when the evidence is incomplete.
Build and Test a Root-Cause Investigation
Turn the matrix’s leading explanations into a written investigation plan. Define which garments need attention, what evidence must remain available, and what decision the next check should support. Give each sample an identifier so photographs, records, and later observations remain connected.
Separate affected units from other stock while establishing scope. Include visibly different examples and apparently unaffected garments from the relevant population. Record garment age, reported care, and when damage was first noticed. Mark locations on a garment sketch so different reviewers can compare the same areas.
Keep a cause-and-evidence log with these fields:
- Hypothesis: the proposed explanation, stated separately from observed facts.
- Supporting observation: the specific record or sample feature that makes the explanation worth investigating.
- Contradiction: evidence that weakens it, including unaffected garments with apparently similar histories.
- Next check: the comparison needed and the observation expected if the explanation is correct.
- Owner and decision date: who will obtain the evidence and when the team will assess it.
Select a comparison garment that matches the affected sample as closely as practical in material, construction, batch, age, and treatment. Write down remaining differences. An unworn retained sample and a worn return can provide useful information, but their different histories limit conclusions about care.
When a controlled check is appropriate, define the expected result before making the change. Change one meaningful factor at a time where practical. Record what remained constant, what changed, and any departures from the plan. If several factors change together, attribute the outcome to that combination until further evidence separates them.
Use an applicable validated method when the question requires technical testing. Establish the project’s requirements before interpreting results; do not invent conditions or acceptance limits from the appearance of the damage. Record the samples assessed, conditions, observations, and any new damage alongside improvement.
Closure requires a traceable connection between the action, the relevant batch or process, and results meeting predetermined requirements. Record who reviewed those results and any planned follow-up for recurrence. If that connection remains incomplete, write: Corrective action taken; effectiveness remains unverified.
Separate Material, Process, Care, and Measurement Explanations
Interpret the findings by asking which explanation accounts for both affected and unaffected garments. A familiar cause deserves consideration, but its name does not make it the best explanation. Keep each conclusion tied to records that another reviewer can examine.
Material or interface. Similar separation across comparable garments makes shared material history worth investigating. Compare material identifiers, lot records, incoming condition, and storage histories. Check whether the affected garments also shared construction or finishing operations. A batch association alone cannot separate a material explanation from a process used on that batch.
Construction or process. A repeated location associated with an operation directs attention toward that operation’s records. Compare seam construction, panel preparation, handling, and recorded heat, pressure, or tension conditions where relevant. Seek differences between affected and unaffected production. Do not assign an incorrect machine setting without evidence of the actual setting and its relevance.
For example, if garments sharing an operation show damage while comparable garments from another operation do not, prioritize that difference. If the groups also used different material lots, the comparison cannot yet distinguish process from material. Document both differences before choosing the next check.
Use or care. Documented laundering, chemical contact, abrasion, folding, and environmental exposure provide comparison variables. Record products and procedures as reported, distinguishing records from recollection. Peeling noticed after washing establishes timing; it does not establish that washing originated the weakness. Keep a pre-existing interface problem among the competing explanations until evidence addresses it.
Observation or measurement. Review whether investigators described the same component and location consistently. Residue, contamination, or lifting of a neighboring component could have been labeled membrane peeling. Retain the original photographs and descriptions when revising an interpretation. Where component identity remains uncertain, seek an appropriate validated examination rather than assigning it from appearance.
Allow mixed explanations. Investigate whether exposure revealed an existing weakness, whether construction concentrated damage locally, or whether inconsistent descriptions combined separate problems. Record the supported contributors and leave unresolved relationships open.
What to Record Before Closing the Case
Assemble a case record linking photographs, damage location and direction, affected scope, material and process history, care conditions, and comparison samples. Include each hypothesis, completed check, action, responsible person, and follow-up result.
As your next step, compare that record with the project’s predetermined requirements and identify the missing evidence. State separately whether the cause is supported and whether corrective-action effectiveness is verified. If either remains unresolved, preserve that status. Check the applicable authoritative method before making a technical claim that the current records cannot support.
Frequently Asked Questions
Does jacket membrane peeling always mean the waterproof layer has failed?
No. Visible peeling alone does not establish which component has separated or whether waterproof performance meets the garment’s requirements. Record the affected area and identify the construction involved. Any performance conclusion needs evidence appropriate to that requirement.
How can I tell whether peeling is from the membrane, seam tape, adhesive, or coating?
Start with construction information and photographs showing the damaged area in context. Describe what lifts and what remains without assigning an uncertain material identity. If records and observation cannot identify the component, preserve the sample for an appropriate validated examination.
Can washing or chemical exposure cause a jacket membrane to peel?
Treat washing and chemical exposure as possible contributors to investigate, rather than confirmed causes. Compare documented exposure with the garment’s care instructions and relevant material information. Damage appearing afterward does not exclude a weakness that existed before the exposure.
What information should I record before investigating a peeling jacket?
Record garment and batch identifiers, age, first appearance of damage, location, direction, and photographs. Add available construction, process, storage, use, and care history. Identify which details come from records, which were reported, and which remain unknown.
Can one repaired or tested jacket prove that the production problem is solved?
No. A successful result describes that garment under the recorded conditions. Production closure also needs evidence addressing the affected scope and predetermined requirements, with traceability to the corrective action. Keep effectiveness unverified when that broader evidence is missing.