
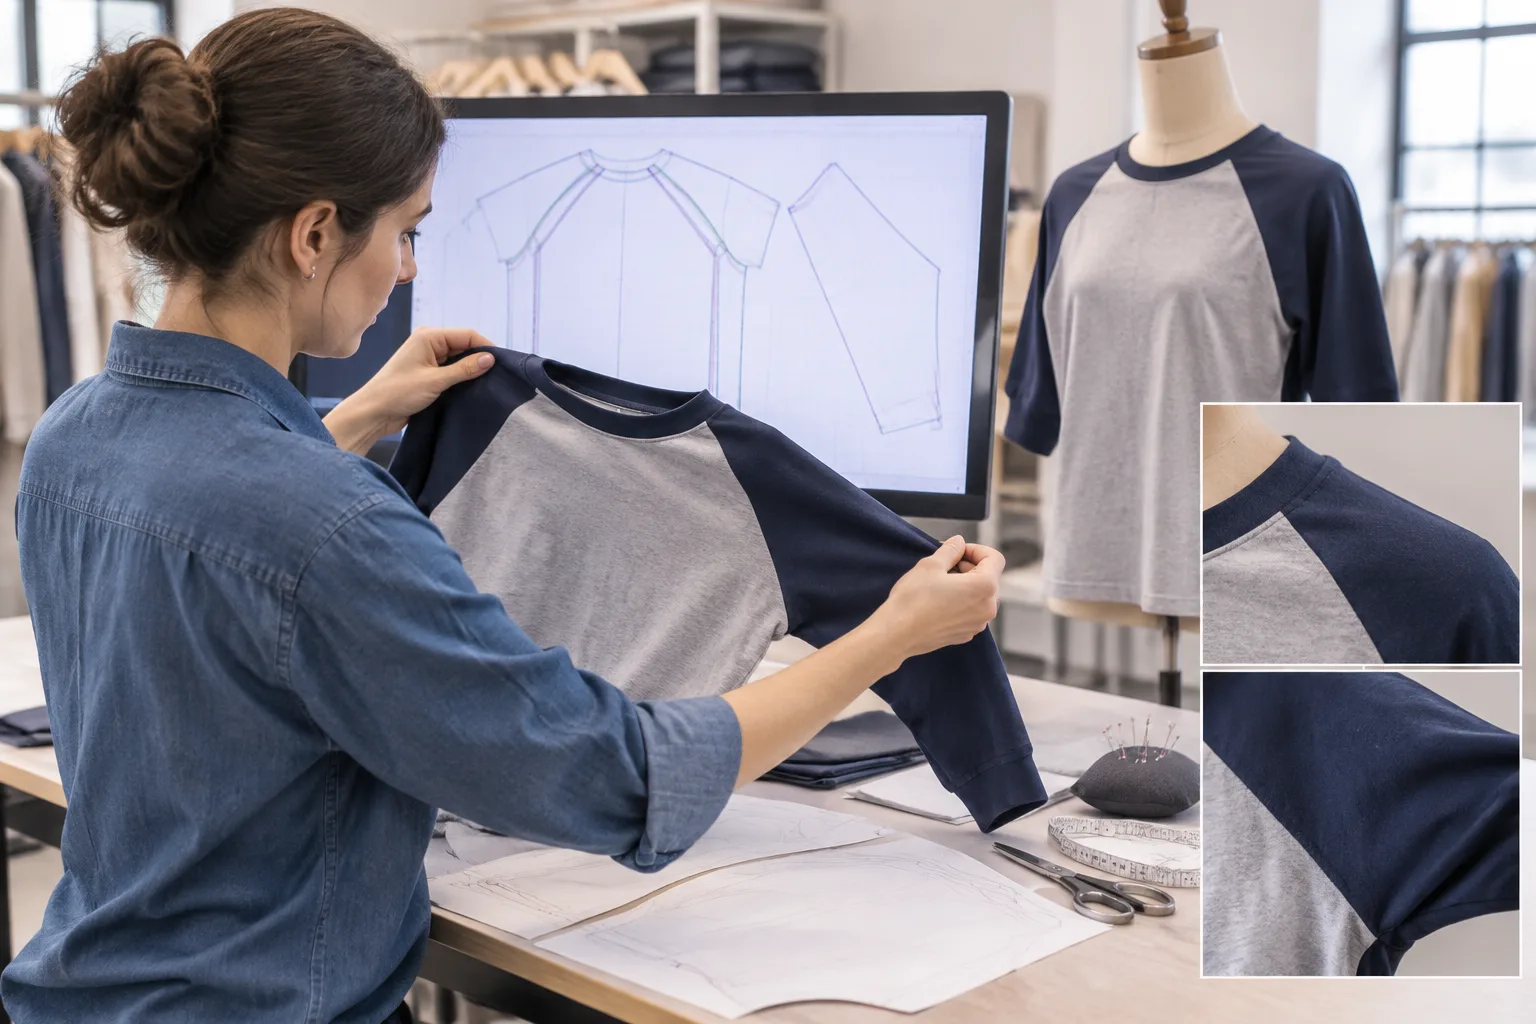
To build digital raglan sleeves, start with compatible front and back bodices and a sleeve block, place the front and back raglan seams, develop the adjoining sleeve areas, and check the resulting stitching edges, notches, grainlines, and junctions. A raglan sleeve joins the bodice along seams that extend toward the neckline, so changing the style line changes both the bodice pieces and the sleeve construction.
Pattern CAD makes these relationships easier to preserve and inspect, but matching lines on screen do not prove garment fit. The working sequence is to establish the seam placement, construct and identify the sleeve pieces, prepare clear assembly references, and then evaluate the pattern against the intended design. Keep the drafting decisions separate from seam allowances: an allowance supports assembly, while wearing ease belongs to the garment dimensions and fit plan.
How to build digital raglan sleeves from a base pattern
Begin with a front bodice, back bodice, and compatible sleeve block. Before drawing, record the block size, intended fit, grain direction, and existing seamline locations. The sleeve and bodice should belong to the same design logic; a visually similar block is not enough if its balance or fit intent differs.
Save an unchanged copy of the base pattern before editing. Build the new raglan sleeve pattern CAD work from the stitching lines rather than from the outer cutting outlines. The stitching line describes the intended joining relationship. The cutting line includes seam allowance and therefore should not be used as a substitute for the garment’s finished dimensions.
The basic sequence is straightforward. First, place the front and back raglan seams on the bodice. Next, transfer the relevant shoulder and upper-bodice areas into the sleeve construction so the new sleeve edges correspond with the bodice edges. Then identify the resulting pieces and review their matching relationships.
Keep design changes separate from fit changes. A different raglan curve can alter the adjoining bodice and sleeve areas, while adding seam allowance does not create wearing ease or correct an unsuitable block. The exact CAD commands will vary by system, so treat this as a drafting and checking approach rather than a universal software procedure.
Place the front and back raglan seams
Place the front and back raglan seams with the neckline, underarm area, and intended style line visible together. A raglan seam commonly travels from the underarm region toward the neckline, but its exact position and curve depend on the block, design, and fit intent. There is no single seam shape that suits every garment.
Keep the front and back seams distinct from the beginning. Label the front and back endpoints, adjoining edges, and related pattern pieces in a way that remains visible during later construction. This reduces the chance of attaching a front sleeve edge to a back bodice edge or reversing the intended assembly relationship.
Work from the bodice seamline and develop the corresponding sleeve edge as part of the same pattern relationship. If the raglan curve moves, inspect the area that it removes from the bodice and the area that must be added or reshaped on the sleeve. Do not treat the edited curve as an isolated line. A local style-line change can affect balance and the adjacent pattern pieces.
The neckline endpoint and underarm endpoint are useful references, but endpoints alone do not define a successful seam. A curve may meet at both ends while differing along its length. Keep the adjoining stitching edges identifiable so they can be walked and compared after the sleeve pieces are constructed.
Also distinguish a visual curve from a construction edge. A smooth-looking line in CAD may still produce an unclear junction, an unintended change in the underarm relationship, or a front-to-back interchange. Check each endpoint, transition, and adjoining edge as a connected system before finalizing the new raglan bodice pattern.
Construct the sleeve pieces around the new seamlines
Once the bodice seams are placed, develop the sleeve around the new front and back raglan edges. The areas assigned to the sleeve must correspond with the areas removed or reshaped on the bodice. This creates matching pattern relationships rather than simply drawing a sleeve outline that appears to reach the neckline.
Keep the original sleeve’s underarm relationship in view while reshaping its upper area. The underarm seam, sleeve hem, and intended sleeve balance still matter after the upper sleeve changes. Joining two curves in CAD can show that edges meet, but it does not by itself preserve the intended distribution of the sleeve around the body.
Identify every resulting edge before moving on. At minimum, mark the neckline edge, sleeve hem, front raglan edge, back raglan edge, and underarm seam. If the sleeve is divided into multiple pieces, identify the corresponding edges on each piece. Clear piece identity makes later seam walking and sample review more reliable.
A one-piece raglan sleeve keeps the sleeve construction together around the upper area. A two-piece raglan sleeve introduces an additional upper-sleeve seam and therefore another joining relationship to control. Both are design choices. Use the selected construction consistently when transferring edges, placing notches, and reviewing the assembled pattern.
Do not assume that the layout that works for one raglan sleeve pattern will work for every garment. Fabric behavior, intended movement, sleeve shape, and the starting block can change the relevant relationships. The useful question is whether each sleeve piece matches its intended bodice edge while preserving the chosen underarm, hem, and construction plan.
Mark orientation, grain, and assembly references
Before checking the pattern, make the pieces unambiguous. Name each piece and identify front versus back sleeve edges, the neckline edge, the underarm edge, and any upper-sleeve seam. Mark the intended assembly relationships so a later copy, export, or printout does not depend on remembering how the pieces appeared on screen.
Retain or add matching notches at useful seam junctions and reference points. A notch should remain associated with the seamline it describes, especially when a curve has been edited or transferred. Front and back raglan sleeve notches should not be interchangeable, and their placement should help distinguish the corresponding edges during assembly.
Inspect the neckline and underarm junctions before adding or finalizing cutting lines. If the design includes an upper-sleeve seam, check that junction as well. Look for clear transitions between adjoining pieces, with no ambiguous corner or mark that could be interpreted as belonging to a different seam.
Confirm the pattern grainline on each piece. Grain direction is a pattern decision that affects how the piece will be evaluated and assembled; it cannot be inferred merely from a visually balanced CAD layout. A sleeve can look symmetrical on screen while still carrying an unintended orientation.
Finally, keep the orientation marks with the pattern pieces during revisions. Seam lengths alone do not explain which edges join, which direction a piece faces, or how the front and back balance is intended to work. Clear names, grainlines, notches, and junction references prepare the raglan pattern pieces for the detailed stitching-line review that follows.
Check matching seamlines and CAD geometry
A CAD review should begin with the stitching lines, not the outer cutting outlines. Compare each bodice raglan edge with the sleeve edge intended to join it. Follow the complete curve from one junction to the other, and account for deliberate shaping before treating a difference as an error.
Walk the adjoining pieces at the neckline and underarm. Check that the front edge meets the front sleeve edge and that the back edge meets the back sleeve edge. Confirm that transferred notches remain on the correct seamline. A smooth curve on screen is not enough if the adjoining pieces use different endpoints, turns, or orientations.
After the stitching geometry is settled, inspect seam allowances and cutting lines around curves and corners. Seam allowance supports assembly; it does not create wearing ease or correct a mismatch in the underlying pattern. For a lightweight knit, two edges might appear to match at their endpoints while diverging through the curve. Walking the full stitching edges reveals that condition more clearly than comparing the cutting outlines. The intended construction and fabric behavior may affect the correction, so the review is diagnostic rather than a universal pass-or-fail tolerance.
| Observable CAD input | Implication | Initial check or correction | What could change the choice |
|---|---|---|---|
| Front raglan edges do not match | The bodice and sleeve may not be joinable as intended. | Walk both stitching lines and verify the front endpoints before reshaping a related edge. | Designed ease, shaping, or the selected construction may explain part of the difference. |
| Back raglan edges do not match | The back balance or sleeve relationship may have changed. | Check the back seam, neckline junction, underarm, and piece identity together. | The back style line, block fit intent, or sleeve layout may require a coordinated revision. |
| Notches are displaced | Assembly references may no longer describe the intended seam locations. | Move or recreate the marks from the settled stitching line and confirm their front or back identity. | A changed curve, seam subdivision, or upper-sleeve seam may require different reference points. |
| Seam junctions are unclear | Pieces may be oriented or assembled incorrectly even when lengths appear similar. | Label the neckline, underarm, front, back, and any upper-sleeve transitions. | The chosen one-piece or two-piece construction changes which junctions must be matched. |
This table supports a focused check of raglan seamlines and raglan sleeve seam allowance. It does not replace the design decision or establish a universal measurement limit.

Evaluate the sample and revise the pattern
A clean CAD audit confirms pattern relationships, but it cannot establish how the garment will fit or move. Evaluate a sewn sample against the intended design. Observe the neckline, the shoulder-to-underarm area, sleeve movement, and front-to-back balance. Keep these observations separate from screen measurements.
When the sample shows a concern, connect the observation to the pattern relationships before editing. For example, if raising the arm exposes a balance issue, review the front and back raglan seams with the adjacent bodice and sleeve areas. Changing only the sleeve edge may hide one symptom while leaving the related balance problem unchanged.
Record the observation, the suspected pattern relationship, and the revision made. Then repeat the matching-seam and notch checks before comparing the next sample. This keeps a revision trace tied to the same fit intent instead of allowing several unrelated edits to accumulate without a clear basis.
Review the neckline and underarm transitions again after any change to a raglan curve. A local adjustment can alter the adjoining edge, its junction, or the way front and back pieces balance. Check the cutting lines only after the revised stitching lines are coherent. Do not use additional seam allowance to conceal a seamline mismatch.
Grading requires a separate review. Point movement rules describe how selected points change between sizes, but they do not by themselves establish fit in every size. Check matching edges, notches, grainlines, junction references, and the intended fit across the size range. Pay attention to the smallest and largest sizes as well as an intermediate size; a satisfactory base size does not validate all others.
The same principle applies when the design changes after sampling. Preserve the prior pattern version, identify the changed relationship, and compare the revised piece with its intended partner. If the sleeve is divided into two pieces, check both upper-sleeve edges and their junctions. If it remains one piece, confirm that the front and back edges still carry unambiguous orientation marks.
Use sample observations as conditional evidence about that design, block, and fabric combination. They are not proof that every raglan sleeve will behave the same way. The practical goal of raglan sleeve fit review is a controlled link between what is observed in the garment and what is changed in the pattern.
Keep a repeatable raglan pattern check
A repeatable raglan pattern check follows the same sequence: establish the seam placement, construct and identify the sleeve pieces, confirm stitching-edge relationships, and evaluate the sewn sample. Keep the intended seam matches, notch locations, grain decisions, and revision notes with the CAD pattern. For the next educational review, compare the revised pattern and sample against those recorded assumptions before making another change.
Frequently Asked Questions
Should raglan seam lengths be checked on the stitching line or the cutting line?
Check the intended joining edges on the stitching line first. Cutting lines include seam allowances and can obscure a mismatch. Review the cutting lines afterward for usable corners, curves, and consistent assembly allowance.
What should I check if the front raglan seam matches but the back seam does not?
Verify that the back bodice edge is paired with the correct back sleeve edge and that the endpoints and notches are correctly identified. Then walk the full back stitching lines and review the adjoining neckline, underarm, and balance relationships.
Can matching CAD seamlines confirm that a raglan sleeve will fit?
No. Matching seamlines show that the intended pieces can relate for assembly, but CAD geometry does not establish wearing comfort, movement, drape, or overall balance. A sewn sample remains necessary for evaluating the intended design and fabric combination.
How do I keep front and back raglan sleeve edges from being confused?
Use clear piece names, front and back labels, distinct notches, grainlines, and junction references. Keep those marks associated with their stitching lines through each revision, and verify the assembly relationship before finalizing cutting lines.
Do I need to recheck raglan seams after grading the pattern?
Yes. Recheck matching edges, notches, junctions, grain direction, and the intended fit across the graded sizes. A base-size review or point movement rule alone does not confirm that every size remains coherent.