
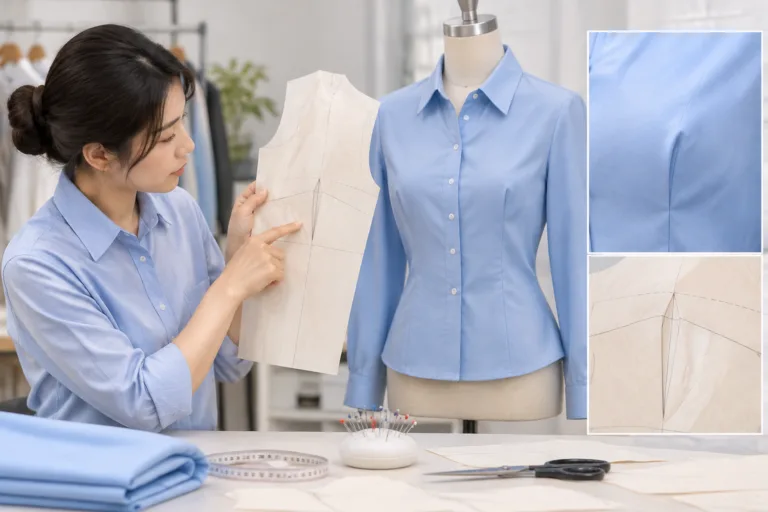
Blouses bust dart placement is the location and direction of shaping that guides fabric toward the bust area. To judge it, compare the dart with the intended silhouette, wearer, ease, fabric, grain, and garment balance rather than looking for one universally correct position. A side-seam, waist, neckline, or armhole dart can each be appropriate when its design purpose is clear. This independent guide explains the evaluation process; Apparel Wiki’s Sponsor page is separate from the technical judgment described here.
The practical question is whether the dart shapes the blouse smoothly without creating unwanted pointiness, drag lines, collapsed areas, excess fullness, or imbalance elsewhere. Begin with the pattern, then assess the assembled blouse on the intended body or form. Keep placement separate from dart intake and length, because changing the wrong variable can hide the real cause of a fit problem.
What Bust Dart Placement Means in a Blouse
Bust dart placement describes where shaping enters the garment and the directional relationship between that shaping and the bust area. The dart line is the visible or planned line running from its opening toward the area being shaped. The dart tip is the pattern termination of that shaping. The bust point is the body reference used to understand the fullest area of the bust. These points are related, but they are not automatically identical.
A pattern dart usually approaches the bust point rather than ending directly on the anatomical point. The visible termination needs to be considered with the fabric, pressing, ease, and wearer in mind. A dart that ends too close to the fullest area may emphasize a point; one that ends farther away may distribute the transition more softly. The suitable relationship is therefore a fitting and design decision, not a universal distance or angle.
Placement is also different from dart intake. Placement identifies where the dart originates and where it directs shaping. Intake is the amount removed from the pattern to create that shaping. Dart length, the number of darts, and shaping absorbed into princess seams or other style lines are separate decisions. Two blouses can use similar total intake but look different because the shaping enters from different design lines.
For a close-fitting woven blouse, a dart may provide visible, controlled shaping. A relaxed blouse may use more ease or distribute shaping through seams, making the dart less visually dominant. A knit or dartless style may rely more on stretch, ease, or molded pattern lines. In every case, assess the intended movement and silhouette first.
Body shape, posture, grain, construction, and fabric behavior can change the result. Appropriate blouse bust dart placement directs shaping toward the bust area while preserving the balance of the front, side seam, neckline, armhole, and hem. It should be judged as part of the complete garment, not as an isolated line on paper.
Read the Pattern Before Judging the Sample
Start with the paper or digital pattern before fitting the sewn blouse. Mark the dart origin, direction, and termination. Ask whether the line points toward the intended bust area and whether its origin makes sense for the design line carrying the shaping. A clean-looking pattern is only an initial screen; it does not prove that the finished blouse will lie smoothly.
Read the dart together with the center front, grainline, side seam, armhole, neckline, waistline, and closure. A side-seam dart may support a horizontal design line, while a waist dart may work with a vertical silhouette. A neckline or armhole dart may be chosen to preserve another style line. These are comparison points, not automatic claims that one origin produces better fit than another.
Record the intended ease and silhouette before altering the pattern. A close-fitting blouse exposes shaping more clearly, while a loose blouse may soften or redistribute its visual effect. Also note whether shaping is shared with seams or style lines. The pattern should be assessed as a system that will later include the main fabric, lining, interfacing, closures, and other components.
| Observable input | Likely implication | Initial evaluation choice | Variable that may change it |
|---|---|---|---|
| Side-seam origin | Shaping enters through the side design line | Compare its direction with the bust area and side balance | Ease, side-seam position, fabric, and closure |
| Waist origin | Shaping is connected to the vertical body line | Check the waist relationship and intended silhouette | Posture, center-front length, and style-line goals |
| Neckline origin | Shaping is carried into the upper front design | Review neckline appearance and dart termination | Neckline shape, print, pressing, and ease |
| Armhole origin | Shaping is linked to the armhole area | Inspect armhole balance and movement requirements | Shoulder balance, sleeve construction, and fabric behavior |
Use the table as an observation framework, not a production specification or approval record. Before calling the pattern suitable, confirm that the intended grain and balance remain clear when the dart is closed or transferred. Then test the complete construction in the final or closely representative fabric.
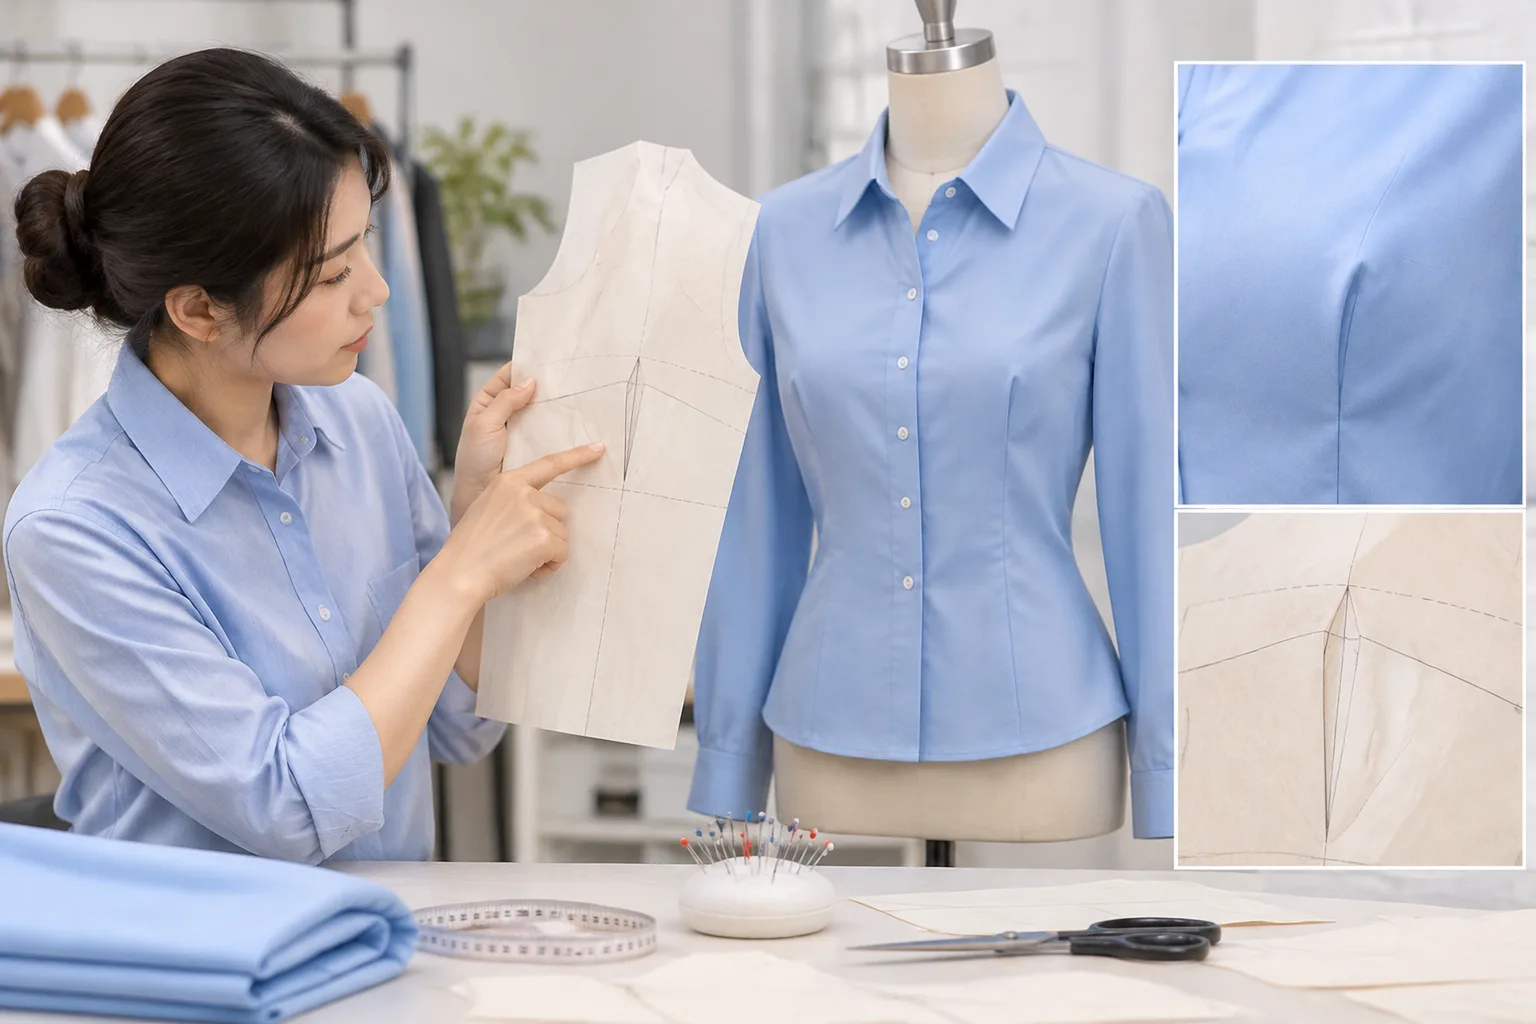
Evaluate the Sewn Blouse on the Intended Body or Form
Evaluate the assembled blouse from the front and side, first while standing and then during ordinary movement. Check whether the dart approaches the bust area without a pronounced bubble, collapsed area, or excess fullness near its tip. Do not immediately move the dart when the direction seems appropriate; dart length, intake, ease, or construction may be responsible.
Observe horizontal, vertical, and diagonal lines around the bust, side seam, armhole, neckline, and waist. Treat each line as a prompt to compare variables, not as a diagnosis by itself. Posture, grain, shoulder balance, fabric stretch, pressing, and assembly can all affect what appears on the front body. A static front view may conceal a problem that becomes visible when the wearer raises an arm or adopts the intended wearing posture.
Use the final fabric and planned closures, lining, interfacing, or support materials when possible. Those components can change how the dart opens, presses, and transitions into the surrounding cloth. An isolated pattern or fabric result does not establish how the assembled blouse will behave.
For a repeatable bust dart fit evaluation, document the body or form, fabric, construction, wearing posture, location of visible concerns, and the single change being tested. Compare the whole front and side view after each revision. This keeps a local observation from being mistaken for proof that the entire pattern is balanced.
Separate Placement Problems from Other Fit Variables
Before moving a dart, separate its position from the amount of shaping. A suitable dart line can still contain too much or too little intake. Likewise, a dart can point in a useful direction but terminate in a location that creates an unwanted visual point. Check placement, intake, and length as separate questions.
Also inspect shoulder balance, side-seam position, center-front length, armhole relationship, and grain. Front-body wrinkles are not automatically bust-dart errors. Ease can make a blouse look fuller or flatter than expected, while stretch, drape, recovery, lining, interfacing, and pressing can change how the same pattern expresses shaping.
A conservative troubleshooting sequence is useful: first state the intended silhouette and wearing task; then inspect the pattern relationship to the bust area and surrounding seams. Next, assess the sewn blouse in the representative fabric and planned construction. If a concern remains, change one relevant variable where practical, record the result, and reassess the complete front and side view.
This approach treats bust dart placement as one part of a broader garment system. The bust area interacts with the armhole, neckline, closure, grain, and movement zones. A pattern revision is therefore a project-specific editorial recommendation, not a measured test method or universal fitting rule.
Choose a Placement That Matches the Design and Use
Choosing bust dart placement starts with the blouse’s intended use and silhouette, not with the most convenient seam to alter. A close-fitting woven blouse may need visible, controlled shaping. A relaxed blouse may use less obvious shaping through a seam, a style line, or additional ease. A dartless or stretch-sensitive design may approach the bust area differently again.
For a close-fitting woven blouse, compare a side-seam dart and a waist-origin dart with the garment’s style lines, closure, and intended front balance. Both can be reasonable starting points. The useful question is whether the chosen origin supports the silhouette without creating an unwanted point, interrupting the design, or shifting attention away from the intended visual line. The wearer’s bust shape and posture also affect the evaluation.
A dart can be directed toward the bust area and still be unsuitable for the design. It may interrupt a stripe, print, princess-style seam, neckline, or other planned feature. In that case, the issue is not necessarily that the dart is technically misplaced. The shaping strategy may simply conflict with the blouse’s appearance or use.
Fabric changes the starting point for review. With a lightweight fabric, a dart may appear more softly, but drape and ease can also make local fullness harder to interpret. A more structured woven may show the dart line and pressing more clearly. A stretch-sensitive material may redistribute shaping during movement, depending on its stretch, recovery, construction, and intended ease. These are conditional observations, not universal fabric rules.
For example, a close-fitting blouse with a stable woven fabric and a defined closure may call for a clear comparison between side-seam and waist-origin shaping. A softer blouse intended for relaxed movement may be better assessed by asking whether the dart should remain subtle or be redistributed into a style line. In both cases, reassess the choice in the final fabric, with the planned lining, interfacing, closure, and pressing.

A Practical Review Sequence for the Next Sample
Begin by recording the intended silhouette, wearing task, and body or form used for review. Mark how the dart relates to the bust area, then inspect the pattern’s grain, seam balance, and ease. Assess the assembled blouse from the front and side while standing and moving. Record one controlled revision, such as a placement, intake, or length change, and compare it under the same conditions when possible. If the fabric or construction changes, treat the comparison cautiously and check an applicable technical reference before relying on a specific method or claim.
Frequently Asked Questions
How can I tell whether a blouse bust dart is positioned correctly?
Look for a dart line that directs shaping toward the bust area without creating pronounced pointiness, collapsed fabric, excess fullness, or imbalance elsewhere. Review the blouse in its intended silhouette, fabric, construction, and wearing posture. A smooth pattern alone does not establish a successful sewn result.
Why can a dart point toward the bust area and still create a poor fit?
Direction is only one part of the evaluation. Dart length, intake, ease, grain, posture, shoulder balance, and fabric behavior can affect the result. A dart may point appropriately yet terminate in an unsuitable location or produce local fullness. Compare these variables before moving the dart.
Is a side-seam bust dart better than a waist or neckline dart?
No single origin is automatically better. The suitable choice depends on the intended silhouette, style lines, wearer, fabric, closure, and desired visual effect. A side-seam dart may suit one close-fitting blouse, while a waist or neckline origin may better support another design.
How do dart placement and dart intake differ?
Placement describes where the shaping enters the garment and its directional relationship to the bust area. Dart intake describes the amount of shaping removed or controlled by the dart. A placement may be suitable while the intake is too large or too small, so assess them separately.
Can the same bust dart placement work in different blouse fabrics?
It can be a useful starting point, but the visible result may change with fabric weight, drape, stretch, recovery, lining, interfacing, pressing, and ease. Review the complete blouse rather than transferring a decision from one material to another without comparison.
When should I evaluate the dart on the final sewn blouse?
Evaluate it as soon as a representative sample is assembled, then reassess using the final fabric and planned construction before treating the pattern decision as reliable. Closures, support materials, pressing, and movement can change how the shaping appears and behaves.