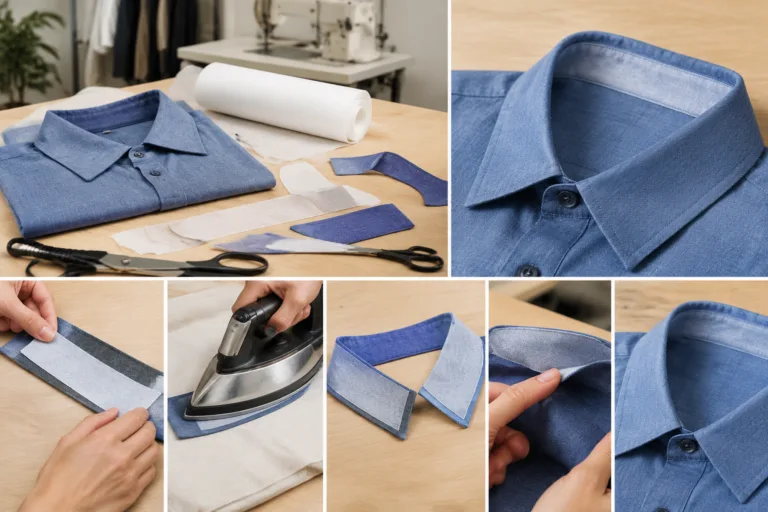
To attach fusible web without distorting a garment, bond the web between compatible textile layers using controlled heat, pressure, time, and cooling, then verify the result on the actual garment construction. The correct process is not a universal iron setting: it depends on the adhesive web, fabric, placement, equipment, and construction. This practical guidance is independent editorial content; readers can review the Sponsor page for information about Apparel Wiki’s editorial independence.
Fusible web attachment is the process of using an adhesive web to join two compatible textile surfaces. The web may have a carrier, mesh, film, or other construction that distributes the adhesive and affects how it handles during application. A successful attachment preserves the intended dimensions, surface appearance, flexibility, and drape of the garment component.
What Is Fusible Web Attachment, and How Does It Prevent Garment Distortion?
Good fusible web attachment requires the adhesive, web construction, garment fabric, placement, equipment, and process conditions to work together. Heat activates the adhesive, pressure brings the layers into contact, and dwell time allows the bond to develop. Cooling then gives the joined materials an opportunity to stabilize before they are moved, stretched, folded, or sewn further.
The central practice is to establish and record a process on the actual fabric and garment construction rather than copying a generic setting. A loose web may bond adequately to a flat swatch and still perform poorly after installation. The assembled component can respond differently because of seam allowances, curved edges, grain direction, layered thickness, or the tension created by the surrounding pattern pieces.
In this context, distortion includes more than a weak bond. It can appear as rippling, bubbling, shrinkage, stretching, shine, stiffness, edge pull, adhesive migration, or a loss of the intended drape. These effects may become visible immediately, after cooling, during garment movement, or after a relevant care or use simulation. A web that looks acceptable before installation is not proof that the finished garment will remain acceptable.
Process validation should therefore be construction-specific. Record the selected web product, fabric, component location, equipment type, application conditions, cooling method, and operator instructions. The word “validated” here means that the process has been trialed and accepted for the intended materials and use; it does not mean that one setting applies to every fusible adhesive web or every machine.
Why Fusible Web Causes Ripples, Bubbles, or Shape Change
Ripples, bubbles, and shape changes do not all indicate the same failure mechanism. A mismatch between the web and the fabric can create problems when the layers differ in shrinkage, stretch, thickness, surface texture, or response to heat. Even when the adhesive is active, the joined materials may move differently as they cool or later experience laundering and garment movement.
Uneven process conditions are another common source of inconsistent results. If heat does not reach the full bonding area, some sections may activate while others remain poorly attached. Uneven pressure, insufficient or excessive dwell time, irregular adhesive distribution, or premature handling can also leave local tension in the component. Excessive heat or pressure may change the fabric’s surface appearance or hand even when the bond appears strong.
Garment geometry matters. A flat fabric swatch does not reproduce the behavior of a curved neckline, shaped panel, hem, seam intersection, opening, or layered edge. Grain direction and seam allowances can restrict movement in one area while allowing stretching in another. Sliding an iron, dragging the layers, or pressing across an unsupported edge may shift the web or fabric and introduce distortion that is later mistaken for an adhesive problem.
Preparation and handling can also produce visible defects. Wrinkles trapped before fusing, fabric that is not aligned consistently, contamination on the bonding surface, or a pattern shape that already contains tension may affect the finished appearance. Diagnose the full process before changing the web. A single symptom can result from material incompatibility, handling, equipment variation, fabric preparation, or post-fusing movement, so it should not be assigned automatically to one cause.
How to Prepare the Fabric and Test Fusible Web Compatibility
Begin by confirming the web’s intended use, adhesive side, compatible substrates, application method, storage or handling instructions, and supplier recommendations. The selected web must suit both the fabric and the job it is expected to perform. Consider whether the attachment will support a shaped edge, stabilize a panel, join layers, or provide another function, because the construction affects the required trial.
Prepare the fabric and garment components consistently. Align the grain, establish the intended seam allowances, keep bonding surfaces clean, and remove wrinkles before testing. If the project calls for preconditioning or pre-shrinking, determine that requirement from the fabric, supplier guidance, care expectations, and product-use conditions. Do not assume that prewashing or pre-shrinking is universally required or universally sufficient.
Make a test piece that behaves like a small version of the finished construction. Reproduce the actual fabric layers, web placement, edge or seam arrangement, grain direction, and relevant curves or openings. Use the intended equipment where possible. A loose, single-layer swatch can provide an initial compatibility check, but it should not replace a construction-level trial when the finished component will behave differently.
For each trial, record the equipment type and the process conditions used, including temperature setting, pressure, dwell time, application method, and cooling method. Also note the web product, fabric identity or lot, component location, operator instructions, and visible result. Exact settings must come from the selected web supplier’s documentation and an equipment trial; Apparel Wiki does not provide universal numeric settings.
Inspect the test after it has cooled fully. Look for bubbles, ripples, edge lift, shine, stiffness, adhesive migration, strike-through, or a change in drape. Compare the component with the approved pattern or sample to identify unwanted dimensional change. Where relevant to the garment’s care and use, repeat the inspection after an appropriate care-cycle or use simulation before approving the process. The acceptance decision belongs to the product, construction, buyer or brand specification, and intended use.
Approve production only when the test demonstrates that the web remains suitably attached and the garment component retains its intended appearance and shape. Keep the approved process with the production instructions so operators can reproduce the result. If the construction, fabric, web, equipment, or care expectation changes, repeat the relevant compatibility test rather than treating the previous result as automatically transferable.
A Controlled Procedure for Applying Fusible Web Without Distortion
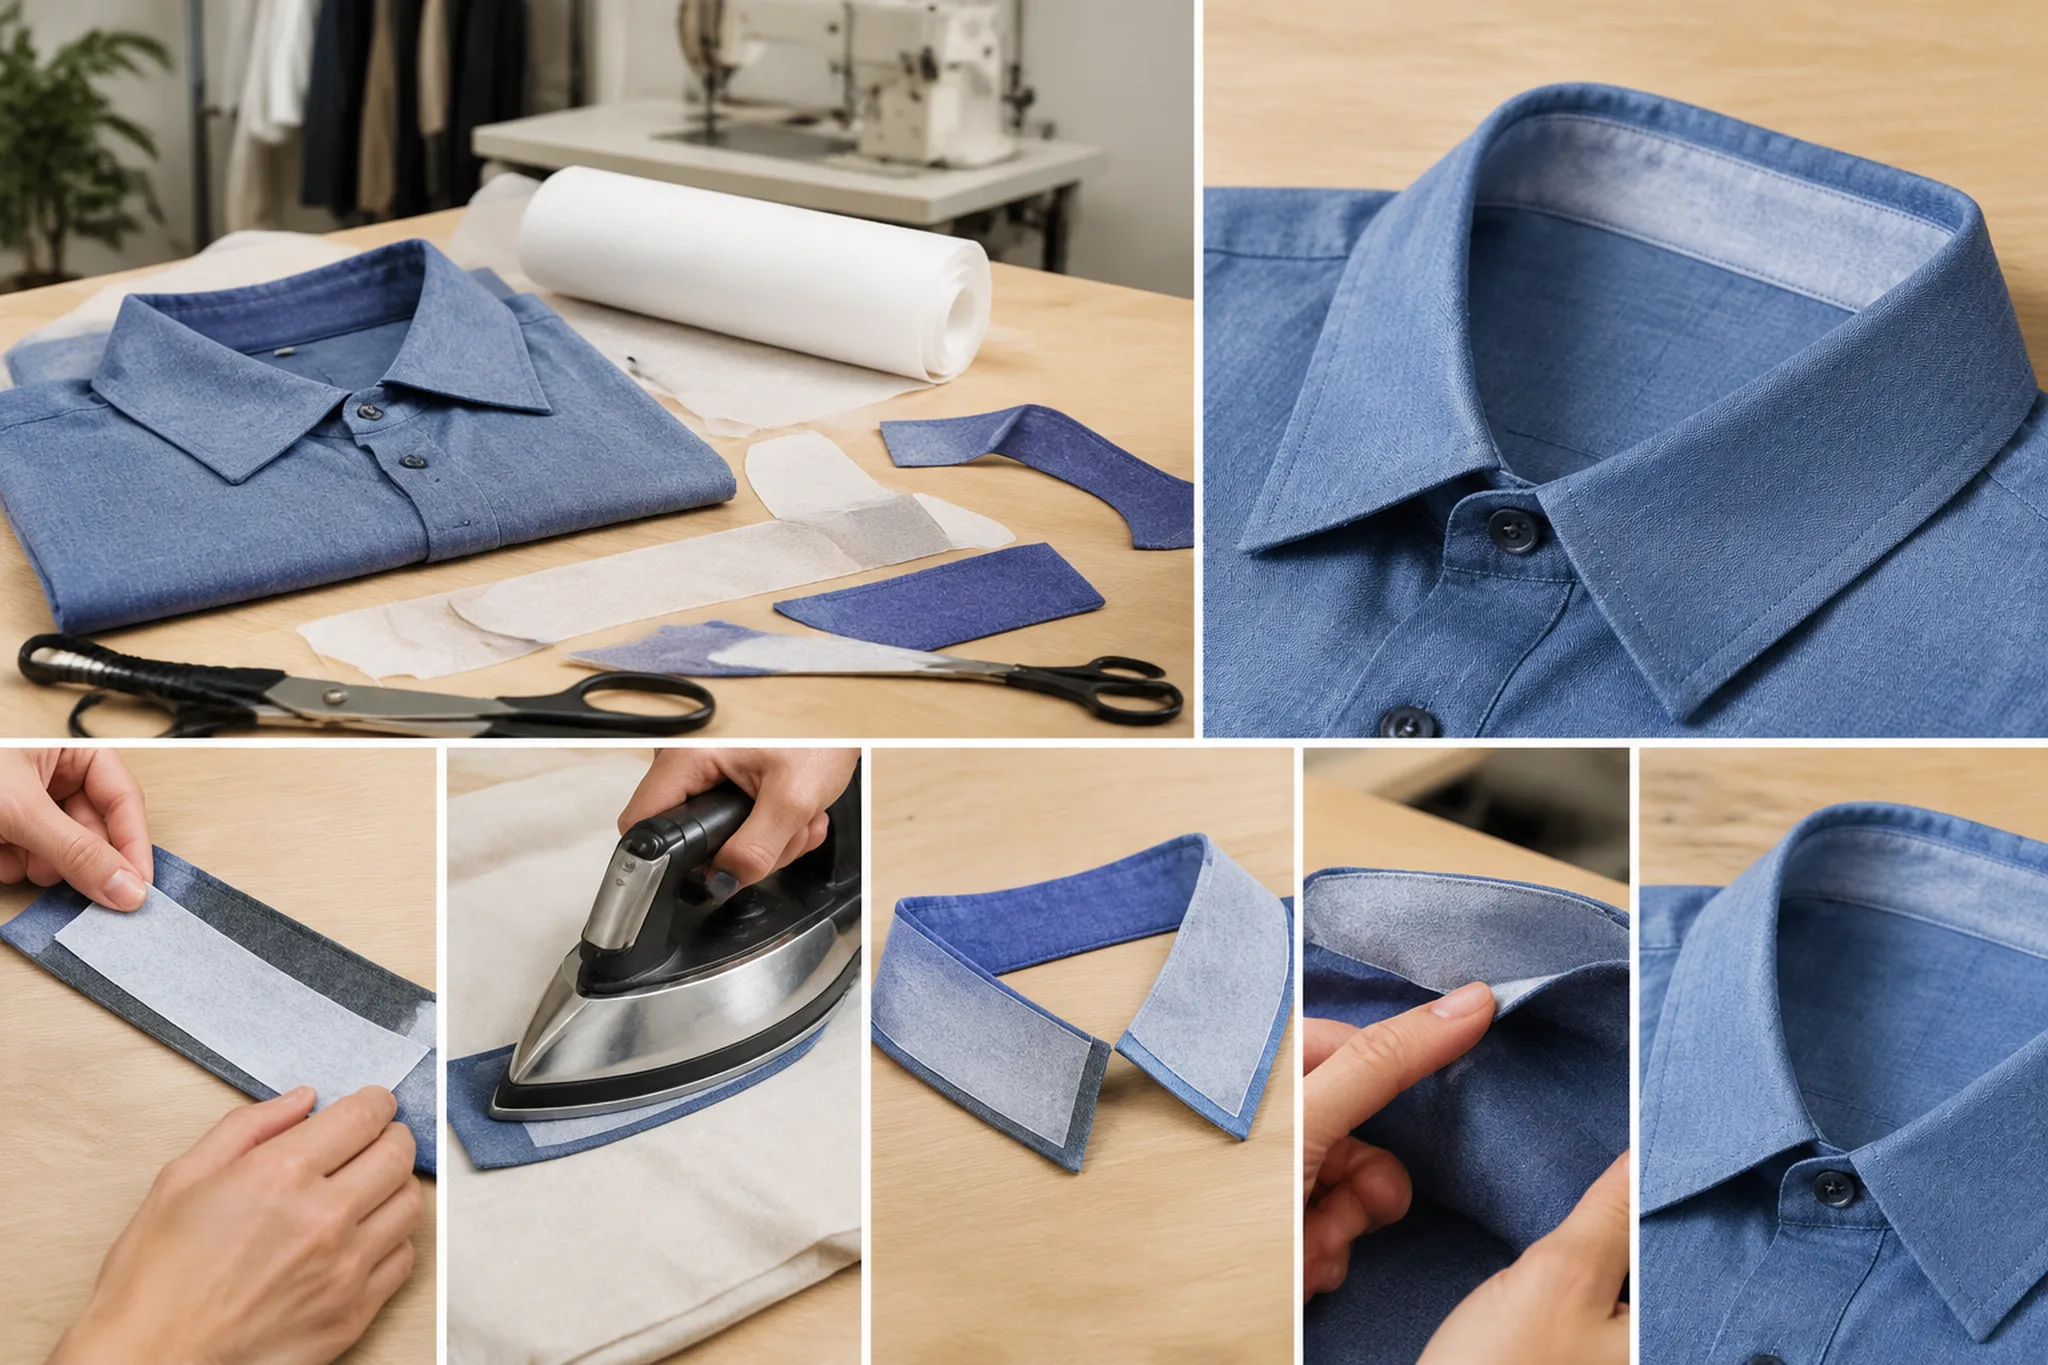
Once compatibility has been established, apply the web as a controlled production process rather than as a quick pressing step. Cut the web accurately and position it only where bonding is intended. Unless the construction requires otherwise, keep it clear of unintended seam, fold, opening, and finished-edge areas. Extra material in these locations can affect bulk, flexibility, edge appearance, or the way the garment turns during assembly.
Before applying heat, align the fabric and web on a stable surface. Do not stretch the fabric, drag the web into position, or trap wrinkles between the layers. Grain direction and the shape of the garment component matter, particularly around curves, hems, openings, and seams. A flat piece that is easy to align may not behave the same way once it is shaped or joined to other panels.
Use the adhesive side, application method, equipment, and activation conditions specified for the selected product. Exact temperature, pressure, and dwell-time settings must come from the web supplier’s instructions and a trial on the actual fabric and construction. A household iron, hand press, or production fusing machine may transfer heat and pressure differently, so a setting copied from another product or machine is not automatically suitable.
Apply heat and pressure evenly across the full bonding area. Follow the product instructions on whether the layers should remain stationary during application; avoid sliding an iron when movement could shift the web or stretch the fabric. Work in a sequence that gives every area comparable exposure, and keep the component supported so its shape does not change while the adhesive is activated.
Cooling is part of the attachment process. Place the fused component in a supported, undisturbed position and allow it to stabilize before folding, stretching, sewing, or moving it through the next operation. Handling a warm component can introduce waves, edge pull, or local displacement that may be mistaken for an adhesive problem. Record the approved method, including positioning, equipment, process conditions, cooling method, and operator instructions, so production can reproduce the tested result.
How to Evaluate the Bond on the Finished Garment
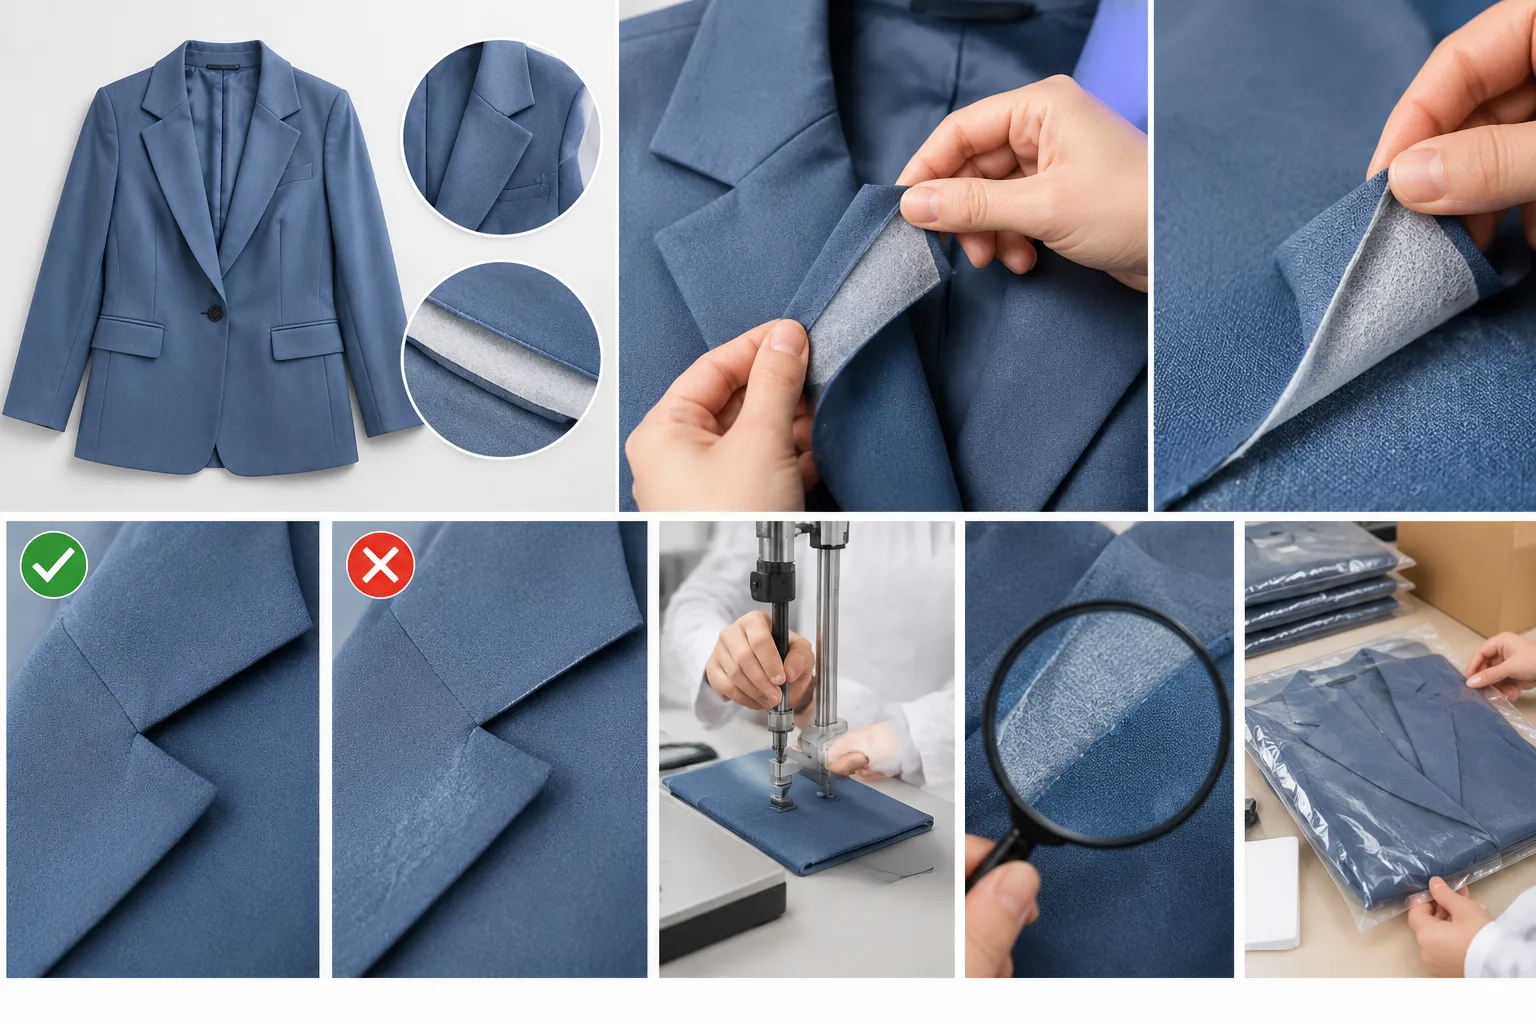
Evaluate the installed web at three levels: the material area, the garment component, and the finished garment. Begin with a visual inspection after cooling. Look for bubbles, ripples, edge lift, strike-through, adhesive migration, shine, stiffness, and any change in surface texture or drape. Inspect both the fused area and its transition into unfused fabric, where a difference in tension or hand may become visible.
Next, compare the component with the approved pattern, sample, or construction reference. Check whether edges, curves, hems, and openings retain their intended shape and whether the fabric has stretched, shrunk, or pulled away from the planned position. This dimensional review should be made after the component has cooled fully and, where relevant, after a care-cycle or use simulation appropriate to the garment.
A flat swatch is useful for screening, but it cannot prove that the finished garment will perform acceptably. Movement, seam intersections, layered areas, and curved sections can place different demands on the attachment. Handle and move the garment in ways that reflect its intended use, while checking whether the bond remains secure and whether the fabric retains its expected flexibility and appearance.
Acceptance criteria belong to the product, intended use, buyer or brand specification, and applicable market requirements. Visual inspection, dimensional assessment, handling simulation, and formal laboratory testing are separate forms of evidence. Where a documented specification requires a formal bond, peel, laundering, dimensional, or appearance evaluation, use the applicable validated method rather than treating an informal inspection as a substitute.
Keep an approval record that connects the web product and material lot with the garment construction, equipment, process conditions, cooling method, inspection result, and final disposition. This record helps distinguish a material issue from a handling or equipment issue and gives the team a reference when the fabric, web, machine, operator instructions, or care expectation changes.
Troubleshooting and Choosing the Next Process Decision
When ripples or stretching appear, first review how the layers were aligned and supported. Check grain direction, fabric stability, wrinkles trapped before pressing, pressure uniformity, and the cooling position. Also inspect whether the defect is limited to a curve, seam, edge, or change in layer thickness. These observations can show whether the problem is related to handling or construction rather than proving that the web itself is unsuitable.
For bubbles or edge lift, review web coverage, surface cleanliness, activation conditions, pressure, and the contact between the layers. Consider whether the fabric and web respond differently to heat, moisture, or dimensional change. Incomplete activation and incompatible movement can produce similar visible symptoms, so repeat the relevant trial under controlled conditions before selecting a different adhesive web.
Shine, excessive stiffness, or an unwanted change in hand may indicate that the process or the web is unsuitable for the fabric’s surface and drape. Review heat exposure, pressure, protective materials, web weight, and the location of the attachment. A stronger-looking bond is not necessarily a better result if the garment loses its intended appearance or flexibility.
Use a staged decision process: correct handling first, verify process conditions next, reassess material compatibility after that, and only then consider changing the web or construction. If the required result still cannot be achieved, another attachment method may be appropriate for the project. Repeat the test on the actual garment component and document the approved revision before making a wider production change.
The practical next step is to create one controlled sample that matches the finished construction, record the supplier-approved process and cooling method, and inspect it after the relevant use or care simulation. This gives the development or production team evidence for a specific garment rather than relying on a generic fusible web setting.
Can fusible web be attached without an iron?
Yes, some fusible webs can be applied with a press or production fusing equipment instead of a hand iron. The equipment must deliver the product’s required heat and pressure consistently. Follow the selected web supplier’s instructions and confirm the process on the actual fabric and garment construction.
Why does fusible web make fabric ripple or bubble?
Possible causes include fabric and web incompatibility, uneven heat or pressure, incorrect positioning, trapped wrinkles, local differences in thickness, or handling before cooling. The visible defect does not identify one universal cause, so inspect the construction and repeat a controlled trial before changing materials.
Should fabric be prewashed or pre-shrunk before applying fusible web?
That depends on the fabric, garment care expectation, and supplier or product-development instructions. Use the same preparation planned for production, including any required preconditioning or pre-shrinking, and test the complete construction before approval.
How long should fusible web be pressed?
There is no universal pressing time for every web, fabric, and machine. Use the selected product’s application instructions as the starting point, then verify the dwell time through an equipment trial on the actual construction. Record the approved result for production use.
How can I test fusible web on a garment before production?
Make a sample that reproduces the real fabric layers, grain direction, seam or edge construction, placement, and equipment. Inspect it after cooling, compare it with the approved sample or pattern, and perform a relevant care or use simulation when the product requires one.
What should I do when fusible web lifts after washing?
Separate the symptoms from the cause by reviewing the original process, coverage, pressure, activation conditions, fabric preparation, and cooling. Check the washed garment component against the approved trial. Repeat the relevant test with a controlled revision before changing the web or releasing additional production.