Wheelchair trousers waist closure access depends on more than the size of an opening. The intended wearer must be able to find the closure, reach it from the relevant seated posture, manipulate it, and confirm that the trousers are secured. Apparel Wiki is an independent clothing industry knowledge publication; its Sponsor page explains that sponsorship does not control editorial content.
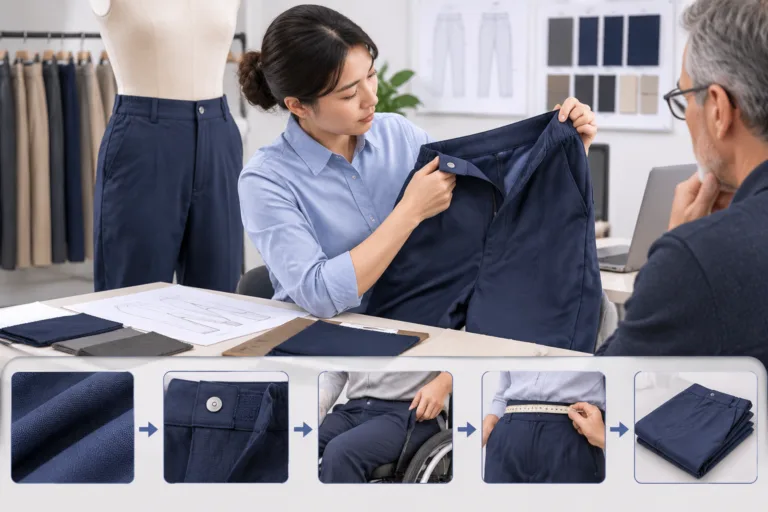
For production teams, the direct answer is to review the complete trouser in its intended seated-use scenario. Check the final pattern, fabric, waistband, closure, nearby trims, and sewing together. A component that operates easily on a table or standing model may behave differently when the seat, crotch, waistband, and closure share movement and local pressure.
How wheelchair trousers waist closure access affects production checks
Waist-closure access is the interaction among posture, reach, closure location, operating action, waistband behavior, and closure confirmation. An accessible wheelchair trouser design is therefore not established by a front opening, elastic panel, zipper, or pull tab alone. The useful question is whether the intended wearer can complete the dressing task in the conditions that matter for the product.
Begin by recording the use case. Note whether the wearer dresses while seated, transfers before closing the garment, or receives assistance. Record the reach direction, hand function, dexterity, sensation, visibility, clothing layers, and expected dressing sequence. These inputs are wearer-specific. A category label such as “wheelchair user” does not describe one consistent body position, movement pattern, or assistance requirement.
The review zone includes the waist opening, closure, waistband edge, front rise, crotch, seat, and nearby trims. These areas work together as the garment moves around a seated body. A closure may be reachable but still cause excess bulk, shifting, poor coverage, or unwanted waistband tension. Conversely, a comfortable waistband may be difficult to open or secure if the pull, fastening point, or overlap is hard to locate.
Standing inspection remains useful for construction, but it cannot replace seated review. In sitting, the rise balance, seat shaping, fabric stretch, and chair environment can change the closure path and the wearer’s available reach. The wheelchair seating measurements and wearer-specific seated fit evaluation context is relevant when defining the posture to be reviewed.
Use a simple production logic: document the input, observe the result, identify the variable that may have caused it, then revise or validate the sample. This creates a seated trouser closure check without claiming that one design works for every wearer.
Translate seated use into closure and waistband requirements
Convert the dressing task into questions that a development team can observe. The use brief should state who operates the closure, in which posture, with which layers, and at what point in dressing. It should also state whether independent operation is an objective for the project or whether assistance is expected. These decisions affect the preferred closure position, opening direction, waistband shape, rise balance, and amount of adjustment.
Next, map the closure path against the body and chair environment. A front, side, or other position may be considered, but none is automatically best. Compare each option for reach, visibility, pressure or bulk, snag exposure, and the wearer’s ability to recognize the secured state. Review the entire action, including locating the pull or fastening point, moving the waistband, completing the closure, and checking the result.
Assess the waistband while seated and during the dressing sequence. Look for rolling, gaping, digging, shifting, or excessive tension. Tie each observation to the actual pattern, fabric stretch, lining, elastic, interfacing, closure, and seam arrangement. A change to one element can alter the behavior of the others.
Keep access separate from fit and pressure management. An easy-to-reach closure does not guarantee stable coverage or comfortable wear. Poor rise balance, excessive seam bulk, or unwanted movement can remain even when the wearer can operate the fastening. These are garment-level findings, not evidence that a closure type is universally suitable.
Use wearer participation or a representative wear review to challenge design assumptions. Record which observations apply only to the tested wearer, posture, size, material version, or dressing method. If a project needs numeric reach, pressure, opening, or fit limits, those limits require an appropriate authoritative method. Without one, retain qualitative observations and project-specific validation rather than inventing a universal dimension.
Check the waistband, closure, and attached trims as one system
Inspect the garment at four connected levels: pattern, sewing construction, trim installation, and finished use. At pattern level, review closure placement and length, overlap, waistband extension, front rise, seat shaping, and opening geometry. At sewing level, inspect seam bulk, stitch security, edge finishing, and whether the opening remains usable when the wearer is seated.
Then operate the finished sample through the full sequence. Locate the pull or fastening point, open the garment, manage the waistband, close it, and confirm that the secured state is clear. Review the slider or fastening surface, attachment area, surrounding fabric distortion, exposed edges, and interaction with lining or elastic. Zippers, snaps, hooks, buttons, tabs, and elastic should be assessed as installed systems, not as isolated components.
Wash-care compatibility also belongs in the review. A component can behave differently when combined with the final shell, lining, interfacing, elastic, seam allowance, and sewing method. Inspect the relevant post-care sample when that condition matters to the product. Do not replace garment-level observation with a component description or an unsupported durability number.
| Observable inputs | Access or comfort implications | Initial closure choice | Variables that could change the choice |
|---|---|---|---|
| Front reach and visibility; clear pull direction; limited obstruction from layers | May make locating and confirming the closure more direct, but the front area still needs review for bulk and seated contact | Front zipper or another front fastening arrangement | Rise balance, pull geometry, overlap, chair position, fabric stiffness, and whether the wearer closes the garment before or after transfer |
| Need for adjustment around the waist; ability to grasp and pull a tab or waistband section | May support adjustment without repeated fastening, but the waistband can roll, shift, or create uneven tension | Pull-adjusted waistband or elastic-assisted arrangement | Elastic recovery, tab size and location, stretch, seam bulk, coverage, and the wearer’s hand function |
| Reach direction, side clearance, visibility, and contact with chair components | May reduce front interference for some use cases, but can be harder to see or reach in another posture | Side or alternative closure arrangement | Posture, transfer sequence, assistance, fastening engagement, snag exposure, and size or material changes |
Record defects by condition: standing versus seated, assisted versus independent dressing, dry versus post-care sample, and intended size or fabric. This keeps a result within its tested scope. Approval of a trim does not approve access for the complete trouser, and successful operation by one wearer does not establish a universal performance claim.
Build a sample review workflow for access decisions
Begin with a written use scenario before reviewing the sample. Record who is expected to operate the closure, whether operation occurs before or after a transfer, the intended seated posture, clothing layers, and the assistance available. Define what accessible, secure, comfortable, and maintainable mean for that project. These terms should describe observable decisions for the intended use case, not become universal claims about wheelchair trousers.
Review the pattern and construction before sewing. Check the closure location, opening geometry, waistband extension, rise balance, seam allowances, and areas that may add bulk. Then inspect a complete sample made with the intended fabric behavior, lining, elastic or interfacing, closure, sewing method, and finishing. A component result or paper pattern review cannot establish how the assembled garment will behave around the waist, seat, and crotch.
Use a structured seated-use review. Ask the wearer or representative user to locate the closure, reach it, manipulate it, manage the waistband, and confirm the secured state using the planned dressing sequence. Observe visibility, hand position, compensating movements, waistband stability, contact or bulk concerns, and any need for assistance. Record successful actions as well as difficulty. The observation may apply only to that wearer, posture, size, material, or dressing method.
A defect log makes revision more useful. Link each observation to a likely variable, such as closure placement, pull geometry, fabric stretch, trim shape, seam bulk, rise balance, or user technique. Note the condition in which it occurred: standing or seated, assisted or independent, dry or after care, and in which size or material version. This prevents a problem found in one configuration from being generalized without support.
Repeat the review after a meaningful change to the pattern, material, trim, placement, or sewing method. Include relevant sizes or material versions when those changes can alter access or waistband behavior. This is an editorial production workflow for learning from complete samples, not a certification protocol. One wearer operating one sample successfully does not prove access for every intended user.
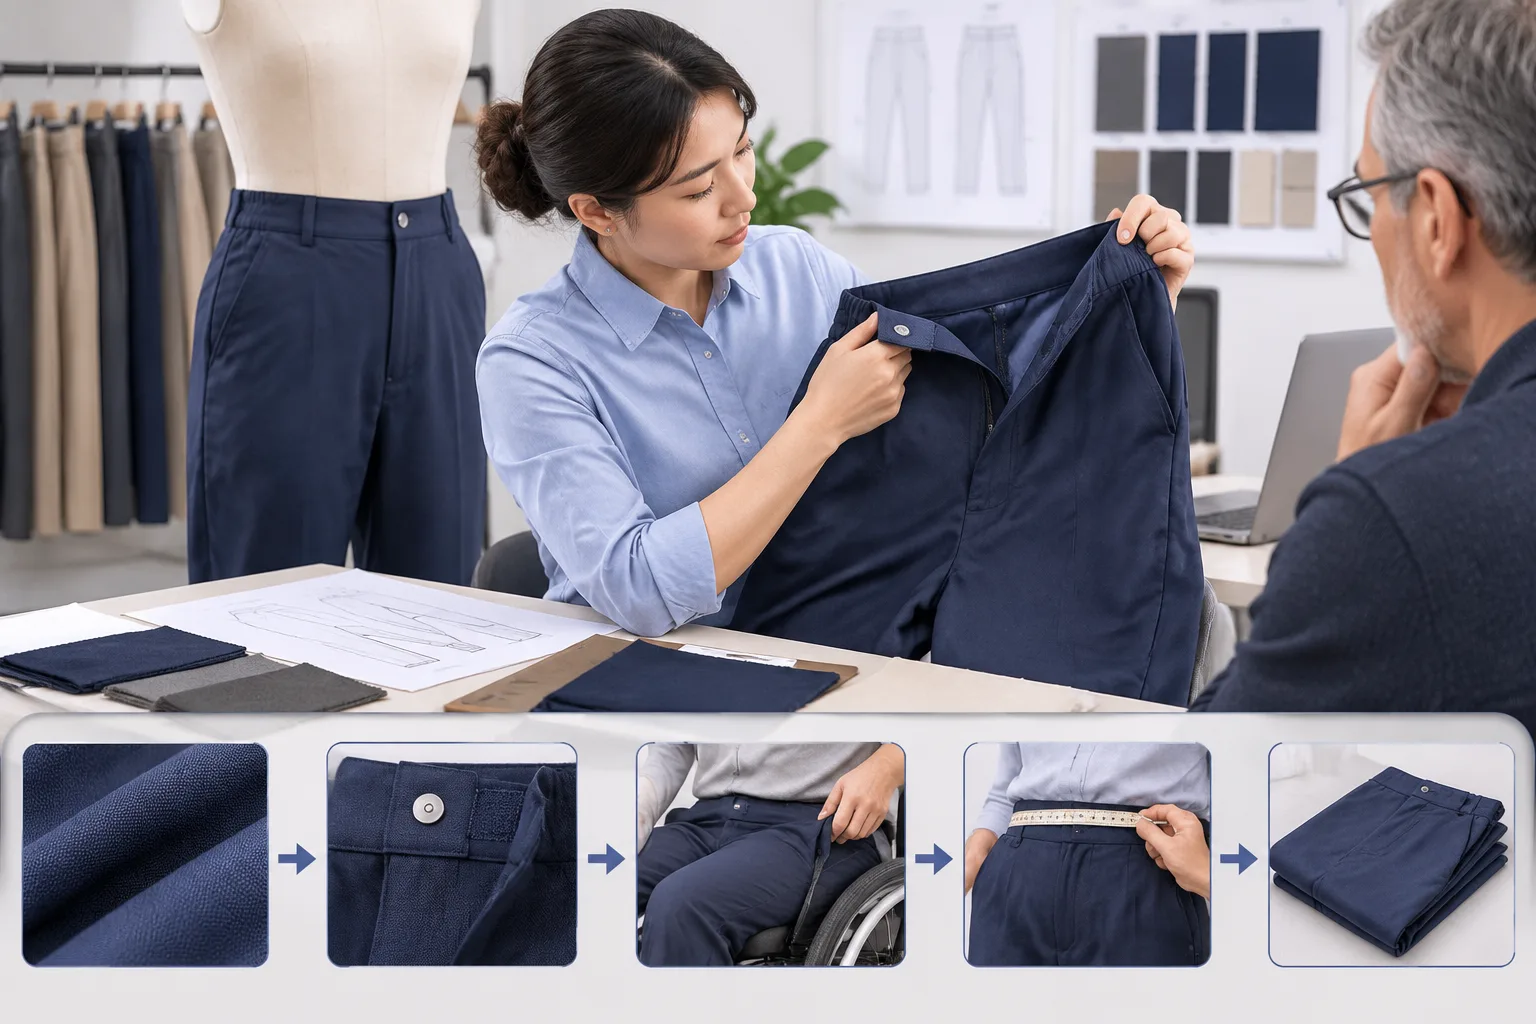
Diagnose access failures and weigh the design trade-offs
When reach or manipulation is difficult, compare closure placement, pull or fastening geometry, visibility, and dressing sequence before simply enlarging the opening. A longer opening may not help if the pull remains hard to grasp or the waistband shifts during operation. A change in position may improve reach while increasing contact, snag exposure, or difficulty confirming the secured state.
For rolling, gaping, digging, or shifting at the waistband, review the trouser as a connected structure. Consider rise balance, elastic recovery, fabric stretch, seam bulk, closure tension, and seated posture together. Changing only the closure can leave the underlying balance problem unchanged. An accessible closure is not automatically a good fit, and a comfortable waistband is not automatically easy to operate.
If the garment appears to open unintentionally or the secured state is unclear, inspect overlap, fastening engagement, pull direction, user feedback, and movement conditions. Describe what was observed without assigning an unsupported security level. The review should identify whether the issue comes from the fastening, surrounding fabric distortion, the operation sequence, or a mismatch between the garment and the intended user.
Design decisions also involve trade-offs. Independent operation may conflict with low bulk, appearance, coverage, adjustability, wash-care behavior, or production simplicity. A front arrangement may offer visibility for one user while creating unwanted contact in another posture. A side arrangement may reduce front interference but become harder to see or reach. These are reasons to compare project options, not evidence that one closure type is universally superior.
After a change, repeat the complete-garment review. Document a limitation when the available evidence supports only a narrower use case. Avoid hiding that limitation behind a broad adaptive-clothing claim, especially when the result concerns independent operation, medical suitability, injury prevention, or pressure management. Those conclusions require appropriate qualified evaluation and evidence beyond a garment observation.
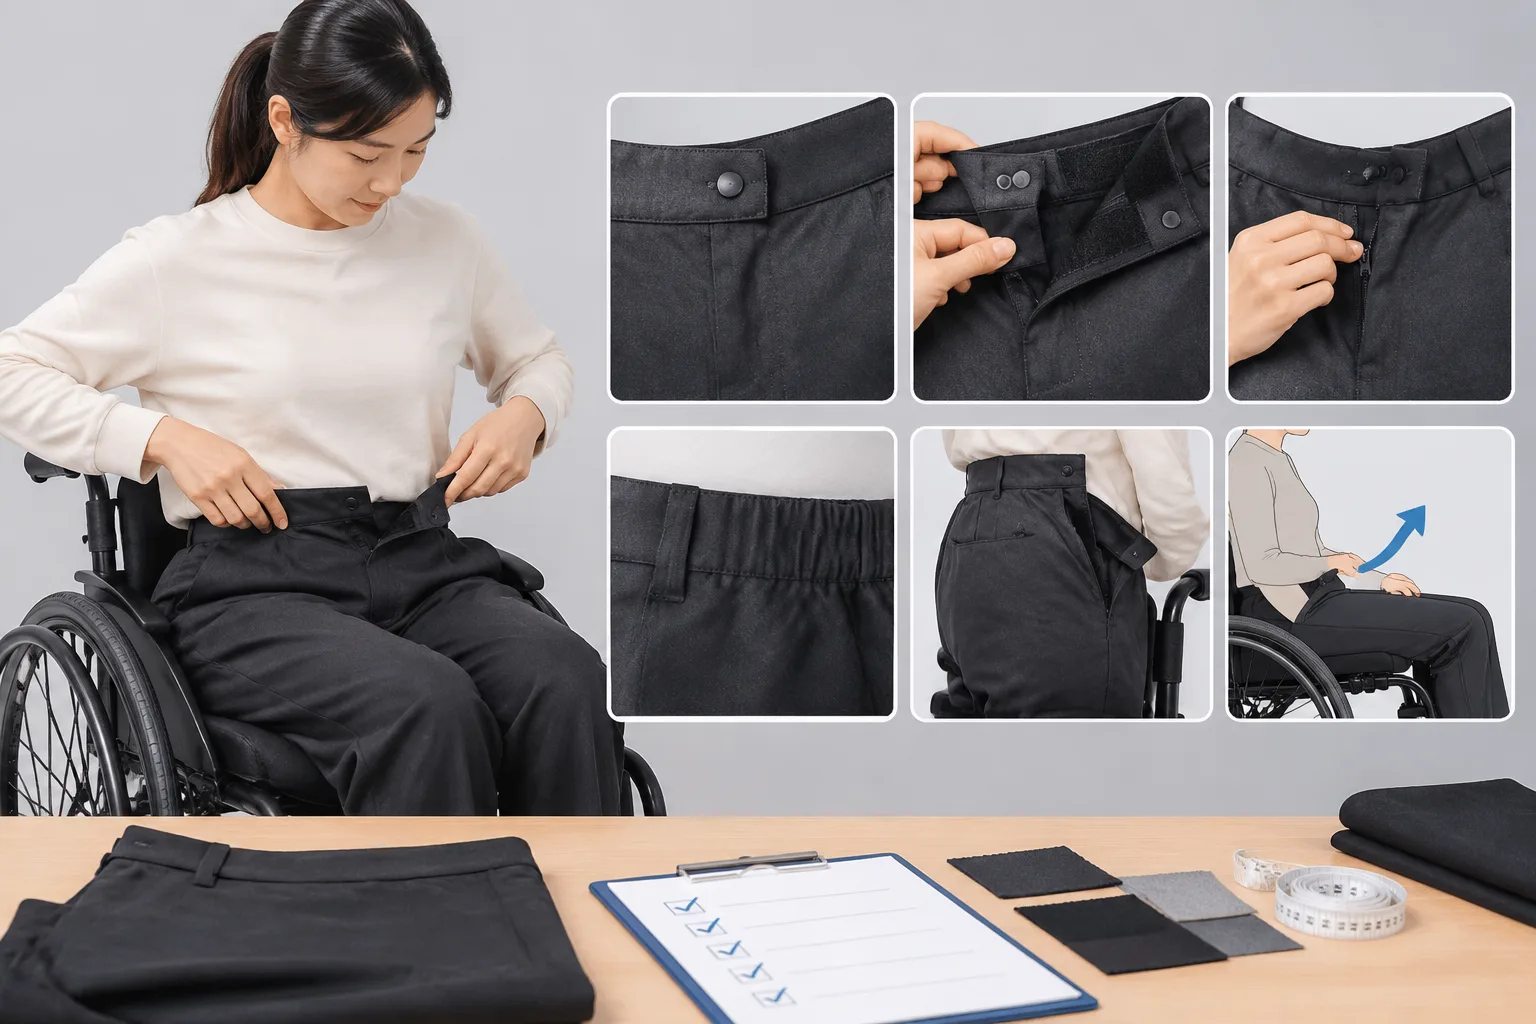
Document the next production decision
Create a closure-access checklist from the recorded seated-use inputs, compare the intended closure options, and inspect the finished sample in the relevant posture. Log unresolved variables before approving the next version. When a project requires numeric, clinical, regulatory, or formal test claims, compare the applicable specifications and evaluation method with an appropriate expert or authoritative source. Wheelchair trousers waist closure access is a project-dependent outcome established through documented garment review, not by one trim or pattern feature.
Frequently Asked Questions
What makes a waist closure accessible in wheelchair trousers?
Access means the intended wearer can locate, reach, operate, and confirm the closure in the relevant seated posture. The result also depends on waistband behavior, clothing layers, hand function, dressing sequence, and the installed garment construction.
Should wheelchair trousers use a front, side, or adjustable waist closure?
There is no universal choice. Compare each option against reach direction, visibility, chair contact, dressing order, fastening control, waistband stability, and the wearer’s assistance needs. The preferred arrangement is specific to the documented use case.
How should a production team evaluate waist closure access in a seated position?
Use a complete sample with the intended materials and construction. Observe the planned dressing sequence, including locating, opening, adjusting, closing, and confirming the closure. Record posture, size, layers, assistance, successful actions, and compensating movements.
Why can a closure component work by itself but fail after installation in trousers?
Installation changes the forces and handling conditions around the component. Seam bulk, fabric stretch, lining, waistband tension, surrounding distortion, pull direction, and rise balance can all affect operation. Component approval therefore does not establish garment-level access.
What should be documented when one wearer can operate the closure but another cannot?
Record the tested posture, size, materials, dressing method, hand function, reach direction, assistance, and the exact successful or unsuccessful action. Treat the finding as configuration-specific until additional representative evaluation supports a broader conclusion.
When does a change to the waistband or fabric require another sample review?
Review again when the change could affect reach, opening geometry, stretch, tension, bulk, coverage, closure engagement, or seated stability. Pattern, material, trim, placement, and sewing changes can alter the complete garment even when the closure itself is unchanged.