A recutting procedure is a controlled method for producing replacement garment components when an original piece is missing, damaged, rejected, incorrectly cut, or unsuitable for the next operation. It is not the same as repeating the entire bulk-cutting plan. The goal is to replace only the affected component while preserving the approved pattern, material requirements, shade or batch expectations, and production identity. Apparel Wiki is an independent educational publication; its Sponsor information does not change the editorial basis of this guide.
This recommended framework is intended for apparel brands, product developers, quality teams, cutting rooms, and production managers. The exact trigger, approval route, inspection criteria, and records should follow the product specification and the factory’s own work instructions. A recut is a controlled correction, not an automatic response to every visible difference.
What Is a Recutting Procedure in Garment Production?
In garment manufacturing, recutting means cutting one or more replacement garment components after the original cut has been found unsuitable. These components may include body panels, sleeves, collars, cuffs, pockets, waistbands, linings, or other pieces needed for a particular garment or bundle. The replacement may be required because a piece is absent, damaged during cutting or handling, rejected during inspection, cut to the wrong size, oriented incorrectly, or affected by a material defect.
Recutting is narrower than cutting an entire order again. It normally addresses a defined quantity and a defined component, while the unaffected cut pieces remain in production. It is also different from reworking a sewn garment. Rework changes or repairs an assembled product; recutting creates a new fabric component that must later be paired with the correct garment pieces and sent to the appropriate operation.
The control objective is straightforward: the replacement piece should correspond to the latest approved pattern and component identity, use suitable material, follow applicable grainline or placement rules, and remain identifiable through production. Whether approval comes from product development, quality, production, or another designated role depends on the factory and project. This article presents process logic, not a universal mandatory work instruction.
When Should a Garment Be Sent for Recutting?
A garment or bundle should be considered for recutting only after the issue has been confirmed and the affected scope is understood. Common triggers include a fabric or cut-component defect, a missing piece, incorrect dimensions, the wrong size or marker, incorrect orientation, cutting damage, or loss during handling. This list is practical rather than exhaustive, and the appropriate response depends on the approved specification and the cause of the problem.
Start by containing the issue. Hold the affected bundle, garment, or component so that a questionable piece does not move into the next operation. Then identify which styles, orders, colors, sizes, material lots, bundles, and quantities may be involved. A single damaged panel may call for an isolated replacement. Similar defects across several bundles may indicate a broader problem with the pattern, marker, spreading method, fabric batch, cutting equipment, or handling process.
Do not authorize a recut solely because a replacement piece looks different from the original. Appearance can change for legitimate reasons, or it can reveal a mismatch in shade, direction, surface, size, or material. Compare the piece with the approved pattern, specification, approved sample where relevant, and the physical fabric conditions. The decision should distinguish observed production facts from project-dependent judgments and should consider whether correction, clarification, or a wider investigation is more appropriate.
What to Verify Before Approving a Recut
Before cutting replacement garment panels, confirm that the team is using the current approved information. Verify the pattern version, style, size, component name, grainline, notches, seam allowances, and piece-specific markings. Check whether the component has left-right pairing, placement, matching, or orientation requirements. An obsolete pattern or incorrect size can create a second defect even when the cutting itself is accurate.
Next, verify the material. Match the replacement to the relevant fabric type, color, finish, shade or dye-lot expectations, and usable width required by the product specification. Decide whether the original material lot is suitable or whether another lot must be separately identified and reviewed. There is no universal rule that every recut must use the same lot, but an unexplained lot change can create a visible or performance difference.
Consider fabric conditions that affect the component. Depending on the product and material, checks may include relaxation, width, shrinkage behavior, surface direction, pattern direction, nap, print or stripe alignment, and visible defects. A sample or earlier fabric check does not automatically represent every later production batch. Use the project’s applicable inspection information and record any decision that affects the replacement material.
Finally, confirm the request details before cutting begins:
- Style or order reference, color, size, component, and quantity
- Reason for the recut and the affected bundle or garment
- Material source, lot or shade identification, and pattern or marker version
- Requester, designated approver, required date, and destination operation
Exact tolerances and acceptance limits should come from the approved product requirements, buyer instructions, pattern, or applicable factory criteria. They should not be replaced with a generic value.
Step-by-Step Recutting Procedure for Replacement Components
The following sequence is a recommended working framework for a garment recutting procedure. A factory can adapt the steps to its own forms, systems, responsibilities, and product requirements.
- Contain the issue. Hold the affected bundle, garment, or component. Identify the suspected cause and prevent the questionable piece from moving forward or being mixed with another order.
- Inspect and confirm. Compare the rejected or missing component with the approved pattern, specification, and physical material. Establish whether the problem is isolated or may affect related pieces or bundles.
- Raise the recut request. State the style or order, color, size, component, quantity, reason, material source, affected bundle, required date, and designated approval route. The information may be recorded in a factory form or another local system.
- Prepare the cut. Use the approved pattern or marker. Verify size, grainline, orientation, placement rules, notches, and markings. Identify the material and cut order clearly before the cutting operation starts.
- Cut and identify. Keep the replacement pieces together and preserve their association with the correct style, size, color, and bundle. Where the production system requires it, distinguish the recut from the original cut so it can be tracked during sewing and inspection.
- Inspect the replacement. Check component identity, count, shape, markings, appearance, material match, and dimensions against the applicable requirements. Use the project’s stated tolerances rather than assuming a universal acceptance limit.
- Rejoin production and close the action. Issue accepted pieces to the correct bundle or operation. Record the completion and inspection outcome according to the factory’s procedure, and flag unresolved or repeated issues for further review.
This sequence controls both material flow and information flow: the request leads to approval, cutting, identification, inspection, issue, and closure. It should be adapted to the garment type, defect cause, material behavior, and customer requirements rather than treated as a fixed industry rule.
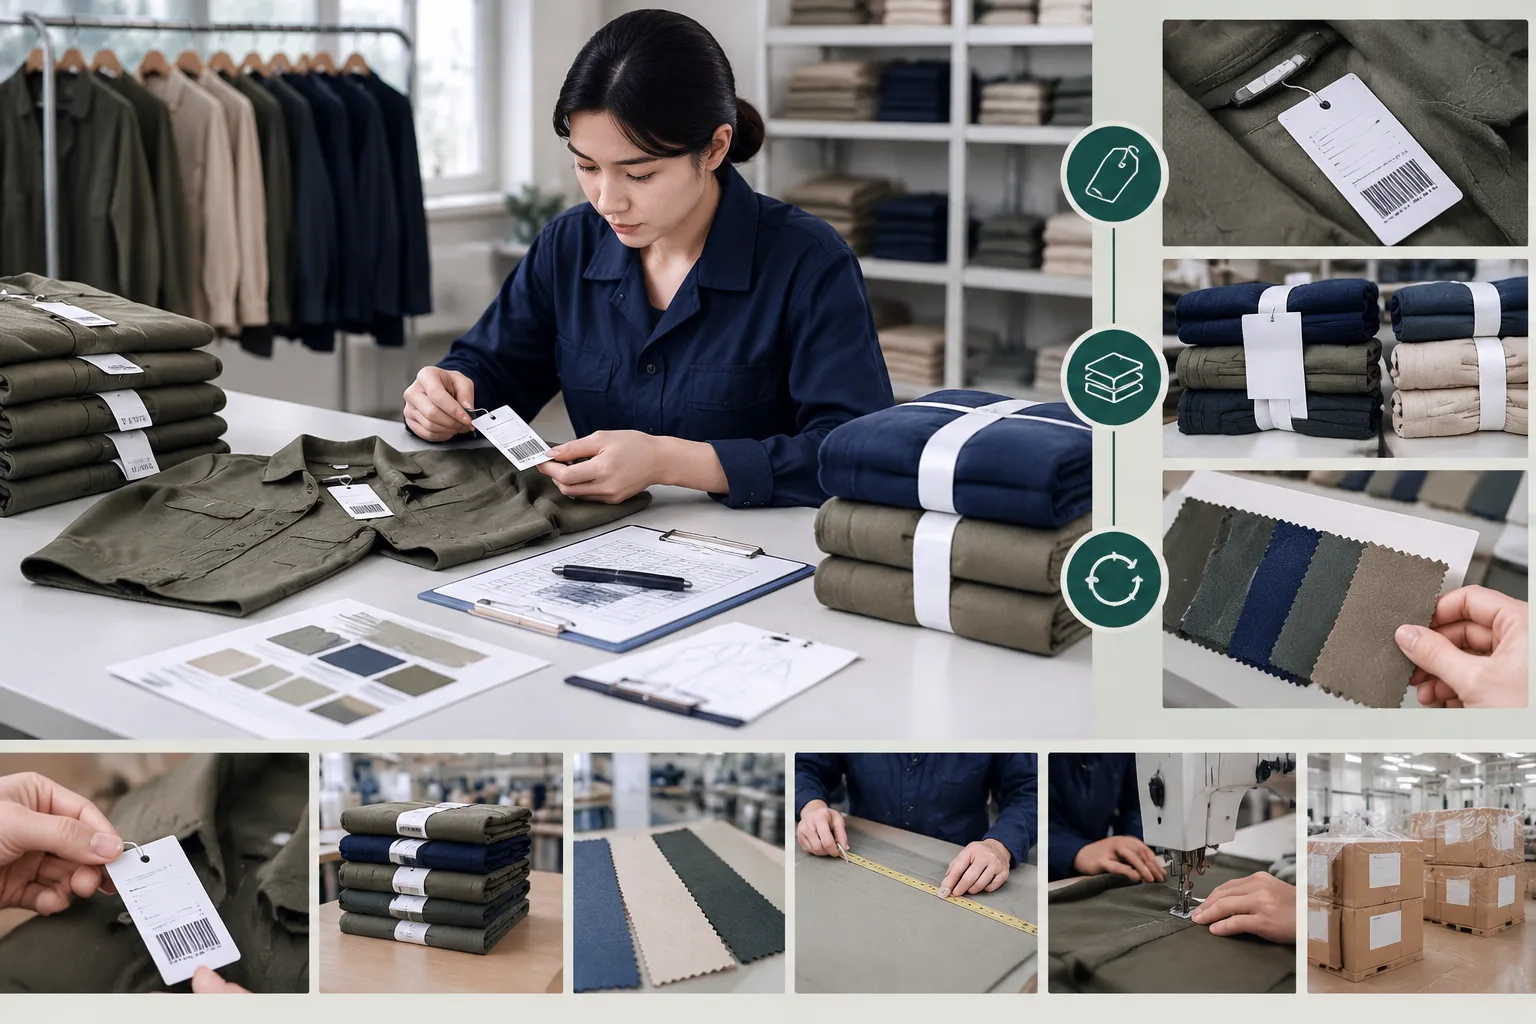
How to Control Traceability, Bundles, and Replacement Material
A replacement piece is useful only when production can identify where it belongs. The recut record should connect the component to the relevant style or order, size, color, quantity, material lot, pattern or marker version, reason for recutting, date, responsible people, inspection outcome, and final disposition where relevant. These fields are a practical recommendation, not a universal form or documentation requirement.
Bundle identity is equally important. Keep replacement pieces with the correct style, size, color, and operation, and distinguish them from the original cut when the factory system requires that distinction. A simple label, bundle ticket, or local tracking entry may be enough, depending on the production method. The control should prevent a replacement sleeve, pocket, collar, or panel from being issued to a similar-looking but different bundle.
Material identity needs additional attention when appearance depends on shade, direction, surface, or pattern matching. Check whether the replacement comes from the original fabric lot or from a separately identified lot. For directional fabrics, nap, prints, stripes, checks, or a visible face, record the handling decision and keep matching pieces together where the product requirements call for it. Repeated recuts or several affected bundles should trigger a broader review rather than being closed as unrelated individual events.
How to Inspect and Release Recut Pieces
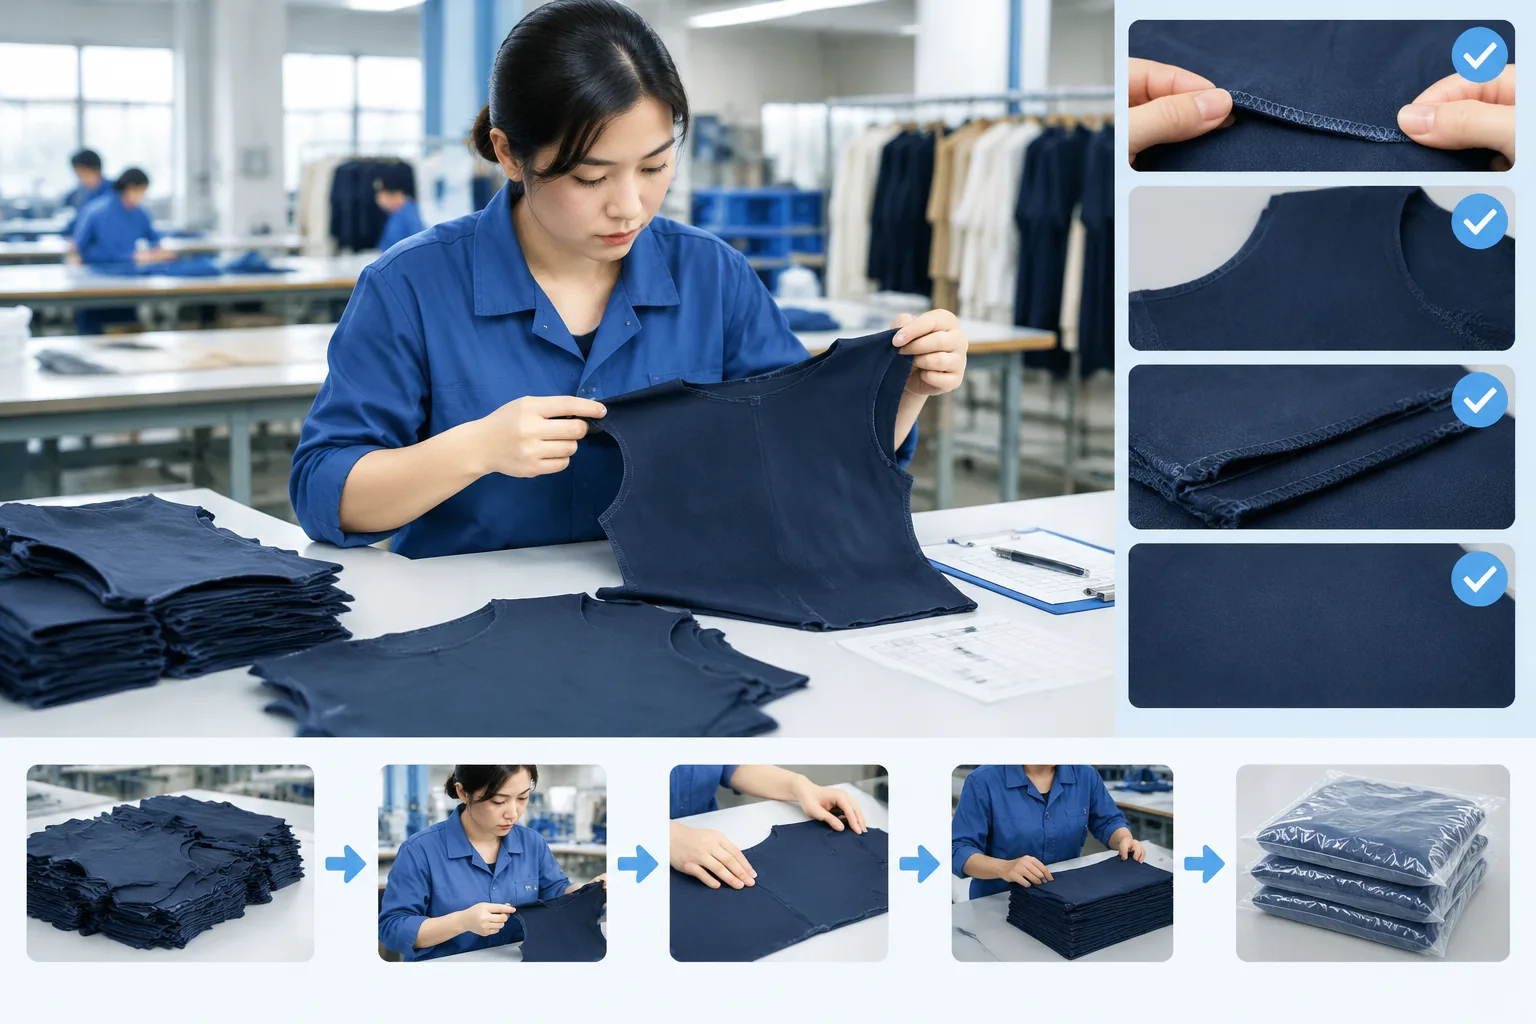
Inspection should compare the replacement with the approved pattern, component standard, product specification, or other controlling project document. Begin with document and identity checks: confirm the style, component, size, orientation, pattern version, notches, markings, and quantity. Then check shape and dimensions against the applicable project tolerance. Do not substitute a generic tolerance for the requirement approved for that product.
Visual and material checks should cover shade or batch compatibility, surface direction, print or stripe placement, visible defects, and any matching points that affect assembly. Confirm paired components such as left and right pieces, or component sets that need to come from compatible material conditions. A replacement can have the right outline and still create a problem if its face, direction, shade, or markings do not suit the garment.
Use a clear disposition after inspection:
- Accept and issue: The piece meets the applicable requirements and can return to the correct bundle or operation.
- Hold: Information, clarification, correction, or a further decision is needed before use.
- Reject and investigate: The piece does not meet the requirements, or the cause suggests a wider problem that needs review.
Record the inspection outcome and the person responsible for the decision according to the local procedure. Final-garment inspection may still be necessary; an acceptable replacement component does not by itself demonstrate that the completed garment conforms to every product requirement.
Common Recutting Mistakes and How to Prevent Repeat Problems
Several avoidable mistakes can create a second defect. Common examples include using an obsolete pattern, cutting from an unmatched shade lot, ignoring grainline or nap, losing bundle identity, and recutting before confirming what caused the original problem. Another weak practice is closing the request as soon as a replacement is issued without checking related pieces, sizes, colors, bundles, or the same cutting operation.
Prevention starts with comparing production against the intended target: the approved pattern, sample, material requirement, and process instructions. Batch records, process checks, and exception notes can help show whether the problem is isolated or recurring. If replacement work repeatedly waits, accumulates, or returns from another operation, review the flow around it. Increasing cutting speed or the number of recuts does not necessarily improve total output when another operation remains constrained; it may only create more work in process.
A compact prevention checklist should cover the complete information and material path:
- Confirm the trigger and contain the affected bundle or garment.
- Check the approved specification, pattern, marker, size, and component identity.
- Verify the material lot, shade, width, direction, surface, and pattern requirements that apply.
- Obtain the project-defined approval before cutting.
- Cut, identify, and keep the replacement with the correct bundle.
- Inspect identity, quantity, appearance, markings, shape, and applicable dimensions.
- Issue accepted pieces to the correct operation and record the outcome.
- Review repeated recuts and unresolved causes instead of treating them as isolated events.
This framework is a starting point for an actual work instruction. Adapt the approval route, record fields, inspection criteria, and release decisions to the garment type, factory procedure, customer requirements, and approved product documents. Apparel teams can also use relevant Apparel Manufacturing Tools to organize production checks and supporting information, while keeping the controlling criteria specific to the project.
What is a recutting procedure in apparel manufacturing?
A recutting procedure is a controlled method for producing and releasing replacement garment components after original pieces are missing, damaged, rejected, incorrectly cut, or otherwise unsuitable. It normally includes confirmation, approval, cutting, identification, inspection, issue, and closure.
What are the most common reasons for recutting garment components?
Common reasons include component defects, missing pieces, incorrect dimensions, wrong orientation, incorrect size or marker use, cutting damage, and loss during handling. The exact decision depends on the verified cause and the applicable product requirements.
Should a recut use the same fabric lot as the original cut?
Not always. Using the original lot may help maintain consistency, but availability and material condition also matter. If another lot is used, its identity and compatibility should be checked against the project requirements, especially for shade, direction, surface, and pattern matching.
What information should a garment recut request include?
It should identify the style or order, color, size, component, quantity, reason, material source or lot, relevant pattern or marker version, destination bundle, required date, requester, and approval route. The factory may use different fields or systems.
How do you prevent replacement pieces from being mixed with the wrong bundle?
Keep the pieces together, identify them with the correct style, size, color, component, and bundle information, and distinguish the recut where the production system requires it. Issue them only after inspection and confirmation of the destination operation.
Who should approve a recut before the replacement pieces are cut?
The responsible approver depends on the factory and project procedure. It may involve production, cutting, quality, development, or another designated role. The important point is that the approval authority and acceptance criteria should be defined before cutting begins.