Understanding Zipper Waviness and Zipper QC
Zipper waviness—sometimes called zipper rippling—occurs when the fabric around a zipper looks wavy, bumpy, or uneven after being sewn in. For apparel brands and garment factories, controlling zipper waviness is a crucial aspect of zipper QC (Quality Control), as it directly impacts the finished product’s appearance and perceived quality. This guide unpacks why zippers warp or wave, the best practices to prevent defects, and how to achieve perfectly flat zipper installations every time.
What Is Zipper Waviness?
Zipper waviness refers to visible ripples or undulating lines forming alongside a stitched zipper. The issue is especially obvious on delicate or stretchy fabrics and can occur with both invisible and exposed zippers. Garment professionals take zipper waviness seriously, since it’s a sign of poor construction or improper QC, and can result in costly rework or product returns.
Main Causes of Zipper Warping or Waviness
To correct or avoid zipper waves, it’s important to understand the main factors behind the issue. The most frequent culprits are presser-foot pressure, fabric stretch, stabilizer use, and sewing direction. Let’s review each in depth.
The Role of Presser-Foot Pressure
Presser-foot pressure is a decisive factor in zipper waviness. If the presser foot presses too hard, it can push the zipper tape and fabric out of shape, leading to ripples. This is particularly likely with lighter fabrics. On the other hand, insufficient pressure can cause shifting and uneven stitch lines. Carefully adjusted presser-foot pressure, tailored for the project’s fabric type and zipper thickness, is key for flat zipper installation.
How Fabric Stretch Affects Zipper Installation
Stretched or distorted fabric during assembly is one of the most common reasons zippers warp or wave. Stretchy or unstable fabrics—think knits, rayon, or thin woven materials—can elongate as they’re sewn. If fabric is pulled or stretched while the zipper is attached, it will contract and pucker after release, resulting in wavy seams.
Why Stabilizing Techniques Matter
Stabilizing the zipper area before installation can dramatically reduce waviness. Techniques include:
- Applying fusible interfacing or stabilizer strips to the zipper seam allowance
- Using a stay tape or lightweight woven tape
- Employing water-soluble stabilizer for difficult fabrics
The goal is to support the fabric so it maintains its shape and resists distortion during both sewing and wear.
Presser-Foot Pressure: How to Adjust for Flawless Zipper Attachment
Correct presser-foot pressure varies by fabric type and zipper model. On most industrial machines, adjustments are made with a screw or dial above the presser bar. The aim is to use minimal pressure that still maintains fabric control. Test different settings on scraps:
- For light fabrics: Reduce pressure so the zipper and fabric slide smoothly, without marks.
- For heavy fabrics: Maintain moderate pressure for even feeding without fabric slippage.
- Avoid tugging or stretching as you sew. Let the feed dogs guide the material naturally.
Sewing Direction: Top-Down or Bottom-Up?
Consistent sewing direction can minimize waviness. For zippers, it’s best to sew both sides in the same direction (e.g., from the top of the garment downward). This helps ensure both seam allowances and fabrics relax similarly, preventing uneven pull and ripples. Mark notches before starting for perfect alignment.
The Impact of Fabric Properties
Different fabrics behave uniquely during zipper installation. Firm woven and non-stretch materials usually hold their shape, while spandex blends, chiffons, or bias-cut panels are more likely to wave. Take extra precautions when sewing with tricky substrates—extra stabilization and a gentler touch are essential.
Stabilizing Techniques: Choosing the Right Method
Select stabilization based on garment needs and fabric:
- Fusible Interfacing for stable support (woven or knit types exist)
- Stay Tape along the seam for extra hold
- Basting by hand or machine to set the zipper temporarily before final stitching
Lightweight adhesive tapes can also help place the zipper securely without shifting during assembly.
Needle and Thread Selection for Perfect Zippers
Choosing the correct needle and thread prevents skipped stitches and puckering. Use a size 75/11–80/12 universal or microtex needle for fine fabrics. Use all-polyester or high-quality cotton/poly thread, as both deliver smooth seams and minimal tension changes.
Feed Dog Interactions: Controlling Fabric Movement
The feed dogs—the lower teeth on your sewing machine—advance fabric during stitching. For zipper QC, ensure the feed ratio isn’t dragging or pushing the fabric unevenly. Some machines allow for fine-tuning or even lowering feed dog height, which is useful for delicate work and slippery fabrics.
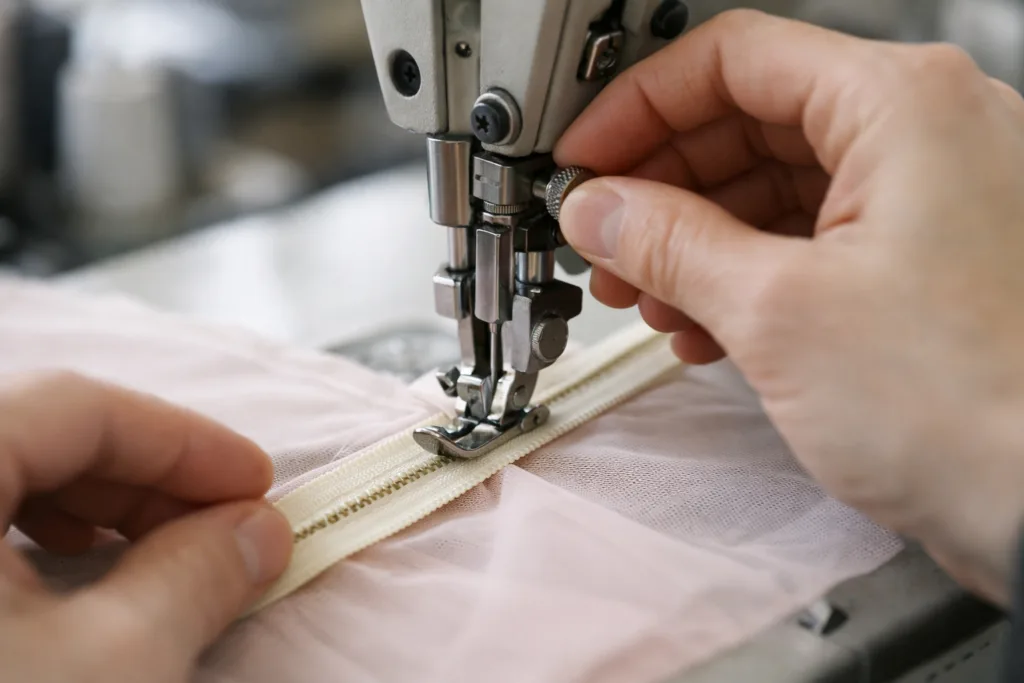
Invisible Zippers: Unique Challenges
Invisible zippers require especially careful handling. Because stitching must be very close to the zipper coils, there’s less margin for error:
- Use a specialty invisible zipper foot
- Stabilize seam allowances
- Sew slowly and avoid stretching the opening
Ripples here are often even more visible due to the design.
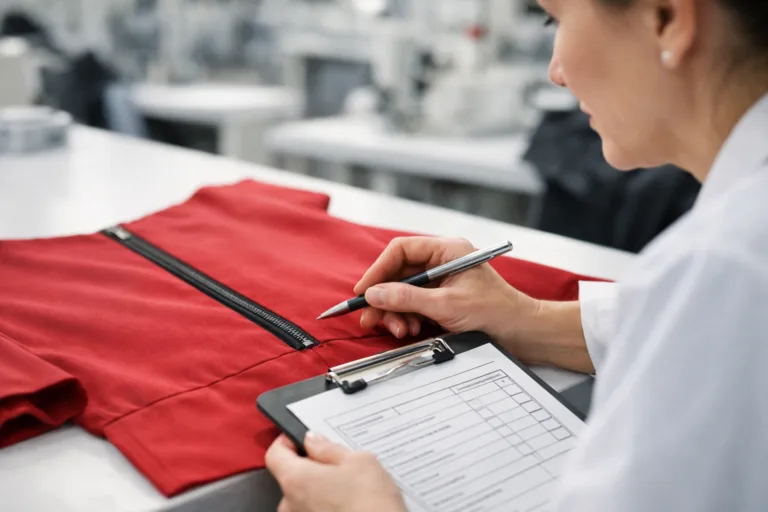
Quality Control Standards for Zipper Installations
Zipper QC in factories includes checks for flatness, evenness, matching seam lines, and absence of waviness. A routine inspection checklist includes:
- No ripple or wave present along zipper seam
- No distortion on garment front or back
- Consistent stitch length, tension, and seam width
- Fastener moves smoothly
How Apparel Wiki Approaches Zipper QC
According to Rain Chen from Apparel Wiki, practical QC goes beyond visual inspection. Technicians assess not just seam appearance, but also the hand-feel and the stability of the surrounding fabric. On high-volume sewing floors, common pitfalls—such as unstandardized presser-foot adjustments or rushing through stabilizing steps—are watched closely. Rain suggests, “The real trick is to teach machinists about the interplay between pressure, feed, and fabric memory. Small details make a big difference.”
Signs of Zipper Warping to Watch For
- Fabric undulates or ripples alongside zipper
- Zipper tape looks puckered after pressing
- Seam pulls or twists after garment is zipped up
- Zipper stands away from garment, not lying flat
Step-by-Step: Installing a Zipper Without Waviness
Ensuring a flat zipper every time:
- Choose the right zipper and size for your application
- Prepare and stabilize the seam allowance
- Mark match points and notches for accurate alignment
- Test and set presser-foot pressure suitable for the fabric
- Pinned or basted zipper before sewing
- Sew both sides in the same direction, without stretching
- Press lightly using a pressing cloth to set the seam
Zipper Types: Coil, Vislon, Metal—Does Material Matter?
Zipper construction affects waviness. Lightweight coil and invisible zippers are more prone to rippling, especially on thin or unbacked fabrics. Sturdy metal or molded plastic zippers usually offer a broader, stiffer tape, minimizing the risk on more robust textiles.
Garment Categories Most Affected by Zipper Waves
- Dresses with invisible or lapped zippers
- Stretchy knit skirts and sportswear
- Unlined jackets, especially with soft shell faces
- Pillowcases and home textiles when using lightweight cottons
Preventing Zipper Waviness in Home Sewing and Factory Settings
For home sewists and commercial operators alike, the solutions are straightforward:
- Never stretch the fabric under the presser foot
- Match zipper, machine needle, and thread to fabric weight
- Stabilize seam allowances, especially for delicate or thin fabrics
- Adjust presser-foot pressure and conduct test stitches
Testing and Troubleshooting: Sample, Check, Repeat
Professional zipper QC includes making test samples before bulk production. Common troubleshooting tactics:
- If waves persist, further reduce pressure or add extra stabilization
- Try a walking foot or zipper foot to promote even feeding
- Slow machine speed, especially on delicate seams
Documentation and Feedback in Zipper QC
Factories and brands often document zipper QC methods and common failures. Feedback between QC technicians and sewists ensures ongoing improvement, reducing defect rates in future runs.
Common Myths About Zipper Warping
- “Pressing will eliminate waves.” (Pressing can minimize ripples but won’t fix underlying fabric distortion.)
- “Any fabric can take any zipper.” (Pairing matters—a heavy zipper can distort lightweight fabric.)
- “All waviness is from the sewing.” (Pre-existing stretches or flaws in fabric spreading can also cause issues.)
Maintaining Zipper Flatness During Garment Use
Proper manufacturing fixes most waviness—but garment care also matters. Users should avoid pulling zippers with excessive force. If mild waviness emerges after laundering, gently pressing with steam can help smooth temporary puckers.
Why does the zipper warp or wave?
The most common reasons zippers warp or wave are excessive presser-foot pressure, sewing on stretched or unstable fabric, and skipping seam stabilization. Proper adjustment of machine pressure and careful preparation of the zipper seam area—especially for light, delicate, or stretchy textiles—are essential for crisp, professional zipper installation. Garment factories and home sewists alike can greatly reduce zipper QC failures with these preventive steps, resulting in flatter, more consistent seams and happier customers.
Conclusion: Key Takeaways for Flawless Zippers

Perfect zippers don’t have to be a mystery. Understanding the mechanics of presser-foot pressure, fabric stability, and consistent sewing technique delivers crisp, professional results. By stabilizing fabric, adjusting machine settings, and paying close attention to feed direction, both brands and individual sewists can achieve top-tier zipper QC with confidence. Keep testing, tweaking, and learning—because every successful garment is built on the details.
Frequently Asked Questions
What causes zipper waviness in finished garments?
The main causes are too much presser-foot pressure, sewing on stretched fabric, and lack of proper stabilization during zipper installation.
How do I prevent a zipper from waving on lightweight fabrics?
Stabilize the seam area using fusible interfacing or stay tape, reduce presser-foot pressure, and sew slowly without pulling the fabric as you attach the zipper.
Does the type of zipper affect waviness?
Yes, lightweight coil and invisible zippers are more prone to cause ripples on thin fabrics than stiffer metal or molded plastic zippers.
Is it better to sew zippers from top to bottom?
Sewing both sides of the zipper seam in the same direction, top-down, helps prevent uneven stretching and reduces waviness.
Can pressing fix a wavy zipper after sewing?
Pressing can help minimize mild puckers but usually won’t eliminate waves caused by improper installation. Prevention is more effective than correction.
Why does stabilizing tape help with zipper QC?
Stabilizing tape keeps the fabric from stretching, supporting the zipper seam and helping to maintain a flat, even finish after sewing.