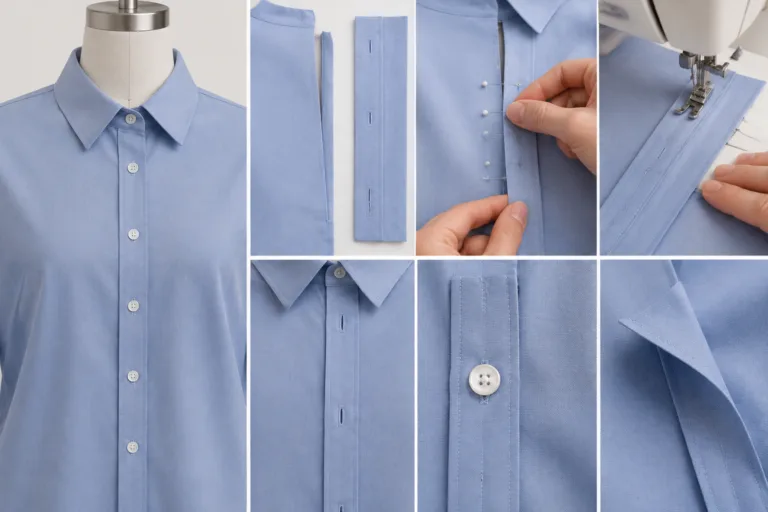
Button front plackets construction is the planned sequence used to build the front opening that carries a button-and-buttonhole closure. The placket is an assembled opening area, not simply the garment front, one seam, or one stitch type. A practical sequence is to read the pattern and markings, prepare and stabilize the required layers, assemble and press the placket, join it to the front, complete the closure, and inspect alignment and function. Apparel Wiki is an independent educational publication; you can Sponsor its work without treating sponsorship as control of editorial content.
The sequence protects access to internal edges, controls the finished opening, and gives later closure operations reliable landmarks. It is a planning framework rather than a universal recipe. Folded, applied, faced, knit, and woven plackets can require different operations because layer order, fabric movement, garment shape, and available equipment change how the work can be reached and controlled.
Button Front Plackets Construction: The Basic Sequence
A button front placket is the constructed portion of a garment front that supports the opening, its finished edges, and the button-and-buttonhole closure. It may use the garment front itself, added fabric, folded layers, or a facing. The placket assembly should be distinguished from the front panel around it. It should also be distinguished from a seam, seam allowance, or stitch: a seam describes how layers are joined, while a stitch describes how thread is formed or interlaced.
The general button front placket sequence is:
- Interpret the pattern, opening edges, fold lines, grain or stretch direction, and closure landmarks.
- Prepare the cut components and any specified stabilization or reinforcement.
- Construct the placket layers, control the edges and ends, and press the intended shape.
- Attach the finished or partly finished placket to the garment front, or build it directly on the front when the design requires that method.
- Make the buttonholes and attach the buttons from the finished opening and approved markings.
- Inspect alignment, edge control, flatness, opening and closing, and other specified quality requirements.
This order reflects access as much as appearance. Internal edges, reinforcement, and difficult-to-reach areas are generally easier to handle before surrounding sections are permanently closed. Buttonholes and buttons come later because their positions depend on the completed opening, overlap, and confirmed landmarks. Closing a neckline, hem, or adjacent front area too early can restrict access and make correction more difficult.
The exact button front placket sequence depends on the pattern design, fabric behavior, garment front, closure direction, and equipment. A lightweight stretch front may need more controlled handling than a stable woven front, while an applied placket may be assembled differently from a folded self-fabric one. Treat the sequence as a decision framework, not a mandatory specification.
Read the Pattern and Prepare the Placket Components
Preparation begins by separating the information that controls the opening from general front-panel information. Identify the wearer’s left and right sides when the closure is directional. Then locate the opening edges, fold or turn lines, notches, ends, grainline or stretch direction, and the landmarks used for buttonholes and buttons. Check whether the pattern calls for a separate placket, a facing, a folded extension, or a directly constructed opening.
Before sewing, compare the cut pieces with the approved pattern or specification. Check the shape of each edge, the location of matching points, the intended fold, and any stabilization layer. Transfer only the marks needed for alignment and closure placement. Extra marks can become confusing, especially when the visible finished edge differs from an internal joining seam. Establishing a pressed crease may help some designs, but the appropriate handling depends on the fabric and the intended finish.
| Observable input | Construction implication | Initial sequence choice | Variable that may change it |
|---|---|---|---|
| Folded self-fabric placket | The front fabric may supply both the visible edge and internal layers. | Confirm fold lines and control the extension before joining nearby front areas. | Fabric thickness, stretch, and the specified edge finish. |
| Applied or separate placket | A prepared unit must match the front opening at its edges and ends. | Check the unit’s layer order and landmarks before attachment. | Whether the finished edge is visible and how the ends are enclosed. |
| Faced opening | The facing and front must turn cleanly without losing the intended opening shape. | Prepare the facing, turning points, and internal access before closure. | Neckline, hem, and front-edge relationships. |
| Stretch-sensitive front | Handling and stabilization can affect opening control and comfort. | Control the layers before applying closure details. | Stretch, recovery, thickness, and the specified finish. |
Stabilization is a design-dependent decision. Added layers can control shape and help distribute closure load, but they can also create thickness, stiffness, friction, or a noticeable hard point. Reinforcement should correspond to a defined handling or failure risk rather than being added wherever the area feels weak. Confirm the approved pattern or specification before using any unlisted allowance, spacing, or reinforcement detail.
Assemble and Press the Placket Before Joining the Front
Once the components are identified, bring the layers together in the order established by the pattern. Match the relevant edges, notches, fold lines, and ends before sewing or applying the specified edge treatment. In some designs, the placket becomes a separate unit. In others, one layer remains part of the front and the placket is built directly on it. The visible result may look similar, but the order of access and layer control is different.
Keep the terminology clear during assembly. The visible finished edge is not necessarily the internal joining seam. A seam allowance is the fabric area reserved for a seam or edge treatment, while a stitch is the thread formation used to make that connection. A placket can therefore contain several seams, folds, edge treatments, and securing operations without any one of them representing the entire placket construction.
After the layers are positioned, sew the required joining operation while keeping the marked fold and opening direction under control. The suitable stitch choice and machine setup depend on the approved construction and material, so this sequence does not prescribe settings. What matters at this stage is that the intended layers are captured, the edges remain aligned, and the operation does not introduce avoidable distortion.
Turn, clip, trim, or grade only where the pattern and fabric behavior call for it. Removing too much material can weaken an edge or end; retaining too much can create bulk and prevent a clean turn. The correct treatment also depends on whether the area will be enclosed, topstitched, folded, or joined to another garment section. Do not apply one trimming rule to every placket design.
Pressing is a shaping and alignment operation, not merely a final appearance step. Establish the intended fold, keep the opening straight, and avoid pressing a distortion into the front. The appropriate heat, moisture, pressure, and support depend on the material and finish. Pressing should help the layers settle into their planned position without flattening a form that the design needs to remain dimensional.
Before attaching the placket to the garment front, inspect the partly finished assembly. Look for uneven edges, trapped or missing layers, puckering, damaged or skipped stitches, misaligned folds, bulky ends, and a placket that no longer lies flat. Also check that the opening remains the intended length and direction according to the pattern. These are construction checks, not production acceptance limits; any formal limits belong to the applicable specification or quality system.
Strength also depends on the relationship between the thread, stitch, seam, fabric, and movement. A stronger thread alone does not guarantee a durable assembly if the fabric, seam, or placket edge cannot accommodate the applied load. Correcting a weak-looking area with more layers or securing stitches may redistribute force, but it can also increase stiffness, friction, or bulk. Evaluate the whole layer system before moving to attachment.
Attach the Finished Placket to the Garment Front
Once the placket assembly has been prepared, align it with the garment-front opening using the pattern’s notches, fold lines, ends, and center or overlap landmarks. Check the direction of the finished edge before securing the layers. A small marking error at this stage can affect the entire closure, so compare both sides against the approved pattern or specification where the design requires directional placement.
Some plackets are assembled as a unit and then attached to the front. Others are built directly on the garment panel. The choice depends on the layer order, the visibility of the finished edge, access to internal seams, and the need to keep the opening straight. A unitized placket can make its shape easier to inspect before attachment. A directly constructed version may provide better control when the front panel itself establishes the opening or when the design uses integrated folds.
Secure the placket in the order specified by the design. Keep the opening, overlap, and adjacent front edge aligned while joining the layers. Internal or difficult-to-reach work should generally be completed before the neckline, hem, or nearby front area is permanently closed. Closing those surrounding areas too early can restrict access and make correction more difficult. Conversely, postpone any operation that needs the finished opening as its reference until the opening has been stabilized and checked.
Pay particular attention to the upper and lower ends. Seam allowances, turns, and folded layers can collect bulk where the placket transitions into the neckline, hem, or front edge. The pattern may call for a specific end treatment, but there is no universal finish that suits every design. Follow the planned layer order and inspect whether the transition turns cleanly, presses flat, and leaves the opening in the intended position.
Fabric behavior can change the priority. With a lightweight knit, controlled handling and suitable stabilization may matter most because stretching during attachment can distort the opening. With a crisp woven, pressing and edge alignment may dominate the sequence. Stretch, recovery, thickness, and the specified finish can all change the appropriate method. Added layers or securing stitches may redistribute closure force, but they can also increase stiffness, skin contact, or friction. Evaluate the complete assembly rather than treating reinforcement as automatically beneficial.
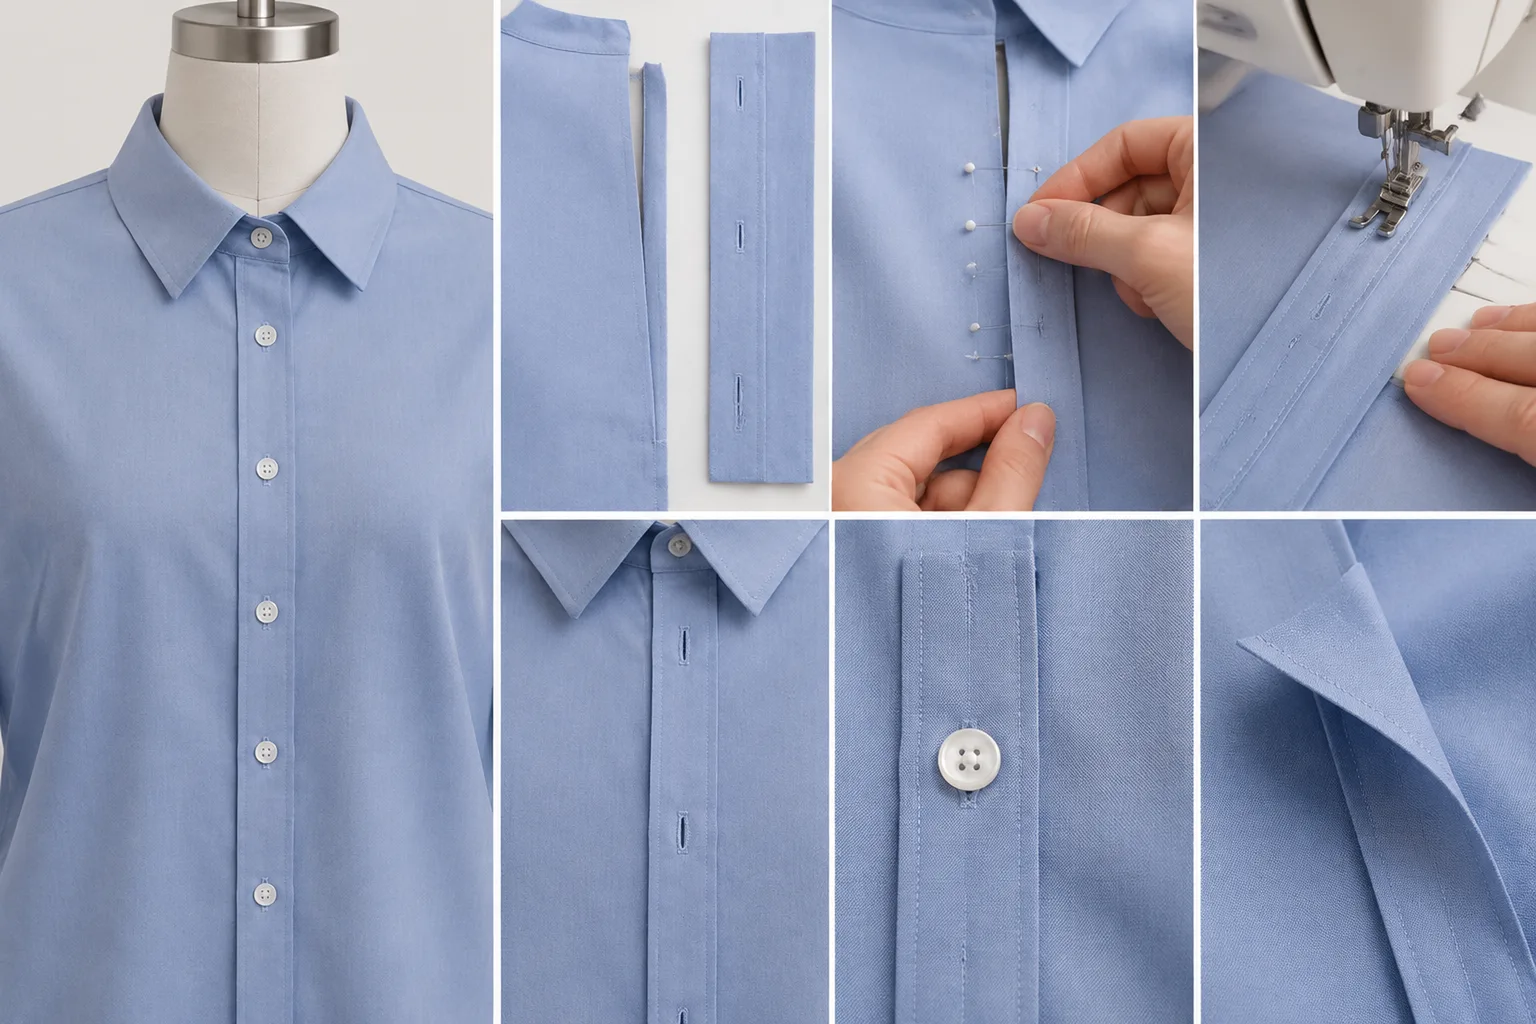
Complete the Closure and Inspect the Finished Opening
Place the buttonholes and buttons from the finished placket and the approved closure landmarks. Their relationship matters more than any universal measurement. Check the overlap, opening direction, ease of opening, and engagement of each button. The buttonhole and button should be evaluated together because a correct-looking location on one side can still produce drag or gaping when the two sides meet.
Separate visual inspection from functional inspection. First examine the opening for intended straightness, symmetry where the design calls for it, flatness, clean corners, secure ends, and a consistent finished edge. Look for trapped layers, uneven turns, damaged or skipped stitches, puckering, twisting, and changes in width. Then open and close the garment through the complete closure. Observe whether the placket drags, gaps, shifts, or resists at a particular point.
| Observed symptom | Possible area to check | Follow-up consideration |
|---|---|---|
| Uneven overlap | Transferred landmarks, edge alignment, or directional placement | Compare the finished opening with the approved pattern markings |
| Puckering | Handling, stabilization, layer movement, or stitch formation | Check the local assembly before adding more reinforcement |
| Excessive bulk | Layer count, seam-allowance management, or bulky ends | Review the planned construction and transition into adjacent areas |
| Poor button engagement | Buttonhole and button placement as a combined system | Test the closure at each location and inspect for drag or gaping |
Use the symptom to guide the correction. Uneven overlap may point to a marking or alignment problem. Puckering may require a closer look at handling, stabilization, or stitch formation. Excessive bulk may result from the number of layers or from allowances that were not managed for the fabric. Poor closure function may require checking both button placement and buttonhole placement rather than adjusting only one component.
Any local reinforcement, additional securing, or altered handling should address an identified failure mechanism. Recheck the area afterward for new hard points, friction, stiffness, bulk, or distortion. A stronger thread or extra securing operation does not by itself guarantee a stronger placket. The fabric, seam, stitch, edge, and closure must accommodate the load and movement together.
For repeatability, record the approved pattern version, the construction variation used, and the issue observed during inspection. Formal production acceptance criteria belong to the applicable specification or quality system. Where no numeric limit or named test method is supplied, use these checks to identify conditions that need review rather than treating qualitative observations as pass-or-fail standards.
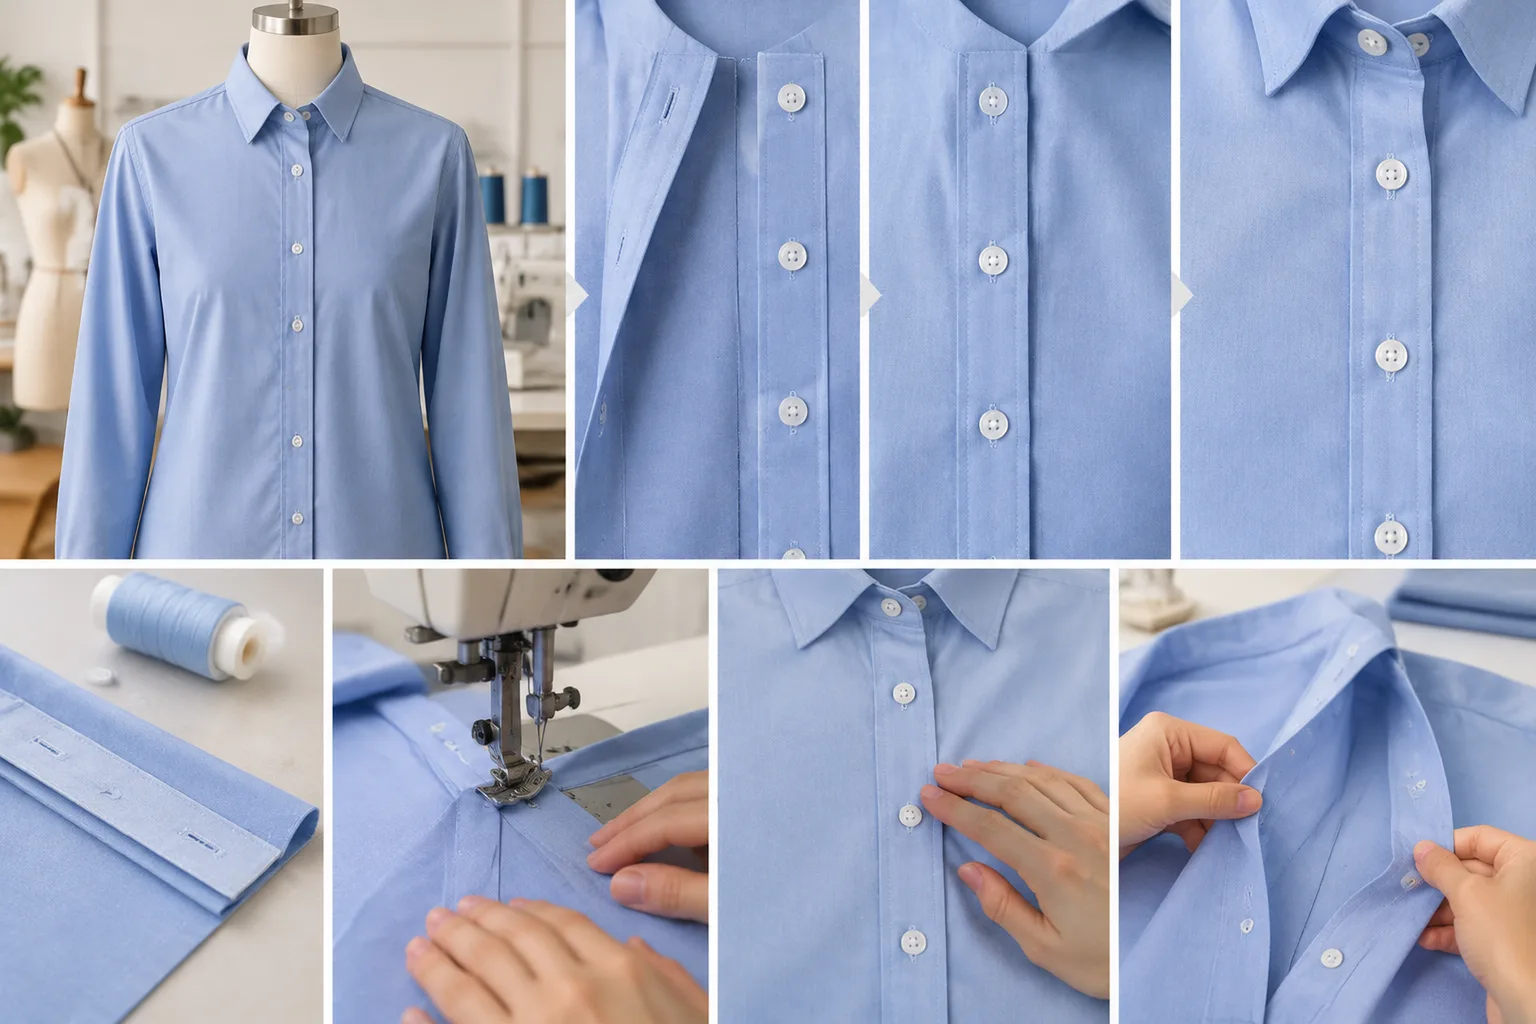
Use the Sequence as a Construction Checklist
Use the general sequence as a working checklist: prepare the pattern and components, mark the necessary landmarks, assemble and press the placket, attach it with access in mind, complete the closure, and inspect both appearance and function. Annotate the pattern or sample with checkpoints for layer order, bulk, alignment, and difficult-to-reach operations. There is no single best order for every style; the useful order preserves access, controls the layers, and matches the specified finish. Check the applicable pattern, specification, and construction or test guidance whenever a project requires numeric settings, acceptance limits, or a named method.
Frequently Asked Questions
What is the first step in constructing a button front placket?
Begin by reading the approved pattern and identifying the opening edges, fold lines, notches, grain or stretch direction, closure landmarks, and required layers. This preparation establishes the alignment references before the placket is assembled or attached.
Can a button placket be assembled before it is attached to the garment front?
Yes. Some designs are assembled as a separate unit before attachment, while others are built directly on the front. The suitable method depends on layer order, access to internal seams, the finished-edge treatment, and how the design controls the opening.
How does fabric type change the button front placket construction sequence?
Fabric stretch, recovery, thickness, and pressing response can change the priority of each operation. A lightweight knit may need more controlled handling and stabilization, while a crisp woven may place greater emphasis on pressing and precise edge alignment.
When should buttonholes and buttons be added to a button front placket?
Add them after the finished opening and its approved landmarks have been established, unless the pattern specifically directs another order. Check buttonholes and buttons together for overlap, alignment, engagement, and ease of opening.
What should be checked if a finished button placket puckers or does not lie flat?
Inspect layer alignment, handling, stabilization, stitch formation, seam-allowance bulk, pressing, and the transition at the ends. Correct the likely cause, then check that the change has not introduced stiffness, friction, hard points, or further distortion.