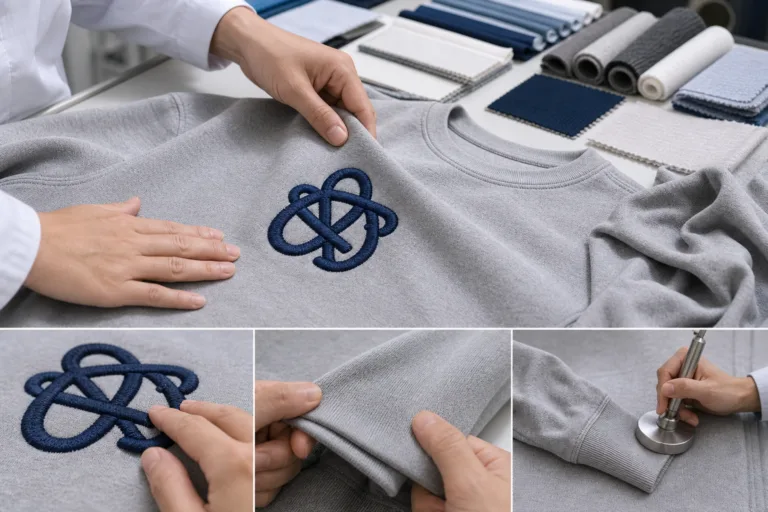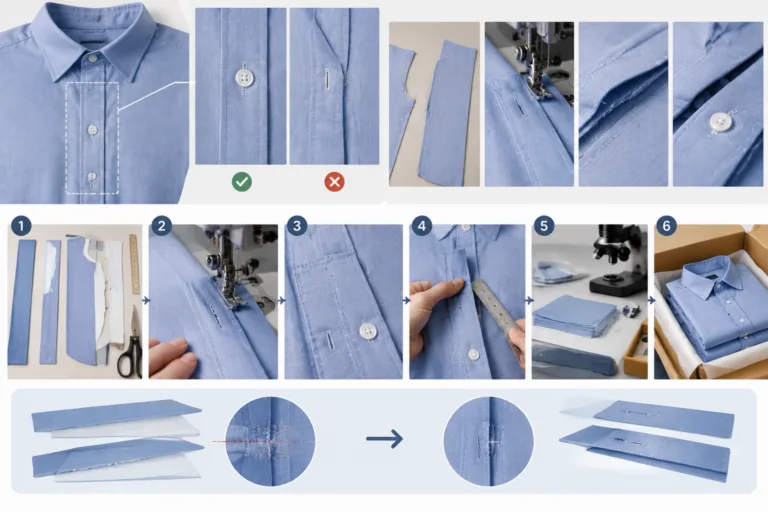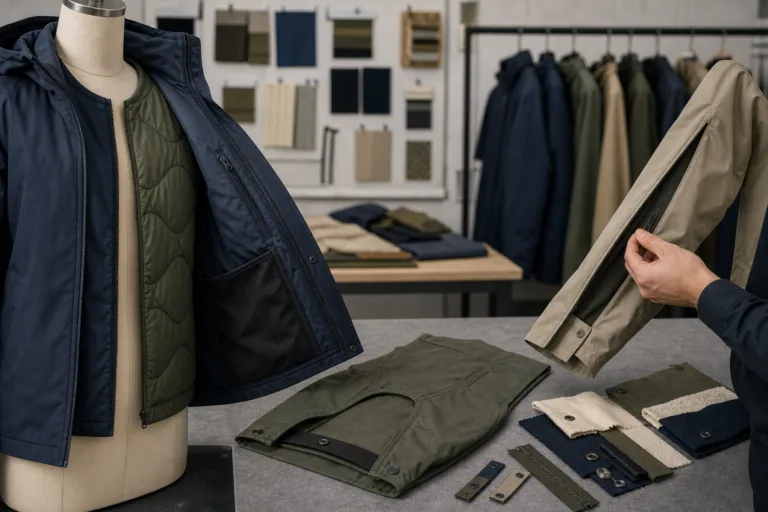
Clothing design for repair means planning a garment’s construction, components, access points, and repair information so foreseeable damage or wear can be corrected without unnecessarily changing the intended fit, proportion, or appearance. For apparel teams, this makes repairability a product-development requirement rather than a consumer-only afterthought. The approach described here follows Apparel Wiki’s independent editorial principles, including those outlined on its Sponsor page.
Repairability is not the same as durability, a guaranteed long service life, recyclability, or an assurance that every repair will be invisible. A repairable garment may still require skilled work, replacement materials, or access to a suitable repair service. The practical goal is to protect the outcomes that matter for continued use: measurements, seam alignment, silhouette, surface appearance, component function, comfort, and the wearer’s willingness to keep using the garment.
What Clothing Design for Repair Means
Designing clothes for repair starts with foreseeable problems. A team considers where the garment may experience stress, abrasion, snagging, loosening, staining, or component failure, then plans a realistic way to inspect, open, resew, reinforce, replace, adjust, or clean the affected area. The best solution depends on the garment category, fabric, construction method, expected use, available skills and tools, replacement parts, and local repair options.
Repair access must also be judged against the result after repair. A seam may be easy to reach but difficult to resew without changing its position. A replaceable fastener may restore function but introduce a visible color or finish mismatch. A patch may secure a damaged area while changing local thickness, stretch, or drape. These are design decisions that need evaluation, not assumptions based only on the original sample.
Research on clothing repair practices and techniques supports treating repair as a relationship between garment design and later use. In product development, that relationship can be recorded through a repair scenario: the likely damage, the person or service expected to perform the work, the materials and tools required, and the fit and appearance requirements to check afterward.
There is no single repair-friendly detail that works for every product. A construction choice suitable for a woven work jacket may be inappropriate for a lightweight stretch garment. Similarly, a feature that helps a professional repairer may be impractical for a wearer working without specialized equipment. Typical construction practice can inform the decision, but the intended garment, failure mode, and repair setting determine whether the choice is appropriate.
Map Failure Points Before Choosing Construction Details
A failure map gives the design and product team a structured view of where repair is most likely to matter. It should begin with product-specific evidence such as wear observations, sample reviews, returns, repair records, quality reports, and user feedback. These sources show what has happened to a particular product or comparable product; they do not prove that the same failure will occur in every garment category.
Review the garment by zone rather than adding generic reinforcement everywhere. High-load seams, openings, hems, pockets, waist areas, straps, fasteners, and surfaces exposed to abrasion or snagging may each need different responses. One area may need access for resewing, another a replaceable component, and another a patching or cleaning instruction. The repair requirement should follow the observed or anticipated failure, not the other way around.
| Failure area | Repair question | Fit or appearance risk |
|---|---|---|
| High-load seam | Can it be opened and resewn with sufficient access? | Changed seam position, local bulk, or altered balance |
| Hem or cuff | Can the original length and edge finish be restored? | Uneven hem, changed proportion, or visible needle marks |
| Pocket or opening | Can the damaged section be replaced or reinforced? | Misalignment, reduced capacity, or distorted drape |
| Fastener or strap | Is a compatible replacement available and attachable? | Different color, finish, position, strength, or function |
For each failure point, record the intended repair action and the conditions that could affect the result. Rese wing may change seam allowance or local thickness. Patching can alter stretch and surface appearance. Component replacement can affect symmetry or the position of matching details. A useful product specification records the original construction, the intended repair outcome, and the person or service expected to complete the work.
Prioritize the failures that are both consequential and realistic. A rare defect with little effect on fit may deserve less design attention than a common closure failure that prevents use. Conversely, a technically possible repair may not be worth specifying if the necessary part, tool, or skill is unavailable in the intended repair setting.
Use Pattern and Seam Choices That Preserve Fit
Pattern making for repair requires attention to the areas that control measurements, balance, and silhouette. Designers should plan where a garment can be opened or resewn without disturbing critical fit lines, seam intersections, balance points, or graded proportions. An accessible seam is useful only when the repair can be completed without pulling the surrounding fabric out of position.
Seam allowance, seam placement, seam finish, stitch configuration, and reinforcement all influence future repair work. More access may help a repairer reach the damaged area, while excess layers or reinforcement may create uncomfortable thickness after resewing. The appropriate choice depends on the fabric and garment. A construction detail that works for a stable woven material may behave differently in a fine knit, a lined garment, or a fabric with limited recovery.
Pattern decisions also need to account for grain, stretch direction, ease, lining behavior, and fabric recovery. If a repaired panel is placed off grain or attached with the wrong amount of ease, the surrounding garment may twist, ripple, or lose its intended drape. Closure zones, cuffs, pocket parts, and waist sections can sometimes be planned as replaceable or adjustable areas, but only when that arrangement fits the garment’s function and visual language.
Hidden repair zones are not automatically better than visible ones. A concealed repair may be difficult to access or may require extensive disassembly. A visible repair can be practical when its placement, scale, color, and proportion are intentional. In either case, a construction feature that facilitates repair remains a design hypothesis until a representative repair confirms that measurements, seam alignment, comfort, and appearance are preserved.
Select Materials and Components for Repairable Appearance
Material selection affects whether a repair remains acceptable after the work is complete. Before specifying a repair path, assess whether the base fabric can tolerate resewing, needle marks, patching, pressing, localized stress, and repeated handling without an unacceptable change in surface appearance. The answer depends on fiber content, fabric construction, finish, color, and care history, so broad claims about every fabric should be avoided.
Replacement components should be assessed for size, attachment method, color, finish, strength, stretch, and realistic availability. Buttons, zippers, elastic, labels, thread, and trims may be technically replaceable while still appearing inconsistent with the original garment. Product planning can reduce this problem by recording component details and identifying practical alternatives, but availability should not be claimed without supporting supplier or service evidence.
When exact concealment is unrealistic, visible repair can become an intentional appearance choice. The repair still needs proportion, placement, and material compatibility appropriate to the garment. A single-material or simplified construction does not automatically produce better repair outcomes; the receiving repair capability and the actual repair route remain decisive. Technical compatibility and visual acceptance are separate checks, and both should be considered before approving the design.
Build Repair Access Into the Product and Service Plan
Repairability depends on more than the physical garment. The product plan should identify who is expected to perform each repair: the wearer, a local repairer, a brand service team, or a factory. A simple seam repair may be realistic for one audience, while a component replacement requiring specialized tools may need a different service route. Construction complexity should match the capability that the product is actually intended to reach.
Repair instructions should provide enough information to support the intended task without implying that every repair is suitable for every person. Relevant details may include fiber or material composition, component identification, attachment method, care constraints, and the location of fit-critical seams. Where a repair could affect shape or balance, the documentation should identify the original measurements, seam positions, or appearance references that can be checked afterward.
Replacement planning also needs realistic boundaries. A brand may record the size, color, finish, stretch, and attachment details of a zipper, button, elastic section, label, or trim, but that record does not prove that matching parts will remain available. Teams should distinguish a preferred replacement part from a practical alternative and document who owns the decision if the original component cannot be sourced.
Useful repair documentation connects design intent with production and service controls. Include the intended repair scenarios in the product specification, sample approval notes, and quality records. A repair trial can also show whether the written instructions are understandable and whether the proposed method requires skills or equipment that the service route does not have. Research on clothing repair practices and techniques can provide broader context, but product-specific decisions still require product evidence.

Evaluate Fit and Appearance After a Repair
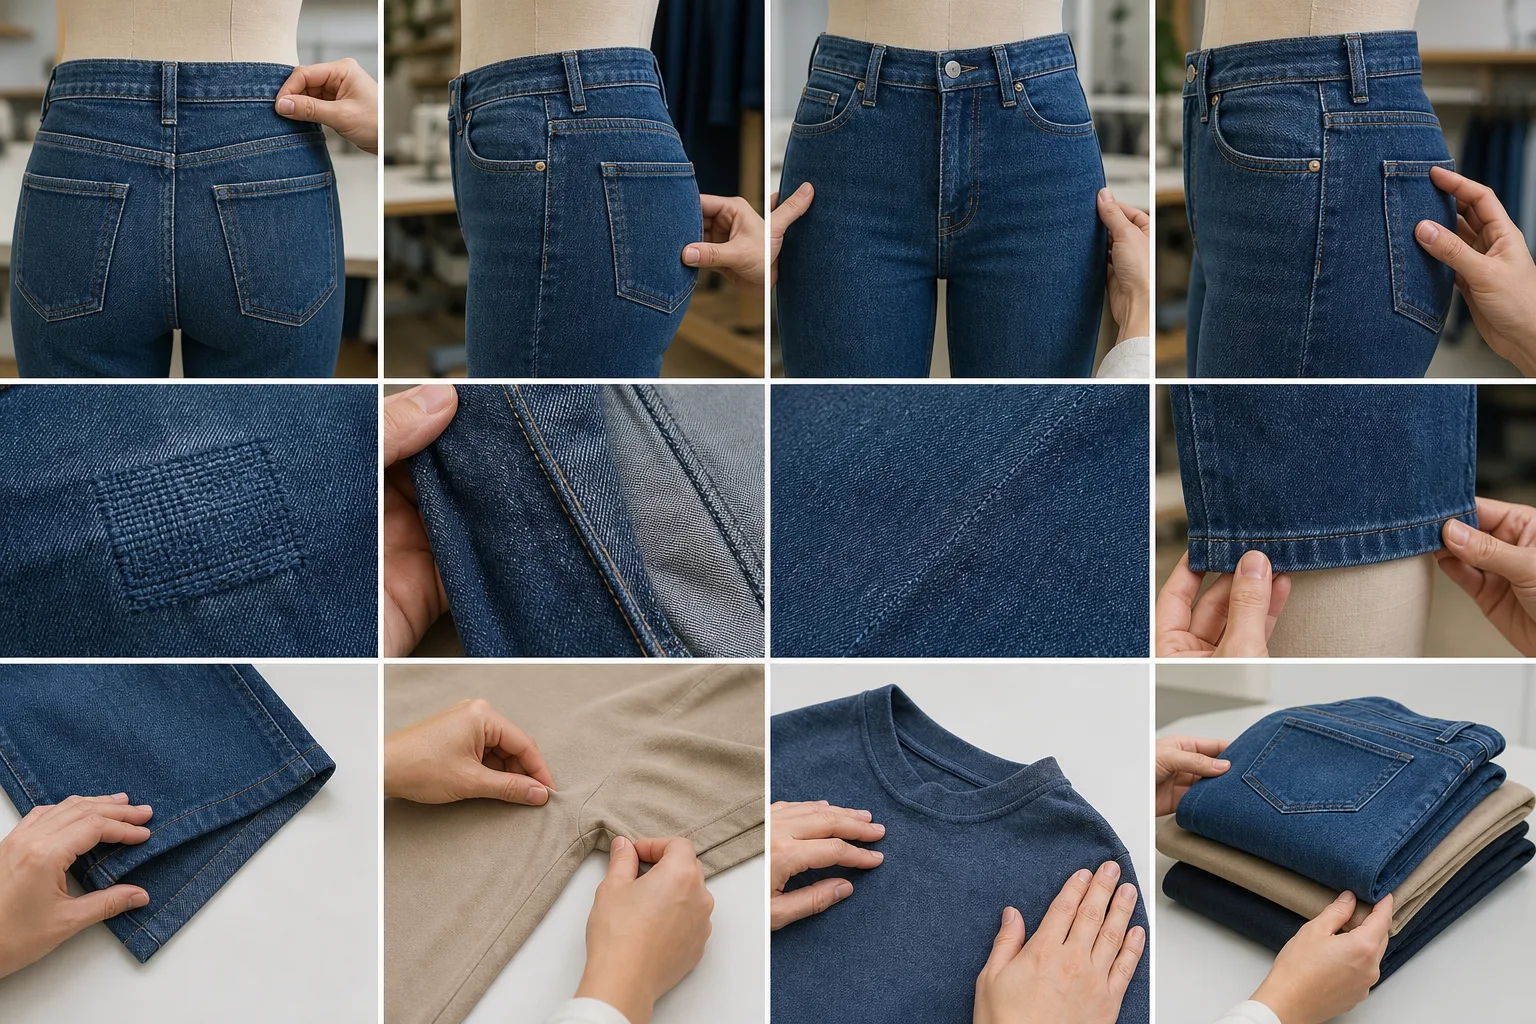
A repaired garment should be compared with a documented baseline rather than judged only from memory. Record relevant measurements, photographs, seam positions, symmetry, closure operation, surface appearance, and fit observations before the repair. The baseline does not need to describe every feature of the garment; it should capture the areas most likely to change during the selected repair.
Next, perform a representative repair on a prototype or damaged sample. Use the intended method, tools, replacement materials, and approximate skill level of the planned repair setting. For example, a repair intended for a local service provider should not be validated only through a highly controlled factory operation. The trial should reflect the conditions that the product information actually supports.
After the repair, check separate outcomes rather than treating “looks good” as a complete result. Recheck critical measurements, balance, ease, drape, stretch, comfort, seam alignment, and the operation of closures or other components. Inspect for visible needle marks, puckering, color mismatch, local thickness, distortion, or a shifted detail. A garment may function correctly while failing an appearance requirement, or retain its appearance while no longer fitting as intended.
Compare the repaired sample with the baseline under consistent conditions and record the result against the product requirement. The decision may be to approve the repair scenario, revise the construction, change the replacement component, improve the instructions, or limit the repair claim. One successful trial demonstrates only that particular repair under those conditions; it does not establish universal service life or performance across all fabrics, users, and damage types.
Set Practical Limits and Document the Repair Decision
Repairability should be described as a set of supported scenarios, not as an unrestricted product attribute. A specification might cover a particular seam repair, component replacement, minor adjustment, or visible patch, while excluding damage that affects several structural areas or requires unavailable materials. Clear boundaries help designers, service teams, and customers understand what has actually been considered.
Every repair plan involves trade-offs. Easier access may require an opening, seam detail, or local construction change that affects appearance or production complexity. A secure repair may add thickness. A clean visual result may depend on an exact fabric or trim match that is difficult to obtain later. Decisions should therefore consider access, seam security, local bulk, comfort, cost, material matching, production method, and future serviceability together.
Repair should also remain distinct from alteration, refurbishment, resale, rental, and recycling. These pathways preserve different forms of product value and require different operations. A garment designed for a replaceable closure is not automatically optimized for material recycling, and a garment that can be resold is not necessarily easy to repair. The intended pathway and its receiving capability should be stated separately.
A concise development checklist can keep the decision traceable:
- Which failure modes are most relevant to this garment?
- Where can access be provided without disturbing fit-critical areas?
- Which components and materials are compatible with the intended repair?
- Who is expected to perform the repair, and what information or tools are required?
- What baseline measurements and appearance references will be used afterward?
- Which repair scenarios were tested, and which remain outside the supported scope?
Review the completed plan with design, pattern, production, quality, sourcing, and service stakeholders before scale production. Apparel Wiki is an independent educational publication, not a manufacturer, factory, laboratory, certifier, or repair provider. Its practical recommendations should be adapted to the garment, materials, market, and evidence available for the specific project.
Next step: Select the highest-priority failure mode for one garment style, document the original fit and appearance, and validate one realistic repair scenario against those requirements. Record both successful outcomes and limitations before extending the approach to other products.
What is clothing design for repair?
It is the practice of planning construction, components, access, and information so foreseeable repairs can be completed while protecting the garment’s intended fit, function, proportion, and appearance as far as the supported scenario allows.
How can a garment be repaired without changing its fit?
Use a repair route that respects grain, stretch, ease, balance points, seam alignment, and surrounding construction. Compare the repaired garment with documented baseline measurements and fit observations instead of assuming that access alone will preserve the original result.
Which garment construction details make repairs easier?
Accessible seams, carefully planned seam allowances, replaceable components, and clear repair zones can help. Their suitability depends on the fabric, garment category, expected damage, repair skill, tools, and the effect on local bulk and appearance.
How should a brand test whether a repaired garment still looks and fits as intended?
Document a baseline, perform a representative repair with the intended method and materials, then check measurements, balance, comfort, drape, symmetry, component function, seam alignment, and visible changes under consistent conditions.
Does repairable clothing design mean the garment will last longer?
No. Repairability can support continued use when repairs are needed and practical, but it does not prove durability, a specific lifespan, or universal performance. Those conclusions require relevant product evidence.
How should repair limitations be communicated to customers?
State the supported repair types, intended repair route, relevant care or material constraints, and important exclusions. Avoid implying that every kind of damage can be repaired invisibly or by every user.