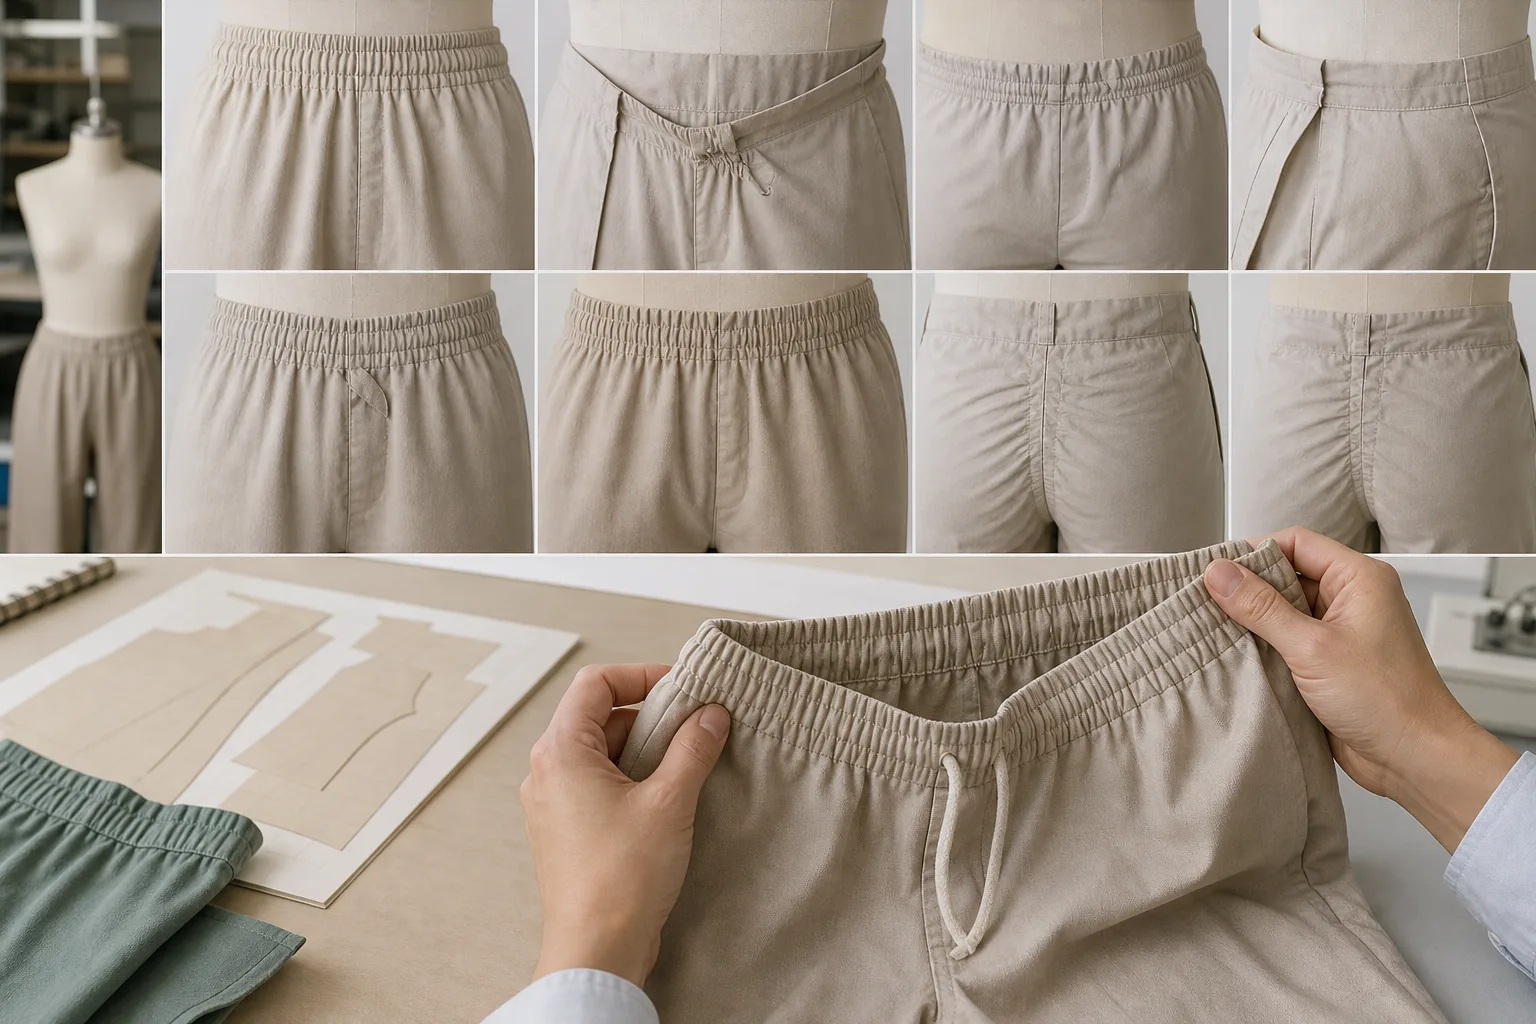
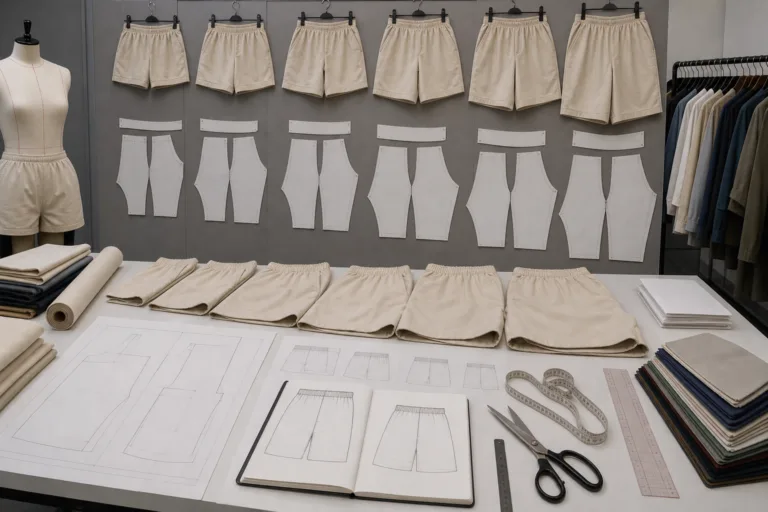
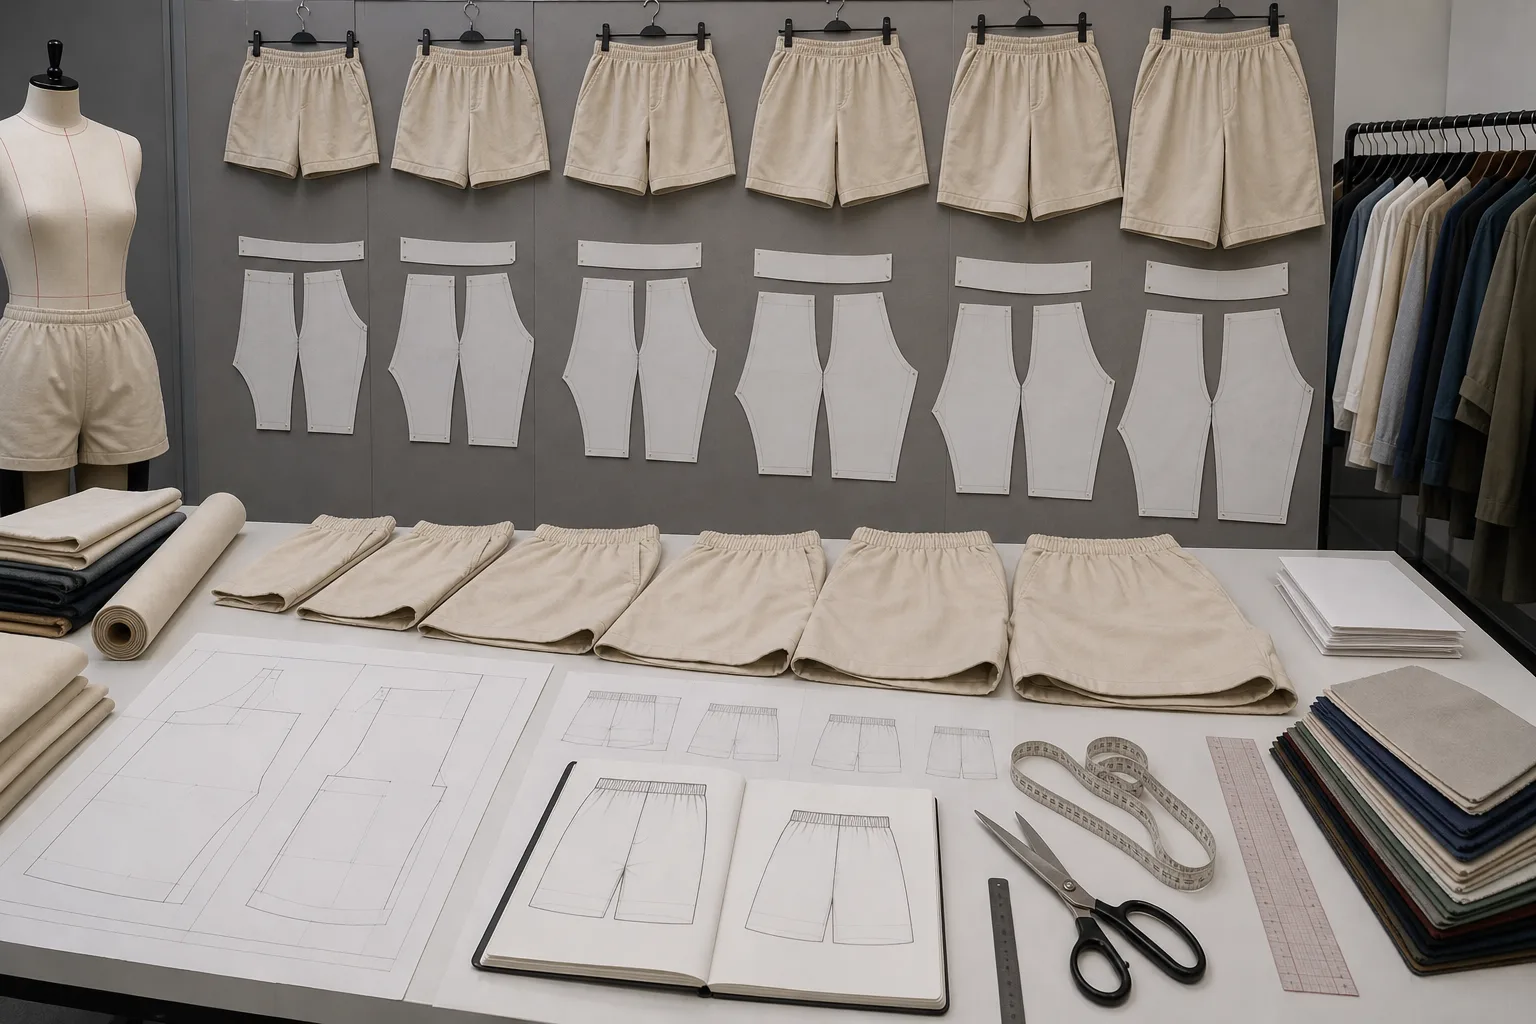
Grading elastic waist patterns means changing defined body and garment measurements between sizes according to a grading rule, while preserving the intended shape and construction. Elastic does not make grading automatic: hip or seat room, rise, garment length, and balance still influence fit. For background on the publication, see Apparel Wiki’s editorial independence.
Keep the pattern’s sewing line as the measurement reference. The cutting line includes seam allowance, which is for assembly rather than wearing ease. The waistline on the pattern is also distinct from the finished elastic length, how far the elastic extends in wear, and the dimensions of its casing. These values are related, but they are not interchangeable.
Choose grading rules for the garment type, size range, fabric, elastic, and intended fit; there is no single increment that applies to every design. Treat shrinkage compensation separately as well. If fabric behavior has been evaluated, any compensation should reflect that evidence and the relevant direction or pattern piece, not an arbitrary enlargement of the whole pattern.
What Does Grading an Elastic-Waist Pattern Involve?
In pattern making, grading applies planned changes to relevant measurement points so a pattern can serve different sizes. It is not simply enlarging the outline by the same amount everywhere. An elastic waist can contract around the body, but it cannot correct a pattern that is too tight across the hip, has an unsuitable rise, or hangs out of balance.
Separate the pattern’s waist measurement from the elastic specification. The pattern measurement describes the garment along its sewing line; the elastic’s relaxed length and extension affect how the waist behaves when worn. Casing width and construction determine how the elastic is enclosed or attached. The right relationship depends on the materials and method, so validate it for the actual design rather than relying on a universal formula.
Keep wearing ease distinct from both elastic stretch and seam allowance. Wearing ease is the difference between body and garment measurements that supports the intended fit or movement. Stretch is a material response, while seam allowance is added outside the sewing line for construction. Confusing these bases can make measurements look correct on paper while leaving the garment uncomfortable or difficult to assemble.
Identify the Design Features That Must Stay Consistent
Before grading, record what defines the design. Note waist placement, fullness and where it is distributed, rise or torso length, waistband or casing appearance, seam locations, hem proportions, and balance lines. Mark notches, grainlines, foldlines, pockets, gathers, and pleats. A small feature may affect not only appearance but also where fabric is stressed, how the garment moves, or the order in which it is assembled.
Distinguish design ease from movement needs and material stretch. Fullness added for a gathered silhouette is a design choice; room needed for sitting or bending serves movement; stretch comes from the fabric or elastic. They can interact, but one should not be used as an undocumented substitute for another. Write down which proportions should remain visually consistent and which may change deliberately across sizes.
This design record becomes a set of constraints for the grading work. For example, a hypothetical gathered skirt might aim to keep its casing visually narrow while allowing its fullness to change across sizes. That choice should be made explicitly and checked against the garment’s function and construction, rather than assumed from the base pattern.
Choose the Correct Grading Reference for the Waist and Body
The waist alone is rarely enough to guide grading. Identify the body and garment measurements that control fit, then relate them to the pattern’s sewing lines. Which measurements matter most depends on how the garment is worn and where it must pass over the body.
| Garment type | Fit references to review |
|---|---|
| Skirts, shorts, and trousers | Hip or seat, entry over the body, waist placement, rise, crotch depth where relevant, and garment length |
| Dresses and tops with an elastic waist | Bust, torso length, waist placement, side-seam balance, and room for arm movement |
| Any elastic-waist style | Finished waist shape, fullness distribution, and the relationship between the waist and adjoining seams |
For bottoms, check whether the garment must pass over the hip before the elastic contracts at the waist. For a dress or top, a suitable waist measurement will not resolve a torso-length or side-seam balance problem. Two patterns with the same nominal waist measurement can fit differently because their entry points, rises, and construction differ.
Apply the grading rule to the relevant points and shaping lines, not just the waist width. After movement, compare adjoining sewing lines and check notches, grain direction, and front-to-back balance. A grading rule specifies how pattern points move between sizes; it does not establish that all bodies change proportionally, so review the intended size range rather than assuming a single measurement explains fit.
Account for Elastic, Fabric Stretch, and Wearing Ease Separately
Elastic is one variable in the fit system, not a substitute for grading the garment pattern. Its width, extension, recovery, joining method, and interaction with the casing can change how the finished waist behaves. Fabric weight, drape, stretch direction, and laundering can also affect gathering, compression, sag, and the garment’s final dimensions.
Keep three measurements distinct during development: the relaxed waist measurement of the garment, the body measurement the garment must pass over, and the operating range created when the elastic is worn. These measurements answer different questions. A garment may need enough opening to pass over the hips, while the elastic must contract comfortably at the waist. The pattern must support both requirements.
Do not rely on stronger elastic or stretchier fabric to correct a pattern that is wrong through the hip, rise, torso length, or side seam. A material change may alter the symptom without resolving the underlying proportion. Likewise, design ease, movement allowance, and material stretch should be recorded separately. Treating all extra width as one type of ease makes later grading and fit decisions difficult to trace.
Review the intended use of the garment as well as its standing fit. Sitting, bending, walking, and reaching may change the required comfort and balance. Any conclusion about elastic comfort or recovery should remain specific to the selected elastic, fabric, construction, and laundering conditions rather than being treated as a universal performance claim.
Validate the Graded Sizes Before Approving the Pattern
Pattern approval should cover the base size, relevant intermediate sizes, and both ends of the planned size range. A middle size can appear balanced while a smaller or larger size develops problems in rise, fullness, entry, length, or waist placement. Reviewing the endpoints helps reveal whether the selected grading rule remains appropriate across the whole range.
Begin with a pattern inspection at the sewing lines. Compare the intended relationships among the waist, hip or seat, rise, garment length, side seams, and key design features. Check that adjoining seams match, notches remain useful, grain direction is clear, and the casing or waistband still supports the selected construction. Inspect pockets, folds, hems, and openings because local grading changes can affect neighboring details.
Then review a suitable sewn sample or fit sample in the intended material. Check the relaxed waist, entry over the body, elastic tension, gathering distribution, waist placement, front-to-back balance, and movement. A static try-on can identify one class of problem, but movement can reveal pulling, shifting, compression, or excess fabric that is not visible while standing still.
- Pattern inspection: confirm sewing-line measurements, seam matching, notches, grain, casing dimensions, and design proportions.
- Sample evaluation: review entry, relaxed fit, elastic behavior, gathering, balance, and movement.
- Diagnosis: record whether each issue relates to the grade rule, body-shape assumptions, material behavior, construction, or an intentional design decision.
- Revision: update the relevant rule or specification, then repeat the review across the size range.
These checks are project decisions, not universal pass-or-fail requirements. The useful result is a traceable reason for each revision. When the pattern, material, and construction are documented together, the team can distinguish a grading problem from a fabric problem instead of changing several variables at once.
Common Failure Modes and When to Rework the Design
Symptom: the waist fits, but the garment pulls across the hips. A likely cause is that the waist elasticity has been expected to solve a hip or entry problem. The next check is the hip measurement, opening path, rise, and side-seam balance at the sewing line. Adding more elastic tension may make the waist less comfortable without improving the controlling fit dimension.
Symptom: gathers are uneven or the waistline shifts. Possible causes include uneven fullness distribution, casing placement, balance, or elastic behavior. Compare the pattern’s fullness on the relevant sections and inspect whether the elastic is positioned consistently during assembly. Confirm the result in the sewn sample before changing the entire waist width.
Symptom: adjoining seams twist or no longer match. This can happen when grading is judged only by the outer cutting outline. Recheck the sewing lines, seam lengths, notches, grain direction, and the relationship between neighboring pieces. Seam allowance is an assembly allowance; widening it is not a verified correction for a grading or silhouette problem.
Symptom: the middle size works, but the size endpoints do not. The grade rule may not reflect how body proportions change across the selected range. Review rise, hip, torso length, waist placement, and fullness distribution rather than applying uniform enlargement. A revised block, size chart, or proportion rule may be more appropriate than adding ease everywhere.
Repeated sampling can show that the design specification itself needs reconsideration. If the same issue persists after construction and material variables are controlled, revisit the base block, grade rule, intended silhouette, or material specification. Reworking the design is often more reliable than masking a structural problem with arbitrary elastic lengths or extra seam allowance.
As a practical next step, document one approved base pattern, the selected grading reference, the elastic and fabric specifications, and the checks used for each size. Apparel teams can also organize related development references through Apparel Manufacturing Tools. This creates a repeatable review record without treating one project’s result as a universal grading formula.
Does an elastic waist pattern still need to be graded between sizes?
Yes. Elastic changes waist behavior, but it does not automatically grade the hip, rise, length, balance, entry, or surrounding seams. Those pattern dimensions still need a size-based grading rule.
Should I grade the waist measurement or the hip measurement first on an elastic-waist garment?
Assess the garment’s controlling fit dimensions first. Bottoms often need to pass over the hip before the elastic contracts at the waist, while dresses and tops may also depend on bust, torso length, and side-seam balance.
Can I grade an elastic waist pattern by adding the same amount to every size?
Uniform enlargement is not a reliable general method. The appropriate changes depend on the garment, size range, body measurements, fabric, elastic, construction, and intended silhouette.
How should elastic stretch and recovery be considered when grading the pattern?
Separate elastic behavior from pattern grading. Review the relaxed garment measurement, body entry requirement, and comfortable operating range for the specific elastic and fabric combination. Do not use elastic performance to conceal a pattern proportion problem.
How can I check whether the graded pattern preserves the original design?
Compare waist placement, fullness, rise or body length, balance, seam locations, casing appearance, hems, pockets, and key style lines across sizes. Confirm the relationships on both the pattern and a suitable sewn sample.
Why does an elastic-waist garment fit at the waist but pull across the hips?
The hip or entry dimension may be too small, or the rise and side-seam balance may be incorrect. Check those sewing-line measurements and the garment’s path over the body instead of simply increasing elastic length or waist width.