
Glow thread embroidery problems are easiest to solve when you treat the visible defect as a symptom, not a diagnosis. Puckering, skipped coverage, thread breaks, loose tails, and uneven appearance can come from the thread path, digitized file, fabric, stabilizer, hooping, machine setup, trimming, or evaluation conditions. This independent Apparel Wiki guide supports practical garment-manufacturing learning; Sponsor information does not determine its technical conclusions.
Begin by describing exactly what happened, then compare competing causes through a controlled adjustment. Record where the defect appears, its direction and frequency, the thread color or layer involved, whether it occurred during stitching or afterward, and whether handling or washing changed it. A photograph or one sample can document an observation, but it cannot establish the root cause.
How to Troubleshoot Glow Thread Embroidery Problems
To troubleshoot glow thread embroidery, separate three activities: describing the symptom, testing plausible causes, and making a controlled adjustment. The same skipped stitch may reflect a file path, thread routing, needle or tension observation, fabric movement, or another condition. The same puckering may involve material support, hooping, stitch structure, or post-process handling.
Use the first check as a starting point rather than a universal diagnosis. Note the file revision, fabric, stabilizer, hooping condition, thread and needle combination, machine event, and finishing state. Compare samples while changing one meaningful variable where practical. Changing several settings together may produce a better-looking result without showing which change mattered.
| Observable input | Likely implication | Initial check | Variables that could change the choice |
|---|---|---|---|
| Break or skipped stitch during sewing | Path, thread handling, needle, tension, or machine behavior needs investigation | Record the exact stitch location and observe the machine event | File revision, thread layer, needle condition, routing, and fabric support |
| Puckering or distortion on the face | Material movement or stitch formation may be involved | Inspect hooping, stabilizer movement, fabric stretch, and the file | Fabric recovery, stitched area, support condition, and whether distortion appeared before or after handling |
| Loose tails or exposed thread after trimming | Finishing, jumps, overlaps, or thread buildup may need review | Inspect the reverse side and compare the affected design area | Trimming practice, layer order, placement, and thread path |
| Uneven appearance after washing or wear | The evaluation condition has changed the observation | Record the handling or wash conditions before comparing samples | Placement, movement, material interaction, and the defined evaluation method |
Consider a lightweight knit with visible distortion around a large embroidered area. Its stretch and recovery may make fabric support and hooping the first checks, before changing a file or tension setting. A stable woven fabric with the same motif may justify a different starting comparison. This is an illustrative decision path, not a measured result. Retained comparison samples and records provide stronger evidence than a single image.
Start With the Embroidery File, Thread Path, and Stitching Behavior
A digitized embroidery file defines the sequence and path of stitches. Features such as density, direction changes, short stitches, overlaps, long jumps, and layered areas can affect how the design behaves with a particular thread and fabric combination. These are variables to inspect, not universal limits or automatic explanations for every defect.
A design that looks correct on screen may still need revision for the actual material. Equal artwork does not guarantee equal stitching behavior on a stable woven fabric and an elastic knit because the material and support conditions differ. The file is therefore part of the production setup, not merely a picture of the intended result.
Use a focused sequence. First inspect the file and identify the exact area where the problem occurs. Next observe whether the event happened during stitching, such as a break or skipped stitch, or appeared later as a coverage, trimming, handling, or washing issue. Then compare the thread path and tension behavior with the same file and documented setup. Revise one meaningful variable and retain the result.
For each comparison, record the file revision, thread and needle combination, fabric, stabilizer, hooping condition, and machine observations. If a thread break repeatedly occurs at one path transition, that location deserves inspection alongside routing and machine behavior. If coverage looks uneven only after trimming, the review should include overlaps, jumps, loose tails, and the reverse side rather than assuming the stitching event was the cause.
A file prepared for one material is not automatically a production-ready program for another. A motif may require a different path or support arrangement when the fabric stretches, shifts, or reacts differently under stitching. Treat file revision as a controlled test tied to the real material combination, not as a correction based only on a screen preview.
Check Fabric, Stabilizer, Hooping, Needle, and Tension Together
Fabric weight, stretch, recovery, surface structure, stabilizer, hooping, needle condition, thread path, and tension can influence the same visible symptom. Keep these as competing hypotheses. Puckering or deformation does not prove that stitch density alone is wrong, and changing tension is not a universal correction.
Start with the material and support condition. Check whether the fabric was stretched, shifted, or insufficiently supported in the hoop, while noting that the correct interpretation depends on the fabric, design, and setup. Then inspect the needle, thread path, and tension behavior as observations connected to the actual machine event. Avoid assigning a cause from the face alone.
Where practical, retain the same file and fabric while changing one setup variable. Document what changed and what became different. A comparison might examine the support condition first, then the hooping state, then needle or thread-path observations. The purpose is to distinguish causes, not to accumulate undocumented adjustments.
Inspect the reverse side as well as the face. Stabilizer movement, thread buildup, floating tails, and dense stitched areas may reveal information hidden from a front-only view. This inspection can also show whether a correction affects bulk, flexibility, or finishing quality.
Keep numeric needle sizes, tension settings, density values, and universal stabilizer rules out of a general diagnosis unless authoritative technical documentation supplies an applicable range. Reducing density or changing tension may be a useful comparison to run in some cases, but the result should remain an observation from that material and file until further evidence supports a broader conclusion.
Evaluate the Reverse Side, Wear, Washing, and Glow Appearance
Inspect the reverse side as carefully as the face. Backing edges, floating threads, dense stitched areas, loose tails, and rough transitions can affect skin contact, flexibility, garment movement, and perceived quality. A large stitched area may also add bulk or restrict stretch, especially when placed where the garment bends or extends.
Evaluate the embroidery in its intended position rather than on a loose sample alone. A design on a sleeve, cuff, waistband, or close-fitting panel may experience movement and contact that are absent during a flat inspection. Note whether discomfort, abrasion, thread damage, or distortion appears during handling. These are observations about that sample and placement, not automatic conclusions about durability or comfort.
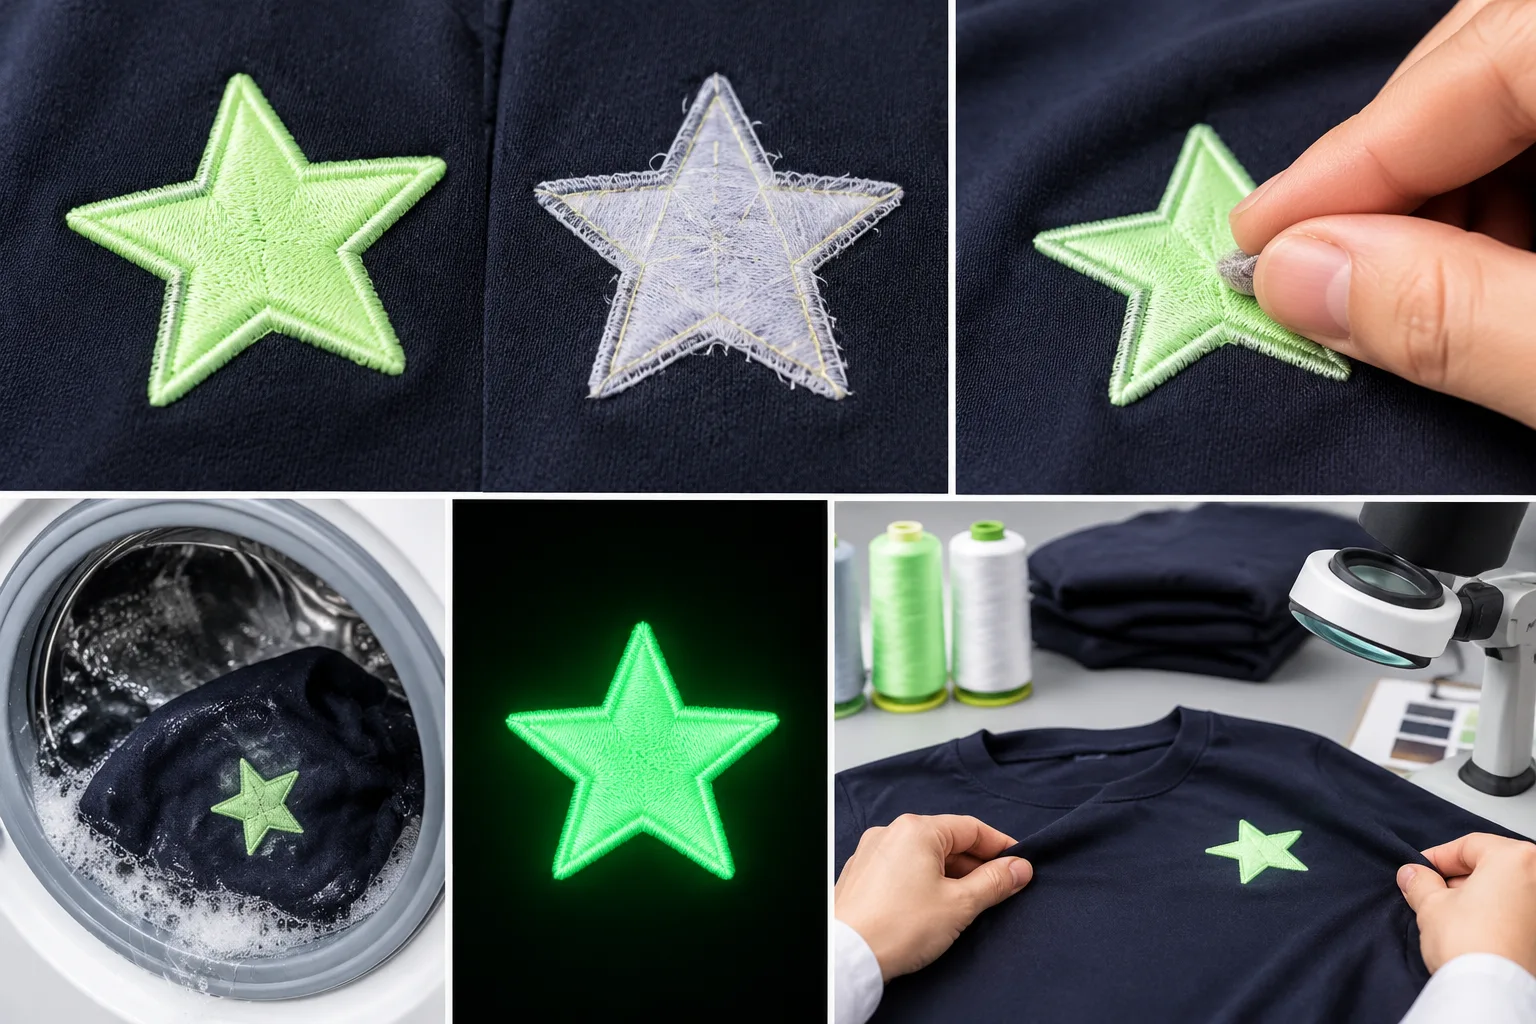
Keep construction defects separate from glow appearance. Loose tails, uneven coverage, or backing problems can be inspected immediately after stitching. Visibility, persistence, brightness, and any change after washing require a defined comparison condition and evidence appropriate to the claim. Without that evidence, record what changed without assigning a universal wash or performance result to the thread.
For a comparison, document the garment location, handling or wash conditions, inspection timing, and whether the face or reverse side changed. A front photograph can show an appearance issue, but it cannot establish softness, comfort, stretch, abrasion resistance, or wash durability. Corrective options may involve finishing, backing, placement, file structure, or material selection. Improving one attribute can alter another, such as softness, flexibility, bulk, or visual uniformity.
Use a Controlled Correction and Record the Result
Convert the observation into a short troubleshooting record before changing the setup. Include the sample identifier, fabric and garment location, thread and file revision, stabilizer and hooping condition, relevant machine observations, defect location and frequency, and any post-process observations. Record whether the issue appeared during stitching, immediately afterward, or only after handling or washing.
Next, rank the plausible causes. For each one, note the evidence supporting it, evidence that does not fit, and the smallest comparison that could distinguish it from another explanation. Where practical, keep the file, fabric, and machine conditions consistent while changing one meaningful variable. This does not prove a cause by itself, but it makes the resulting observation easier to interpret than several undocumented changes.
Consider a large stitched area on stretch fabric. If distortion appears immediately after stitching, begin by reviewing the construction and support conditions, including the fabric state, hooping, stabilizer, and file behavior. If the shape changes only after washing, retain the wash condition and reassess the interaction between the stitched area and the fabric. Neither observation alone proves that one variable is responsible.
- Inspect the face and reverse side before making another adjustment.
- Record the exact change and the resulting visible difference.
- Label a single-sample result as an observation, not a confirmed correction.
- Use repeat comparisons or an applicable technical document before making a broader performance claim.
At the end of the comparison, choose one of three paths: retain the revision for the current evaluation, run another controlled comparison, or return to the file, material combination, or evaluation condition. When the evidence remains mixed, consult the relevant equipment or material documentation rather than treating a common explanation as the diagnosis.

What to Do When the Cause Is Still Unclear
Retain the defective sample, comparison sample, file revision, material combination, and observation record before making further changes. Compare one variable at a time where practical. For questions about glow performance, washing, abrasion, comfort, or durability, check the applicable manufacturer documentation or defined evaluation method. Qualitative troubleshooting can narrow competing causes, but a final performance conclusion requires evidence suited to that claim.
Frequently Asked Questions
Why can the same glow thread embroidery design behave differently on two fabrics?
Fabric stretch, recovery, surface structure, and support can change the stitching conditions. The same artwork and thread therefore do not guarantee the same coverage, registration, distortion, or handling result on a stable woven fabric and an elastic knit.
What should be recorded before changing an embroidery setting?
Record the sample, garment location, fabric, thread, file revision, stabilizer, hooping condition, machine observation, defect location and frequency, and whether the issue appeared during stitching or afterward. Include any handling or wash condition used for comparison.
How can I tell whether puckering is related to hooping, stabilizer, or the embroidery file?
Do not assign the cause from puckering alone. Keep the fabric and file consistent where practical, compare the support and hooping condition, then examine the file and stitching behavior. A one-variable comparison can narrow the possibilities but may not establish a universal correction.
Why should the reverse side of glow thread embroidery be inspected?
The reverse side may reveal backing edges, floating threads, thread buildup, rough transitions, or dense areas that are hidden from the face. Those conditions can affect skin contact, flexibility, garment movement, and finishing quality.
What evidence is needed before claiming that glow thread embroidery will remain effective after washing?
The claim should be tied to the specific thread, garment construction, wash conditions, inspection timing, and an appropriate evaluation method. An informal home observation or front photograph may document a result, but it does not establish universal wash durability or glow persistence.
When should an embroidery problem be treated as unresolved rather than assigned to one cause?
Treat it as unresolved when several variables could explain the symptom, the comparison changed more than one condition, or the result comes from only one sample. Preserve the records, run a focused comparison, or consult relevant technical documentation before stating a confirmed cause.