
A clothing size chart is not just a sales tool for your website. For a new brand, it is part of product development, fit control, customer communication, and return prevention. If the chart is vague, copied from another brand, or disconnected from the actual sample measurements, problems usually show up fast: customers say the fit is inconsistent, factories receive unclear specs, and repeat orders become harder to build with confidence. For first collections, the goal is not to create a perfect universal system. The goal is to create a practical size structure that matches your target customer, your product type, and your real sample results.
If you are also trying to understand how sizes are graded from a base pattern, that knowledge becomes useful very early in size chart planning. Many new brands think sizing starts with labels like S, M, and L, but the real work starts with the base size, the measurement points that matter, the grade increments between sizes, and the fit intention of the garment. That Apparel Wiki resource helps connect these ideas so readers can see how size charts, pattern grading, fit consistency, and production specs work together instead of being handled as separate tasks.
What a clothing size chart is and why it matters for new brands
A clothing size chart is a structured set of measurements used to explain what body size or garment size each labeled size is intended to fit. In apparel development, this chart may be based on body measurements, garment measurements, or both. That distinction matters. A body measurement chart tells the customer which size they should choose based on their own body. A garment measurement chart tells the customer the actual dimensions of the finished item, such as chest width, body length, waist, or inseam.
New brands often make the mistake of mixing these two systems without explaining the difference. For example, a product page may show chest width of the garment but label it as body chest size. That creates confusion immediately. In many projects, the size chart problem is not that the size range is too small or too large. The problem is that measurement logic was not defined clearly before samples were approved.
Size charts matter because they affect four things at the same time: fit expectation, customer confidence, factory execution, and return risk. Online apparel shoppers often hesitate when size information is unclear, and fit uncertainty is a known buying concern in e-commerce, especially for new or unfamiliar brands. That is one reason clear measurement communication matters, not only from a marketing view but from a product accuracy view as well, as discussed in research on consumer fit concerns and online size uncertainty.
How size charts connect to fit, returns, and production efficiency
For buyers, the key is not only whether the product is called relaxed fit or regular fit. The key is whether the chart matches the actual pattern, the grading, and the finished garment tolerances. A clothing size chart that looks acceptable on a website can still fail in production if it is not connected to the technical package.
Here is what usually happens when a new brand skips this step:
- The sample is fitted by eye without written measurement targets.
- The factory revises the pattern based on visual comments only.
- Bulk production follows a chart that was created later for the website.
- The final products do not match the fit message used in sales copy.
That sequence creates avoidable inconsistency. A reliable chart supports production efficiency because it gives the supplier measurable targets for pattern development, grading, and quality control. It also helps customer service teams answer sizing questions without guessing.
Understanding sizing systems: letter, numeric, and measurement-based sizing
Most new brands use one of three basic systems.
Letter sizing
This includes XS, S, M, L, XL and similar labels. It is common in casualwear, T-shirts, sweats, knit tops, and many unstructured garments. It is easy for customers to scan, but it can hide large fit differences between brands. One brand’s medium may fit like another brand’s small or large.
Numeric sizing
This includes sizes such as 28, 30, 32 for bottoms or 2, 4, 6, 8 for womenswear. Numeric systems are common when more precise waist or body size increments are needed. They are useful for trousers, denim, tailored garments, and styles where fit tolerance is tighter.
Measurement-based sizing
This approach presents the relevant body or garment dimensions directly, sometimes with a size label and sometimes without one. It is common in performance wear, uniforms, custom programs, and some direct-to-consumer brands that want to reduce ambiguity.
Whichever system you choose, the technical logic should come from consistent body measurement definitions. When teams use chest, bust, waist, hip, rise, or inseam inconsistently, the chart becomes hard to manage across design, development, and supplier communication. For readers who need a standards-based reference point, ISO discusses standard body measurement definitions for apparel, which is useful when building spec sheets and comparing measurement terms across vendors.
How sizing expectations differ by market, region, and customer segment
A size chart should reflect who you are selling to, not just what label names you prefer. Sizing expectations vary by region, age group, channel, garment category, and fit trend. A unisex streetwear hoodie sold in North America may need a different chest ease and body length expectation than a slim-fit polo designed for a European market. Kidswear, maternity, activewear, and uniforms each need their own logic as well.
Some of the main differences include:
- Region: US, UK, EU, and Asian markets often interpret sizes differently.
- Customer segment: Juniors, misses, plus, and menswear blocks are not interchangeable.
- Use case: Fashion fit, performance fit, workwear fit, and loungewear fit should not share the same ease plan automatically.
- Sales channel: Marketplace selling usually requires clearer size guidance because the customer cannot compare fit against your store history.
This detail may look small, but it can create problems later if it is not confirmed early. A brand can technically keep the same labels across markets, but if the measurement expectations behind those labels are not aligned with the target customer, complaints increase quickly.
How to define your brand’s fit block before building a size chart
Before writing any size chart, define the fit block. That means deciding what body shape, posture, proportions, and ease level your first collection is built around. If the base pattern is unstable, the chart will not solve the problem. From a development perspective, the fit block is the real foundation, and the chart is the communication layer built on top of it.
For many startup teams, it helps to review the difference between a pattern block versus sloper for fit development before locking the size system. A close-fitting sloper is not the same thing as a production-ready block, and that distinction matters when you add design ease, adjust silhouettes, and build a graded size range. If your block starts too narrow in the shoulder, too long in the rise, or too low in the armhole, the size chart may look fine on paper while the actual garment still fits poorly.
At this stage, confirm:
- Your base size, such as M or size 8.
- Your intended fit, such as slim, regular, boxy, or oversized.
- Your target wearer profile.
- The garment category, because tops, bottoms, and outerwear need different ease logic.
- Whether the chart will show body measurements, garment measurements, or both.
Planning an S-XL size range that actually works
For a first collection, S-XL is common because it is manageable for inventory and pattern development. But the labels alone do not tell you where each size should start, scale, and stop. You need a base size and grade rules that create even movement across the range.
| Planning Point | What to Decide | Why It Matters |
|---|---|---|
| Base size | Usually M for unisex or menswear, sometimes S or size 8 for womenswear | All grade increments expand from this starting point |
| Size interval | How much chest, waist, hip, or length changes between sizes | Too small feels repetitive; too large creates fit gaps |
| Range limit | Where S begins and XL ends for your customer | Defines whether the range is realistic for the intended market |
| Ease strategy | Whether all sizes keep the same look and wearing comfort | Prevents larger or smaller sizes from drifting visually |
In practice, a balanced size range should not only become wider. It should also keep the garment proportionally wearable. That is why pattern balance and garment proportion matter during grading. If width increases but shoulder slope, armhole depth, rise shape, or leg balance are not adjusted correctly, the bigger sizes may twist, pull, or hang incorrectly even when the listed measurements look acceptable.
How to choose key measurements for tops, bottoms, and full garments
Not every measurement belongs in every chart. The right chart shows the points that help the customer choose and help the factory control the result.
For tops
- Chest or bust
- Shoulder width when relevant
- Body length
- Sleeve length
- Hem width for fitted or oversized styles
For bottoms
- Waist
- Hip
- Front rise and back rise when fit is sensitive
- Inseam
- Leg opening
For dresses, jumpsuits, and one-piece garments
- Chest or bust
- Waist
- Hip
- Torso or body length where applicable
- Inseam for jumpsuits
Keep the chart practical. If a measurement does not help a buyer choose a size or help a factory control fit, it may not need to appear on the customer-facing chart. But it may still belong in the tech pack.

New brands should also separate stretch and non-stretch products. A knit legging, a woven trouser, and a brushed fleece short cannot share the same measurement communication style. Fabric stretch, recovery, shrinkage, and washing behavior all affect how close the garment can sit to the body.
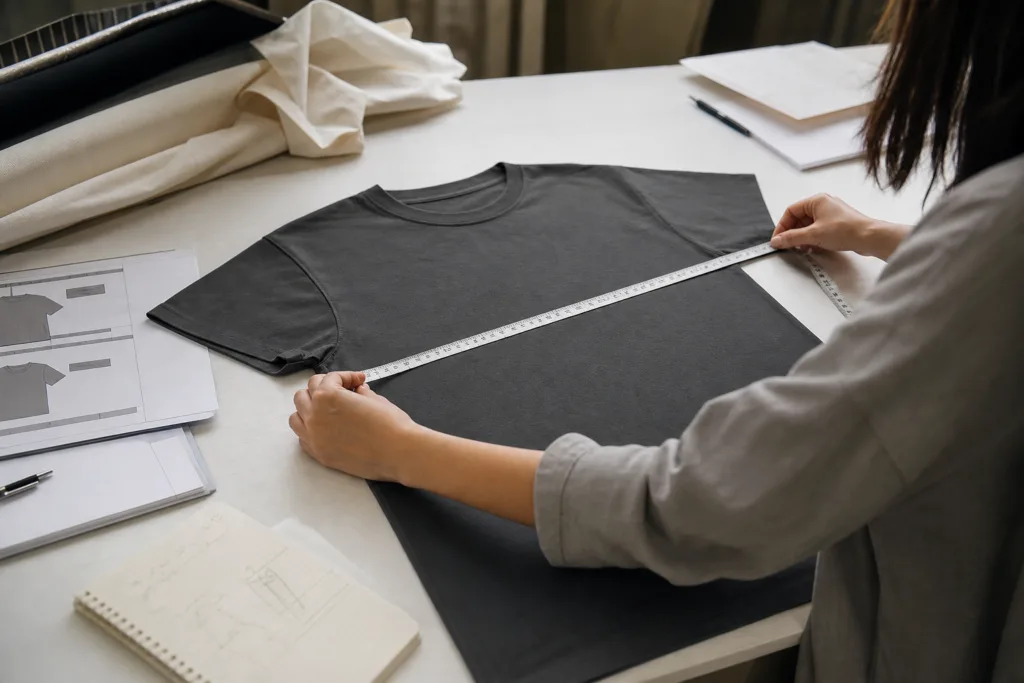
How to convert sample measurements into a usable apparel size chart
One of the most common mistakes is building a chart first and then trying to force the sample to match it. Usually, the better process is to establish your target measurements, make the proto sample, measure the sample carefully, fit it on the intended body, and then revise the chart based on what actually worked.
A simple process looks like this:
- Start with target body measurements for the customer profile.
- Add intended ease based on the product category and fit goal.
- Create the base pattern and first sample.
- Measure the sample flat using consistent points of measure.
- Try it on and record visual and comfort issues.
- Revise the base size before finalizing grade rules.
For readers comparing terminology, measurement logic, and technical development steps across categories, Apparel Wiki is useful because sizing problems rarely come from one isolated detail. They usually come from the overlap between fabric behavior, pattern method, grading, and unclear supplier communication.
Fit session basics: how to test samples and record problems
A fit session should be structured, not casual. Use a consistent fit model or at least a clearly documented body profile. Measure the garment before the try-on, then record what happens when the person stands, moves, sits, reaches, and walks.
During fit review, look at:
- Shoulder position
- Chest, waist, and hip tension
- Arm mobility
- Neck opening
- Rise comfort and crotch balance
- Inseam and outseam length
- Hem position after movement
- Visual proportion from front, side, and back
Photos help, but notes are still essential. If the team only says things like “make it nicer” or “slightly looser,” revisions become inconsistent. In some projects, teams also explore digital simulation before new rounds of physical sampling. That is where tools and methods such as using digital body shapes for fit testing can help compare posture and proportion issues earlier, especially when fit models are limited.
How to revise the size chart before bulk production
After fit testing, update the base size first. Do not start by changing every size in the range. If the base sample is still unresolved, grading the whole range only multiplies the problem. Once the base is corrected, review grade increments for each critical point.
At this stage, confirm:
- Final approved points of measure
- Tolerance allowed in bulk production
- Wash effect if the garment is pre-washed or garment dyed
- Fabric shrinkage impact
- Any size-specific pattern adjustment beyond standard grading
Factory communication matters a lot here. If comments are broad or contradictory, the next sample may create new problems instead of fixing the current ones. A practical method is to centralize revisions and use clear, measurable instructions. That is why guides on writing precise sample comments for factory revisions are useful during size chart finalization, especially when multiple people are reviewing the same style.
Common size chart complaints and what usually causes them
Customer complaints about sizing often sound simple, but the causes vary. “Too small” does not always mean the garment is literally too narrow. It can mean the armhole is high, the bicep is tight, the rise is short, the fabric has low stretch, or the website chart compares body size to garment size without saying so.
| Complaint | Common Cause | What to Check |
|---|---|---|
| Runs small | Insufficient ease, shrinkage, or regional size mismatch | Base spec, wash effect, market benchmark |
| Runs large | Oversized design not explained clearly | Fit note on product page, garment width |
| Waist fits but hip does not | Poor grade distribution in bottoms | Hip increment, rise shape, seat ease |
| Sleeves feel short | Length spec or shoulder position issue | Sleeve method, shoulder seam placement |
| Same size fits differently across styles | No stable fit block across collection | Pattern consistency, fabric differences |
Typical sizing mistakes new brands make
The most common mistakes are predictable:
- Copying another brand’s chart without matching its target customer or fit intent.
- Approving a sample visually without measuring it properly.
- Using body measurements in one place and garment measurements in another without explanation.
- Ignoring fabric stretch, shrinkage, and finishing effects.
- Changing the base fit after grading has already been done.
- Using the same grading logic for all categories.
- Printing size labels that do not match the approved final spec.
In apparel sourcing practice, one more mistake appears often: the brand confirms the chart late, after material booking or bulk marker planning. That can create delays, extra sampling, and avoidable cost because the supplier has to revise patterns after production planning has already started.
How to communicate sizing on product pages, tech packs, and spec sheets
A clear size chart should appear in three places with slightly different purposes.
On product pages
Keep it readable. State whether it shows body measurements, garment measurements, or both. Mention if the style is slim, regular, relaxed, or oversized. If the fabric stretches significantly, say that too.
In tech packs
List exact points of measure, measuring method, size range, grade rules, tolerances, and any wash expectations. This is where precision matters most.
In internal spec sheets
Record revision history. If the chest changed after fit sample 2, note the reason. If the inseam changed only for larger sizes, note that too. This avoids confusion when the style is repeated in a later season.
Size chart checklist for launching a first collection
- Define the target customer before choosing labels.
- Lock the base fit block before grading.
- Confirm whether the chart is body based, garment based, or mixed.
- Use the right key measurements for each garment type.
- Review market expectations by region and customer segment.
- Fit test the sample on the intended body profile.
- Revise the base size before finalizing the whole range.
- Align website chart, labels, and tech pack data.
- Set tolerances for production control.
- Keep a revision log for future reorders and new styles.
Conclusion

For a new brand, a reliable clothing size chart is less about copying a standard and more about building a system that is clear, testable, and consistent. Start with the target customer, define the fit block, choose the right measurement points, and fit the base sample carefully before expanding the range. If the chart, the pattern, the sample comments, and the product page all say the same thing, you reduce a large share of fit-related complaints before launch. That is what matters most for a first collection: not theoretical perfection, but dependable sizing that your team and your customer can both understand.
FAQs
Should new brands follow standard sizes or create their own fit?
Most new brands should start from common market expectations, then adapt the fit for their own customer and product category. Creating a completely original size system too early can confuse buyers and make development harder. A practical approach is to use familiar labels such as S to XL or common numeric sizes, but build the actual measurements around your fit block, fabric behavior, and target market.
What is the difference between a body measurement chart and a garment measurement chart?
A body measurement chart helps the customer choose a size based on their own chest, waist, hip, or other body dimensions. A garment measurement chart shows the actual finished measurements of the item itself. Both can be useful, but they should never be mixed without explanation. If a customer reads garment width as if it were body size, the fit expectation becomes inaccurate immediately.
How many measurements should a customer-facing size chart include?
Only include the measurements that help the customer choose correctly for that garment type. A T-shirt usually does not need the same level of detail as tailored trousers. For tops, chest, length, and sometimes sleeve length are often enough. For bottoms, waist, hip, and inseam are usually more important. Keep the chart simple, but keep the tech pack more detailed.
Should every product in a collection use the same clothing size chart?
No. A brand should aim for fit consistency, but different categories need different size logic. A fleece hoodie, woven shirt, legging, and cargo pant should not all share one identical chart. The labels may stay consistent across the collection, but the measurement points, ease, and customer guidance should reflect the garment category and fabric behavior.
When should a brand revise its size chart?
Revise it after fit sessions, after wash testing if shrinkage changes the result, and after early customer feedback if a repeat sizing problem appears. Do not wait until complaints become widespread. At the same time, do not change charts too often without documenting why, because uncontrolled updates can create inconsistency across production runs and reorder programs.
Can a good size chart reduce returns on its own?
It can reduce avoidable confusion, but it cannot fix a bad pattern or unstable production. A useful size chart works when it matches the real garment, the fit description, and the approved sample. If the chart is accurate and clearly explained, it supports better size selection. If the product is inconsistently made, the chart alone will not solve the problem.


How to Give Clear and Effective Garment Sample Comments to a Factory