Engineered stripe knit cutting distortion is a mismatch between the intended stripe path or panel geometry and what appears in a cut panel. It may show up as a bowed stripe, a skewed panel, waviness, stripe drift, or misaligned joins. These are symptoms, not diagnoses: similar appearances can arise at different stages. Apparel Wiki is an independent educational publication; this guide offers a way to organize observations, not a determination of a specific production fault. For context on the site’s support model, see Sponsor.
“Engineered stripe” describes a design and placement characteristic; “knit” describes fabric construction, not fiber identity. To investigate distorted knit panels, first record what changed, where it changed, and when it became visible. Then compare that evidence with plausible causes before adjusting a pattern or process.
What Engineered Stripe Knit Cutting Distortion Looks Like
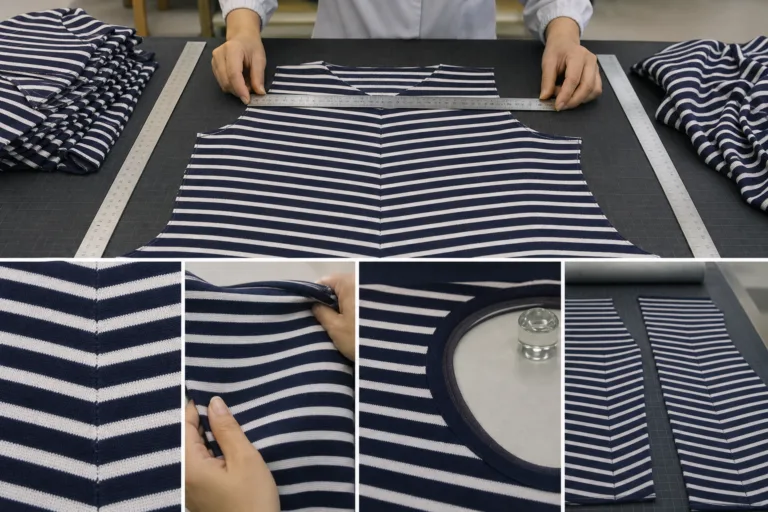
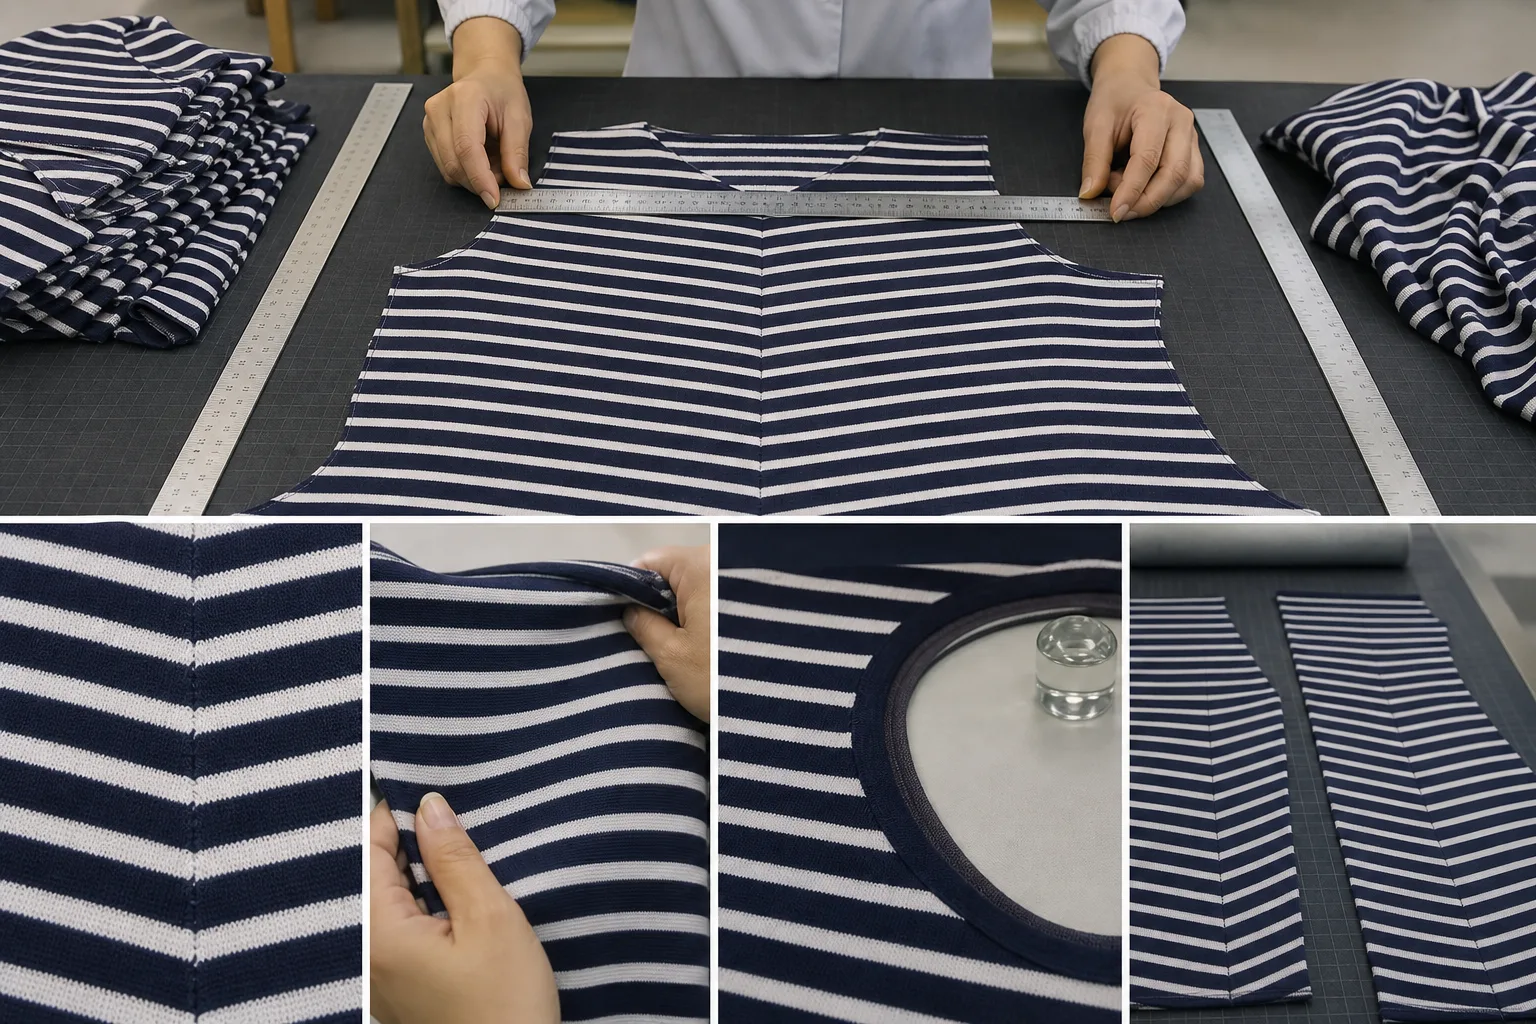
Describe the visible mismatch in concrete terms. A stripe may bow instead of following its intended path, cross a reference line at an unexpected angle, or drift relative to the panel edge. A panel may look wavy, its dimensions may differ from the pattern reference, or stripes may fail to meet at a join. “Stripe alignment problems” is a useful symptom description, but it does not identify why alignment changed.
Record the location and direction of each symptom, whether it recurs across panels, and which plies or positions in the lay are affected. Note when it appears: on fabric before cutting, on a freshly cut panel, after handling, or only after sewing, pressing, or washing. Those distinctions help narrow the investigation, but timing alone does not establish cause.
Support the description with photographs, marked reference lines, repeatable panel measurements, fabric-lot and roll details, and process records. A photograph can show where distortion is visible, but perspective, panel support, and handling can affect what it appears to show. Compare like with like and preserve the original sample when practical; avoid treating one image as proof of a root cause.
Build a Cause Map Before Changing the Pattern
Keep competing explanations open. A cause map can group hypotheses by fabric condition; knit construction and recovery; stripe formation; spreading and relaxation; pattern or grainline; cutting equipment; panel handling; and later sewing or finishing. These categories guide questions rather than assign blame. Knit construction can offer clues, but it does not independently determine stretch, recovery, breathability, or durability.
Separate material information into layers: fiber content, yarn, knit structure, finishing, and fabric mass per unit area (GSM). GSM describes mass per area, not thickness or quality. None of these labels alone proves how a particular fabric will behave during spreading, cutting, or later processing. When specifications or process records are incomplete, keep conclusions conditional and seek the information relevant to the observed symptom.
| Observation | Possible cause | Evidence to compare | Smallest useful validation |
|---|---|---|---|
| Similar stripe shift across multiple rolls | Fabric condition or stripe formation | Roll identity, stripe reference, and observations before cutting | Compare representative fabric samples from the affected rolls |
| Shift concentrated in certain plies or lay positions | Spreading, cutting, or handling | Layer position, panel timing, and operator or equipment records | Compare matched panels from different positions in the lay |
| Panels align after cutting but not after a later process | Sewing, pressing, washing, or finishing | Measurements and photographs before and after that process | Track the same landmarks through the next relevant stage |
For each hypothesis, write down what would support it, what would contradict it, and what trial could distinguish it from alternatives. Compare rolls, lay positions, plies, and repeated panels where records allow. The aim is to identify a pattern in the evidence before choosing a correction, not to infer a universal cause from a familiar symptom.
Check the Fabric Before Cutting
Confirm the fabric identity, lot and roll, stripe repeat or engineered layout, and usable cutting width. Record the measurement state and the source of each detail: supplier information, production records, or your own observation. Keep total width distinct from usable width, since selvedges or defects may affect what can be placed in a marker.
Follow the supplier’s instructions or documented process requirement for allowing the fabric to stabilize before inspection or cutting. There is no universal relaxation duration that can be assumed for every knit. Note the conditions used for inspection so comparisons are meaningful, and avoid changing those conditions midway through a comparison without recording it.
Inspect the fabric along its length and across its width for visible bow, skew, spirality, uneven tension, edge-to-edge differences, changes in stripe repeat, and other distortion. Compare a representative sample or test panel with the production material, then document relevant changes after handling or care processes when those are part of the investigation. Use consistent reference points and preserve the sample’s lot and roll information.
Do not use GSM alone to judge suitability or alignment. Usable width, defects, relaxation state, and dimensional behavior can also affect yield and placement. If an inspection method or acceptance limit is needed, use the procedure and criteria approved for the specific product or supplied by a qualified source; do not substitute an invented tolerance for project requirements.
Use Panel Measurements to Separate Causes
Visual inspection can show that a stripe has moved, but it cannot reliably show when or why the movement occurred. Start by marking repeatable reference points at stripe intersections, center lines, cross-grain lines, notches, and other stable pattern landmarks. Use the same points on the uncut fabric, marker or pattern reference, freshly cut panels, and panels after the next relevant process.
Compare stripe angle, panel length and width, opposite-edge relationships, seam-line distances, and left-to-right differences. Also compare panels from different positions in the lay, such as the first, middle, and last layers. A fabric-wide effect may appear across many positions, while a spreading, cutting, or handling issue may be concentrated in particular plies or areas.
Record the findings in a simple matrix with columns for the symptom, location, affected layers, timing, possible causes, supporting evidence, contrary evidence, trial result, and corrective action. This keeps a plausible explanation from becoming a conclusion too early. Measurement error, operator variation, and unsupported panels can create apparent changes, so those conditions should be checked as part of the investigation.
A small controlled trial is usually more informative than changing several variables at once. For example, compare the current spreading or panel-support method with one documented adjustment while keeping the fabric, marker, and cutting conditions otherwise comparable. Preserve the original sample and record the inspection conditions. Project-specific tolerances should come from the responsible product team or approved procedure, not from a universal limit.
Choose the Corrective Action Without Hiding the Cause
Corrective action should follow the evidence. If the fabric condition is unstable, review the supplier information, finishing history, conditioning requirement, and handling method before compensating the pattern. A pattern adjustment may make one sample appear better while leaving the underlying material behavior unchanged.
If the marker or pattern is not aligned with the engineered stripe, verify the fabric reference first. Then review grainlines, stripe reference lines, repeat placement, notches, seam allowances, and panel orientation. The correction may belong in the marker or pattern, but it should be based on a confirmed relationship between the design reference and the actual material.
If movement begins during spreading or cutting, review the controlled process, equipment setup, operator method, and support of the cut stack. Recheck the result after the change under comparable conditions. If the panels are accurate immediately after cutting but shift after sewing, pressing, washing, or finishing, investigate that later process instead of assigning the entire problem to the cutting room.
Separate immediate containment from verified root-cause correction. Containment may protect the current order, while a root-cause action should explain why the distortion occurred and under which conditions the solution remains valid. Record the evidence, trial conditions, selected action, and limits requiring revalidation for another fabric lot, size range, style, or machine.
A Production Checklist and Escalation Path
Use the following sequence when engineered stripe knit cutting distortion is found:
- Describe the symptom by location, direction, frequency, affected layers, and the stage at which it is visible.
- Secure the fabric identity, roll and lot information, marker, pattern, spreading record, cutting setup, and handling notes before making changes.
- Confirm the stripe reference and fabric condition, then compare representative panels across the lay.
- Measure repeatable landmarks and preserve the original fabric, marker reference, and cut-panel samples.
- Test the smallest credible hypothesis with a controlled comparison, changing one meaningful variable where production conditions permit.
- Escalate to the supplier, pattern team, cutting-room lead, or quality team when the evidence points outside the current process.
- Revalidate after correction and document the conditions, measurements, and acceptance decision used.
This workflow helps technical and nontechnical teams communicate without treating a visual symptom as proof of one cause. Apparel Wiki is an independent garment-manufacturing knowledge publication, not a factory, manufacturer, laboratory, certifier, or sourcing supplier. For related production references, readers can also consult the Apparel Manufacturing Tools area, then confirm product-specific procedures with the responsible organization.
The useful next step is to create a one-page evidence record for the affected style. Attach photographs, marked samples, measurements, lot details, process conditions, and the result of each trial. That record gives the appropriate supplier, pattern specialist, cutting-room lead, or quality professional enough context to investigate the issue without repeating uncontrolled changes.
What is engineered stripe knit cutting distortion?
It is a mismatch between the intended engineered stripe path or panel geometry and the alignment or shape observed in the cut panel. The description identifies a symptom; it does not by itself prove whether the fabric, pattern, spreading, cutting, handling, or later processing caused it.
How can I tell whether stripe distortion started in the fabric or during cutting?
Compare the fabric before cutting with the marker reference and panels from different positions in the lay. Repeatable measurements across rolls, plies, and stages can indicate where the change first appears, although later handling and measurement conditions must also be controlled.
Should knit fabric be relaxed before engineered stripe panels are cut?
Follow the supplier’s instructions or the documented process requirement for the specific fabric. There is no universal relaxation duration for every knit, so record the fabric state and inspection conditions before comparing results.
Which measurements help diagnose bow, skew, or stripe drift in cut panels?
Useful comparisons include stripe angle, center-line position, cross-grain relationships, panel length and width, opposite-edge distances, seam-line measurements, and layer-to-layer differences. Use repeatable reference points and project-approved criteria.
Can changing the pattern fix distorted engineered stripes?
It can correct a confirmed marker or pattern reference problem, but it may only mask unstable fabric or process movement. Confirm the source first and revalidate any compensation across the relevant lot, size, and production conditions.
Why do cut panels look accurate before sewing but misalign after production?
The change may begin during sewing, pressing, washing, finishing, or unsupported handling rather than cutting. Compare the same landmarks before and after each relevant stage to identify when the alignment changes.