A garment layering simulation workflow is a repeatable method for digitally evaluating multiple garments worn together on a defined avatar, pose, material setup, and simulation environment. It connects garment patterns and construction details with body shape, material data, layering order, solver settings, and structured review outputs. The goal is not merely to create a realistic render, but to make results comparable across design iterations. This independent Apparel Wiki guidance follows the editorial principles described on our Sponsor page.
Repeatability means keeping the relevant inputs, simulation sequence, settings, and evaluation criteria consistent enough to identify why two results differ. A digital garment layering workflow can support product development, pattern review, design communication, and sample planning. It does not, by itself, prove physical fit, comfort, hand feel, durability, production feasibility, safety, or compliance. A polished image is a visual output, not evidence that physical behavior has been validated.
What Is a Garment Layering Simulation Workflow?
Garment layering simulation is the digital evaluation of two or more garments as a combined outfit rather than as isolated pieces. The setup may include a base layer, shirt, jacket, trousers, or other garments arranged according to an intended wearing order. Each layer interacts with the avatar and with nearby garments, so a change to one item can affect contact, spacing, drape, strain, and visible fit elsewhere.
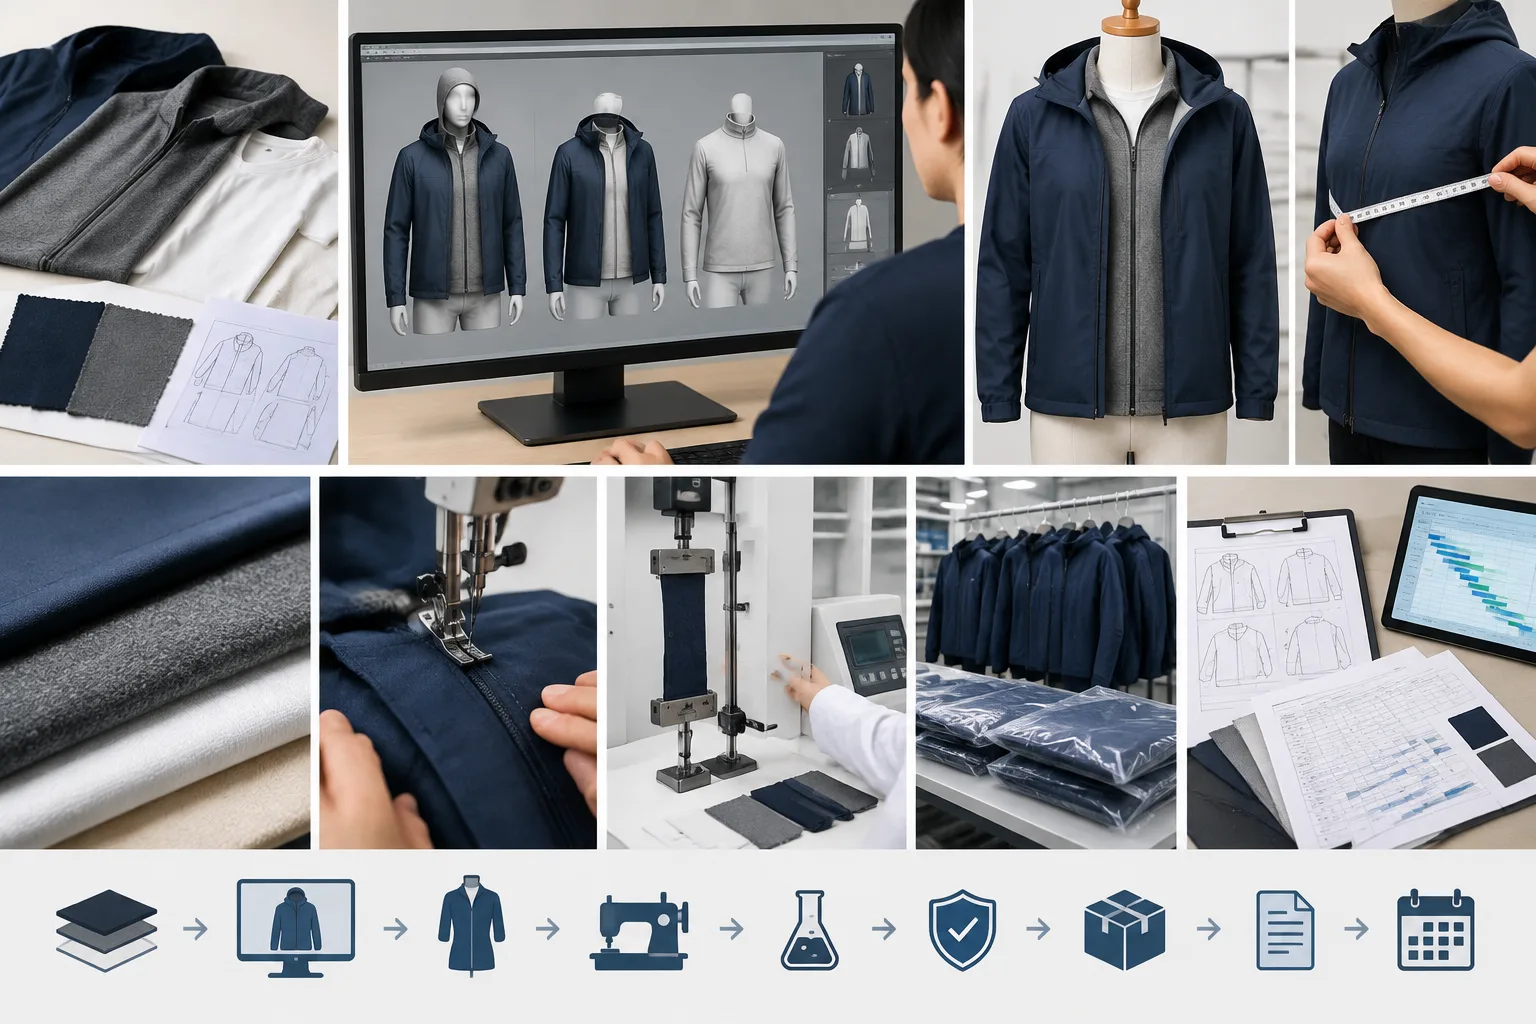
A useful 3D apparel simulation workflow follows an entity chain: approved garment patterns, sewing and construction relationships, body model, posture, pose, material data, layer order, environmental conditions, solver controls, and review outputs. These elements should be treated as connected inputs. For example, changing the avatar shape or posture can alter the apparent result even when the pattern and material settings remain unchanged.
The workflow should also distinguish established process principles from software-dependent choices. Most platforms provide controls for avatars, patterns, materials, collisions, positioning, and simulation behavior, but the names, units, defaults, and available parameters vary. Document the selected platform and map its terminology to the project record instead of assuming that a setting has the same meaning everywhere.
Repeatability does not require every project to use identical settings. It requires the team to know which variables were held constant, which were changed deliberately, and which remain uncertain. The result is a traceable comparison: a reviewer can determine whether an apparent improvement came from a pattern change, a different pose, a new material input, a changed layer order, or a simulation adjustment.
Prepare and Version the Inputs Before Simulation
Begin with a controlled input record for every garment in the stack. Record the pattern file and version, garment measurements, seam and construction details, closure state, seam allowance treatment, intended wearing position, and relevant design assumptions. A garment that appears similar to an earlier version may still produce a different result if its ease, seam placement, opening, or construction relationship has changed.
Document the avatar as carefully as the garments. Include the body measurements or model identifier, body shape, posture, pose, and movement state. Similar measurements do not necessarily produce the same posture or body distribution, and a static avatar cannot represent every movement or wearer. A pose selected for a standing review may be appropriate for one question but insufficient for assessing behavior during reaching, sitting, walking, or another intended activity.
Keep visual material assets separate from physical material inputs. Color, weave appearance, texture, and surface graphics describe how a fabric is presented. Stretch direction, bending response, thickness, friction, and related software-defined properties describe how it is modeled to respond. A detailed texture map cannot substitute for appropriate material behavior data, and a photograph cannot reliably provide every parameter needed for simulation.
For each material input, record its source, measurement method when known, units, date, and version. If a value is estimated, mark it as an assumption rather than presenting it as measured fact. Software parameter names should be copied accurately from the chosen platform, then explained in project language where needed. Avoid carrying values from one software system into another without checking how each platform defines and uses them.
A practical input log can include:
- Pattern, construction, and garment file names with revision dates.
- Avatar model, measurements or identifier, posture, pose, and movement state.
- Material asset files and separate physical-property inputs, including units and sources.
- Software name and version, project units, intended layer order, and starting assumptions.
- Unresolved questions, estimated values, and changes required before comparison.
These records are part of the simulation workflow, not administrative work added afterward. Without them, a team may compare two attractive renders without knowing whether the underlying garments, body model, material data, or settings were actually comparable.
Build the Layer Stack and Standardize the Simulation Setup
Define the intended wearing order from the innermost layer to the outermost layer. Include undergarments or base layers when they materially affect spacing, contact, or fit. Layer order is a design and use assumption, not an automatic truth for every wearer. A jacket simulated over a shirt may need a different starting arrangement and review question than the same jacket evaluated over a thin base layer.
Before running the complete stack, verify each garment independently. Check the correct pattern revision, sewing relationships, closures, seam treatment, initial placement, and orientation. Save an untouched baseline before making adjustments. Use a consistent naming convention for garments, avatars, material files, camera views, and simulation versions so that exported images and project files remain intelligible to another reviewer.
Set the avatar pose, garment starting positions, collision behavior, gravity or other environmental conditions, and solver controls according to the selected software. These controls are platform-specific, so describe them by function when creating a platform-neutral process. Record the values or selected states used for each run, including any deliberate change made to resolve instability, contact, or placement issues.
When the complete stack is difficult to interpret, simulate in stages. First inspect individual garments, then add layers progressively, and finally review the full outfit. This staged approach helps identify which layer introduced an intersection, gap, compression effect, or unexpected displacement. Change one meaningful variable at a time when diagnosing a result; changing the pattern, avatar, material, and solver together makes the cause of an observed difference difficult to establish.
Keep a short change log beside the project files. Note the original baseline, the variable changed, the reason for the change, and the resulting review status. The purpose is not to claim that every run will behave identically, but to make the setup sufficiently explicit that another user can reproduce the comparison and understand where judgment entered the process.
Which Variables Most Affect the Result?
Several variable groups can alter the appearance and interaction of layered garments. Pattern geometry, ease, seam placement, closures, and layer thickness affect how garments occupy space and contact one another. Avatar size, shape, posture, and movement can change contact, strain, drape, and perceived fit. Material assumptions also matter, particularly stretch direction, bending response, friction, thickness, and anisotropy where the selected software supports those concepts.
| Variable group | What to control or record | How to interpret uncertainty |
|---|---|---|
| Garment construction | Pattern revision, ease, seams, closures, and layer thickness | Separate visible geometry issues from assumptions about production behavior |
| Avatar and pose | Body model, posture, pose, and movement state | Do not generalize one avatar or pose to every wearer or activity |
| Material inputs | Visual assets, physical properties, source, units, and version | Do not infer complete physical response from texture or photographs |
| Simulation setup | Initial placement, collisions, environmental settings, and solver controls | Record software-specific settings and treat unexplained differences as unresolved |
Visual texture and physical response should remain separate during review. A fabric may look convincing because its color, weave, or surface map is detailed while its modeled behavior remains uncertain. Likewise, a visually plain material may still be useful for isolating geometry or contact issues. Use the appropriate evidence for each question rather than allowing one strong visual cue to stand in for overall garment performance.
When comparing runs, classify each variable as controlled, project-dependent, or unresolved. Controlled variables are intentionally held constant. Project-dependent variables reflect the intended user, garment, or use condition. Unresolved assumptions are inputs that require better data, a new comparison, or physical confirmation. This classification makes uncertainty visible instead of hiding it behind a polished render.
Review the Output With a Repeatable Evaluation Checklist
A simulation becomes more useful when every iteration is reviewed under comparable conditions. Use the same camera views, avatar pose, garment state, and review checkpoints when comparing versions. A different view or posture can make a change appear more significant or less visible than it really is, so record these conditions with the exported images or review file.
Begin with the layer stack itself. Confirm that the garments remain in the intended wearing order and that each layer is positioned as expected. Look for visible intersections, unintended gaps, excessive compression, and areas where one garment pushes another into an implausible shape. Check hems, cuffs, sleeves, armholes, waist and hip contact, and closure alignment when those features are relevant to the style.
Then separate what the model shows from what the reviewer infers. An intersection, gap, distorted hem, or strain indication is an observable digital finding. Comfort, hand feel, durability, thermal behavior, and production feasibility are broader conclusions that may require different evidence. A polished render can support a visual discussion, but it does not by itself establish how the finished garment will feel or perform.
Record each finding with a location, affected garment or layer, project relevance, evidence, and proposed next action. For example, a shoulder intersection may lead to a pattern or starting-position review, while uncertain fabric response may lead to a material-data request. This structure makes the garment simulation evaluation checklist useful to designers, developers, pattern makers, and quality teams without turning it into an unsupported universal acceptance standard.
Retain screenshots, measurement views, or exported review files with the relevant simulation version. Mark whether an issue was corrected by changing the pattern, avatar, material input, layer order, or solver setup. If several variables changed together, the result may be harder to interpret. When possible, adjust one meaningful variable at a time and keep the prior baseline available for comparison.
Finally, flag findings that need another evidence type. A digital review may identify a construction concern, but a physical sample, fit session, material assessment, wash evaluation, safety review, or formal quality process may still be necessary. Keep visual inspection criteria separate from regulatory, compliance, and release criteria.

Decide What Digital Simulation Can Replace and What It Cannot
Digital samples can support suitable development decisions and may reduce some rounds of visual or construction review. They do not automatically eliminate physical sampling. The appropriate handoff depends on the garment’s construction, material, intended use, development risk, and the quality of the available inputs.
A useful validation gate maps each decision to the evidence needed to support it. A digital observation may be enough to identify a visible intersection or compare alternative layer orders. A measured material input may support a narrower discussion of modeled response. Physical confirmation remains important for critical construction, tactile hand feel, finish changes, wash-related behavior, and material characteristics that have not been reliably represented in the simulation.
Do not treat one avatar, pose, or fabric setup as proof for every wearer or activity. A static digital result describes the conditions that were modeled. It may not represent movement, a different body shape, another size, or a changed production material. Likewise, visual similarity between a digital textile and a photograph does not demonstrate that the physical response has been characterized adequately.
For each open question, identify whether the next step is a digital observation, improved material data, a controlled rerun, a physical sample, wearer or fit review, or a formal test program. This prevents a convincing visual result from carrying more authority than the evidence supports. Apparel Wiki presents this as independent educational guidance, not as a certification, laboratory, manufacturing, or compliance service.
A Practical Repeatability Protocol for Future Projects
A repeatable 3D garment workflow starts with a minimum project record. Keep the approved pattern version, construction assumptions, avatar and pose, intended layer order, material-data source, units, simulation settings, software version, review checklist, and unresolved questions together. The exact parameter names vary by platform, but the need to identify the inputs does not.
Save an untouched baseline before making adjustments. Use a clear file-naming convention and maintain a change log for pattern, material, avatar, pose, layer, and solver changes. The record does not need to be complicated; it needs to show what changed, why it changed, and which result should be compared with the previous run.
For comparable styles, use the same core review package: consistent views, poses, checkpoints, issue categories, and evidence fields. Add project-specific checks for unusual structures, complex closures, high-risk materials, or movement conditions that are important to the intended use. A shared format improves comparison while still allowing the workflow to reflect the product.
After physical sampling, compare the digital findings with what was observed in the sample or fit review. Use that comparison to improve future assumptions, material records, and review questions. One successful comparison can inform a team, but it should not be treated as universal proof for every fabric, avatar, construction, or software setup.
At each decision point, choose one of four practical paths: proceed with the digital result for the decision in question; repeat the run with controlled input changes; request better material or construction data; or move to physical validation. This decision framework keeps uncertainty visible and makes the workflow easier to explain across design, development, sourcing, and quality functions.
For related guidance on digital development resources and production-focused references, continue with the Apparel Manufacturing Tools collection. The useful next step is to connect simulation records with the broader product-development process while keeping digital observations, physical evidence, and formal requirements clearly separated.
FAQ
What is a garment layering simulation workflow?
It is a controlled process for evaluating multiple garments on a defined avatar, pose, material setup, layer order, and simulation environment, then reviewing and documenting the results consistently.
Which inputs need to be standardized for repeatable 3D garment layering results?
Standardize the pattern and construction versions, avatar and pose, garment order, material-data source, units, starting positions, relevant solver settings, software version, review views, and unresolved assumptions.
Does a realistic 3D render prove that layered garments will fit and feel correct?
No. A render can reveal visual geometry, contact, and layering issues under modeled conditions, but it does not by itself prove physical fit, comfort, hand feel, durability, wash behavior, safety, or compliance.
How should garments be arranged in a digital layer stack?
Arrange them according to the intended wearing order, from the innermost relevant layer to the outermost garment. Check patterns, sewing relationships, closures, initial placement, and collision behavior before reviewing the complete stack.
Why can the same fabric look different in two garment simulations?
Differences may result from pattern geometry, ease, avatar shape, posture, layer thickness, material assumptions, initial conditions, or solver settings. Visual texture alone does not define physical fabric response.
What should be checked after simulating multiple garment layers?
Review layer order, intersections, gaps, compression, strain indicators, hems, sleeves, armholes, waist and hip contact, closures, and consistent camera views. Record each finding and identify whether it needs digital revision or physical confirmation.