

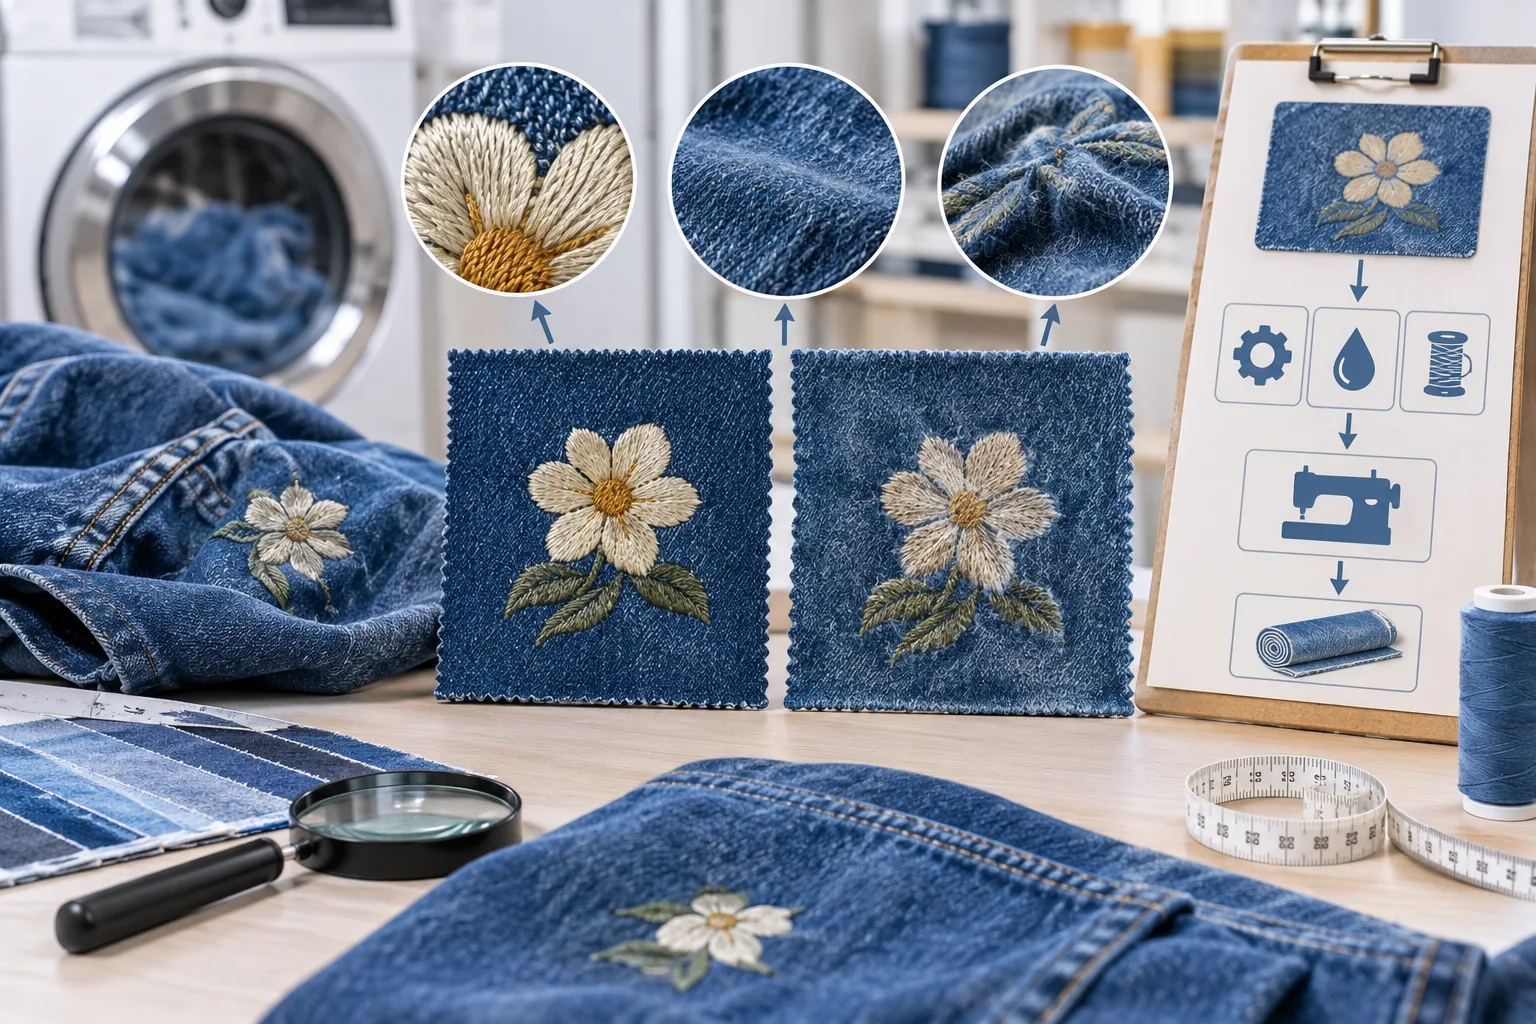
Sponsor Denim embroidery wash testing is a before-and-after evaluation of embroidered denim under a recorded laundering condition. Compare the same identified garment or swatch before and after laundering, noting the embroidery location and the care process used. This makes changes easier to assess, but does not by itself establish whether the result meets a product requirement.
Evaluate the denim, embroidery, and laundering process together. Look for changes in puckering, thread appearance, edge definition, dimensions, stiffness, and movement or fit. A single sample describes only that sample under its recorded conditions; it cannot establish a universal performance limit. The practical goal is to document what changed and decide whether to revise the construction, repeat the comparison, or investigate further.
What Denim Embroidery Wash Testing Should Reveal
Matched observations before and after laundering help separate what is visible from what requires measurement or hands-on assessment. Record the sample identity, embroidery placement, and laundering condition so the comparison has context. Without those details, an apparent difference may reflect a different sample or process rather than a meaningful change.
Inspect the front for puckering, rippling, skew, altered fill coverage, exposed threads, and changes in edge definition. Then consider other outcomes separately: dimensional change in the denim, local distortion around the stitched area, stiffness, and the feel of the reverse side. A clean front image cannot show whether the back feels irritating or whether the garment moves comfortably.
These observations can have several contributing variables. Denim may change dimensions during laundering, while embroidery density, stabilizer, hooping, thread, and tension may also affect how the stitched area sits. Those factors can interact, so a change after washing does not identify one cause by itself.
A useful evaluation ends with a documented decision: revise a feature, repeat the comparison under known conditions, or investigate a possible cause. A test method describes how an evaluation is performed; a product specification states what a particular product is expected to meet. One sample result is not a pass/fail rule for all denim embroidery.
Prepare Comparable Denim Embroidery Samples Before Laundering
Start with the actual denim and embroidery construction when the decision concerns a finished garment. A design file describes stitch paths, but it does not establish how those stitches will behave on a particular fabric. Record the file or sample revision and the material combination so later comparisons refer to the same version.
Before laundering, make a compact record: sample identity; denim type or material description; garment or panel location; embroidery dimensions and placement; and thread and stabilizer details when known. Note the care process selected, cycle count if applicable, and drying condition. Treat these as variables to record, not fixed requirements that apply to every denim project.
Capture consistent front and back images, with the same view, lighting, and scale where practical. Take measurements at identifiable locations and record the units. Note the existing appearance and hand, including puckering, distortion, edge quality, stiffness, exposed backing, or floating threads. These pre-laundering observations provide a baseline for identifying what changed.
Keep the laundering condition tied to the sample record. A controlled comparison with documented conditions can support a more focused review than a casual home-care observation, but neither should be described as a formal method unless the applicable method was followed. If key conditions are unknown or differ between samples, limit the comparison to what the records can support rather than ranking the results.
Inspect Appearance, Structure, and Wearability After Laundering
Compare post-laundering images with the baseline using a consistent view, lighting, and scale. Look for puckering, rippling, skew, changes in fill or edge definition, exposed thread, and visible color or surface changes. Also inspect the denim around the embroidery: distortion across the panel may differ from deformation localized around the stitches. These are observations, not proof of colorfastness or durability.
Turn the sample over. Check for backing or stabilizer edges, floating threads, and areas where the stitched layer feels notably dense or stiff. Visible backing or dense stitching can prompt a closer review of the reverse, but a photograph cannot establish softness or skin comfort. Assess hand directly, and consider whether the embroidered area sits against skin in the intended garment location.
When wearability matters, assess the area during relevant garment movement as well as while flat. A stretch-sensitive denim panel, for example, may show restricted movement or distortion around embroidery. That observation should be considered alongside fabric stretch and embroidery construction; the interpretation could change with placement, garment pattern, or laundering conditions.
If puckering appears after washing, investigate fabric handling, backing, hooping, stitch density, stitch path, needle and thread, and tension as related variables. Several may contribute, and changing one is an investigation rather than a guaranteed fix. Record the observed change and construction details before revising, so a later sample can be compared on the same basis.
Keep the conclusion proportional to the inspection. Appearance can be reviewed in images, but structure, hand, and movement need closer assessment. A visual change may justify further investigation; it does not alone establish a cause, a comfort outcome, or whether the product meets its intended requirement.
Measure and Interpret Changes Without Overclaiming
To compare dimensional change, measure the same marked or clearly identifiable locations before and after laundering. Record units and direction, and distinguish change across the denim panel from local distortion around the embroidery. Keep the sample identity and laundering condition with the measurements so the result remains tied to the comparison that produced it.
If you express a length change as positive shrinkage, use: shrinkage rate = (L0 – L1) / L0 x 100%, where L0 is the pre-laundering length and L1 is the post-laundering length. Using these example inputs, a 50 cm length before laundering and 48 cm afterward gives (50 – 48) / 50 x 100%, or 4% shrinkage. This arithmetic illustrates the sign convention; it is not a measured result or an acceptance limit.
Record the measurement locations, sample direction, units, laundering pre-treatment, and evaluation conditions. If you repeat observations, keep their conditions identifiable instead of averaging away inconsistent readings. Compare results only when the sample and relevant method conditions are sufficiently aligned. Numbers from different methods or laundering conditions cannot be ranked by size alone.
A measurement describes a change; it does not establish whether that change is acceptable. Check the applicable product specification before making an acceptance decision. If there is no defined requirement, report what changed and what remains uncertain rather than turning one sample result into a universal tolerance.
Turn Wash Findings Into Design and Process Decisions
Use an observed change to guide investigation, not to assign a root cause immediately. Denim behavior, embroidery construction, and laundering conditions may interact. The table gives starting points; the variables listed are candidates to examine, not guaranteed fixes.
| Observation | Possible implication | Initial choice | Variables that could change the choice |
|---|---|---|---|
| Puckering or skew after laundering | The denim or stitched area changed shape | Review fabric handling, backing, hooping, stitch path, and construction before revising | Density, needle and thread, tension, placement, and laundering condition |
| Changed edge definition | The embroidered outline or surrounding fabric looks different | Compare the same area and inspect the stitch path and fabric together | Thread, construction, fabric behavior, and image or viewing conditions |
| Stiffness or reverse-side irritation | The stitched area or backing may affect hand at the wear location | Inspect backing edges and floating threads; consider construction or placement changes | Body location, garment movement, stitched area, and laundering condition |
| Dimensional change across the denim panel | Overall fabric change may be distinct from local embroidery distortion | Separate panel measurements from observations around the stitching | Fabric behavior, pattern, placement, and laundering conditions |
| No noticeable change | No change was observed in this sample under its recorded condition | Keep the record; do not treat it as proof of universal performance | Sample identity, comparison conditions, and the product requirement |
For puckering, check fabric handling, backing, hooping, density, stitch path, needle and thread, and tension as related variables. A file revision may be worth investigating, but the file alone does not show how the finished embroidery behaves on the actual denim. For stiffness or irritation, inspect the reverse at the intended wear location before deciding whether to investigate placement or construction.
If the sample, laundering condition, or measurement record is not comparable, repeat the comparison under a clearly recorded condition. Retain both the original and revised records so you can assess what changed rather than assume an adjustment worked. For the next review, document the observation, sample and file revision, laundering condition, measurements, and the one variable selected for investigation. Compare that record with the applicable product specification and check the relevant authoritative method before making a production or care decision.
Document the Next Evaluation Step
Useful denim embroidery wash testing connects a matched pre-laundering record, an identified laundering condition, post-laundering observations, and project-specific criteria. Assemble the sample identity, known denim and embroidery variables, measurements, and limits of the conclusion. Then check the applicable method or product requirement and identify the next variable to investigate. The record supports learning and comparison; it is not, by itself, a formal test outcome or acceptance decision.
Frequently Asked Questions
What should be recorded before laundering a denim embroidery sample?
Record the sample identity, denim description, embroidery placement and dimensions, and known thread, backing, and file revision. Capture baseline measurements and front and back observations, along with the intended laundering condition, including drying details when known.
How can I tell whether puckering came from the denim or the embroidery?
One observation may not identify the cause. Compare the surrounding panel with the stitched area, then review fabric handling, backing, hooping, stitch construction, needle and thread, tension, and laundering conditions. Treat these as variables to investigate, not a diagnosis.
Can a front-side photo prove that washed embroidery will be comfortable to wear?
No. A photograph can help compare visible appearance, but it cannot establish hand, skin comfort, or movement. Inspect the reverse and assess the embroidered area at its intended garment location when wearability matters.
How should shrinkage be expressed when comparing denim before and after laundering?
For positive shrinkage, use (pre-laundering length – post-laundering length) divided by pre-laundering length, multiplied by 100%. State the locations and units measured. The result describes that comparison; it is not an acceptance limit.
Can one denim embroidery wash test establish a universal pass or fail limit?
No. A result applies to the sample and conditions recorded. A pass or fail decision requires a relevant product-specific requirement or validated basis; without one, report the observed change and its limits.


