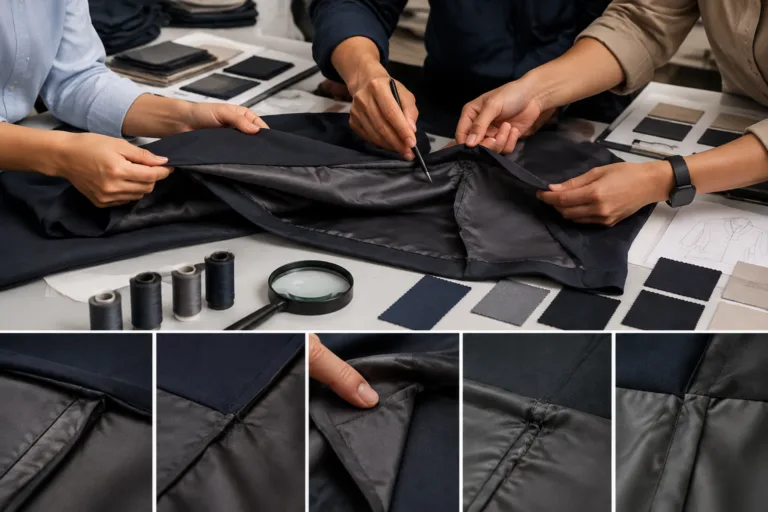
Lining attachment seam defects are unwanted departures from a garment’s approved construction, appearance, or function where the lining is joined to another component. Common symptoms include puckering, waviness, twisting, uneven alignment, skipped or broken stitches, seam opening, excess bulk, and stitch show-through. These symptoms may result from differences between materials, inaccurate dimensions or alignment, unsuitable machine setup, construction order, or operator handling—but appearance alone rarely proves the cause.
Assessment must begin with the approved sample, specification, and agreed quality criteria. A visible wrinkle or exposed stitch is not automatically defective if it is consistent with the intended construction. Apparel Wiki is an independent educational publication; information about its editorial independence and commercial support appears on the Sponsor page. The guidance below explains how to describe observable lining attachment seam problems before evaluating production causes.
What Is a Lining Attachment Seam, and What Counts as a Defect?
A lining attachment seam joins lining fabric to another part of a garment. Depending on the design and assembly sequence, the lining may be attached to shell fabric, a facing, a waistband, a cuff, a hem structure, or another internal component. The layers included in the seam and the seam’s final position therefore vary by garment. Any investigation should identify the exact location and layer combination instead of treating “the lining seam” as a single universal construction.
Several related terms should remain distinct when documenting a concern. The seam structure describes how the material layers are arranged and joined. The stitch type concerns how thread forms or interlaces. The seam allowance is the material between the stitching line and the cut edge, while stitch spacing describes the distance or frequency of stitches along the seam. A problem in one feature does not necessarily mean the others are incorrect.
A defect is a departure from an applicable requirement, not simply a visible variation. The reference may be an approved sample, construction specification, workmanship requirement, fit expectation, functional requirement, or another criterion agreed by the relevant parties. For example, slight fullness may be intentional where ease is required, while similar-looking fullness elsewhere may distort the garment and fail the approved appearance.
A useful defect record states where the symptom occurs, its direction and extent, how often it appears, and which sizes, colorways, material lots, or production lots are affected. It should also note when the issue becomes visible: immediately after sewing, after pressing, after later assembly, during wear, or after care. These details help separate the initial observation from assumptions about its source.
Which Defects Commonly Appear at Lining Attachment Seams?
Puckering, gathers, and waviness are among the most noticeable lining seam defects. They may appear mainly in the lining, mainly in the shell, or across both layers. Record whether the distortion runs continuously along the seam, appears at intervals, or is concentrated near curves, corners, seam intersections, or operation start and stop points. “Puckered seam” alone is usually too broad a description for effective troubleshooting.
Twisting, roping, and uneven alignment describe different visible conditions. A seam may rotate instead of lying in its intended position, or the lining may pull the shell and alter the garment’s hang. Notches, edges, or corresponding construction points may fail to meet. These symptoms can suggest dimensional, feeding, handling, or assembly differences, but they should not be assigned a root cause until the relevant pieces and process are checked.
Skipped stitches, broken stitches, irregular stitch formation, and seam opening should be documented separately. A seam can open because stitches have failed, because the fabric has been damaged or displaced, or because the joined layers are not being retained as intended. Combining all these observations under “weak seam” can hide important differences in the failure mechanism.
Other lining attachment seam problems include excessive thickness, a hard ridge, an outline of the seam allowance visible from the garment face, or unwanted stitch show-through. Whether these conditions are unacceptable depends on the design, material combination, garment area, and approved standard. A deliberate edge detail in one product may be an appearance failure in another.
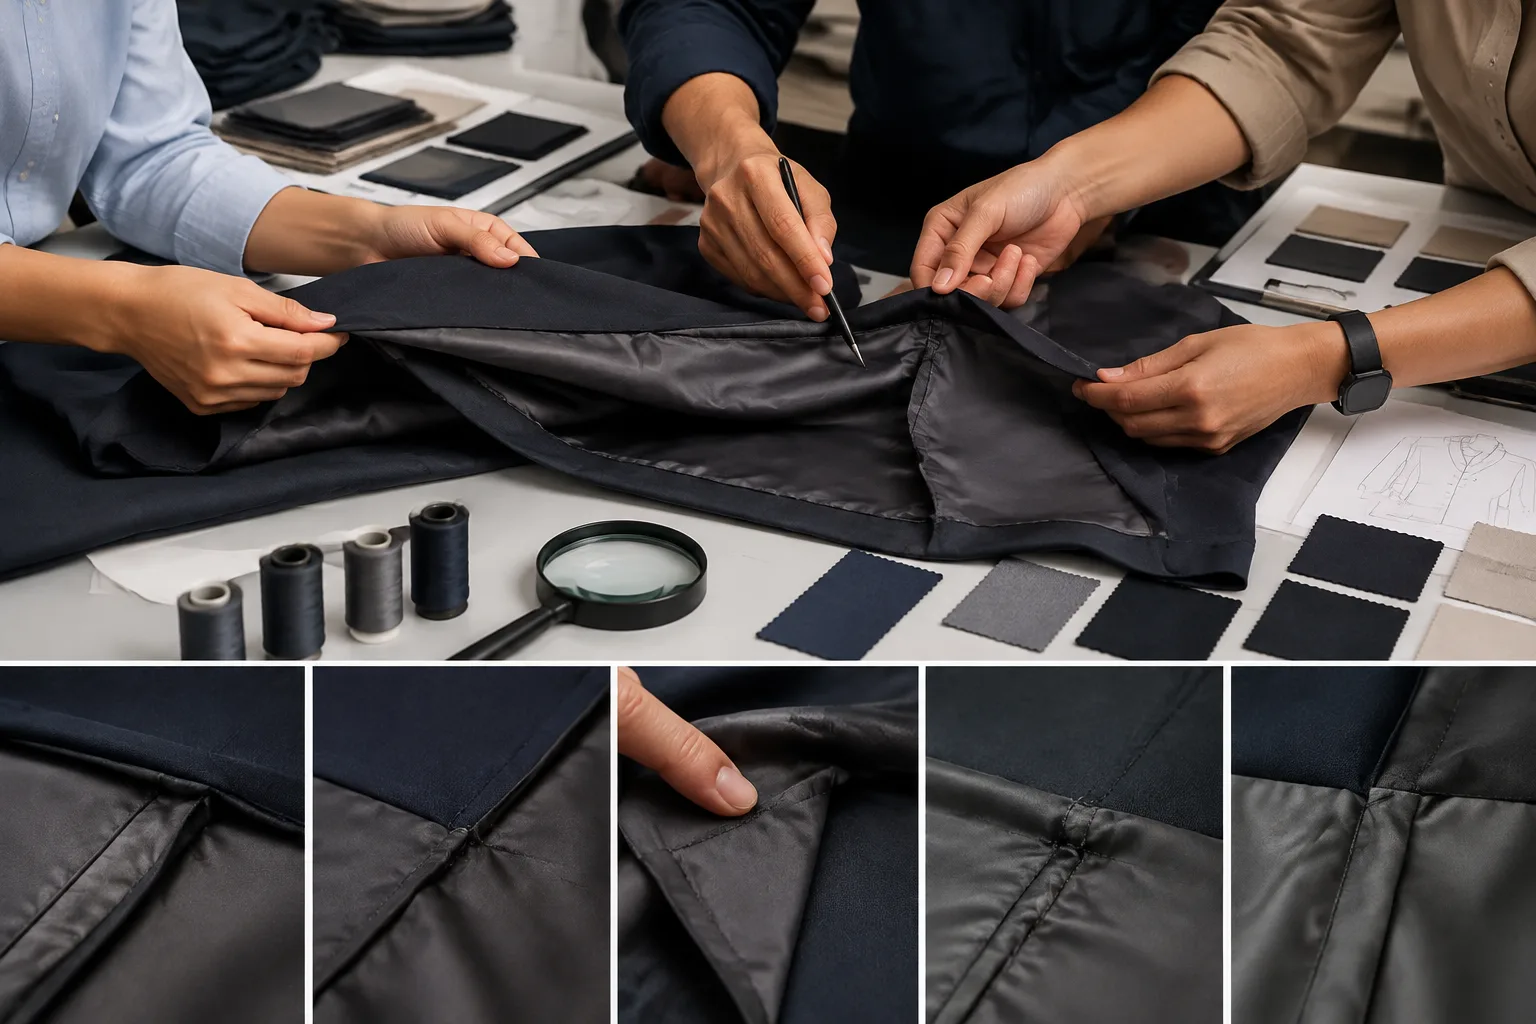
Use consistent photographs, viewing conditions, reference points, and measurements wherever practical. Photograph both the overall garment effect and the close-up seam condition. Compare the affected garment with the approved sample or specification, and state whether the symptom is isolated or repeated. A single image can document appearance, but it generally cannot establish the production cause.
How Can Production Conditions Cause These Defects?
Material behavior
Lining and shell materials may differ in thickness, stretch, recovery, dimensional stability, surface friction, and response to handling or pressing. As the layers pass through an operation, they may feed, compress, or recover differently. This can contribute to waviness, shifting, or unequal fullness. The same symptom may also have another source, so material behavior should remain a hypothesis until actual lots and layer combinations are compared.
Pattern and construction details
Pattern dimensions, intended ease, seam allowance, notches, curves, and alignment points determine how the layers are expected to meet. Incorrect pieces, inconsistent cutting, misplaced reference points, or uneven ease distribution can produce twisting, pulling, or localized gathers. Checks should use the approved pattern and sample rather than assuming that two adjoining edges must have identical lengths.
Construction order also affects access, visibility, and control. An attachment that is easy to align while components remain open may become difficult after another area is closed or obstructed. Later operations can conceal an early error, make correction more disruptive, or introduce new distortion. There is no single best assembly order for every garment; the appropriate sequence depends on the product and available process.
Machine setup and operator handling
Needle and thread suitability, stitch formation, presser-foot pressure, feeding behavior, and the condition of the equipment can contribute to uneven stitching or distortion. Operator actions—such as stretching one layer, restraining another, forcing curves, or distributing ease inconsistently—may create a similar appearance. Production records, machine checks, and controlled samples are needed to distinguish setup effects from handling effects.
Increasing stitch density, choosing stronger thread, or adding localized reinforcement is not automatically corrective. Such changes can alter stiffness, thickness, appearance, and how stress is transferred through the seam and surrounding fabric. In some combinations, additional needle penetrations or a harder reinforced area may introduce a different concern. Any adjustment should therefore be evaluated on the actual garment layers and against the approved product requirements.
How Should a Team Diagnose a Lining Attachment Seam Defect?
Begin by describing the symptom before proposing a cause. Record its location, direction, approximate extent, and whether it affects the lining, shell, seam allowance, or more than one layer. Note the garment size, production lot, and operation at which the issue first becomes visible. A seam that looks acceptable before pressing but distorts afterward is a different investigation from one that is already misaligned at assembly.
Compare affected garments with the approved sample, construction specification, or other agreed reference. Check the relevant pattern pieces, seam allowances, notches, lining and shell material lots, construction details, and process records. The comparison should use the same viewing position and handling conditions where practical. Consistent photographs and simple measurements can make a recurring lining seam defect easier to distinguish from an isolated appearance variation.
Keep several competing hypotheses open. Material behavior, pattern dimensions, machine setup, stitch formation, operator handling, pressing, and measurement error can produce similar symptoms. For each possibility, record the evidence that supports it and the evidence that does not. This prevents a familiar explanation, such as “the machine tension is wrong,” from becoming an unsupported conclusion.
Where practical, change one relevant condition at a time on a controlled sample. The trial might compare the actual lining and shell combination with a documented handling, sequence, or setup adjustment. Inspect the same seam features using consistent criteria and record the trial conditions and outcome. A single improved garment does not prove a root cause; a repeatable result across comparable samples is more informative.
Examine the complete layer combination under conditions relevant to the product. Seam opening, fabric damage, distortion, and discomfort may appear only when the garment is handled, worn, pressed, or subjected to an intended care process. A stronger thread or local reinforcement by itself may leave the original mechanism unchanged, or transfer stress into the lining or shell.
Which Corrective Actions Match the Confirmed Cause?
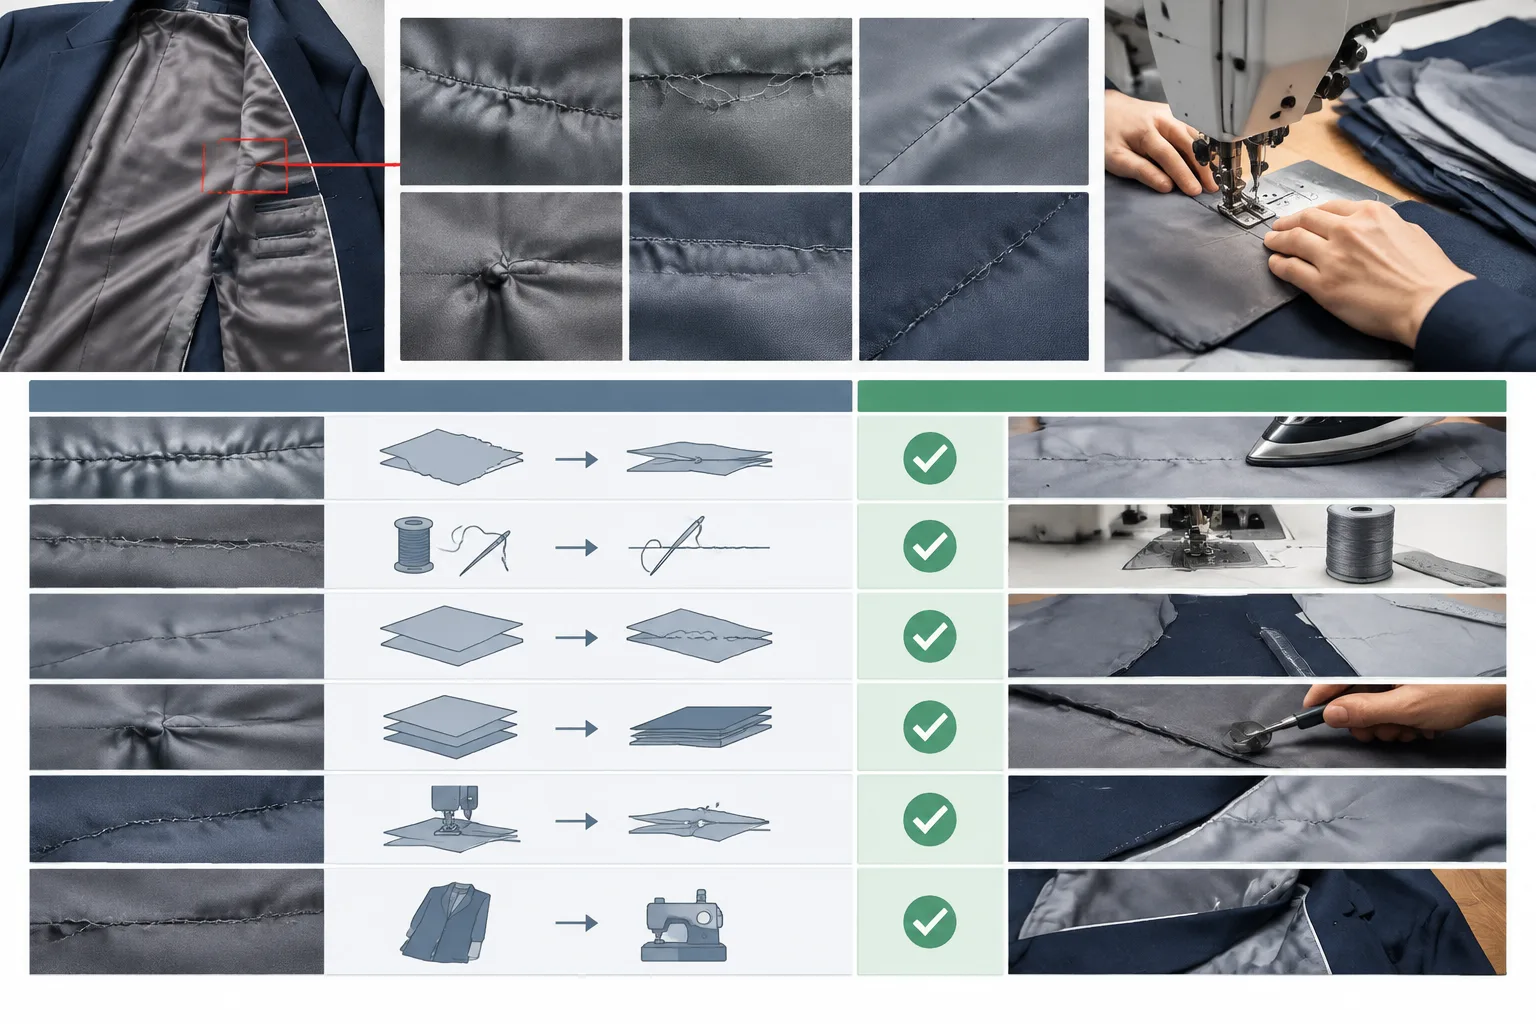
Corrective action should follow the mechanism supported by the investigation. If the issue is alignment or handling, review the guides, notches, operator sequence, and access to the seam. Check whether the layers can be controlled consistently at the operation where the defect begins, then compare trial garments with the approved reference rather than judging the change in isolation.
For a suspected material or dimensional mismatch, verify the incoming materials and pattern assumptions before changing the assembly method. Differences in thickness, stretch, friction, or dimensional behavior may require a product-specific construction decision. Changing the sewing operation without checking the layer dimensions can conceal the symptom temporarily while leaving the underlying mismatch unresolved.
When the evidence points to stitch formation or machine conditions, assess the relevant setup on the actual layer combination. Needle and thread suitability, feeding behavior, presser-foot pressure, and handling should be considered together with the visible stitch result. Avoid applying generic settings or assuming that a setting suitable for a single fabric will produce the same result through a lining, shell, seam allowance, and any additional layers.
Excess bulk or concentrated stress may call for a construction comparison rather than automatic reinforcement. Alternatives should be reviewed for appearance, function, comfort, flexibility, and durability under the product’s requirements. More stitches, stronger thread, added layers, or localized reinforcement can increase stiffness, thickness, needle penetration, or friction. These changes are options to evaluate, not universal solutions.
After a change, reinspect repeat garments and the relevant earlier and later operations. Document the original symptom, the suspected mechanism, the adjustment, the sample conditions, and the result. Also record new concerns, such as stitch show-through, hard areas, seam distortion, or damage elsewhere. This creates a traceable basis for deciding whether the correction is suitable for the product.
What Are the Limits of Visual Inspection and Defect Counts?
Visual inspection is useful for documenting visible symptoms, but it does not necessarily identify the underlying cause or predict performance in use. A photograph may show puckering, uneven alignment, or an exposed seam allowance while revealing little about the material lot, construction sequence, or stitch formation. Observation, measurement, test result, and editorial recommendation should therefore remain separate in the record.
Counts also require clear rules. A team may count garments with one or more defects, or it may count every observed defect location. Those are different measures and should not be presented as interchangeable. A garment with several affected areas contributes differently to a defect total than to a count of affected garments.
Any reported rate should state the inspection sample, criteria, inspection unit, and denominator. A simple comparison between production groups can help identify a change in occurrence, but it is not automatically an acceptance-sampling plan and cannot establish a universal pass or fail limit. Product-specific requirements determine how findings should be judged.
Performance conclusions require an appropriate, validated evaluation for the garment and intended use. If visual checks suggest seam opening or fabric damage, the next step may require a controlled examination of the full construction rather than an assumption based on appearance alone. Apparel Wiki provides independent educational guidance; the responsible product team must apply its approved requirements and documented quality process.
For a practical next step, create a one-page defect record for each recurring lining seam problem. Include a consistent photograph, location, garment and lot information, stage of first appearance, competing hypotheses, trial conditions, and the result after correction. This turns a general concern into evidence that designers, pattern makers, production teams, and quality professionals can review together.
FAQ
What is the difference between a lining attachment seam defect and a lining fabric defect?
A lining attachment seam defect concerns how the lining is joined to another garment component, such as alignment, stitching, seam opening, or excess bulk. A lining fabric defect is a problem in the material itself. The two can interact, so the affected layers and the point of first appearance should be recorded separately.
Why does a lining seam pucker after sewing?
Puckering can result from differences in layer feeding, stretch, dimensional behavior, handling, stitch formation, or pressing. The visible symptom does not identify one confirmed cause. Compare the affected seam with the approved reference and investigate the materials, pattern, machine conditions, and handling together.
Can a lining attachment seam defect be diagnosed from a photo alone?
A photo can document location and appearance, but it usually cannot establish the root cause. Diagnosis may require the garment, full layer combination, production records, pattern information, and a controlled comparison. Use photographs as consistent evidence within the investigation rather than as a standalone conclusion.
Does using stronger thread or more stitches always prevent seam opening?
No. Seam opening may involve fabric damage, yarn movement, dimensional mismatch, poor alignment, or stress transfer rather than thread strength alone. More stitches or stronger thread can also change stiffness, bulk, and needle penetration. Evaluate the complete construction against the product’s requirements.
How should a factory document and verify a correction to a lining seam problem?
Record the original symptom, affected operation, suspected cause, materials and settings involved, trial change, sample conditions, and inspection result. Recheck comparable garments and look for new defects. The correction is more credible when the improvement is repeatable and aligns with the approved sample or applicable product criteria.