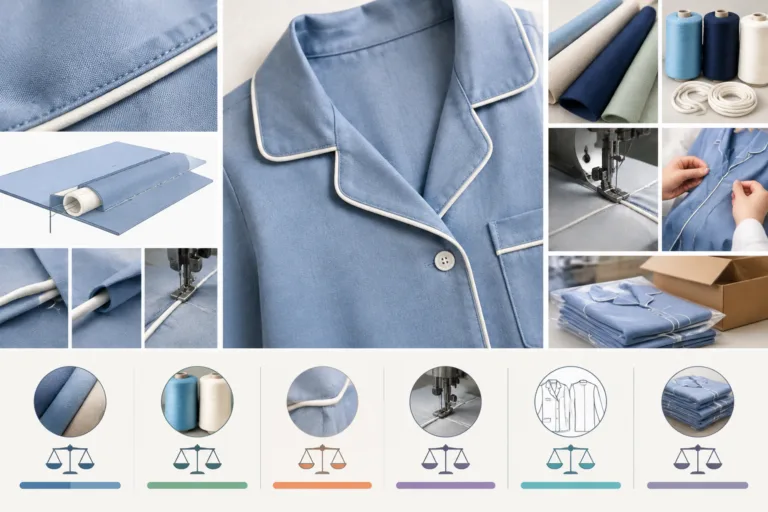
Piped seams construction combines a fabric-covered cord or rounded filler with a seam, creating a raised edge or outlined line in a garment. The piping is usually enclosed between fabric layers or attached along an edge, then secured through a controlled stitching sequence. This guide explains the construction logic from an Apparel Wiki educational perspective; our editorial work is independent, and any support for the site is described on the Sponsor page.
A piped seam is not defined by one stitch type. “Piping” refers to the covered cord or trim, the “seam” describes how fabric layers are joined, the “stitch” describes how thread forms that joining, and the “seam allowance” is the fabric provided beyond the seam line. The seam line is the intended joining path. Keeping these terms separate makes it easier to diagnose an uneven edge or determine whether a problem comes from the trim, pattern, stitching, or assembly order.
What Is a Piped Seam in Clothing?
In a typical piped seam, a cord or rounded insert is wrapped with a fabric strip and positioned at the edge of one or more garment pieces. When the layers are joined, the cord remains visible as a narrow raised ridge while the wrapped fabric is held within the seam. Depending on the design, the piping may outline a panel, emphasize an edge, or create a transition between adjoining pieces.
Common applications include garment edges, style lines, pockets, collars, cuffs, waist details, and decorative panel joins. These applications do not all use the same construction. A pocket may require careful control at corners, an inside collar edge may need a different assembly order, and a curved style line may require the strip and fabric layers to accommodate different amounts of movement. The garment design determines the practical method.
The visible result depends on several connected variables: the cord or filler, the covering fabric, the seam allowance, the position of the stitching, pressing, and the number and thickness of adjoining layers. A firm filler can produce a clearer profile, while a softer filler may create a more flexible edge. Those are design and production choices, not universal requirements. Piping should therefore be evaluated as a complete seam cross-section rather than as an isolated decorative cord.
What Materials and Pattern Pieces Are Needed?
The basic component groups are a covered cord or other rounded filler, a fabric strip, the garment panels, thread, needles, and a presser-foot setup that allows the operator to sew close to the cord. The pattern pieces also need clearly defined seam lines, notches, corners, and seam allowances. If the piping is placed at an edge or between panels, its position should be included in the construction plan before cutting begins.
The fabric strip may be cut on the bias or along the straight grain, depending on the required flexibility, direction, appearance, and garment geometry. A bias strip can generally conform more readily to curves, while a more stable direction may be useful when the design needs a controlled edge. The correct choice depends on the fabric, curve, filler, and intended movement; no single grain direction is correct for every piping seam in clothing.
Fabric weight, stretch, thickness, surface friction, and recovery affect how the strip wraps the cord and how consistently the finished piping follows a line. A slippery fabric may shift during sewing, a thick combination may create excessive bulk, and a stretchy fabric may distort if it is fed unevenly. These effects should be assessed with the actual fabric and trim rather than inferred from a different material combination.
The pattern must account for the piping’s location and the added thickness at the seam. Treating piping as an afterthought can change the apparent seam position, reduce ease at a curved edge, or leave insufficient room for a clean turn. Seam allowance planning must also consider how the wrapped strip and garment layers will be trimmed, graded, pressed, and enclosed.
Support materials such as interfacing, lining, or a stay may be considered when the fabric cannot hold the intended edge or when the surrounding area needs stability. However, each additional layer can increase thickness, stiffness, friction, and resistance to turning. Material selection is therefore a balance among profile definition, flexibility, comfort, appearance, and repeatability in the intended production route.
How Is a Piped Seam Constructed Step by Step?
The following is a general construction sequence for a fabric-covered cord. The exact order can change when piping is inserted into a closed seam, pocket, collar, cuff, finished edge, or another area that becomes difficult to access after assembly.
- Prepare the piping. Cut the covering strip in the planned direction, place the cord on the strip, fold or wrap the fabric around it, and stitch close to the cord. This preparation stitching establishes the covered shape; it is separate from the later seam that joins the garment layers.
- Mark and align the seam. Mark the intended seam line and identify notches, corners, ends, and intersections. Position the piping so the cord follows the intended visible edge consistently. At this stage, check that the covering fabric is not twisted and that the seam allowance is oriented as planned.
- Attach the piping to one layer. Sew the prepared piping to the first garment piece while controlling the position of the cord. The joining path should hold the piping securely without stitching into or flattening the visible filler. Curves may require careful easing or appropriate clipping of the allowance, but the visible cord must not be cut.
- Join the corresponding layer. Place the second garment piece over the first assembly and sew the final joining seam. Keep the original piping line controlled so the new seam encloses the piping consistently. The relationship between the preparation stitching and final joining seam strongly affects how much cord is exposed.
- Manage bulk and finish the seam. Trim or grade allowances where the fabric and design permit, turn the seam, and press according to the material. Corners, ends, closures, and intersections need deliberate handling because several layers can accumulate in a small area.
- Inspect before continuing. Check the exposed edge for continuity, evenness, correct alignment, and unwanted flattening. Correcting an accessible section before lining, facings, or adjacent operations are completed is usually easier than reworking a closed assembly.
This sequence is a construction framework rather than a universal factory method. Access, machine capability, pattern geometry, and the intended finish may require the piping to be attached before a panel is closed or to be sewn as part of an edge operation. The essential controls remain the same: stable cord position, accurate seam placement, suitable handling of curves and corners, and a controlled relationship between preparation stitching and the final joining seam.
How Do Stitching, Seam Allowance, and Assembly Order Affect the Result?
Stitch and seam are related but interchangeable terms. Stitching describes the formation of thread through the material, while the seam describes how the fabric layers are connected. The same piped seam construction may therefore be assembled with different stitch choices, provided the chosen method suits the fabric, trim, access, and intended use.
Stitch placement, seam allowance width, feeding, and cord position influence whether the piping looks sharp and even or exposed, flattened, and irregular. If the joining line moves away from the prepared cord, the visible profile can change. Uneven feeding may create waviness, while excessive handling or pressing can reduce the roundness of the filler. These effects are best judged on the actual garment geometry.
Thread, needle, stitch formation, and fabric behavior need to work together. Increasing thread strength or stitch density alone does not guarantee a more durable seam. A structure that must accommodate movement needs an appropriate balance of strength and extension; otherwise stress may shift into the fabric, cause needle damage, restrict comfort, or contribute to seam failure.
Assembly order also affects access, turning, pressing, rework, and consistency. Enclosing the piping before a lining, facing, collar, or closure is attached may produce a clean result, but it can make later correction difficult. For development work, the sequence should be tested with the intended materials and machine route so that the visible finish and the practical production steps are evaluated together.
What Variables and Trade-Offs Should Be Evaluated?
Piping should be selected as part of the garment design and construction system, not as an isolated decorative detail. The main decisions concern the visible profile, movement, bulk, comfort, appearance, and production repeatability. A more pronounced raised edge may create stronger visual definition, while a softer, lower-profile treatment may turn more easily and feel less noticeable. Neither approach is automatically better for every garment.
Start by considering the geometry of the seam. Straight seams are usually easier to control than inside curves, outside curves, corners, and intersections. Curved areas change how the fabric must ease, clip, turn, and lie around the covered cord. Corners also require deliberate handling so that the cord remains continuous without creating a hard lump, an open gap, or a distorted point. The appropriate method depends on the fabric, pattern shape, and access available during assembly.
Fabric behavior is equally important. Lightweight fabric may show needle marks, distortion, or excessive cord definition, while a bulky fabric can make the finished seam stiff and difficult to turn. Stretch fabrics introduce another concern: a firm piping treatment may restrict extension or pull the adjoining fabric out of shape. Smooth, textured, stable, elastic, lined, and multilayer materials can each require a different balance of strip flexibility, cord coverage, support, and seam allowance management.
Interfacing, stay support, lining, or another local reinforcement may help a fabric hold the intended edge, but each added layer changes the cross-section. It can increase thickness, hardness, friction, and pressing difficulty. Reinforcement should therefore respond to a specific problem, such as edge collapse or distortion, rather than being added on the assumption that more structure always improves the result.
Finally, distinguish decorative piping from piping used to help define or control an edge. A treatment that looks effective on a low-movement panel may be uncomfortable at a skin-contact opening or restrictive in an active area. Before approving a design, compare the intended profile with the garment’s movement, closure, care, and wear requirements. The best piped seam construction is the one that satisfies the complete use case and remains practical to reproduce.
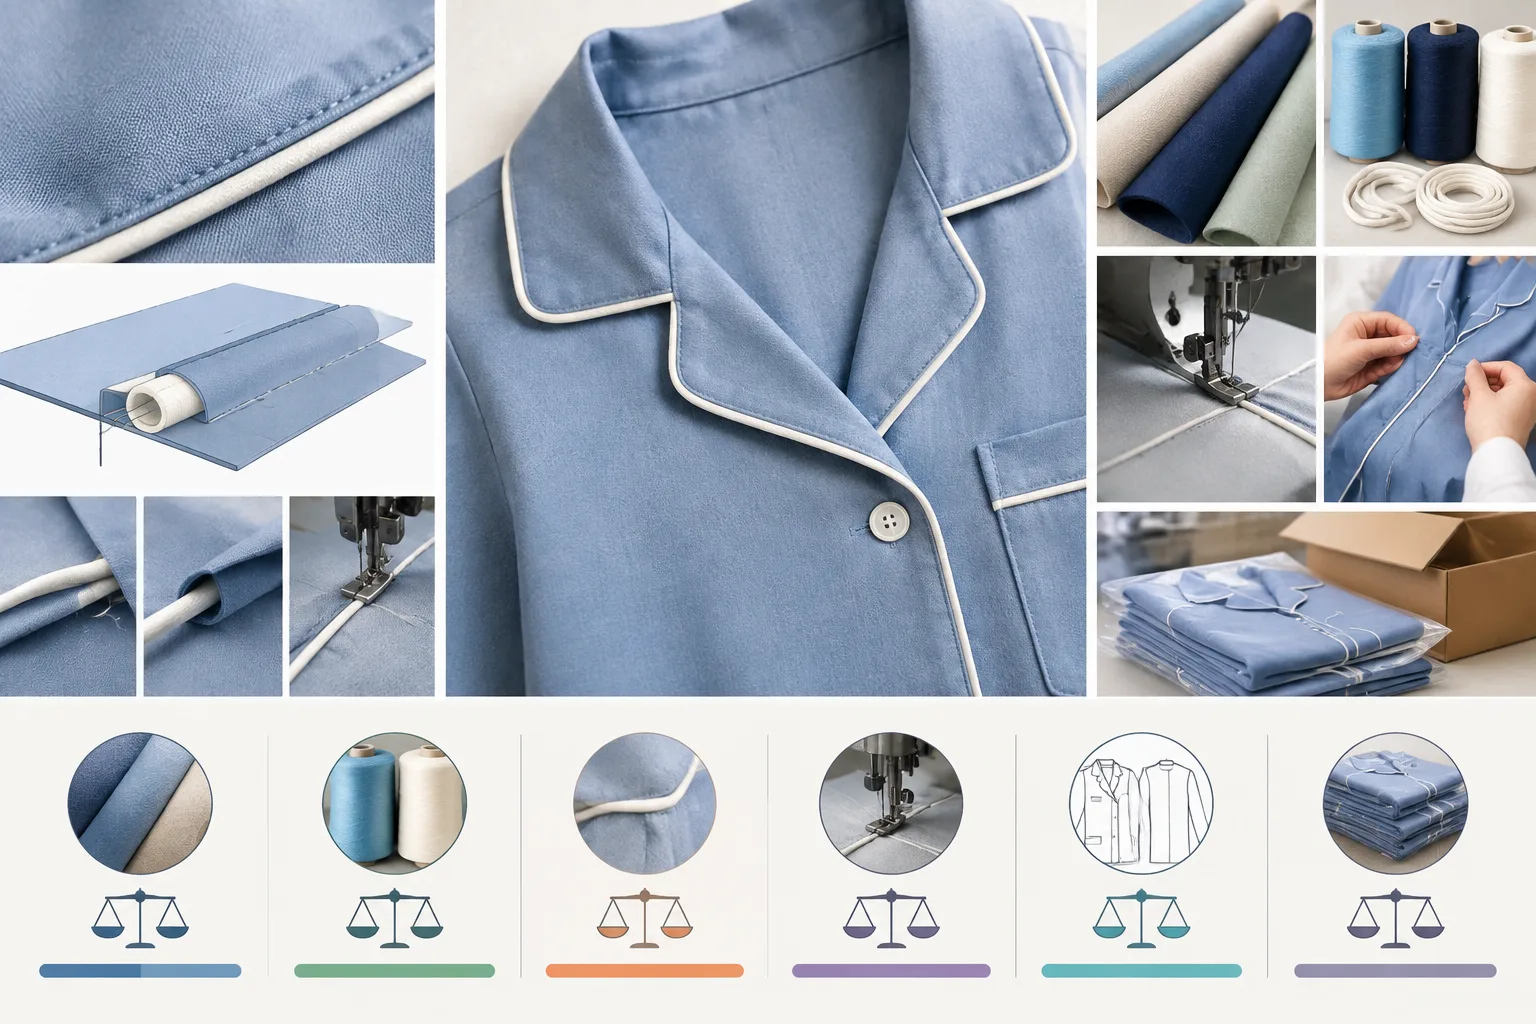
How Should a Piped Seam Be Checked in a Sample or Production Run?
A piping decision should be evaluated in a representative sample made with the intended fabric, cord or filler, covering strip, thread, lining, machine route, and pressing process. An isolated trim swatch can show color and general profile, but it cannot reveal how the seam behaves at a corner, closure, curve, intersection, or layered garment area.
Review the outside first. Check whether the cord exposure is continuous and whether the visible width remains consistent along straight and curved sections. Look for a clean seam line, smooth curves, defined corners, and controlled intersections. Puckering, waviness, flattened areas, sudden changes in exposure, skipped stitches, broken stitches, and visible tension changes can indicate problems with feeding, stitch placement, seam allowance control, cord position, or fabric compatibility.
Then inspect the reverse side. Confirm that raw edges are controlled and that seam allowances do not create trapped folds or unnecessary bulk. Check for loose thread tails, accidental cuts into the visible cord, needle damage, compressed layers, and areas where trimming or grading has weakened the assembly. The inside view often explains an outside defect, particularly when a bulky cross-section has been forced into a narrow or sharply turning seam.
Evaluate the sample under conditions relevant to the garment. Open and close the intended closure, move the garment through its expected range of use, and inspect areas that contact the wearer or experience repeated handling. Apply the relevant care or handling process when appropriate, then compare appearance, fit, comfort, and construction integrity. These observations describe the tested material and process combination; they are not universal pass or fail limits.
For a production run, record the accepted materials, pattern allowance, preparation stitching, joining sequence, machine route, pressing method, and inspection points. A concise piped seam quality checklist should ask: Is the profile continuous? Is the seam line accurate? Are curves and corners smooth? Are stitches intact and evenly formed? Is the reverse side clean and controlled? Does the finished area remain suitable for movement and comfort? Documenting these answers makes the approved method easier to repeat and communicate.
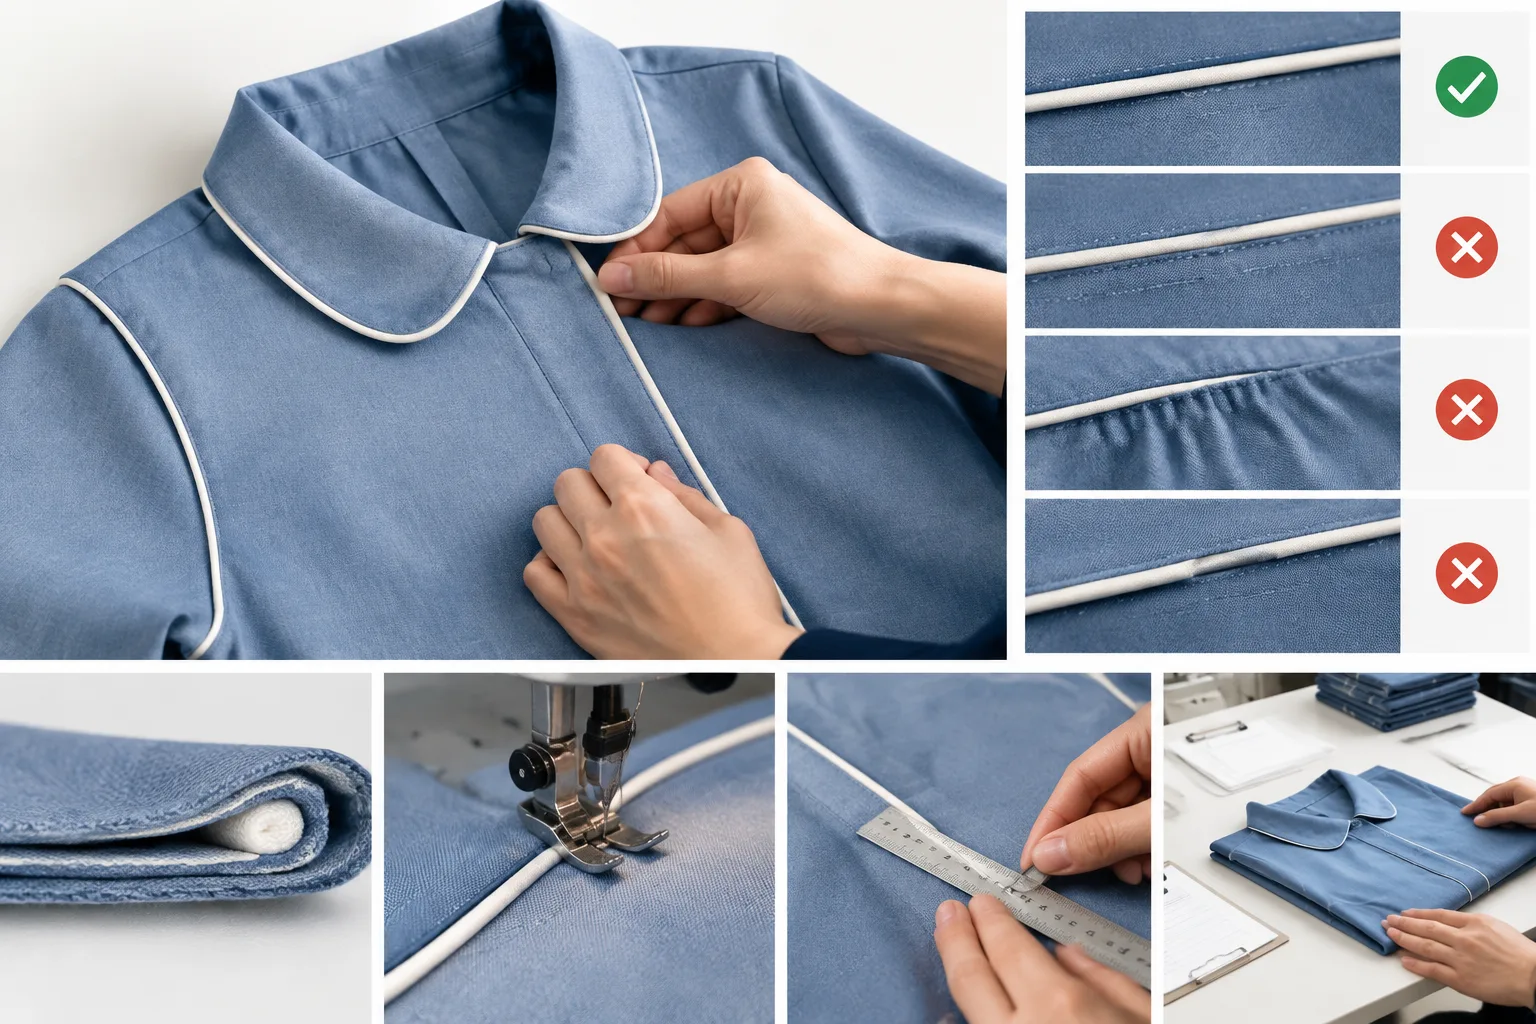
When Is Piping the Wrong Construction Choice?
Piping may be unsuitable when its added bulk, stiffness, friction, visibility, or reduced stretch conflicts with the garment’s purpose. A highly elastic garment, very lightweight fabric, densely layered area, or sharply curved construction may need another seam or edge treatment after sampling. The issue is not that piping is inherently weak or unsuitable; it is that its cross-section may not match the fabric and use conditions.
Piping also cannot substitute for structural reinforcement, sound seam engineering, or a compatible relationship between fabric and pattern. If the cord becomes uneven, the fabric distorts, the seam slips, thread breaks, or the finished edge feels uncomfortably hard, record the failure mechanism before changing the method. Increasing stitch density, adding more support, or choosing a larger filler may address one symptom while creating another.
Depending on the requirement, a plain seam, binding, facing, welt-style treatment, topstitched edge, or another finish may be worth comparing. These are not interchangeable solutions. Assess each alternative against the required stretch, edge definition, bulk, appearance, access, and production route. The practical next step is to prototype the relevant option, inspect the result, identify the failing variable, and revise that variable before approving the construction.
Frequently Asked Questions
What is a piped seam in clothing?
A piped seam is a seam that includes a fabric-covered cord or rounded filler, usually enclosed or attached between fabric layers. It creates a raised edge or outlined seam, with its final appearance influenced by the filler, covering strip, stitch placement, seam allowances, pressing, and adjoining layers.
What is the difference between piping and a piped seam?
Piping is the prepared fabric-covered cord or trim. A piped seam is the completed construction in which that piping is attached to or enclosed between garment pieces. The seam may be assembled with different stitch types depending on the fabric, design, and machine route.
How is piping attached between two fabric pieces?
The prepared piping is generally positioned along the seam line and attached to one fabric layer first. The corresponding layer is then joined over it while the cord remains aligned with the intended visible edge. The exact order changes for pockets, collars, cuffs, closed seams, and lined constructions.
Should piping be cut on the bias?
Bias cutting can help a fabric strip follow curves, but it is not automatically required for every piped seam. Grain direction, fabric stability, stretch, thickness, curve geometry, and the desired flexibility all matter. Test the selected strip direction with the actual fabric and garment shape.
How do you sew piping around a curve or corner?
Control the seam line, match the relevant notches, and allow the covering strip to follow the curve without stretching or bunching. Curves may require appropriate easing or clipping, while corners need careful turning and positioning. Avoid cutting into the visible cord, and inspect the area after turning and pressing.
Why does a piped seam look uneven or flattened?
Common causes include inconsistent cord position, shifting stitch placement, uneven feeding, unsuitable seam allowances, excessive pressing, fabric distortion, or too many layers in the cross-section. Inspect both sides of the sample to identify the cause, then adjust the relevant material, pattern, sequence, or machine operation.