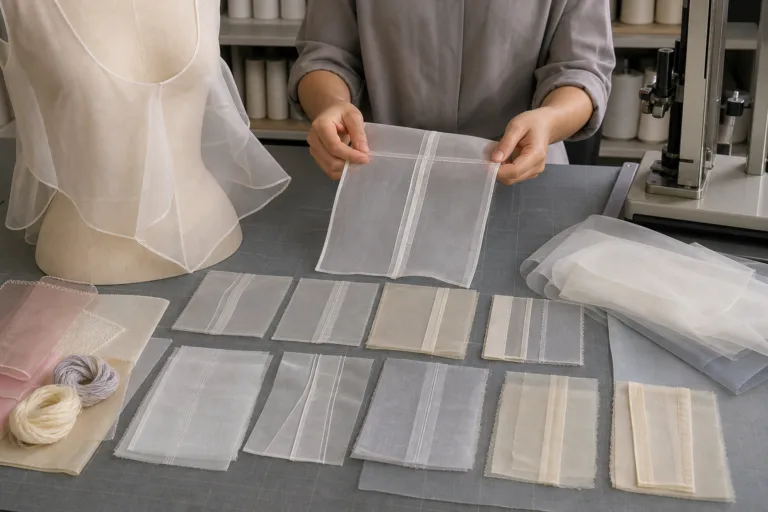
Sheer fabric seams are constructed by matching the seam structure, stitch, seam allowance, edge treatment, thread, needle, and assembly method to the fabric and garment design. The aim is not simply to join two layers. The seam must also control show-through, bulk, distortion, fraying, comfort, and movement. Apparel Wiki is an independent educational publication; its editorial principles, including the separation of sponsorship from content, are described on the Sponsor page.
In practice, there is no single best seam for every transparent or lightweight fabric. A stable woven sheer, stretch mesh, open lace, fine knit, and slippery chiffon-like fabric can respond very differently to the same operation. The appropriate construction depends on fabric structure, seam location, design intent, body movement, care process, and the appearance the garment is meant to achieve.
What Makes Sheer Fabric Seam Construction Different?
Sheer fabric seam construction is the coordinated design of how fabric layers are joined and how their raw edges are controlled. It includes the seam structure, the stitch used to form it, the width of the seam allowance, the thread and needle, the edge finish, and the order in which the garment is assembled. A seam describes the relationship between the fabric layers; a stitch describes how the thread is formed through or around those layers. These terms are related, but they are not interchangeable.
Transparency makes the seam part of the visible design. A wide allowance, a dark thread, a thick enclosed edge, or a raised line can remain visible through the garment. At the same time, lightweight or open fabrics may be more vulnerable to puckering, needle perforation, fraying, yarn slippage, laddering, or distortion during handling. A seam that looks neat on a flat sample may feel stiff against the skin or change the drape when it is placed at an armhole, neckline, shoulder, or curved panel.
Construction should therefore be judged as a balance. Joining strength matters, but increasing thread strength or stitch density alone may move the failure into the fabric, causing tearing or visible damage around the seam. A suitable method distributes the expected load, allows the required movement, protects the edge, and preserves the intended transparency. These results must be confirmed on the actual fabric rather than assumed from its appearance or fiber name.
How Stitch Type, Seam Structure, and Seam Allowance Work Together
A stitch is the thread formation produced by a sewing operation. A seam is the way fabric pieces are positioned and joined. For example, a similar layer arrangement may be sewn with different stitch types, but the resulting flexibility, edge control, visibility, and resistance to opening can differ. The stitch and the seam allowance must be considered together with the loads created by movement and by the garment’s care process.
The following vocabulary helps when reviewing a sample or operation description:
- Seam line: The intended line where fabric pieces are joined.
- Seam allowance: The fabric beyond the seam line that remains in the construction and may be enclosed, trimmed, overedged, bound, or left as a controlled edge.
- Stitch: The formation and interlocking or looping path made by the thread.
- Fabric layers: The plies positioned above, below, or within the seam structure.
Seam allowance width affects more than available sewing room. It can change the amount of visible fabric inside a transparent garment, the stiffness of an enclosed edge, the weight of a seam, and the way the garment hangs. A narrow allowance may reduce bulk but leave little room for correction or edge control. A wider allowance may support handling or enclosure, yet become more visible or create a hard ridge. Trimming can reduce bulk, but excessive trimming may expose the edge or reduce resistance to fraying.
Needle choice, thread size, thread tension, stitch density, stitch length, and fabric control also interact. Settings should be treated as starting points for sampling and adjusted for the machine, operator, fabric lot, and construction. A denser line is not automatically stronger: it can add perforations, restrict elongation, or concentrate force along a fragile line. The appropriate balance depends on whether the seam must remain stable, stretch with the garment, or accommodate changing loads at a curve or opening.
Which Seam Finishes Suit Sheer Garments?
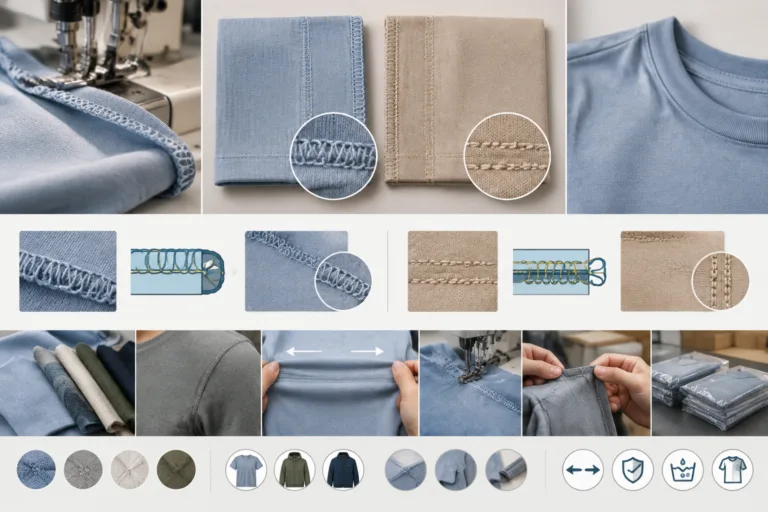
Common finishes include narrow enclosed seams, French seams, overedge or serged edges, bound seams, clean-finished allowances, and carefully trimmed allowances. Each is a construction family with trade-offs, not a guaranteed solution. A finish that is visually discreet on a stable woven sheer may be too rigid for a stretch mesh, while an overedge finish that controls fraying efficiently may be too visible at a neckline or transparent panel.
| Construction family | Likely visibility and bulk | Edge coverage and flexibility | Typical use and risks to verify |
|---|---|---|---|
| Narrow enclosed or French seam | Can look clean, but enclosed layers may show through | Good edge coverage; flexibility depends on layers and fabric | Useful for selected woven seams; check stiffness, transparency, and allowance buildup |
| Overedge or serged finish | Often visible as a thread-covered edge; bulk varies | Good raw-edge control; may accommodate some movement | Useful where edge security is important; check thread exposure and fabric distortion |
| Bound seam | Usually more visible and potentially bulkier | Full edge coverage; flexibility depends on binding material and application | Can protect edges or create a deliberate detail; check friction, drape, and contrast |
| Clean-finished or trimmed allowance | May be visually light, with low to moderate bulk | Edge coverage is limited unless separately secured | Can suit selected stable areas; verify fraying, yarn slippage, and wash or wear behavior |
Location changes the decision. A side seam may tolerate a different profile from a shoulder seam that carries hanging weight. Armholes and necklines combine visibility with skin contact, while panel joins may make the seam intentionally prominent. A French seam can be appropriate for one stable sheer woven and unsuitable for an elastic or highly open fabric. Sampling should examine intersections, curves, and transitions rather than only a straight seam.
How Fabric and Machine Variables Change the Result
Before choosing a seam, assess the fabric’s weight, fiber content, weave or knit structure, stretch and recovery, slipperiness, fraying tendency, surface finish, and openness. These properties influence whether the fabric feeds evenly, holds a stitch, supports an enclosed edge, or tolerates repeated needle penetration. The same machine setup may produce a smooth result on one lot and puckering or skipped stitches on another.
Needle size and point, thread size and construction, presser-foot pressure or control, differential feed where applicable, tension, stitch length, and machine setup can all affect perforation and distortion. Random adjustment is inefficient: connect each change to a symptom. Puckering may prompt review of tension, feed, handling, or thread balance; visible holes may prompt review of needle selection, stitch density, or fabric support. A temporary stabilizer or controlled handling method may help, but it can also alter transparency, hand, flexibility, or comfort.
Separate sample-room experimentation from the production specification. Once the construction is approved, document the fabric lot or representative material, thread and needle choices, seam allowance, machine class, operation sequence, and inspection points. Approval should use production-representative equipment and include the movement and care conditions relevant to the garment. The objective is a repeatable construction whose appearance and behavior are understood, not a machine setting treated as universal.
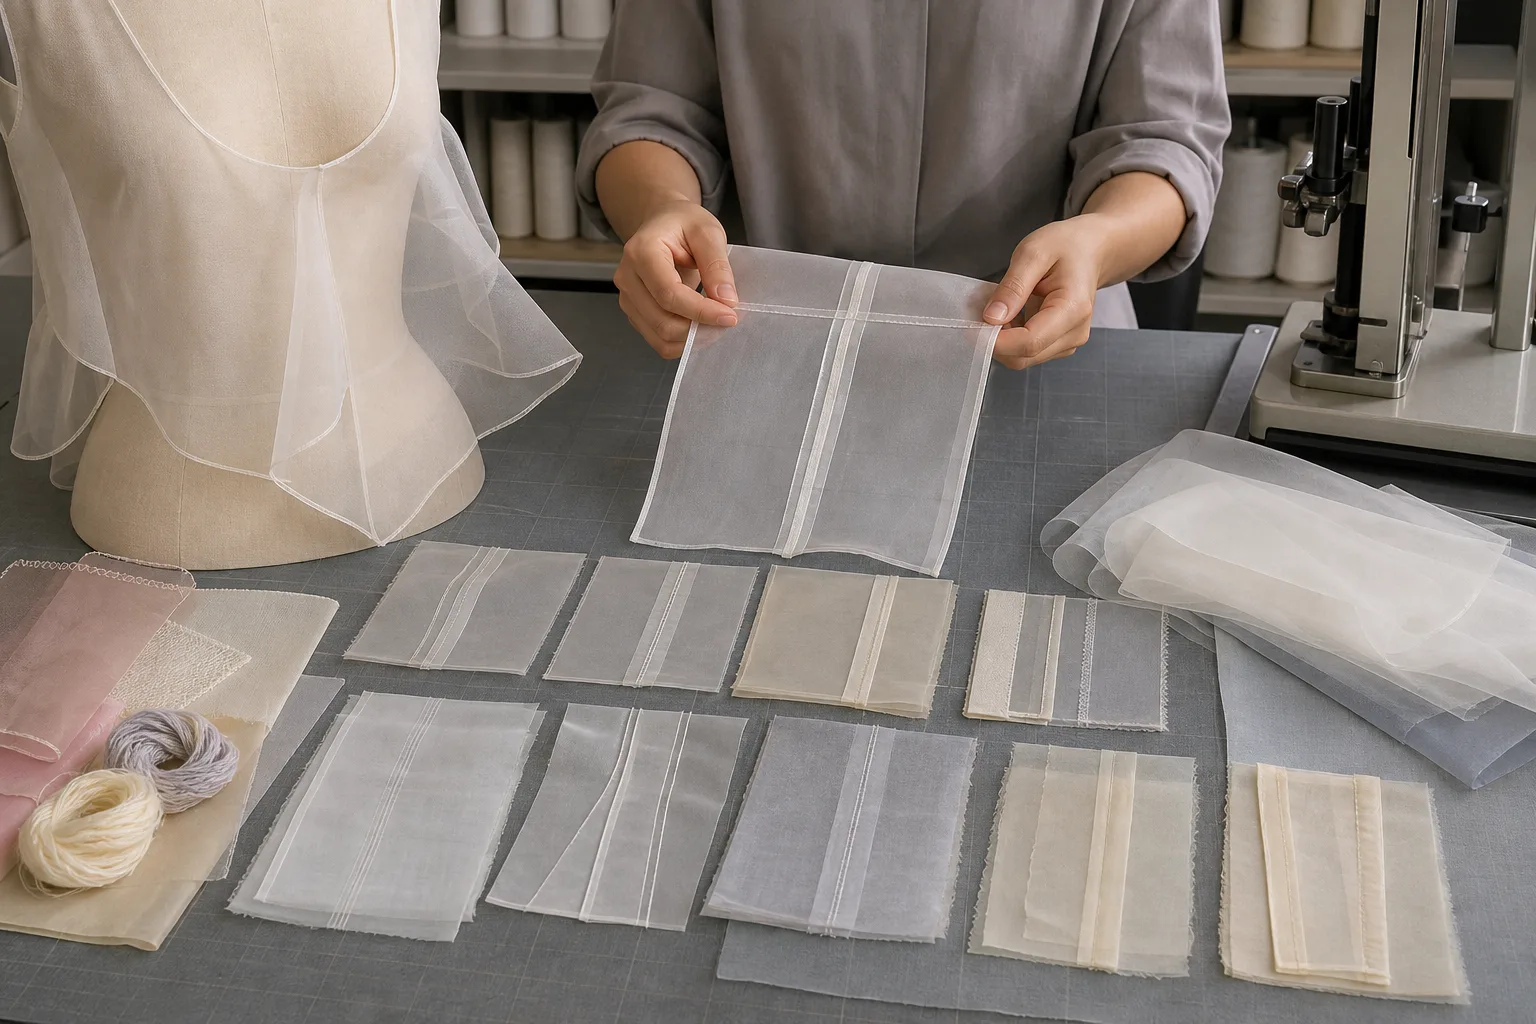
How to Construct and Evaluate a Sheer Seam Sample
Begin a sheer fabric seam sample by defining what the seam must do. Identify its garment location, expected movement, visibility from the outside, contact with skin, and exposure to repeated handling. Also determine whether the finished seam will remain accessible for repair or become enclosed by another operation. These conditions establish a more useful target than choosing a finish by appearance alone.
Use representative materials rather than convenient substitutes. The sample should include the intended fabric or a verified equivalent, thread, needle, trims, seam allowance, edge treatment, and any temporary or permanent support material. Record the machine class and starting settings. These details matter because a visually similar fabric may feed, stretch, fray, or respond to needle penetration differently.
Construct enough of the garment area to reproduce its real difficulty. A straight strip may not reveal problems that occur at a curved armhole, narrow neckline, closure, panel junction, or intersecting seam. Include folds, enclosed edges, topstitching, reinforcement, and changes in layer count that will appear in production. Follow the proposed assembly order so the sample also tests accessibility and handling.
Inspect the sample from both sides and, when relevant, against the body or an appropriate contrasting background. Review it under lighting that makes transparency and surface distortion visible. A practical evaluation should cover:
- Appearance: seam show-through, puckering, waviness, uneven width, distortion, and visible thread balance.
- Construction: skipped stitches, exposed raw edges, damaged yarns, inconsistent allowances, and bulky intersections.
- Performance: opening under expected movement, thread breakage, edge fraying, slippage, or localized tearing.
- Comfort: stiffness, scratching, pressure points, friction, and hard reinforcement edges.
- Repeatability: whether the operation can be reproduced without excessive handling or operator-dependent correction.
Apply handling, movement, and care simulations that reflect the individual product. Acceptance conditions should come from the approved garment requirements and relevant validated methods, not from assumed universal values. If the sample changes after its intended care process, compare the result with the required appearance, dimensions, comfort, and seam behavior.
Keep the approved sample with an annotation or construction record showing materials, seam profile, operation sequence, machine class, quality checkpoints, and agreed care route. When a problem appears, classify its likely source as seam design, material selection, machine setup, handling, or assembly order. This prevents a machine adjustment from being used to conceal a structural problem.
Where Sheer Seams Commonly Fail and How to Diagnose Them
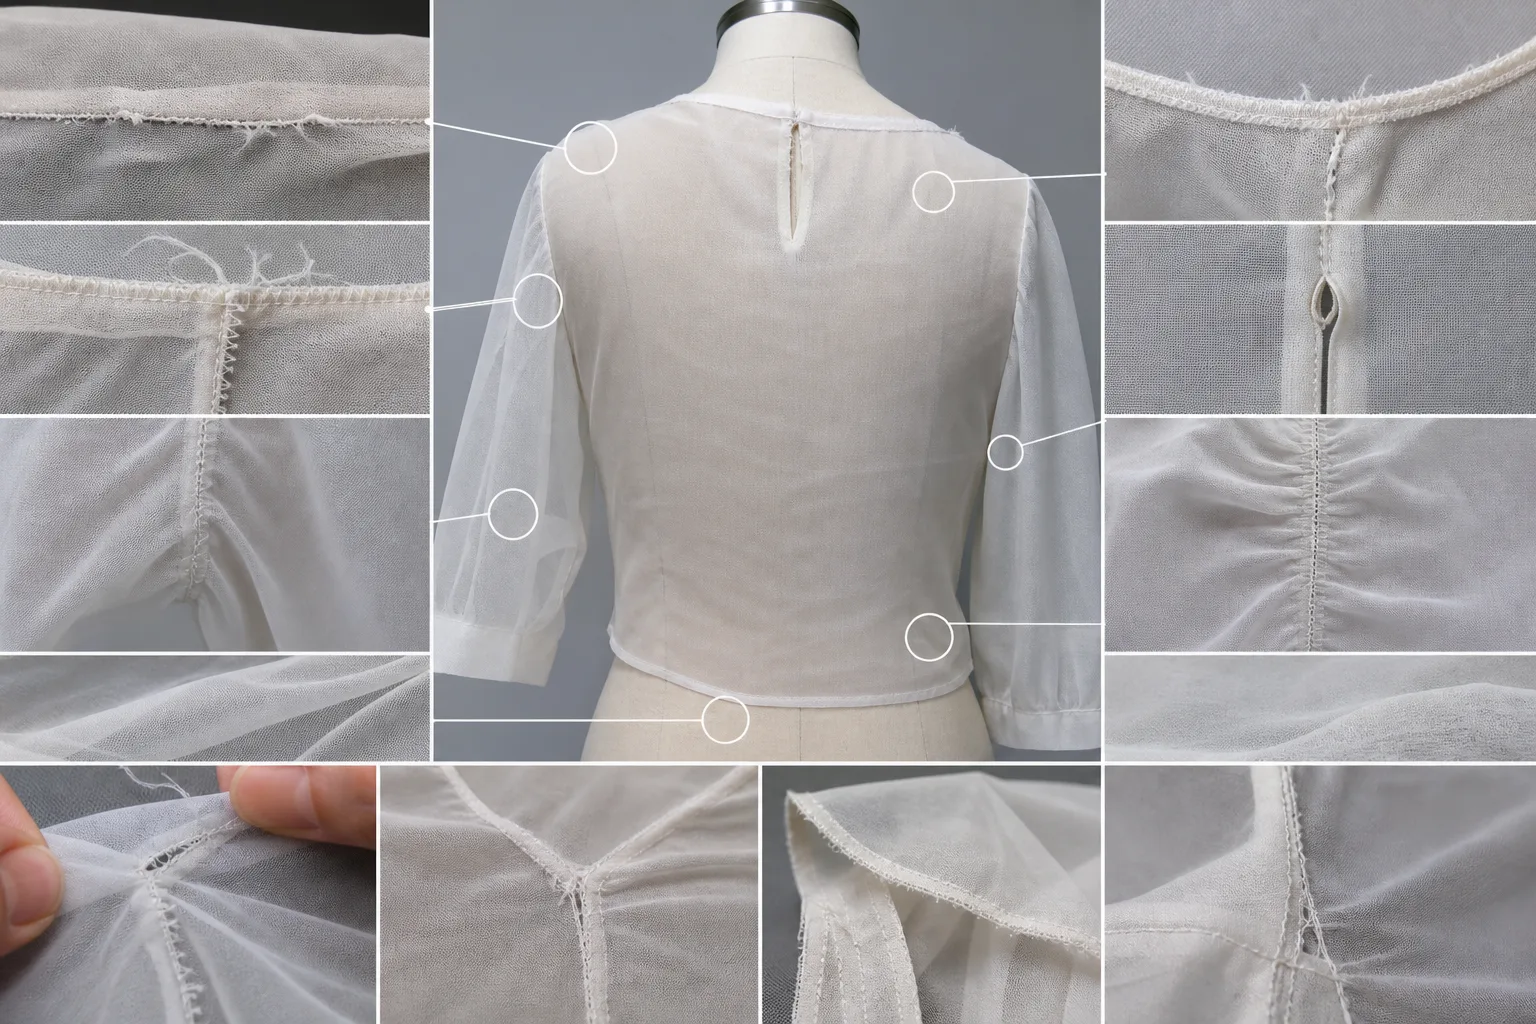
A sheer fabric seam failure should be diagnosed by its location and mechanism. Seam opening may indicate inadequate stitch formation, insufficient flexibility, yarn movement, or an allowance that does not remain secure. Thread breakage can relate to thread selection, tension, abrasion, needle interaction, or insufficient elongation for the garment’s movement. These possibilities should be investigated rather than treated as interchangeable causes.
Fabric tearing beside the stitch line suggests that the fabric, not necessarily the thread, has become the weakest part of the combination. Closely spaced penetration, unsuitable needle action, concentrated load, or an abrupt reinforcement edge may contribute. Yarn slippage has a different appearance: the woven structure moves away from the seam without always producing an immediate tear. Open or mobile constructions can require particular attention during sampling.
Visible needle holes or laddering may point to yarn damage, displacement, or a setup that is too aggressive for the structure. Puckering can result from several interacting factors, including feeding differences, thread tension, stitch formation, handling, or dimensional change after care. Fraying at an allowance may indicate that the selected edge treatment does not provide enough coverage or that trimming has left too little stable material.
Reinforcement options include support layers, bindings, folded constructions, localized securing stitches, or bar tacks where appropriate. However, reinforcement can increase visibility, thickness, stiffness, friction, or stress concentration. A correction is useful only if it addresses the failure without creating an unacceptable hard point or changing the intended drape.
Assembly sequence can also be part of the solution. Completing internal work before closing an area may improve access and reduce repeated handling of delicate material. It can also make an enclosed construction possible without forcing later operations through a narrow opening. There is no single best sequence for every garment, so the proposed order should be included in the trial.
Compare a failed sample with one controlled variation at a time. Changing the needle, thread, seam structure, reinforcement, and feed settings simultaneously may produce a better result without revealing why. Controlled comparisons make it easier to distinguish genuine correction from temporary symptom masking.
How to Choose a Sheer Seam Construction for a Specific Garment
The best seam for sheer fabric is project-dependent. Begin with the garment’s transparency, fabric stability, stretch or movement, seam location, skin contact, care route, and intended visual effect. A visible seam may be an acceptable design feature in one garment but a quality defect in another. Likewise, a clean enclosed edge may be suitable for a stable side seam yet too rigid for a highly mobile area.
| Decision factor | Question to answer |
|---|---|
| Visibility | Should the seam disappear, remain discreet, or become part of the design? |
| Movement | Can the construction follow the required body movement without opening or restricting the fabric? |
| Edge security | Does the allowance remain controlled after handling and the approved care process? |
| Comfort and bulk | Will folds, binding, thread, or reinforcement create stiffness or friction? |
| Manufacturability | Can the intended operation and appearance be repeated on production-representative equipment? |
| Repairability | Can the seam be accessed and repaired without unacceptable damage or visibility? |
Approval should include representative curves, intersections, closures, and high-movement points, not only an isolated straight seam. Document the selected construction and the reasons alternatives were rejected. This gives designers, suppliers, production teams, and quality personnel the same visual and technical target while separating normal industry practice from project-specific approval criteria.
As the next educational step, prepare a representative seam sample, define its inspection points, evaluate it through the garment’s intended movement and approved care route, and document a production-ready operation sequence. Sampling is an editorial recommendation for reducing uncertainty; formal performance requirements must still be established and validated for the individual product.
Frequently Asked Questions
What is the best seam for sheer fabric?
No single seam is best for every sheer fabric. Selection depends on structure, transparency, movement, seam location, edge stability, comfort, care, and the desired appearance. Compare suitable constructions through representative samples.
How do you keep sheer fabric seams from showing?
Reduce unnecessary bulk, control seam allowance width, choose compatible thread, and use an edge treatment that remains visually discreet. Complete invisibility may not be practical, so assess samples under realistic lighting and over the intended background.
Are French seams suitable for sheer clothing?
French seams can enclose raw edges neatly in some stable woven sheers. They may become bulky, stiff, difficult around tight curves, or unsuitable for fabrics requiring substantial stretch. Their suitability should be confirmed by sampling the actual garment area.
How can you prevent puckering when sewing sheer fabric?
Diagnose the cause before adjusting the machine. Review feeding, handling, tension, thread, needle, stitch formation, presser-foot control, and fabric response to care. Change one variable at a time and record the result.
What should be checked when inspecting sheer garment seams?
Check exterior and interior appearance, seam transparency, puckering, skipped stitches, needle damage, raw-edge exposure, allowance consistency, distortion, bulk, comfort, movement, and repeatability. Include intersections and curved or stressed areas.
Why does sheer fabric tear or slip at the seam?
Possible causes include concentrated load, needle damage, excessive penetration, unstable yarn structure, insufficient allowance security, or a mismatch between seam flexibility and garment movement. Examine whether failure occurs in the thread, stitch, fabric, allowance, or adjacent reinforcement.