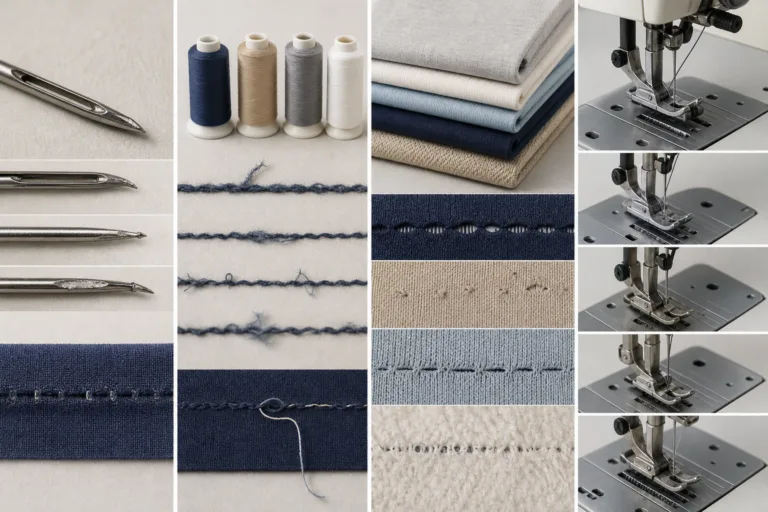
A skipped stitch is an unintended failure in the stitch-forming sequence, so the needle thread does not properly combine with the bobbin thread or looper system at the expected point. The result may be a missing stitch, an open section of seam, uneven stitch formation, or reduced seam security. A practical skipped stitch diagnosis procedure begins by preserving the defective seam, recording its conditions, and checking one variable at a time rather than immediately changing several settings. This independent educational approach follows the same separation between editorial information and sponsorship described on Apparel Wiki’s Sponsor page.
The visible defect does not prove its cause. Sewing machine skipped stitches can result from a needle problem, incorrect threading, unsuitable thread, fabric movement, stretch, thickness changes, feeding conditions, or an internal machine issue. The procedure below helps narrow those possibilities without treating one photograph or one repaired garment as a confirmed diagnosis.
What Is a Skipped Stitch?
In general sewing terminology, a skipped stitch occurs when the machine fails to form one or more expected stitches during normal operation. In a lockstitch, the needle thread and bobbin thread must meet and interlock in the intended sequence. In chainstitch, overlock, coverstitch, and other machine classes, the loopers, needles, and threads interact differently. The exact formation mechanism therefore depends on the stitch-forming system and the machine manufacturer’s design.
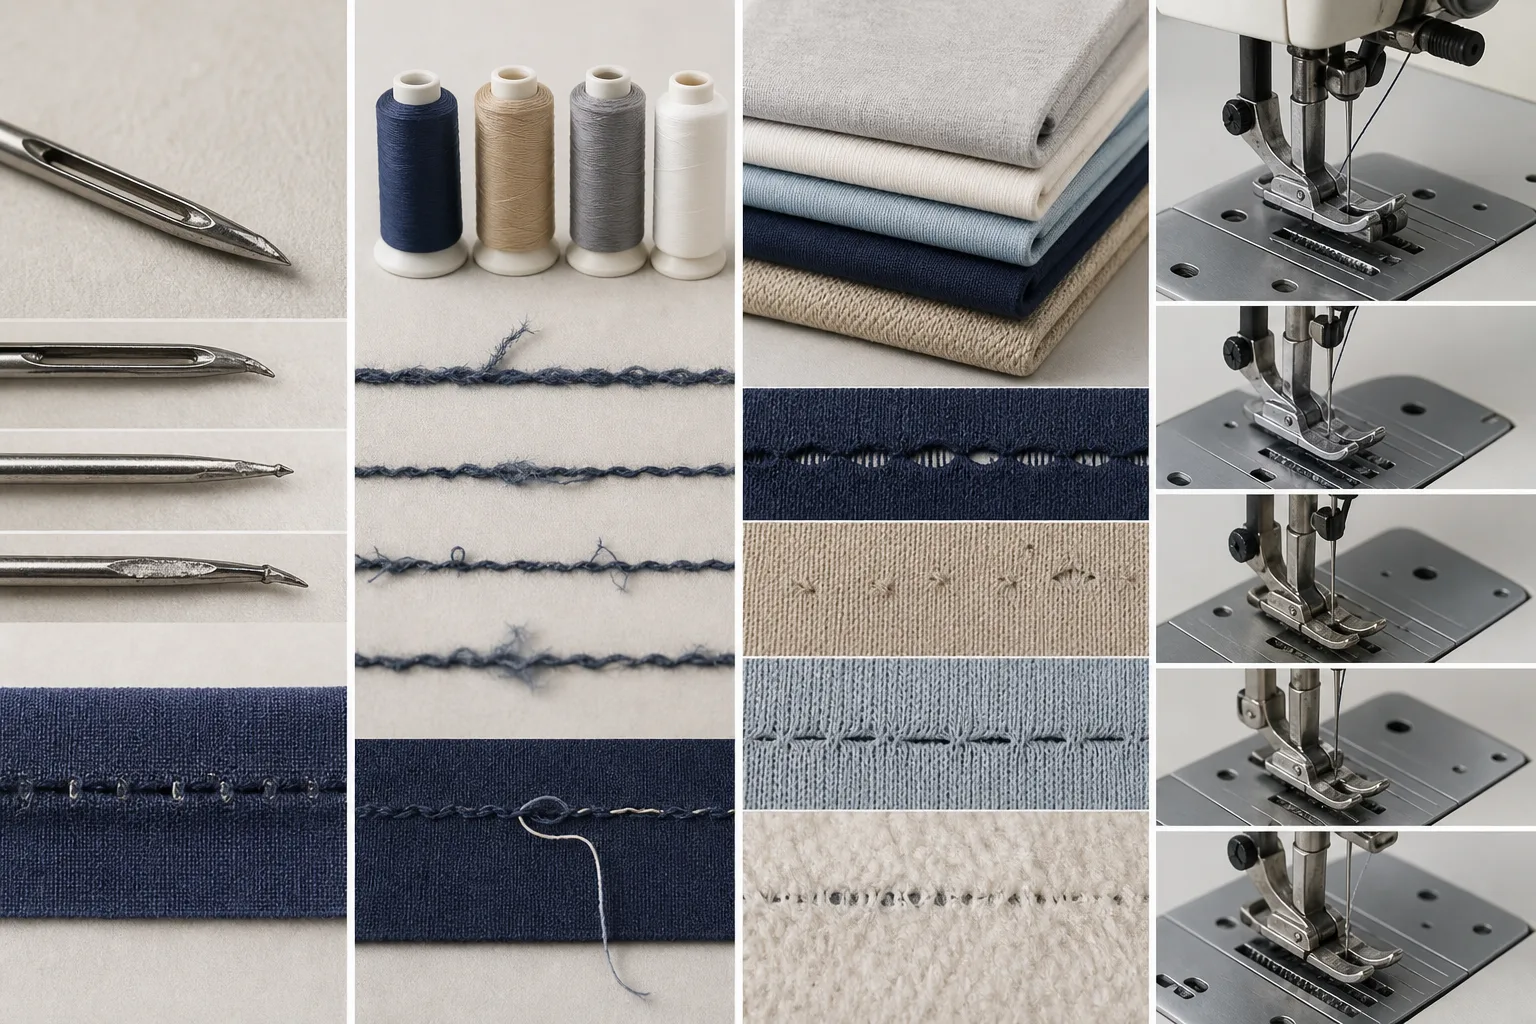
On the finished seam, a skipped stitch may look like a gap in an otherwise regular line of stitching. It may also appear as a short open seam segment, an irregular space between stitches, an isolated loop, or a place where the seam has less apparent security than the surrounding construction. The visual effect varies with the stitch type, fabric structure, thread behavior, and whether the defect occurs on one side or through the complete seam formation.
A skipped stitch is not automatically the same as thread breakage. A broken thread can leave a run of missing stitches after the break, while a skipped stitch may be an isolated failure in an otherwise continuous thread path. Loose tension can produce an unbalanced or loopy appearance without necessarily causing a missed stitch. Puckering is a fabric or seam appearance problem that may involve tension, feeding, or construction. Needle damage may be the cause of a skipped stitch, but the damaged needle itself is not the stitch defect. Intentional stitch variation, decorative spacing, or a planned bartack should also not be classified as skipping.
These distinctions matter because similar appearances can have different causes. The same open-looking area may arise from a thread break, poor handling, a stretched seam, or a failure in stitch formation. A sound diagnosis compares the seam construction and operating conditions before assigning responsibility to the needle, thread, fabric, operator, or machine.
Prepare the Seam Sample and Record the Defect
Before changing a tension dial or replacing multiple components, retain a representative defective sample. The sample is diagnostic evidence: it shows what occurred under known conditions, but it does not by itself prove the final root cause. Keep the original piece identifiable and record enough information for another person to reproduce the operation.
At minimum, note the machine type and operation, stitch class, material and number of layers, needle information, thread information, approximate stitch setting, and the operator’s observations. Also record the machine identity, shift, material batch where available, and the correction history. These details help distinguish a local incident from a recurring process problem.
Inspect the Defect in Context
Examine both sides of the seam and mark where the irregularity begins and ends. Note whether the skipping is continuous or intermittent, whether it is concentrated at starts and stops, and whether it appears during speed changes, curves, stretch, thick transitions, or a change in seam direction. A defect that occurs only as several layers pass under the presser foot provides different evidence from one that repeats at the same point during every cycle.
Make a controlled test seam with the same fabric, seam construction, thread, needle, layer count, and relevant settings used in the operation. A scrap made from a different material may demonstrate that the machine can sew, but it cannot reliably reproduce the production condition. Where laundering or another later process is part of the garment route, keep unwashed and washed observations separate. A later appearance change should not be confused with the original sewing defect.
Use a simple record such as this while investigating:
- Observed symptom: location, frequency, both-sided appearance, and whether the seam is open or merely irregular.
- Operating condition: machine, operation, speed, seam direction, curves, starts, stops, and thickness transitions.
- Material setup: fabric construction, layers, stretch, coatings or pile, and material batch if relevant.
- Machine setup: stitch type, needle, thread, threading path, approximate settings, and feeding or presser-foot conditions.
- Test result: the single variable changed, the retest conditions, and the resulting observation.
Change one relevant variable at a time whenever practical. Replacing the needle, thread, fabric, and tension setting together may remove the symptom, but it also removes the evidence needed to identify what mattered. Retain the original sample and compare it with the controlled retest. A corrected individual garment should not be treated as proof that the sewing process is stable.
Follow This Skipped Stitch Diagnosis Procedure
Use the following sequence as a practical starting point. The exact order may vary by machine manufacturer and stitch class, so the operating and troubleshooting manual remains the reference for machine-specific instructions.
- Stop and inspect the needle. Check whether it is installed correctly and whether it is bent, blunt, damaged, or unsuitable for the material and stitch system. Replace it with an appropriate needle type and size based on supplier guidance and the actual material construction. Do not assume that one needle choice suits every knit, woven fabric, seam density, or layer count.
- Check the complete thread path. Confirm the upper thread, bobbin, looper, and guides are installed as specified. Look for incorrect threading, an obstructed path, inconsistent delivery, or a bobbin or looper condition that prevents regular formation. Threading errors can resemble more serious mechanical faults.
- Review needle and thread compatibility. Consider needle point and size, thread construction and size, fabric density, fabric stretch, seam construction, and operating conditions together. Use manufacturer guidance as the starting point. A change in thread may affect delivery and formation, but it should be tested independently rather than combined with several other adjustments.
- Check fabric control. Observe presser-foot pressure, feeding, handling, and material movement. Stretch, compression, unstable construction, abrupt thickness changes, and poor control at curves can alter the relationship between needle, fabric, and thread. Test representative layers rather than relying on a single flat scrap.
- Review tension and stitch settings. Do this after the physical setup is correct. Use a controlled test seam and compare the result before and after the adjustment. Avoid tuning solely by appearance on one short section, because a setting that hides a gap may create thread breaks, distortion, or another imbalance elsewhere.
- Test representative operation. Run the corrected setup at the relevant production speed and through the conditions where the defect appeared, including starts, stops, curves, thickness transitions, and seam-direction changes. A correction remains provisional until the new output has been inspected under comparable conditions.
- Escalate persistent defects. If skipping remains after appropriate setup, needle, thread, material, feeding, and controlled-setting checks, stop repeated adjustment. Possible timing, hook, looper, feed, or other internal mechanical issues require qualified maintenance assessment. Do not diagnose internal damage from a photograph or a single test seam.
Separate Needle, Thread, Fabric, and Machine Causes
A skipped stitch can have several plausible causes, so use a cause-and-test matrix instead of a fixed fault list. Start with the simplest variable that can be checked or replaced, then compare a new seam with the retained defective sample. This keeps the diagnosis evidence-based and prevents a machine fault from being assumed when the actual problem is needle selection, thread delivery, fabric movement, or handling.
Needle-related clues include a bent, blunt, damaged, incorrectly installed, or unsuitable needle. Needle deflection can also become more likely when the material is dense, layered, elastic, coated, or difficult to control. Confirm a suspected needle issue with an approved replacement appropriate for the machine and material, then repeat the test under comparable conditions. A different result supports the test hypothesis, but it does not by itself prove that every similar defect has the same cause.
Thread-related clues may involve incorrect threading, obstruction in the thread path, inconsistent delivery, unsuitable thread construction or size, or an interaction between thread, tension, and stitch formation. Change only the relevant thread variable when possible. Record the original and replacement thread information, because changing the needle, thread, tension, and fabric at the same time makes the result difficult to interpret.
Fabric-related causes deserve particular attention on stretch materials, unstable constructions, dense layers, pile, coatings, and abrupt thickness changes. The fabric may shift, compress, stretch, or resist the needle differently as the seam moves. Test the same construction with representative layers, curves, transitions, and seam direction. A flat scrap may produce a satisfactory result while the actual operation still skips stitches.
Machine-related causes become more likely when the defect persists across appropriate needles, correctly installed thread, representative materials, and controlled settings. A repeatable defect at a particular mechanical position or operating condition may justify checking timing, hook, looper, feed, or related components. That pattern warrants qualified maintenance assessment; it is not enough to diagnose internal damage from a photograph or one short seam.
Also separate a local seam problem from a broader process problem. Compare equivalent operations across machines, operators, shifts, and material batches where practical. Keep measurements distinct: needle size, thread size, stitch length, stitch count, SPI, and multi-needle spacing are related production concepts but are not interchangeable. Use the terminology required by the machine or product specification and describe any comparison by the way it was measured.
Verify the Correction in Production Conditions
After a suspected correction, run a controlled retest using the actual material layers, seam construction, seam direction, relevant speed, and operating conditions. Repeat the circumstances in which the skipped stitch appeared, including starts, stops, curves, thickness transitions, and changes in direction. A short, easy section of seam can show improvement without demonstrating that the setup is reliable throughout the operation.
Inspect both sides of the seam and examine the corrected area as well as adjacent stitch formation. Look for new thread breaks, needle damage, enlarged needle holes, seam distortion, puckering, uneven stitch length, or other changes in appearance and handling. Removing the skipped stitch may create a different defect, so the review should consider the whole seam rather than the original gap alone.
Record the variable that changed, the machine and operation, the material and layers, the test conditions, the observed result, and the person responsible for review. Compare the output before and after the change using retained samples or equivalent production evidence. A repaired garment can confirm that its appearance was improved locally, but it cannot establish that the sewing process is stable.
Continue checking fresh output after the adjustment rather than relying only on the original test seam. Acceptance criteria should come from the applicable buyer, product, construction, or internal quality specification. There is no universal defect limit that applies to every garment, stitch class, material, or end use. If seam strength, durability, laundering, or another performance property matters, evaluate it with the applicable validated method and project requirements rather than treating visual inspection as a substitute.
When to Escalate and How to Prevent Recurrence
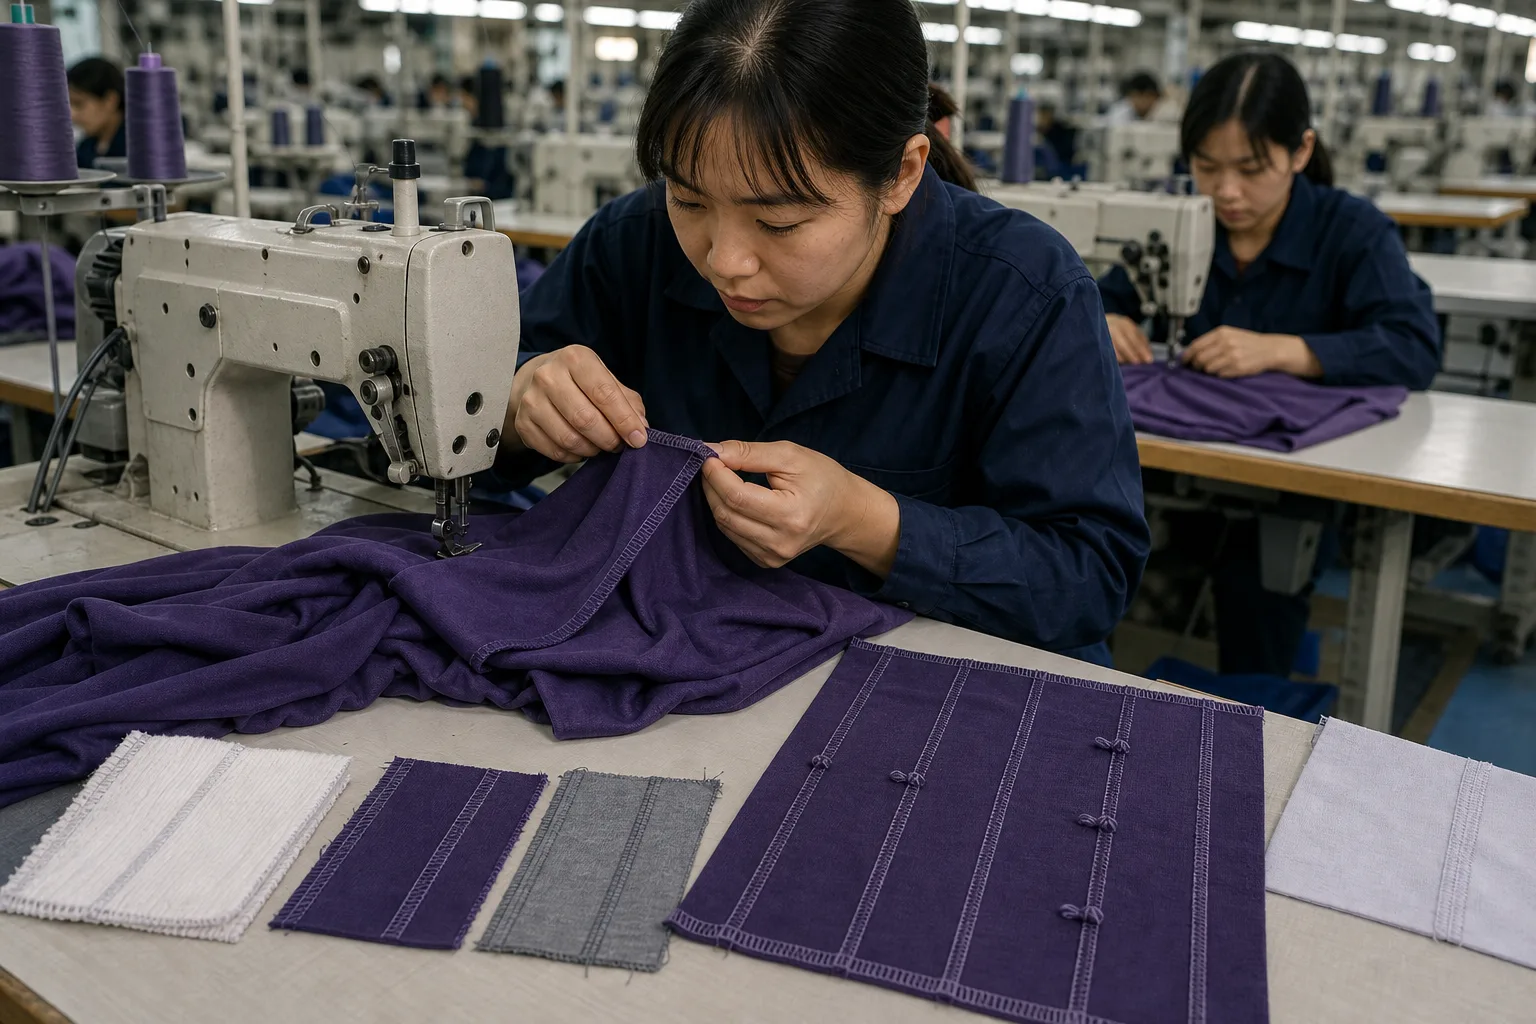
Escalate the issue when skipping continues after approved needle, threading, material, feeding, and controlled-setting checks. Escalation is also appropriate when the defect appears across multiple materials or machines, returns at a repeatable mechanical position, or may require internal adjustment. Provide maintenance with the retained sample, machine identity, stitch type, material construction, setup details, operating conditions, and results from each controlled test.
Prevention begins with a usable setup record. Where appropriate, document the approved needle, thread, threading path, stitch settings, presser-foot or feeding conditions, and known material sensitivities. Use a first-piece or startup check after a changeover, new material lot, needle replacement, machine service, or operation change. These checks should be connected to the product or internal quality requirements rather than treated as a universal inspection formula.
Operators should report the first occurrence and preserve evidence instead of repeatedly changing tension or repairing garments without recording the event. When skipped stitches recur, review material substitutions, operator handling, machine condition, speed changes, and recent setup changes together. This feedback can reveal a process pattern that is invisible when each defective garment is corrected separately.
Apparel Wiki provides general educational guidance as an independent apparel-industry knowledge publication. Machine-specific decisions should follow the applicable manufacturer documentation, supplier guidance, qualified maintenance review, and project quality requirements.
The next useful step is to turn this procedure into a simple record for each operation: identify the symptom, retain the sample, change one variable, retest representative conditions, and document whether the correction remained effective in fresh production. A structured Apparel Manufacturing Tools resource may help organize related production and quality checks, but it does not replace machine-specific instructions or an agreed product specification.
FAQ
Can a skipped stitch be diagnosed from a photograph alone?
No. A photograph can show a visible symptom, but it cannot reliably establish whether the cause is the needle, thread, fabric, feeding, settings, or internal machine condition. A retained sample and controlled retest are needed for a defensible diagnosis.
What should I check first when a sewing machine skips stitches?
Start with the accessible physical setup: stop safely, inspect the needle, confirm threading and thread delivery, and check the material layers and fabric control. Follow the machine manufacturer’s instructions, then test one controlled change at a time.
Can the wrong needle or thread cause skipped stitches?
Yes. Needle condition, point, size, installation, thread compatibility, threading, and delivery can all affect stitch formation. The correct choice depends on the machine, material, stitch type, and operating conditions, so there is no single needle or thread choice for every garment.
Why do skipped stitches appear only on stretch fabric or thick seams?
Stretch, compression, shifting layers, abrupt thickness changes, and reduced fabric control can alter the relationship between the needle, thread, and material. Test representative layers and the actual seam path rather than relying only on a flat fabric sample.
When should skipped stitches be treated as a machine-timing problem?
Consider a machine-related cause when the defect persists after appropriate needle, thread, material, threading, feeding, and controlled-setting checks, especially if it occurs repeatedly at a mechanical position. Timing, hook, looper, and feed issues should be assessed by qualified maintenance personnel.
Does repairing a skipped stitch prove that the sewing process is stable?
No. Repair may restore the appearance of one garment while the underlying process remains unstable. Verify the correction with representative conditions, inspect for new defects, document the change, and monitor fresh production against the applicable quality requirements.