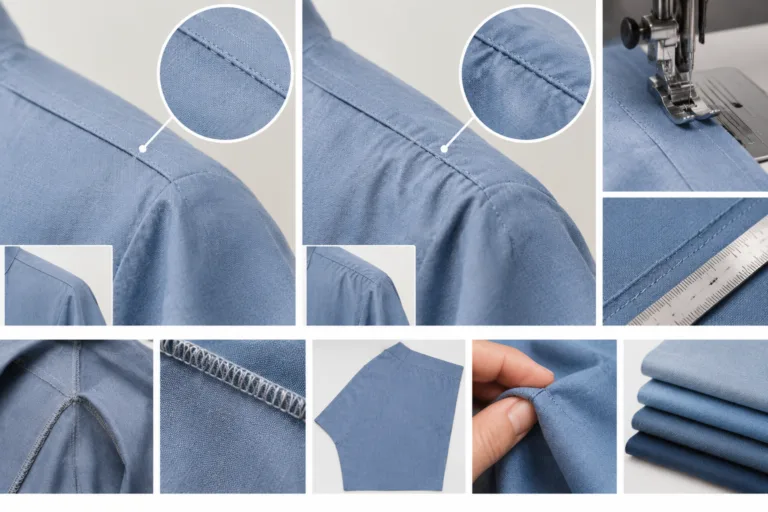
Stitch balancing woven fabrics means adjusting and evaluating how the needle thread, bobbin thread, fabric layers, and stitch formation work together to produce a stable, even-looking seam. On tightly woven garment fabrics, the goal is not a particular tension-dial position; it is a suitable result on the actual material and seam construction. This independent guide from Apparel Wiki explains the fabric factors and sewing variables to assess before approving a sample.
What Is Stitch Balancing in Tightly Woven Garment Fabrics?
Stitch balance describes how the upper and bobbin threads interlock and sit in the sewn layers. A balanced stitch should look appropriate on both sides of the seam and serve the construction’s purpose. Evaluation considers thread seating, seam appearance, puckering, skipped stitches, thread breakage, and seam security together—not the tension setting alone.
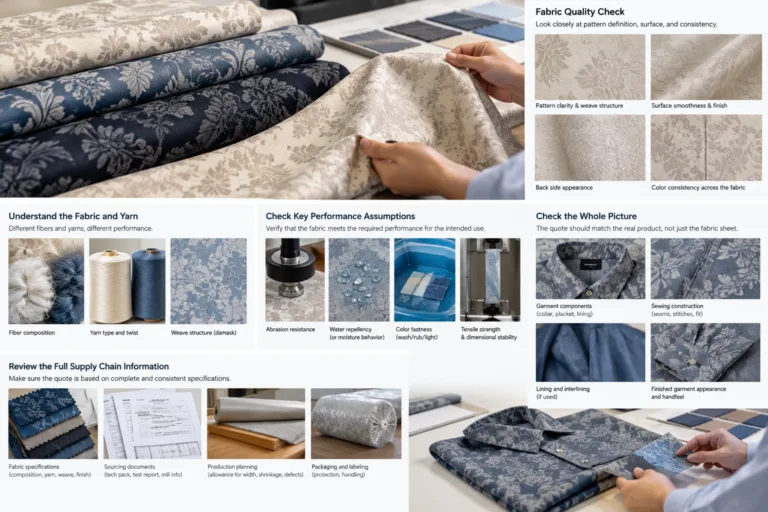
Tightly woven garment fabrics have closely arranged yarns, which can leave less room for a needle and thread to pass between them or displace them during stitch formation. That description does not identify the full fabric: fiber content, yarn structure, weave, finishing, and weight all matter. Fabrics sold under the same commercial name may behave differently.
Stitch balance is also distinct from stitch length, seam allowance, and the spacing between needles on a multi-needle machine. These settings and construction details can affect the finished seam, but they are not interchangeable measures of balance. The appropriate result depends on the fabric, thread, machine, and seam, so confirm it with a representative sample rather than assuming one setting will suit every project.
Why Dense Woven Fabrics Make Stitch Imbalance Easier to See
Closely spaced yarns can make needle penetration and thread seating more sensitive to the needle-and-thread combination and how the stitch forms. A setup that appears acceptable on a less dense material may leave conspicuous needle holes, uneven thread coverage, or distortion on another fabric. This is a possibility to check, not a rule that applies identically to every dense weave.
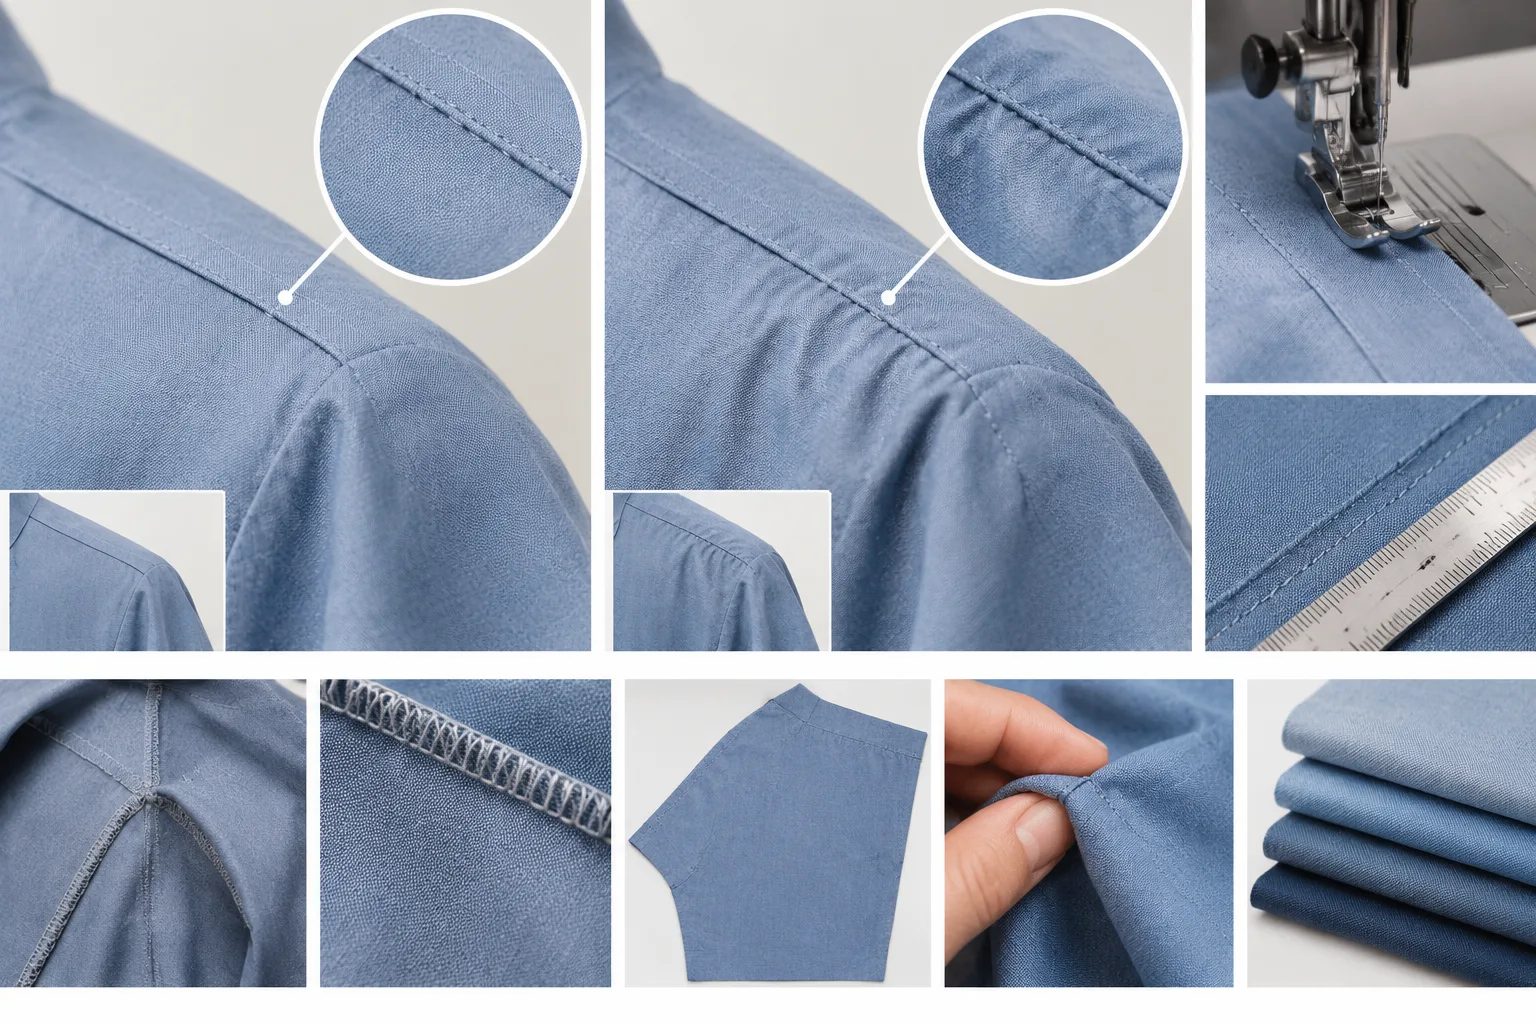
Seam puckering is especially easy to misdiagnose. Thread tension can contribute, but so can uneven feeding between layers, crowding at the seam, or dimensional change after care. Similar-looking wrinkles do not establish a common cause. Compare the fabric and seam under controlled conditions before treating a visual defect as proof of a machine fault.
Describe the material by its fiber content, yarn, weave structure, and finishing rather than relying on a trade name alone. Seam direction, layer count, cut-edge stability, pressing, and any coating or finish may also change how the sewn area looks or behaves. One photograph or isolated defective seam rarely provides enough information to identify the cause.
Which Sewing Variables Control Stitch Balance?
Upper-thread and bobbin-thread tension interact, but tension is only part of the setup. Use the machine and thread supplier’s guidance as a starting point, then make deliberate, recorded adjustments on the target material. Avoid changing several settings at once: doing so makes it harder to tell which change affected the result.
Needle point and size, thread construction and thickness, fabric density, and the number of layers all influence stitch formation. A coarser needle may alter the appearance or leave larger holes, so evaluate the smallest suitable setup rather than assuming that a larger needle will solve penetration problems. Check the chosen combination at the intended sewing speed and on a layer stack that resembles the garment.
Stitch length, or stitches per inch (SPI), is separate from stitch balance. However, stitch density can affect the seam’s appearance and how closely stitches crowd the fabric. Presser-foot pressure, feeding, and machine condition may also contribute to uneven movement or puckering. Treat these as variables to investigate when the seam indicates a feeding or formation issue, not as automatic adjustments for every defect.
There is no universal tension, needle, thread, or stitch-length recipe for tightly woven fabrics. Follow relevant equipment and supplier recommendations, then confirm the combination on the actual fabric and construction.
How to Balance Stitches on a Sample Seam
Make the sample representative: use the intended fabric lot and cut direction, seam type, layer count, thread, needle, presser foot, and machine setup. Record those starting conditions so another person can understand what was tested. Supplier recommendations are useful starting points, while the sewn sample provides project-specific evidence.
Sew comparison samples at a speed and with a layer stack relevant to the intended work. Inspect both sides, the seam line, needle holes, thread seating, and fabric distortion. If you see a defect, identify the most plausible variable before adjusting. Change one major variable at a time, make a controlled adjustment, and record what changed and what you observed.
Compare candidate samples under the same conditions. Keep the strongest candidate as a retained sample or document the agreed visual standard, along with its machine and material setup. A sample check is an evaluation step, not a claim that Apparel Wiki performs factory testing. Avoid inventing a sample size or acceptance threshold; use the project’s applicable guidance when formal test requirements are involved.
How to Diagnose an Unbalanced Seam: A Practical Comparison
A visible defect is a clue, not a diagnosis. Compare the face and underside of the seam, then check whether the same symptom appears along the full seam or only where layers change. A repeat sample made under recorded conditions can help separate a tension issue from needle, thread, feeding, fabric, or construction factors.
| Observed symptom | Plausible contributors | Controlled next check |
|---|---|---|
| Thread appears disproportionately on one side | Upper- or bobbin-thread tension, incorrect threading, or a thread path issue | Check threading and machine guidance, then compare a sample after changing one tension variable. |
| Loops or loose thread on either side | Tension, threading, or thread compatibility with the setup | Re-thread as directed and inspect a fresh sample before making a deliberate adjustment. |
| Puckering along the seam | Thread tension, feed differences between layers, structural crowding, or dimensional change after care | Compare unwashed and relevant post-care samples; observe whether the layers shift during sewing. |
| Skipped stitches or thread breakage | Needle condition or suitability, threading, thread compatibility, machine condition, or setup | Inspect the needle and threading, then test a suitable needle-thread combination using supplier or machine guidance. |
| Enlarged or prominent needle holes | Needle size or point, fabric structure, or repeated penetration | Compare an appropriate finer setup on the same fabric and inspect both the holes and stitch formation. |
| Uneven seam feeding | Presser-foot pressure, feed condition or timing, layer handling, or changing thickness | Run a comparable sample with the same layer stack and check machine setup and layer movement. |
These checks narrow possibilities; they do not prove a cause from appearance alone. A repaired section may look acceptable locally without showing that the sewing process is stable. When a defect persists, retain the sample and note the machine, material batch, and adjustment history before escalating the issue.
How to Confirm Stitch Balance Before Production Approval
A promising seam sample is not automatically representative of every garment area or production condition. Review the construction where it will be used, including curves, cross-seams, facings, pockets, topstitching, and points where several layers meet. Changes in seam direction or thickness can alter feeding and appearance even when the basic fabric and machine settings are unchanged.
When care or finishing could affect the result, compare the sewn sample before and after the relevant process. Fabric and sewing thread may respond differently, so a seam that appears balanced before laundering may show puckering or distortion afterward. Use the buyer’s instructions or an applicable, validated method for any formal care or performance evaluation; do not infer a required test or acceptance limit from a visual check.
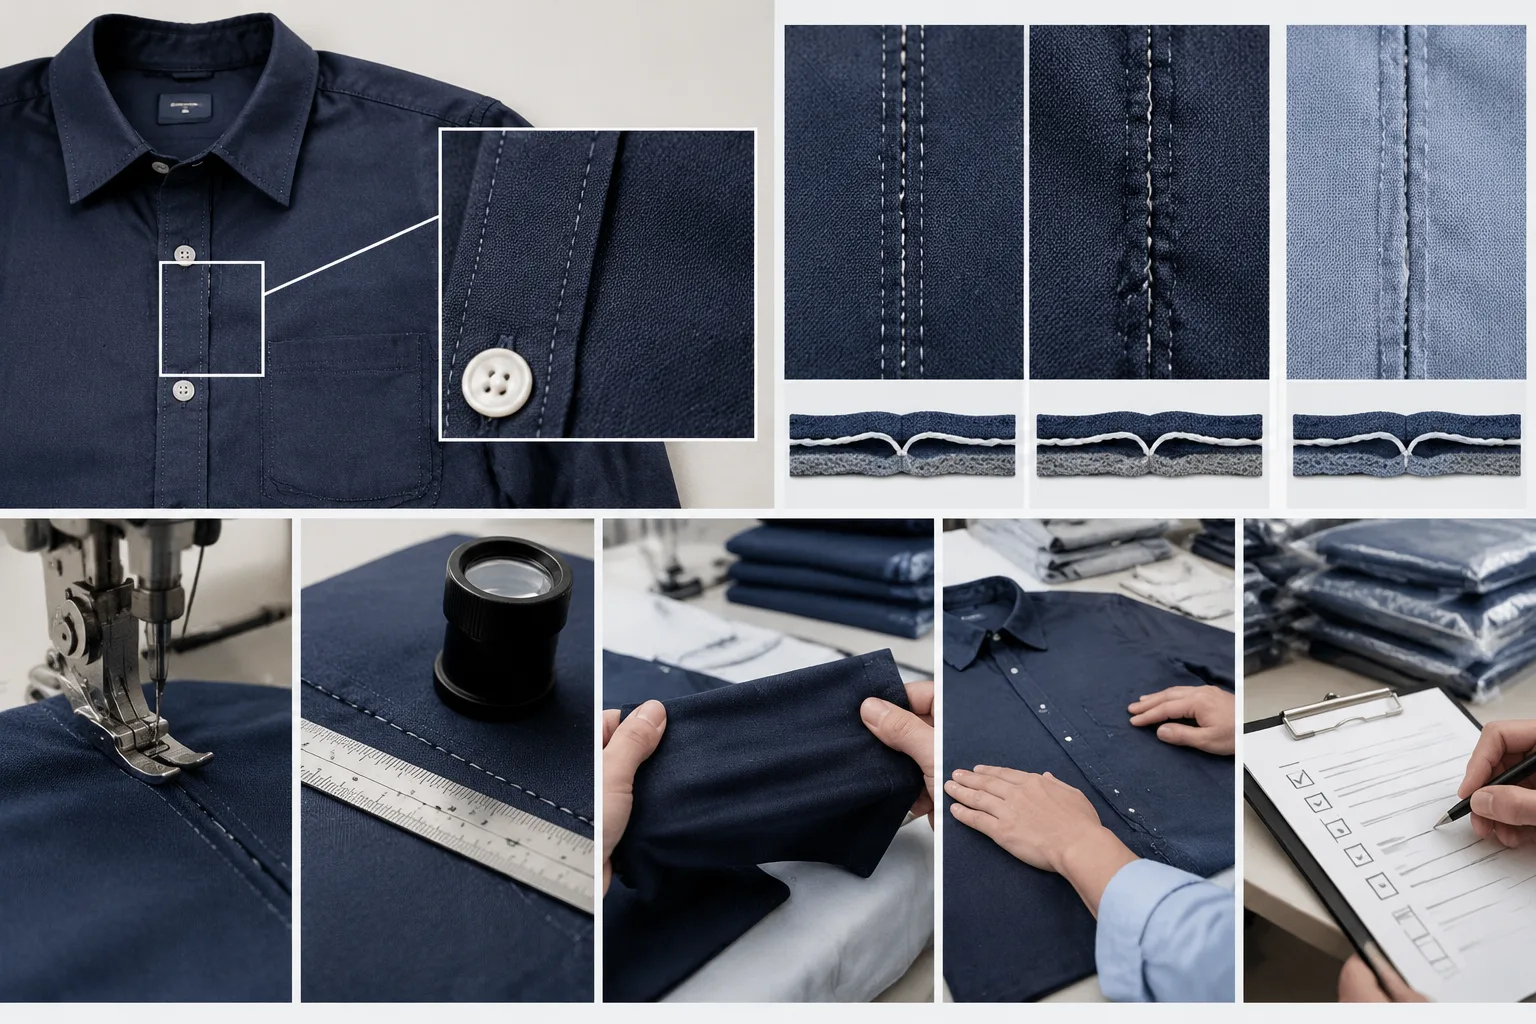
Document the fabric lot, thread, needle, machine setup, seam construction, adjustments, and observations. Where production conditions are expected to vary, review samples across relevant machines, operators, thread packages, lots, or speeds. Agree on the project’s visual criteria in advance, retain the approved reference, and follow up on early production output. Approval is a documented decision for that project, not a universal setting.
Limits of Stitch Balancing and the Best Next Step
Thread adjustment cannot correct every seam problem. If controlled tension changes do not resolve the defect, reconsider needle-and-thread compatibility, feed behavior, machine condition, fabric finishing, seam design, and layer count. A damaged needle, unsuitable thread, unstable material, or crowded construction may require a different response than further tension adjustment.
Use a simple sequence: reproduce the defect, compare the face and underside, isolate one likely variable, and test comparable samples. Check post-care results when relevant, then document the outcome. If the problem continues under a controlled setup, consult the machine, needle, or thread supplier with the sample and setup details; their guidance can help identify machine-specific checks.
For the next production step, keep a sample record, retain the approved seam standard, and monitor the first output for changes. Apparel Wiki is an independent garment-industry knowledge publication, not a factory, manufacturer, laboratory, certifier, or service provider. Its guidance is educational; project decisions should reflect the actual materials, equipment, construction, and agreed requirements.
Frequently Asked Questions
What does stitch balance mean on a sewing machine?
It describes how the needle and bobbin threads interlock within the fabric layers. A balanced result is judged by the sewn seam on both sides and its performance in the intended construction, not by a particular tension-dial position.
Why do tightly woven fabrics show stitch imbalance or puckering?
Dense yarn spacing can make needle penetration and thread seating more sensitive to the fabric, needle, thread, and stitch formation. Puckering can also relate to feeding, seam construction, or dimensional change, so it does not identify one cause by itself.
Should I adjust thread tension first when sewing dense woven fabric?
Not automatically. First check threading, needle condition, and the seam setup. If the visible symptom suggests tension, make a controlled adjustment and compare samples while holding other variables steady.
How do I choose a needle and thread for tightly woven garment fabric?
Use machine and supplier recommendations as a starting point, considering the fabric, thread, seam layers, and intended speed together. Confirm the combination on the actual material; a coarser needle may change the appearance or size of needle holes.
How can I tell whether a seam problem is caused by tension, feeding, or fabric shrinkage?
Compare the seam’s face and underside, observe layer movement while sewing, and make repeat samples with one variable changed at a time. When relevant, compare unwashed and post-care samples to check for dimensional change.
Do I need to test stitch balance after laundering?
Do so when the garment’s care or finishing conditions could change the fabric or seam appearance. Follow the applicable buyer requirements or validated test method rather than assuming one procedure or acceptance limit applies to every product.